Cirkit Designer Logo
Cirkit Designer
Your all-in-one circuit design IDE
Home / 
Component Documentation

How to Use touch sensor: Examples, Pinouts, and Specs

Image of touch sensor
Cirkit Designer LogoDesign with touch sensor in Cirkit Designer

Introduction

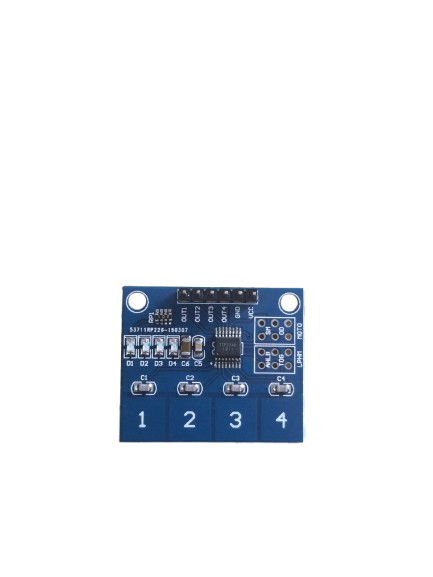
A touch sensor is a device that detects physical touch or pressure on its surface, enabling user interaction with electronic systems. Manufactured by ETC_BVN with the part ID "uno," this touch sensor is designed for seamless integration into a variety of applications. It is commonly used in devices such as smartphones, tablets, home automation systems, and interactive displays to trigger actions based on user input. Its compact design and high sensitivity make it ideal for modern touch-based interfaces.

Explore Projects Built with touch sensor

Use Cirkit Designer to design, explore, and prototype these projects online. Some projects support real-time simulation. Click "Open Project" to start designing instantly!
Arduino UNO Capacitive Touch Sensor Interface
Image of P7Ej2: A project utilizing touch sensor in a practical application
This circuit consists of an Arduino UNO microcontroller connected to a capacitive touch sensor. The sensor's VCC and GND pins are powered by the Arduino's 5V and GND pins, respectively, and the sensor's output is connected to the Arduino's digital pin D10. The Arduino can read touch inputs from the sensor to perform various actions based on the provided code.
Cirkit Designer LogoOpen Project in Cirkit Designer
Arduino UNO Touch Sensor Interface
Image of P7Ej3: A project utilizing touch sensor in a practical application
This circuit consists of an Arduino UNO microcontroller connected to a capacitive touch sensor. The sensor's VCC and GND pins are connected to the 5V and GND pins of the Arduino, respectively, while the sensor's output pin is connected to digital pin D10 on the Arduino. The setup is designed to detect touch inputs via the sensor and process them using the Arduino.
Cirkit Designer LogoOpen Project in Cirkit Designer
Capacitive Touch and Ultrasonic Sensor Interface with Adafruit Feather nRF52840 Sense
Image of Senior Design Project: A project utilizing touch sensor in a practical application
This circuit features an Adafruit Feather nRF52840 Sense microcontroller connected to an ultrasonic sensor for distance measurement and an Adafruit AT42QT1010 capacitive touch sensor for touch input. The ultrasonic sensor's Trigger and Echo pins are interfaced with the microcontroller's digital pins D6 and D9, respectively, to send and receive ultrasonic signals. Additionally, a pressure-sensitive conductive sheet (Velostat) is connected in series with a 10k Ohm resistor to the microcontroller's analog pin A0, likely forming a pressure sensor.
Cirkit Designer LogoOpen Project in Cirkit Designer
Touch Sensor Activated Buzzer with USB Power
Image of Touch Door Bell: A project utilizing touch sensor in a practical application
This circuit consists of a touch sensor, a buzzer, and a USB plug for power. When the touch sensor is activated, it triggers the buzzer to sound, powered by the 5V supply from the USB plug.
Cirkit Designer LogoOpen Project in Cirkit Designer

Explore Projects Built with touch sensor

Use Cirkit Designer to design, explore, and prototype these projects online. Some projects support real-time simulation. Click "Open Project" to start designing instantly!
Image of P7Ej2: A project utilizing touch sensor in a practical application
Arduino UNO Capacitive Touch Sensor Interface
This circuit consists of an Arduino UNO microcontroller connected to a capacitive touch sensor. The sensor's VCC and GND pins are powered by the Arduino's 5V and GND pins, respectively, and the sensor's output is connected to the Arduino's digital pin D10. The Arduino can read touch inputs from the sensor to perform various actions based on the provided code.
Cirkit Designer LogoOpen Project in Cirkit Designer
Image of P7Ej3: A project utilizing touch sensor in a practical application
Arduino UNO Touch Sensor Interface
This circuit consists of an Arduino UNO microcontroller connected to a capacitive touch sensor. The sensor's VCC and GND pins are connected to the 5V and GND pins of the Arduino, respectively, while the sensor's output pin is connected to digital pin D10 on the Arduino. The setup is designed to detect touch inputs via the sensor and process them using the Arduino.
Cirkit Designer LogoOpen Project in Cirkit Designer
Image of Senior Design Project: A project utilizing touch sensor in a practical application
Capacitive Touch and Ultrasonic Sensor Interface with Adafruit Feather nRF52840 Sense
This circuit features an Adafruit Feather nRF52840 Sense microcontroller connected to an ultrasonic sensor for distance measurement and an Adafruit AT42QT1010 capacitive touch sensor for touch input. The ultrasonic sensor's Trigger and Echo pins are interfaced with the microcontroller's digital pins D6 and D9, respectively, to send and receive ultrasonic signals. Additionally, a pressure-sensitive conductive sheet (Velostat) is connected in series with a 10k Ohm resistor to the microcontroller's analog pin A0, likely forming a pressure sensor.
Cirkit Designer LogoOpen Project in Cirkit Designer
Image of Touch Door Bell: A project utilizing touch sensor in a practical application
Touch Sensor Activated Buzzer with USB Power
This circuit consists of a touch sensor, a buzzer, and a USB plug for power. When the touch sensor is activated, it triggers the buzzer to sound, powered by the 5V supply from the USB plug.
Cirkit Designer LogoOpen Project in Cirkit Designer

Technical Specifications

The ETC_BVN "uno" touch sensor is a capacitive touch sensor that operates efficiently in low-power environments. Below are the key technical details and pin configuration:

Key Technical Details

Parameter Specification
Operating Voltage 2.0V to 5.5V
Operating Current < 10 µA (standby), ~1.5 mA (active)
Response Time < 60 ms
Interface Type Digital Output
Operating Temperature -20°C to 70°C
Dimensions 24mm x 24mm x 3mm

Pin Configuration and Descriptions

Pin Number Pin Name Description
1 VCC Power supply pin (2.0V to 5.5V)
2 GND Ground pin
3 OUT Digital output pin (HIGH when touched, LOW otherwise)

Usage Instructions

How to Use the Touch Sensor in a Circuit

  1. Power the Sensor: Connect the VCC pin to a 3.3V or 5V power source and the GND pin to the ground of your circuit.
  2. Connect the Output: Attach the OUT pin to a digital input pin of your microcontroller or other logic circuit.
  3. Pull-Down Resistor (Optional): If the output signal is unstable, use a pull-down resistor (10kΩ) on the OUT pin to stabilize the signal.
  4. Test the Sensor: When the sensor is touched, the OUT pin will output a HIGH signal (logic level 1). When untouched, it will output a LOW signal (logic level 0).

Important Considerations and Best Practices

  • Avoid Noise Interference: Ensure proper grounding and avoid placing the sensor near high-frequency components to minimize noise.
  • Surface Material: The sensor can detect touch through non-conductive materials like plastic or glass, but the thickness should not exceed 3mm for optimal performance.
  • Debouncing: Implement software debouncing in your microcontroller code to filter out false triggers caused by rapid touch events.

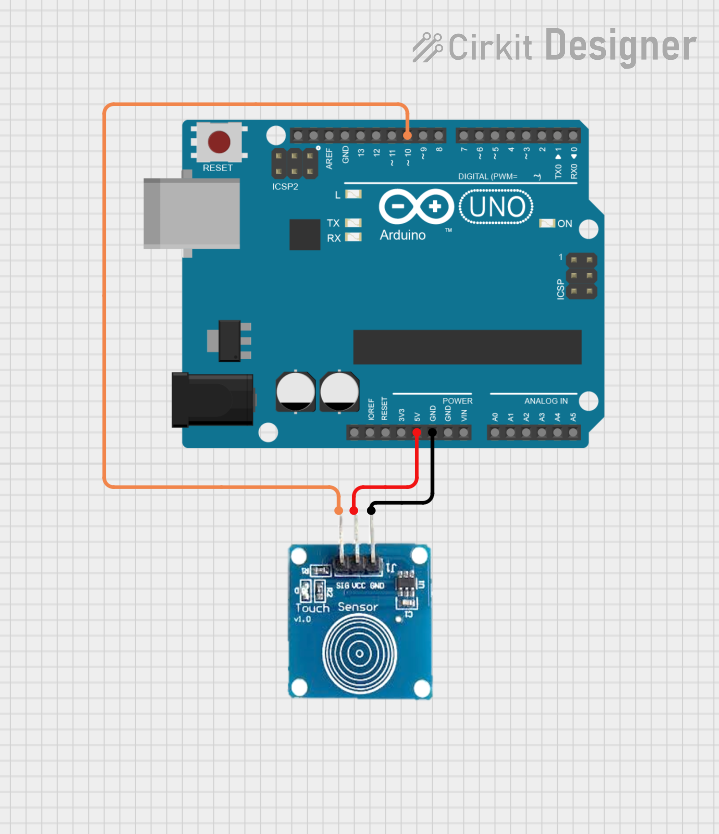
Example: Connecting to an Arduino UNO

Below is an example of how to connect and use the touch sensor with an Arduino UNO:

Circuit Connections

  • Connect the VCC pin of the touch sensor to the 5V pin on the Arduino.
  • Connect the GND pin of the touch sensor to the GND pin on the Arduino.
  • Connect the OUT pin of the touch sensor to digital pin 2 on the Arduino.

Arduino Code

// Touch Sensor Example Code for Arduino UNO
// Manufacturer: ETC_BVN
// Part ID: uno

const int touchPin = 2; // Pin connected to the OUT pin of the touch sensor
const int ledPin = 13;  // Built-in LED pin on Arduino

void setup() {
  pinMode(touchPin, INPUT); // Set touch sensor pin as input
  pinMode(ledPin, OUTPUT);  // Set LED pin as output
  Serial.begin(9600);       // Initialize serial communication
}

void loop() {
  int touchState = digitalRead(touchPin); // Read the state of the touch sensor

  if (touchState == HIGH) {
    // If the sensor is touched, turn on the LED
    digitalWrite(ledPin, HIGH);
    Serial.println("Touch detected!");
  } else {
    // If the sensor is not touched, turn off the LED
    digitalWrite(ledPin, LOW);
  }

  delay(50); // Small delay to stabilize readings
}

Troubleshooting and FAQs

Common Issues and Solutions

  1. Sensor Not Responding

    • Cause: Incorrect wiring or insufficient power supply.
    • Solution: Double-check the connections and ensure the power supply voltage is within the specified range (2.0V to 5.5V).
  2. False Triggers

    • Cause: Electrical noise or improper grounding.
    • Solution: Use a pull-down resistor on the OUT pin and ensure proper grounding of the circuit.
  3. No Output Signal

    • Cause: Damaged sensor or incorrect pin configuration.
    • Solution: Verify the pin connections and test the sensor with a multimeter to check for continuity.

FAQs

  • Q: Can the sensor detect touch through metal surfaces?
    A: No, the sensor is designed to detect touch through non-conductive materials like plastic or glass.

  • Q: What is the maximum distance the sensor can detect a touch?
    A: The sensor is optimized for direct contact or very close proximity (less than 1mm).

  • Q: Can I use this sensor with a 3.3V microcontroller?
    A: Yes, the sensor operates within a voltage range of 2.0V to 5.5V, making it compatible with 3.3V systems.

This concludes the documentation for the ETC_BVN "uno" touch sensor. For further assistance, refer to the manufacturer's datasheet or contact technical support.