How to Use 64x32 LED Matrix 2.5mm pitch: Examples, Pinouts, and Specs

Introduction
The 64x32 LED Matrix 2.5mm Pitch by Adafruit is a high-density rectangular array consisting of 64 rows and 32 columns of RGB LEDs. With a 2.5mm pitch (distance between adjacent LEDs), this matrix is ideal for creating vibrant and detailed displays in a compact form factor. It supports full-color graphics, animations, and text, making it a versatile component for a wide range of projects.
Explore Projects Built with 64x32 LED Matrix 2.5mm pitch


Explore Projects Built with 64x32 LED Matrix 2.5mm pitch
Common Applications
- Digital signage and advertising displays
- Interactive art installations
- Scrolling text displays
- Gaming and retro arcade projects
- IoT dashboards and data visualization
Technical Specifications
Below are the key technical details of the 64x32 LED Matrix:
| Specification | Details |
|---|---|
| Manufacturer | Adafruit |
| LED Configuration | 64 rows x 32 columns (2048 RGB LEDs) |
| Pitch | 2.5mm (distance between adjacent LEDs) |
| Input Voltage | 5V DC |
| Power Consumption | ~4A at full brightness (depends on usage) |
| Interface | HUB75 |
| Dimensions | 160mm x 80mm x 14mm |
| Weight | ~168g |
Pin Configuration
The matrix uses a HUB75 interface for data and power connections. Below is the pinout for the HUB75 connector:
| Pin | Label | Description |
|---|---|---|
| 1 | R1 | Red data for the top half of the matrix |
| 2 | G1 | Green data for the top half of the matrix |
| 3 | B1 | Blue data for the top half of the matrix |
| 4 | GND | Ground |
| 5 | R2 | Red data for the bottom half of the matrix |
| 6 | G2 | Green data for the bottom half of the matrix |
| 7 | B2 | Blue data for the bottom half of the matrix |
| 8 | GND | Ground |
| 9 | A | Row select signal (bit 0) |
| 10 | B | Row select signal (bit 1) |
| 11 | C | Row select signal (bit 2) |
| 12 | D | Row select signal (bit 3) |
| 13 | CLK | Clock signal |
| 14 | LAT | Latch signal |
| 15 | OE | Output enable (active low) |
| 16 | GND | Ground |
Usage Instructions
Connecting the Matrix
- Power Supply: Use a 5V DC power supply capable of providing at least 4A to power the matrix. Connect the power input terminals to the matrix's power connector.
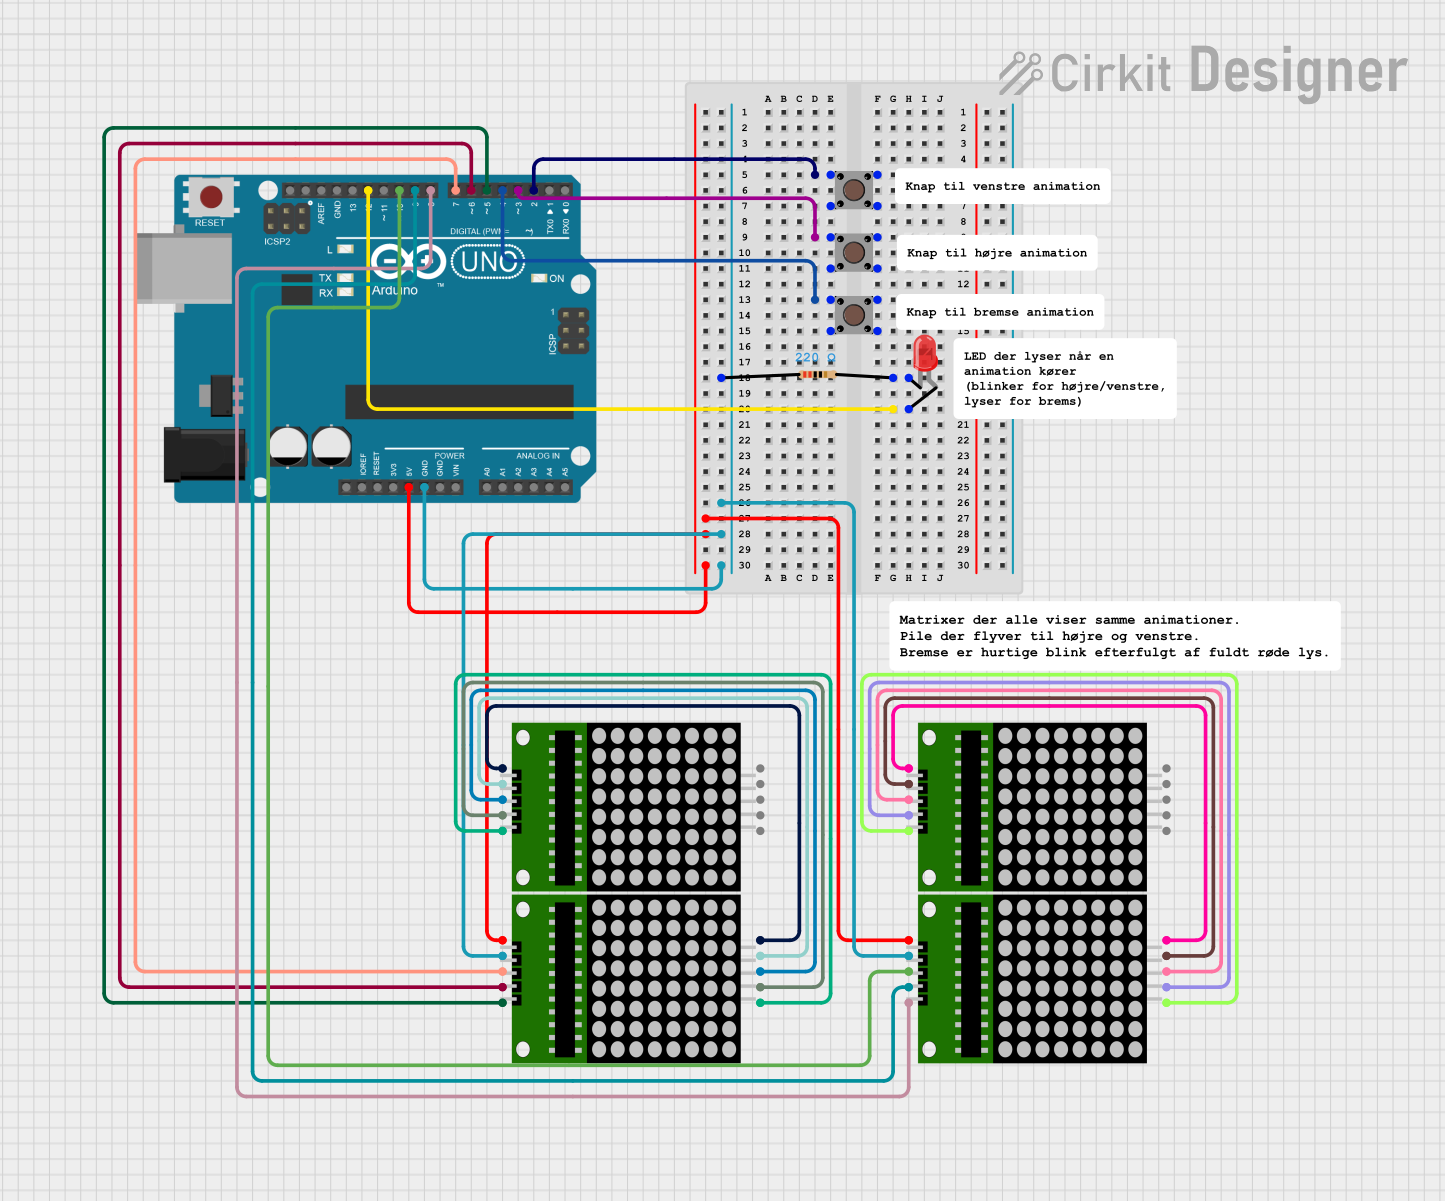
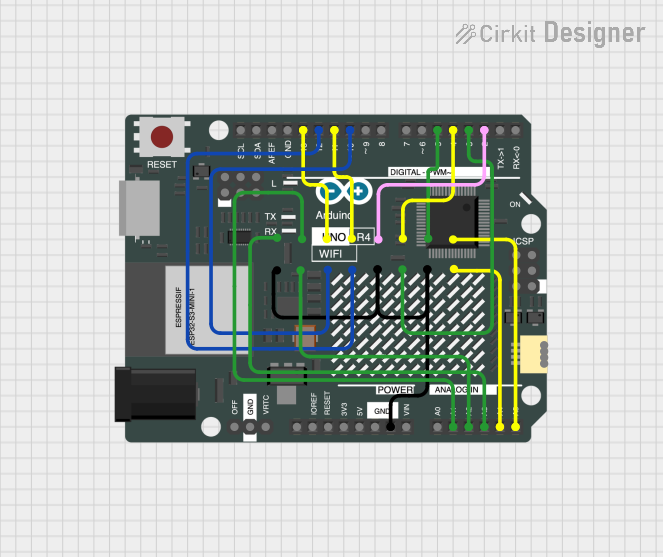
- Data Connection: Use a microcontroller (e.g., Arduino UNO, Raspberry Pi, or ESP32) to send data to the matrix via the HUB75 interface. Ensure proper wiring of the data pins (R1, G1, B1, etc.) and control signals (A, B, C, D, CLK, LAT, OE).
- Library Setup: For Arduino, install the Adafruit GFX and Adafruit RGB Matrix Panel libraries to simplify programming.
Example Code for Arduino UNO
Below is an example of how to display text on the matrix using an Arduino UNO:
#include <Adafruit_GFX.h>         // Core graphics library
#include <RGBmatrixPanel.h>       // RGB matrix panel library

// Define matrix panel configuration
#define CLK 8   // Clock pin
#define OE  9   // Output enable pin
#define LAT 10  // Latch pin
#define A   A0  // Row select A
#define B   A1  // Row select B
#define C   A2  // Row select C
#define D   A3  // Row select D

// Create an RGB matrix object (64x32 panel)
RGBmatrixPanel matrix(A, B, C, D, CLK, LAT, OE, false, 64);

void setup() {
  matrix.begin();                 // Initialize the matrix
  matrix.setTextSize(1);          // Set text size (1 = smallest)
  matrix.setTextColor(matrix.Color333(7, 0, 0)); // Red text
  matrix.setCursor(1, 1);         // Set cursor position
  matrix.print("Hello, World!");  // Display text
}

void loop() {
  // Add animations or additional functionality here
}
Important Considerations
- Power Supply: Ensure the power supply can handle the current draw of the matrix, especially at full brightness.
- Heat Management: Prolonged use at high brightness may generate heat. Ensure proper ventilation.
- Signal Integrity: Use short, high-quality wires for data connections to avoid signal degradation.
- Microcontroller Limitations: The Arduino UNO has limited memory and processing power. For complex animations, consider using a more powerful microcontroller like the ESP32.
Troubleshooting and FAQs
Common Issues
- Matrix Not Lighting Up
- Solution: Check the power supply connections and ensure the voltage is 5V. Verify that the ground (GND) is properly connected.
- Incorrect Colors or Flickering
- Solution: Ensure the data pins are correctly wired to the microcontroller. Verify that the clock and latch signals are functioning.
- Text or Graphics Misaligned
- Solution: Double-check the row select (A, B, C, D) connections. Ensure the software configuration matches the matrix dimensions.
- Microcontroller Resetting
- Solution: The matrix may be drawing too much current. Use a separate power supply for the matrix and the microcontroller.
FAQs
Can I chain multiple matrices together? Yes, multiple matrices can be chained to create larger displays. Ensure your microcontroller and power supply can handle the increased requirements.
What is the maximum refresh rate? The refresh rate depends on the microcontroller and the complexity of the display content. Higher refresh rates require faster microcontrollers like the ESP32.
Can I use this matrix outdoors? This matrix is not weatherproof. For outdoor use, enclose it in a weather-resistant case.
By following this documentation, you can effectively integrate the 64x32 LED Matrix into your projects and create stunning visual displays.