The QB062/QB078 Humidifier Module, manufactured by Acebott, is a compact and efficient device designed to add moisture to the air. It is commonly used in HVAC systems, greenhouses, industrial environments, and home appliances to maintain optimal humidity levels. By dispersing water vapor, this module enhances comfort, prevents dryness, and supports the preservation of materials sensitive to low humidity.
Explore Projects Built with QB062/QB078 Humidifier Module
Use Cirkit Designer to design, explore, and prototype these projects online. Some projects support real-time simulation. Click "Open Project" to start designing instantly!
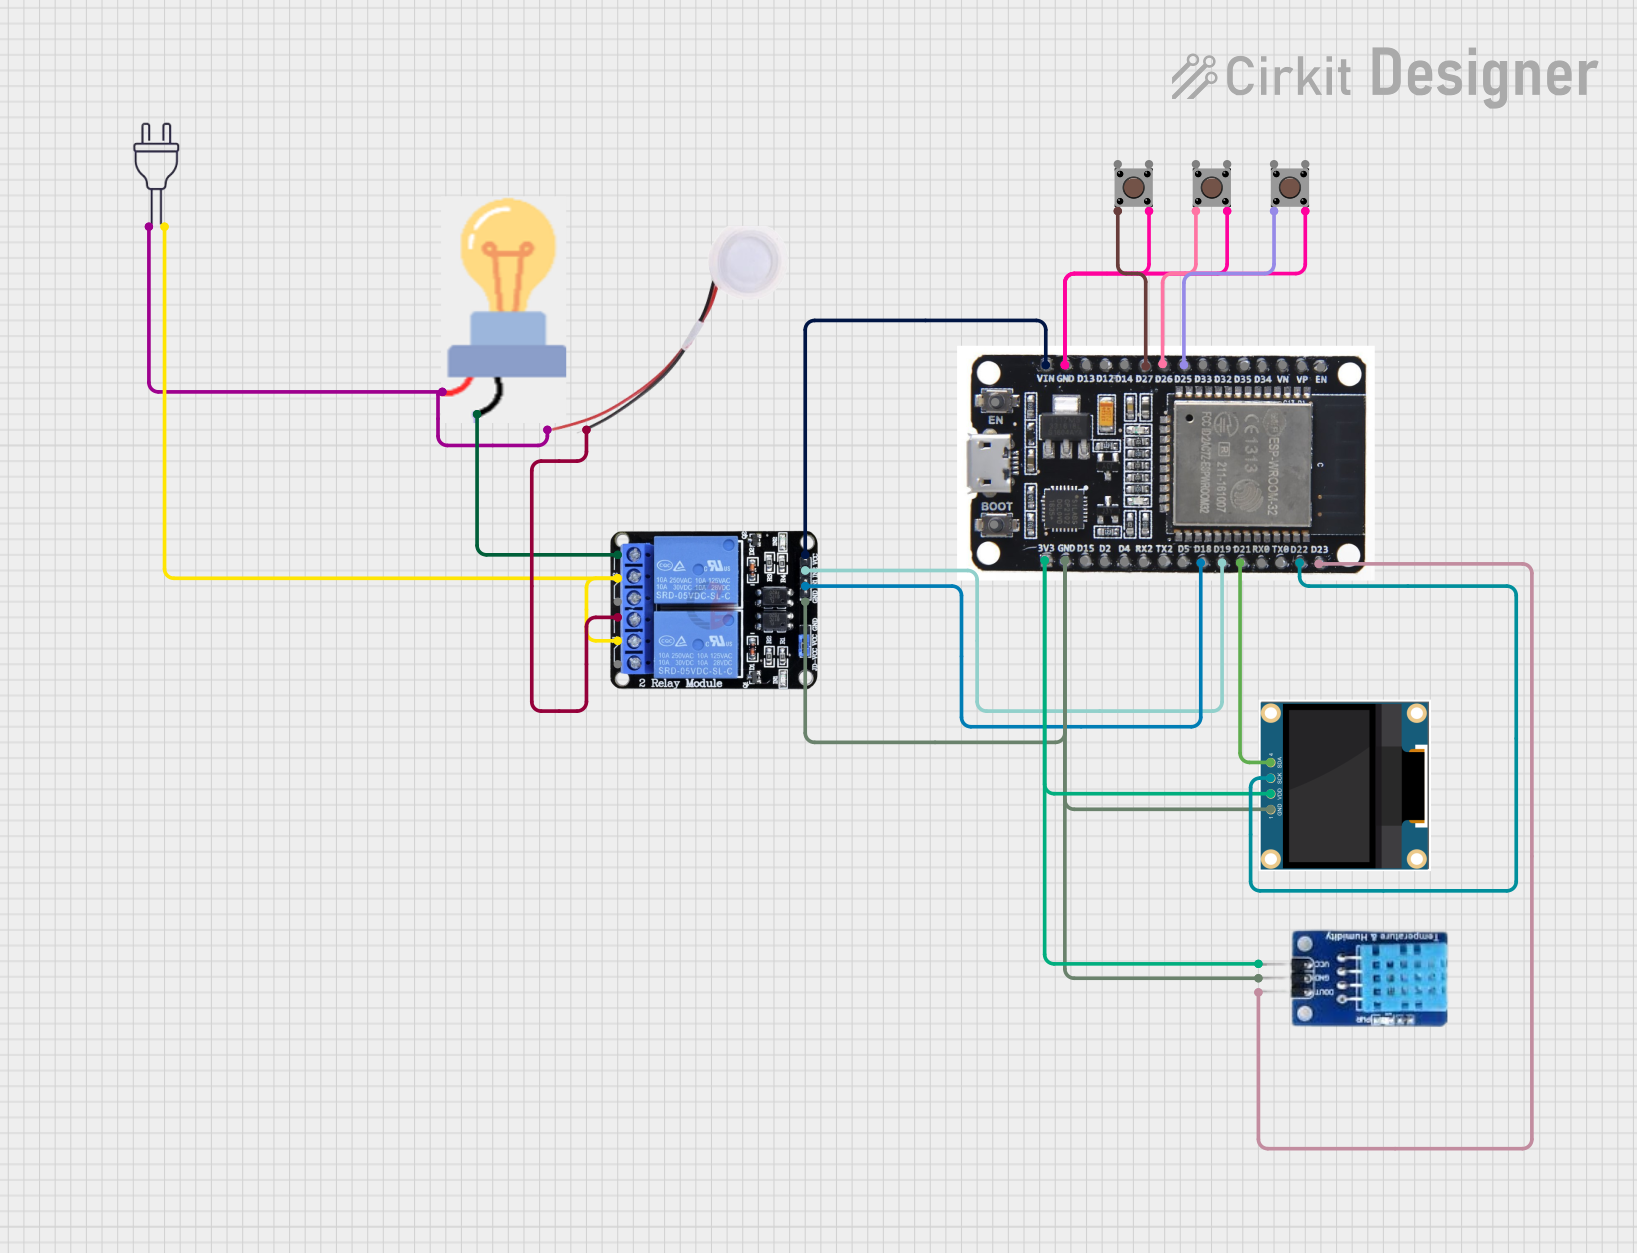
This circuit is designed to monitor and control temperature and humidity using an ESP32 microcontroller, which interfaces with a DHT11 sensor, an OLED display, and a two-channel relay. The ESP32 uses Blynk for IoT connectivity, allowing remote monitoring and control of a connected humidifier and a bulb (as a heater). Pushbuttons are included for manual control, and the system operates in either automatic or manual mode to maintain desired environmental conditions.
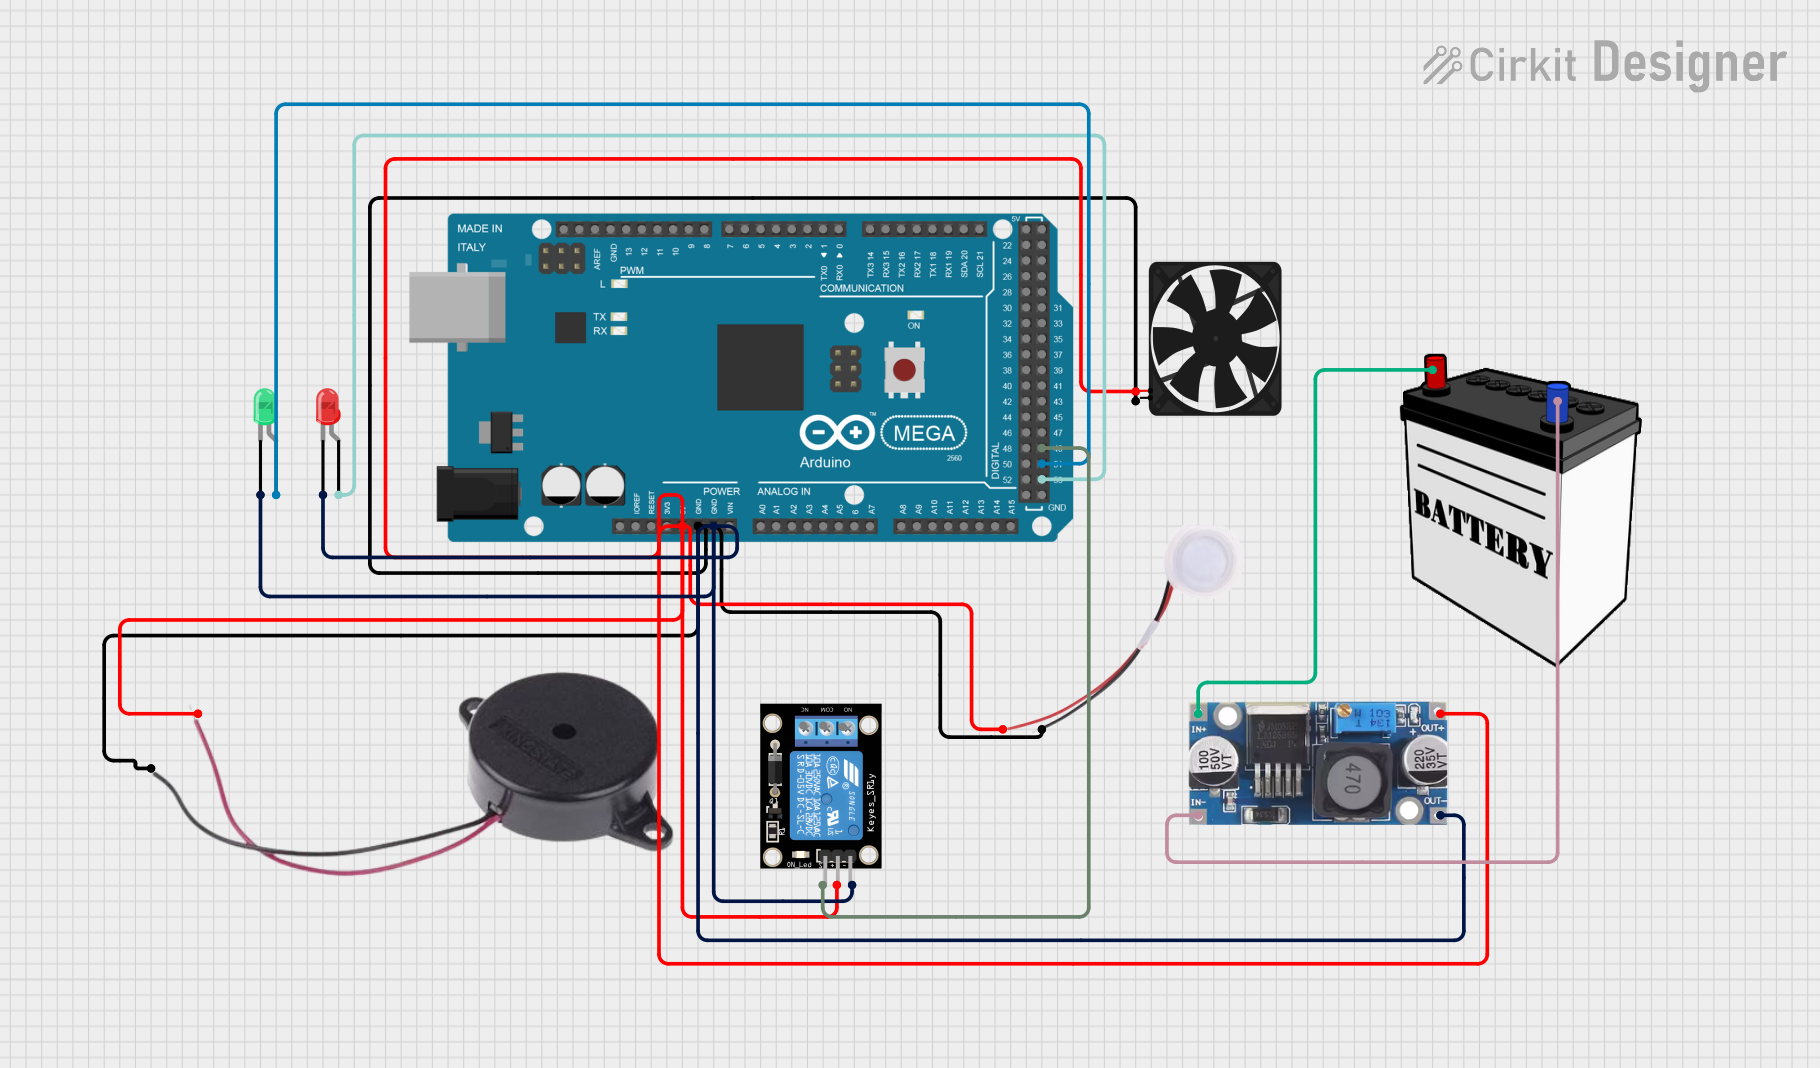
This circuit is designed to control environmental conditions using an Arduino Mega 2560, which manages a humidifier, fan, and provides alerts through a buzzer and LEDs. A relay module is included for high-power device control, and a step-down buck converter is used to power the system from a 12V battery.
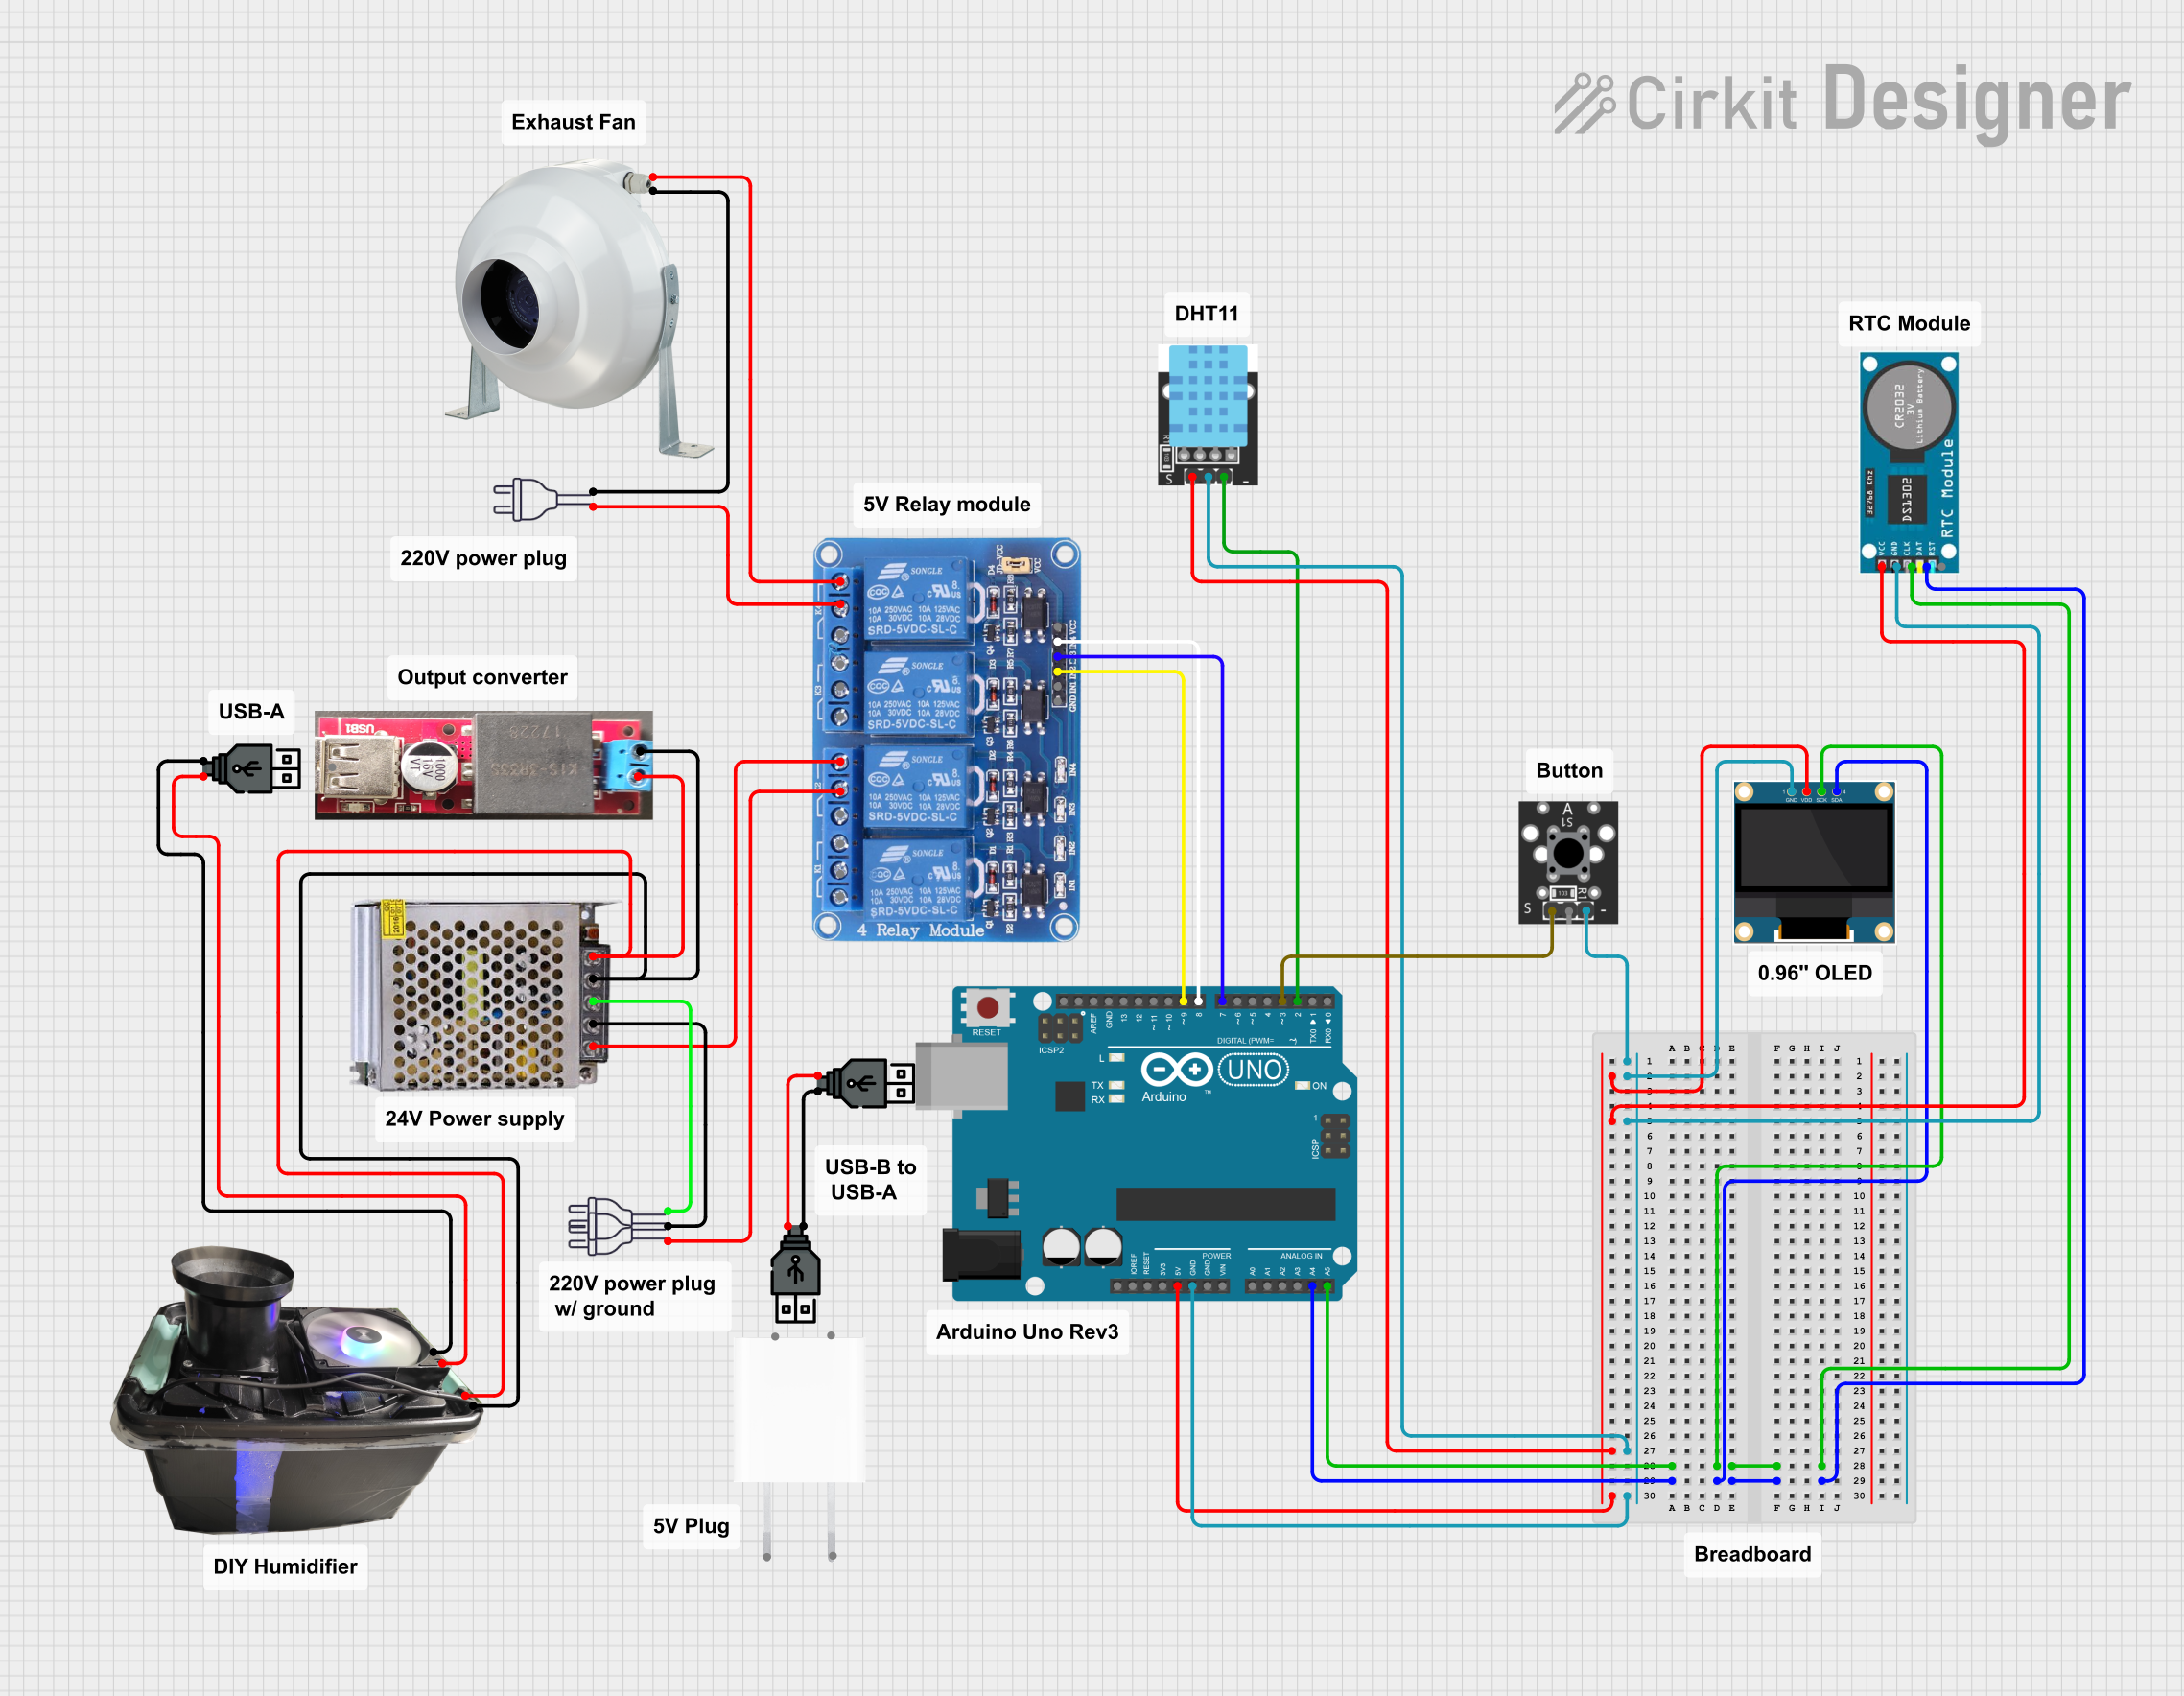
This circuit is a smart environmental monitoring and control system. It uses an Arduino UNO to read data from a temperature-humidity sensor and a real-time clock, displays information on an OLED screen, and controls an exhaust fan and a humidifier via a relay module. The system is powered by a 5V power supply and includes a key switch for user input.
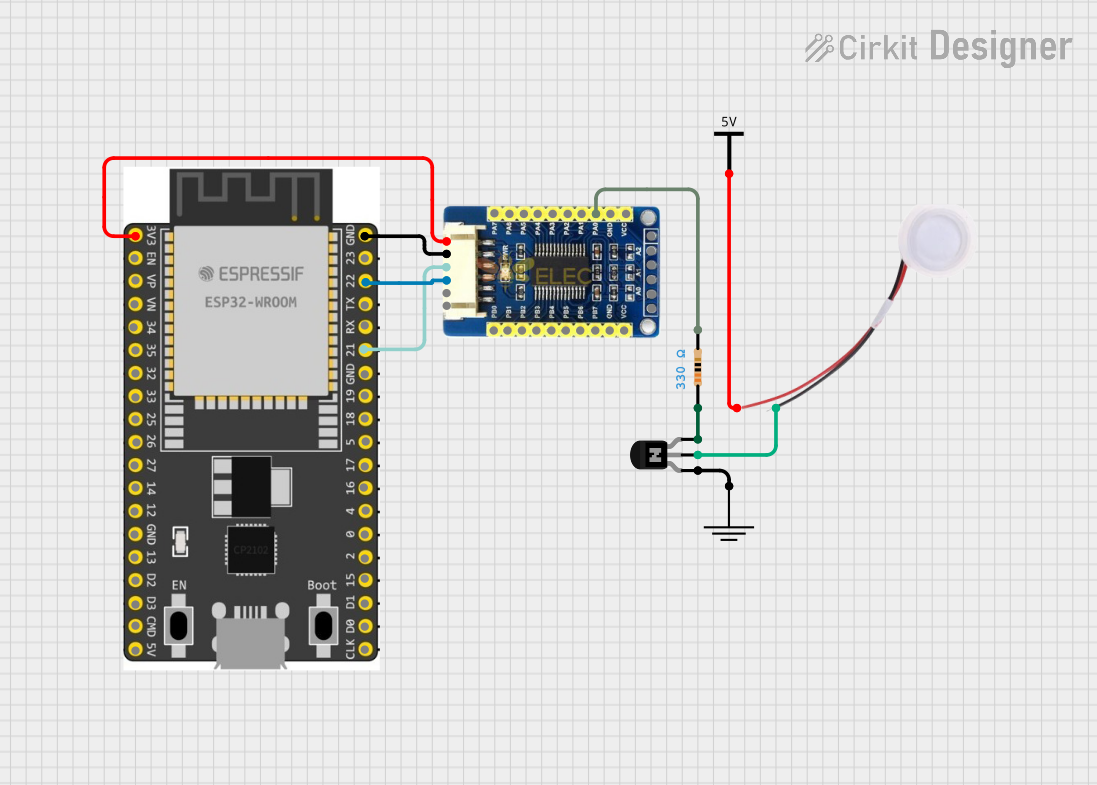
This circuit controls a humidifier using an ESP32 microcontroller and an MCP23017 I/O expansion board. The ESP32 communicates with the MCP23017 via I2C (using GPIO 21 and 22 for SDA and SCL, respectively), which in turn controls the base of an NPN transistor through a 330 Ohm resistor. The transistor acts as a switch to turn the humidifier on or off, with the humidifier's power supply connected to Vcc and its ground connected through the transistor.
Home appliances such as humidifiers and air purifiers
Laboratories and storage facilities for sensitive materials
Technical Specifications
The QB062/QB078 Humidifier Module is designed for reliable and efficient operation. Below are its key technical details:
Parameter
Value
Manufacturer
Acebott
Part ID
QB062/QB078
Operating Voltage
12V DC
Operating Current
300mA (typical)
Power Consumption
3.6W
Humidification Rate
300 mL/hour
Operating Temperature
5°C to 50°C
Storage Temperature
-10°C to 60°C
Dimensions
50mm x 50mm x 20mm
Weight
45g
Pin Configuration and Descriptions
The module features a simple pinout for easy integration into circuits:
Pin
Name
Description
1
VCC
Power input (12V DC)
2
GND
Ground connection
3
CONTROL
PWM input for controlling humidification intensity
Usage Instructions
How to Use the QB062/QB078 in a Circuit
Power Supply: Connect the VCC pin to a stable 12V DC power source and the GND pin to the ground.
Control Signal: Use the CONTROL pin to adjust the humidification rate. This pin accepts a PWM signal (0-5V logic level) to modulate the intensity of water vapor output.
Water Source: Ensure the module is supplied with clean water. Avoid using hard water to prevent mineral buildup.
Placement: Position the module in a well-ventilated area to allow even dispersion of moisture.
Important Considerations
Water Quality: Use distilled or demineralized water to prevent scaling and ensure long-term reliability.
Ventilation: Avoid enclosing the module in a sealed space, as this may lead to overheating or uneven humidification.
PWM Signal: Ensure the PWM signal frequency is between 1kHz and 10kHz for optimal performance.
Safety: Do not operate the module without water, as this may damage the internal components.
Example: Connecting to an Arduino UNO
The QB062/QB078 can be controlled using an Arduino UNO. Below is an example code snippet to control the humidification rate using PWM:
// Define the CONTROL pin connected to the module
const int controlPin = 9; // PWM pin on Arduino UNO

void setup() {
  pinMode(controlPin, OUTPUT); // Set the CONTROL pin as an output
}

void loop() {
  // Gradually increase humidification intensity
  for (int dutyCycle = 0; dutyCycle <= 255; dutyCycle += 5) {
    analogWrite(controlPin, dutyCycle); // Send PWM signal to CONTROL pin
    delay(50); // Wait 50ms before increasing intensity
  }

  // Gradually decrease humidification intensity
  for (int dutyCycle = 255; dutyCycle >= 0; dutyCycle -= 5) {
    analogWrite(controlPin, dutyCycle); // Send PWM signal to CONTROL pin
    delay(50); // Wait 50ms before decreasing intensity
  }
}
Notes:
The analogWrite() function generates a PWM signal on the specified pin.
Adjust the delay and step size in the loop to modify the rate of intensity change.
Troubleshooting and FAQs
Common Issues and Solutions
Module Does Not Turn On
Cause: Insufficient power supply or incorrect wiring.
Solution: Verify that the VCC pin is connected to a stable 12V DC source and the GND pin is properly grounded.
No Water Vapor Output
Cause: Lack of water or clogged dispersal mechanism.
Solution: Ensure the water reservoir is filled and clean the module to remove any mineral deposits.
Uneven Humidification
Cause: Poor placement or insufficient ventilation.
Solution: Reposition the module in a well-ventilated area and ensure unobstructed airflow.
PWM Control Not Working
Cause: Incorrect PWM signal or frequency.
Solution: Verify that the CONTROL pin is receiving a PWM signal with a frequency between 1kHz and 10kHz. Check the Arduino code for errors.
FAQs
Q: Can I use a 5V power supply instead of 12V? A: No, the module requires a 12V DC power supply for proper operation.
Q: Is the module waterproof? A: The module is water-resistant but not fully waterproof. Avoid submerging it in water.
Q: Can I use tap water with the module? A: It is recommended to use distilled or demineralized water to prevent scaling and ensure longevity.
Q: What is the maximum humidification rate? A: The module can achieve a maximum humidification rate of 300 mL/hour.
By following this documentation, users can effectively integrate and operate the QB062/QB078 Humidifier Module in their projects.


 Open Project in Cirkit Designer