
How to Use BME688: Examples, Pinouts, and Specs
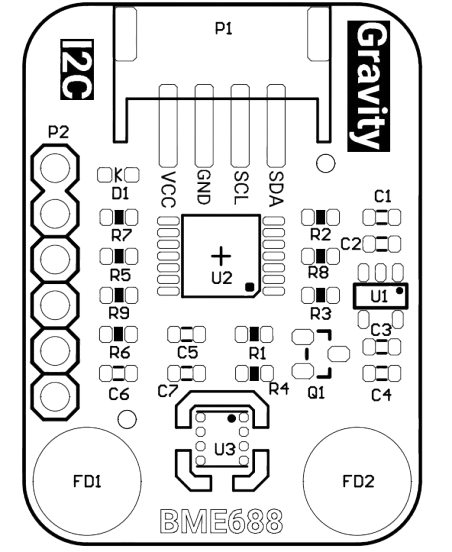
 Design with BME688 in Cirkit Designer
Introduction
The BME688 Environmental Sensor Module by Bosch Sensortec is a highly versatile environmental sensor capable of measuring temperature, humidity, pressure, and gas concentrations (including volatile organic compounds, VOCs). This sensor is designed for applications requiring precise environmental monitoring, such as air quality monitoring, smart home devices, wearables, and IoT systems. Its compact size and low power consumption make it ideal for portable and battery-powered devices.
The BME688 is particularly notable for its ability to detect and classify gases, enabling advanced air quality analysis. It is compatible with microcontrollers like the Arduino UNO, making it accessible for both hobbyists and professionals.
Explore Projects Built with BME688
 Open Project in Cirkit Designer
 Open Project in Cirkit Designer
 Open Project in Cirkit Designer
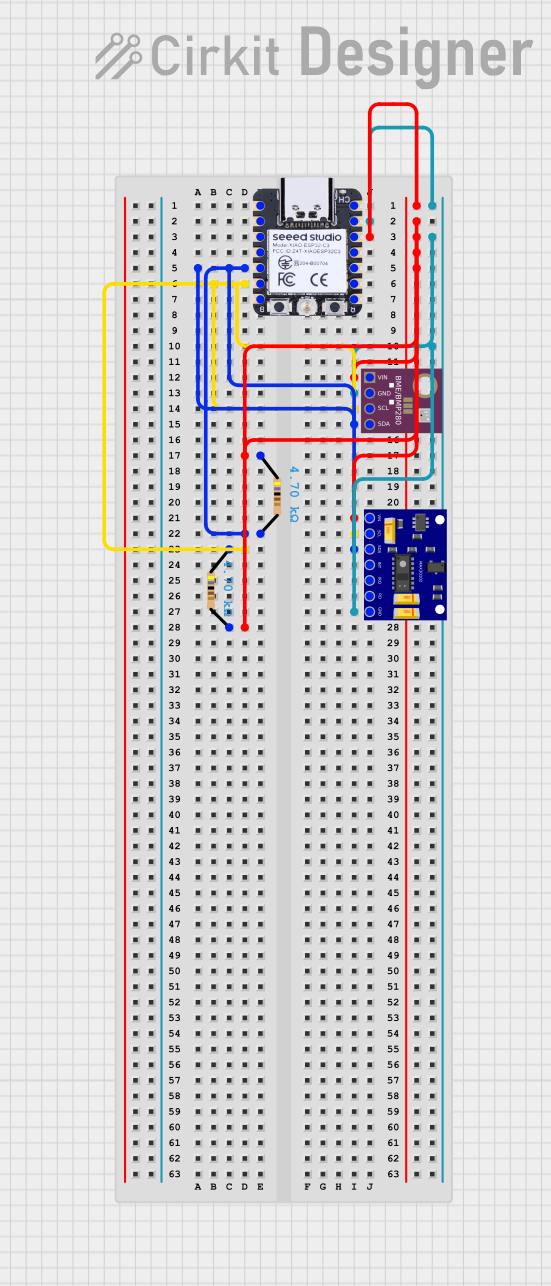 Open Project in Cirkit Designer
Explore Projects Built with BME688
Open Project in Cirkit DesignerOpen Project in Cirkit DesignerOpen Project in Cirkit DesignerOpen Project in Cirkit DesignerTechnical Specifications
Below are the key technical details of the BME688 sensor:
| Parameter | Value |
|---|---|
| Supply Voltage | 1.71V to 3.6V |
| Interface | I²C (up to 3.4 MHz) and SPI (up to 10 MHz) |
| Temperature Range | -40°C to +85°C |
| Humidity Range | 0% to 100% relative humidity (non-condensing) |
| Pressure Range | 300 hPa to 1100 hPa |
| Gas Measurement | VOCs and other gas concentrations (resistance-based) |
| Power Consumption | < 0.15 mA in ultra-low power mode |
| Dimensions | 3.0 mm x 3.0 mm x 0.93 mm |
Pin Configuration and Descriptions
The BME688 module typically comes with the following pinout:
| Pin Name | Description |
|---|---|
| VDD | Power supply input (1.71V to 3.6V). |
| GND | Ground connection. |
| SDA | I²C data line (or SPI data input in SPI mode). |
| SCL | I²C clock line (or SPI clock in SPI mode). |
| CS | Chip select for SPI communication (active low). Tie to VDD for I²C mode. |
| SDO | Serial data output for SPI communication (or I²C address selection pin). |
Usage Instructions
How to Use the BME688 in a Circuit
- Power Supply: Connect the VDD pin to a regulated power source (1.71V to 3.6V) and the GND pin to ground.
- Communication Interface:
- For I²C mode, connect the SDA and SCL pins to the corresponding I²C pins on your microcontroller. Pull-up resistors (typically 4.7 kΩ) are required on both lines.
- For SPI mode, connect the CS, SDO, and SCL pins to the appropriate SPI pins on your microcontroller.
- I²C Address Selection: The I²C address can be set by connecting the SDO pin to either GND (address 0x76) or VDD (address 0x77).
- Gas Sensor Warm-Up: Allow the sensor to warm up for a few minutes after powering on for accurate gas measurements.
Best Practices
- Avoid Condensation: The sensor is not designed for use in condensing environments. Ensure proper ventilation and avoid exposure to liquid water.
- Calibration: For gas measurements, the sensor may require calibration depending on the application. Refer to Bosch's official documentation for advanced calibration techniques.
- Power Modes: Use the ultra-low power mode for battery-powered applications to conserve energy.
Example: Using the BME688 with Arduino UNO
Below is an example of how to interface the BME688 with an Arduino UNO using the I²C protocol. This example uses the Adafruit BME680 library, which is compatible with the BME688.
Wiring Diagram
| BME688 Pin | Arduino UNO Pin |
|---|---|
| VDD | 3.3V |
| GND | GND |
| SDA | A4 |
| SCL | A5 |
Arduino Code
#include <Wire.h>
#include <Adafruit_Sensor.h>
#include <Adafruit_BME680.h>

// Create an instance of the BME680 sensor
Adafruit_BME680 bme;

void setup() {
  Serial.begin(9600);
  while (!Serial); // Wait for serial monitor to open

  // Initialize the BME688 sensor
  if (!bme.begin(0x76)) { // Use 0x77 if SDO is connected to VDD
    Serial.println("Could not find a valid BME688 sensor, check wiring!");
    while (1);
  }

  // Configure the sensor settings
  bme.setTemperatureOversampling(BME680_OS_8X);
  bme.setHumidityOversampling(BME680_OS_2X);
  bme.setPressureOversampling(BME680_OS_4X);
  bme.setIIRFilterSize(BME680_FILTER_SIZE_3);
  bme.setGasHeater(320, 150); // 320°C for 150 ms
}

void loop() {
  // Perform a measurement
  if (!bme.performReading()) {
    Serial.println("Failed to perform reading!");
    return;
  }

  // Print sensor data to the serial monitor
  Serial.print("Temperature = ");
  Serial.print(bme.temperature);
  Serial.println(" °C");

  Serial.print("Humidity = ");
  Serial.print(bme.humidity);
  Serial.println(" %");

  Serial.print("Pressure = ");
  Serial.print(bme.pressure / 100.0);
  Serial.println(" hPa");

  Serial.print("Gas Resistance = ");
  Serial.print(bme.gas_resistance / 1000.0);
  Serial.println(" kOhms");

  delay(2000); // Wait 2 seconds before the next reading
}
Troubleshooting and FAQs
Common Issues
Sensor Not Detected:
- Ensure the I²C address is correctly set (0x76 or 0x77).
- Check the wiring and ensure pull-up resistors are connected to SDA and SCL.
- Verify that the sensor is powered with the correct voltage (1.71V to 3.6V).
Inaccurate Readings:
- Allow the sensor to warm up for a few minutes after powering on.
- Ensure the sensor is not exposed to condensation or liquid water.
- Check for proper calibration, especially for gas measurements.
Communication Errors:
- Verify that the I²C or SPI clock speed does not exceed the sensor's limits.
- Ensure the microcontroller's I²C or SPI pins are correctly configured.
FAQs
Q: Can the BME688 measure CO2 levels?
A: The BME688 does not directly measure CO2. However, it can detect VOCs, which are often correlated with CO2 levels in indoor environments.
Q: How do I reduce power consumption?
A: Use the ultra-low power mode and minimize the frequency of measurements. Refer to the sensor's datasheet for detailed power management options.
Q: Is the BME688 waterproof?
A: No, the BME688 is not waterproof. Avoid exposing it to liquid water or condensing environments.
Q: Can I use the BME688 with a 5V microcontroller?
A: Yes, but you must use a level shifter to step down the logic levels to 3.3V, as the BME688 operates at 1.71V to 3.6V.