How to Use EasyVR plus 3: Examples, Pinouts, and Specs
Introduction
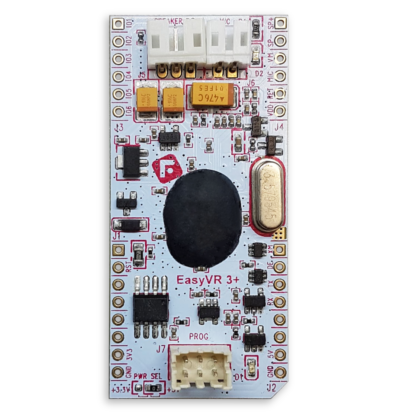
The EasyVR Plus 3, manufactured by Fortebit, is a versatile voice recognition module designed for creating interactive, voice-controlled applications. It features a built-in microphone and supports multiple languages, making it ideal for a wide range of projects. This module allows users to control devices through voice commands, offering a hands-free and intuitive interface for automation, robotics, and other embedded systems.
Explore Projects Built with EasyVR plus 3


Explore Projects Built with EasyVR plus 3
Common Applications and Use Cases
- Home automation systems (e.g., controlling lights, appliances, or security systems)
- Robotics (e.g., voice-controlled robots or drones)
- Assistive technologies for accessibility
- Interactive kiosks and displays
- Automotive voice control systems
- Gaming and entertainment systems
Technical Specifications
The EasyVR Plus 3 is a compact and powerful module with the following key specifications:
| Specification | Details |
|---|---|
| Power Supply Voltage | 3.3V to 5.0V DC |
| Current Consumption | 12mA (typical) |
| Communication | UART (TTL level) and USB |
| Supported Languages | Multiple languages, including English, Spanish, French, German, and more |
| Microphone | Built-in microphone and support for external microphone |
| Recognition Modes | Speaker-dependent and speaker-independent modes |
| Command Capacity | Up to 32 user-defined voice commands per group |
| Dimensions | 30mm x 50mm |
Pin Configuration and Descriptions
The EasyVR Plus 3 module has a set of pins for interfacing with microcontrollers and other devices. Below is the pin configuration:
| Pin Name | Type | Description |
|---|---|---|
| GND | Power | Ground connection |
| VCC | Power | Power supply input (3.3V to 5.0V DC) |
| TX | Output (UART) | Transmit data (connect to RX of the microcontroller) |
| RX | Input (UART) | Receive data (connect to TX of the microcontroller) |
| IO1 | Digital I/O | General-purpose I/O pin |
| IO2 | Digital I/O | General-purpose I/O pin |
| SPK | Output | Speaker output for audio playback |
| MIC | Input | External microphone input |
| RESET | Input | Reset pin (active low) |
Usage Instructions
How to Use the EasyVR Plus 3 in a Circuit
- Power the Module: Connect the VCC pin to a 3.3V or 5.0V power source and the GND pin to ground.
- Connect to a Microcontroller: Use the TX and RX pins to establish UART communication with a microcontroller (e.g., Arduino UNO).
- Microphone and Speaker: Use the built-in microphone for voice input or connect an external microphone to the MIC pin. Optionally, connect a speaker to the SPK pin for audio feedback.
- Load Voice Commands: Use the EasyVR Commander software to define and upload voice commands to the module.
- Integrate into Your Application: Write code on your microcontroller to process voice commands and trigger desired actions.
Important Considerations and Best Practices
- Ensure the module is powered within the specified voltage range to avoid damage.
- Place the module in a location with minimal background noise for optimal voice recognition performance.
- Use a level shifter if interfacing with a 3.3V microcontroller to ensure proper UART communication.
- Regularly test and calibrate voice commands to improve recognition accuracy.
Example: Connecting EasyVR Plus 3 to Arduino UNO
Below is an example Arduino sketch to interface with the EasyVR Plus 3 and process voice commands:
#include <EasyVR.h> // Include the EasyVR library

// Define the pins for UART communication
#define RX_PIN 2 // Connect to TX pin of EasyVR Plus 3
#define TX_PIN 3 // Connect to RX pin of EasyVR Plus 3

// Create an EasyVR object
EasyVR easyvr(RX_PIN, TX_PIN);

void setup() {
  Serial.begin(9600); // Initialize serial communication for debugging
  easyvr.begin(9600); // Initialize EasyVR communication

  // Check if the EasyVR module is connected
  if (!easyvr.detect()) {
    Serial.println("EasyVR not detected! Check connections.");
    while (true); // Halt execution if the module is not detected
  }

  Serial.println("EasyVR detected and ready!");
}

void loop() {
  // Check if a voice command is received
  if (easyvr.hasFinished()) {
    int command = easyvr.getCommand(); // Get the recognized command

    switch (command) {
      case 0: // Command 0 (e.g., "Turn on light")
        Serial.println("Command 0 recognized: Turn on light");
        // Add code to turn on a light or perform an action
        break;

      case 1: // Command 1 (e.g., "Turn off light")
        Serial.println("Command 1 recognized: Turn off light");
        // Add code to turn off a light or perform an action
        break;

      default:
        Serial.println("Unknown command received.");
        break;
    }
  }
}
Notes:
- Install the EasyVR Arduino library from the Arduino IDE Library Manager before uploading the code.
- Ensure the RX and TX pins are correctly connected to the Arduino UNO.
Troubleshooting and FAQs
Common Issues and Solutions
EasyVR Not Detected
- Cause: Incorrect wiring or insufficient power supply.
- Solution: Double-check the connections, ensure the module is powered correctly, and verify the RX/TX pin connections.
Voice Commands Not Recognized
- Cause: Background noise or unclear pronunciation.
- Solution: Reduce background noise, speak clearly, and retrain the voice commands if necessary.
No Audio Output
- Cause: Speaker not connected or volume too low.
- Solution: Verify the speaker connection and adjust the volume settings in the EasyVR Commander software.
UART Communication Issues
- Cause: Mismatched baud rate or incorrect wiring.
- Solution: Ensure the baud rate in the code matches the module's settings and check the RX/TX connections.
FAQs
Q: Can I use the EasyVR Plus 3 with a Raspberry Pi?
A: Yes, the EasyVR Plus 3 can be used with a Raspberry Pi via UART communication. Ensure proper voltage level shifting if required.
Q: How many voice commands can the module store?
A: The module can store up to 32 user-defined voice commands per group, with multiple groups supported.
Q: Does the module support speaker-independent recognition?
A: Yes, the EasyVR Plus 3 supports both speaker-dependent and speaker-independent recognition modes.
Q: Can I use an external microphone with the module?
A: Yes, the module supports an external microphone via the MIC pin for improved voice input quality.