How to Use Arduino BT: Examples, Pinouts, and Specs
Introduction
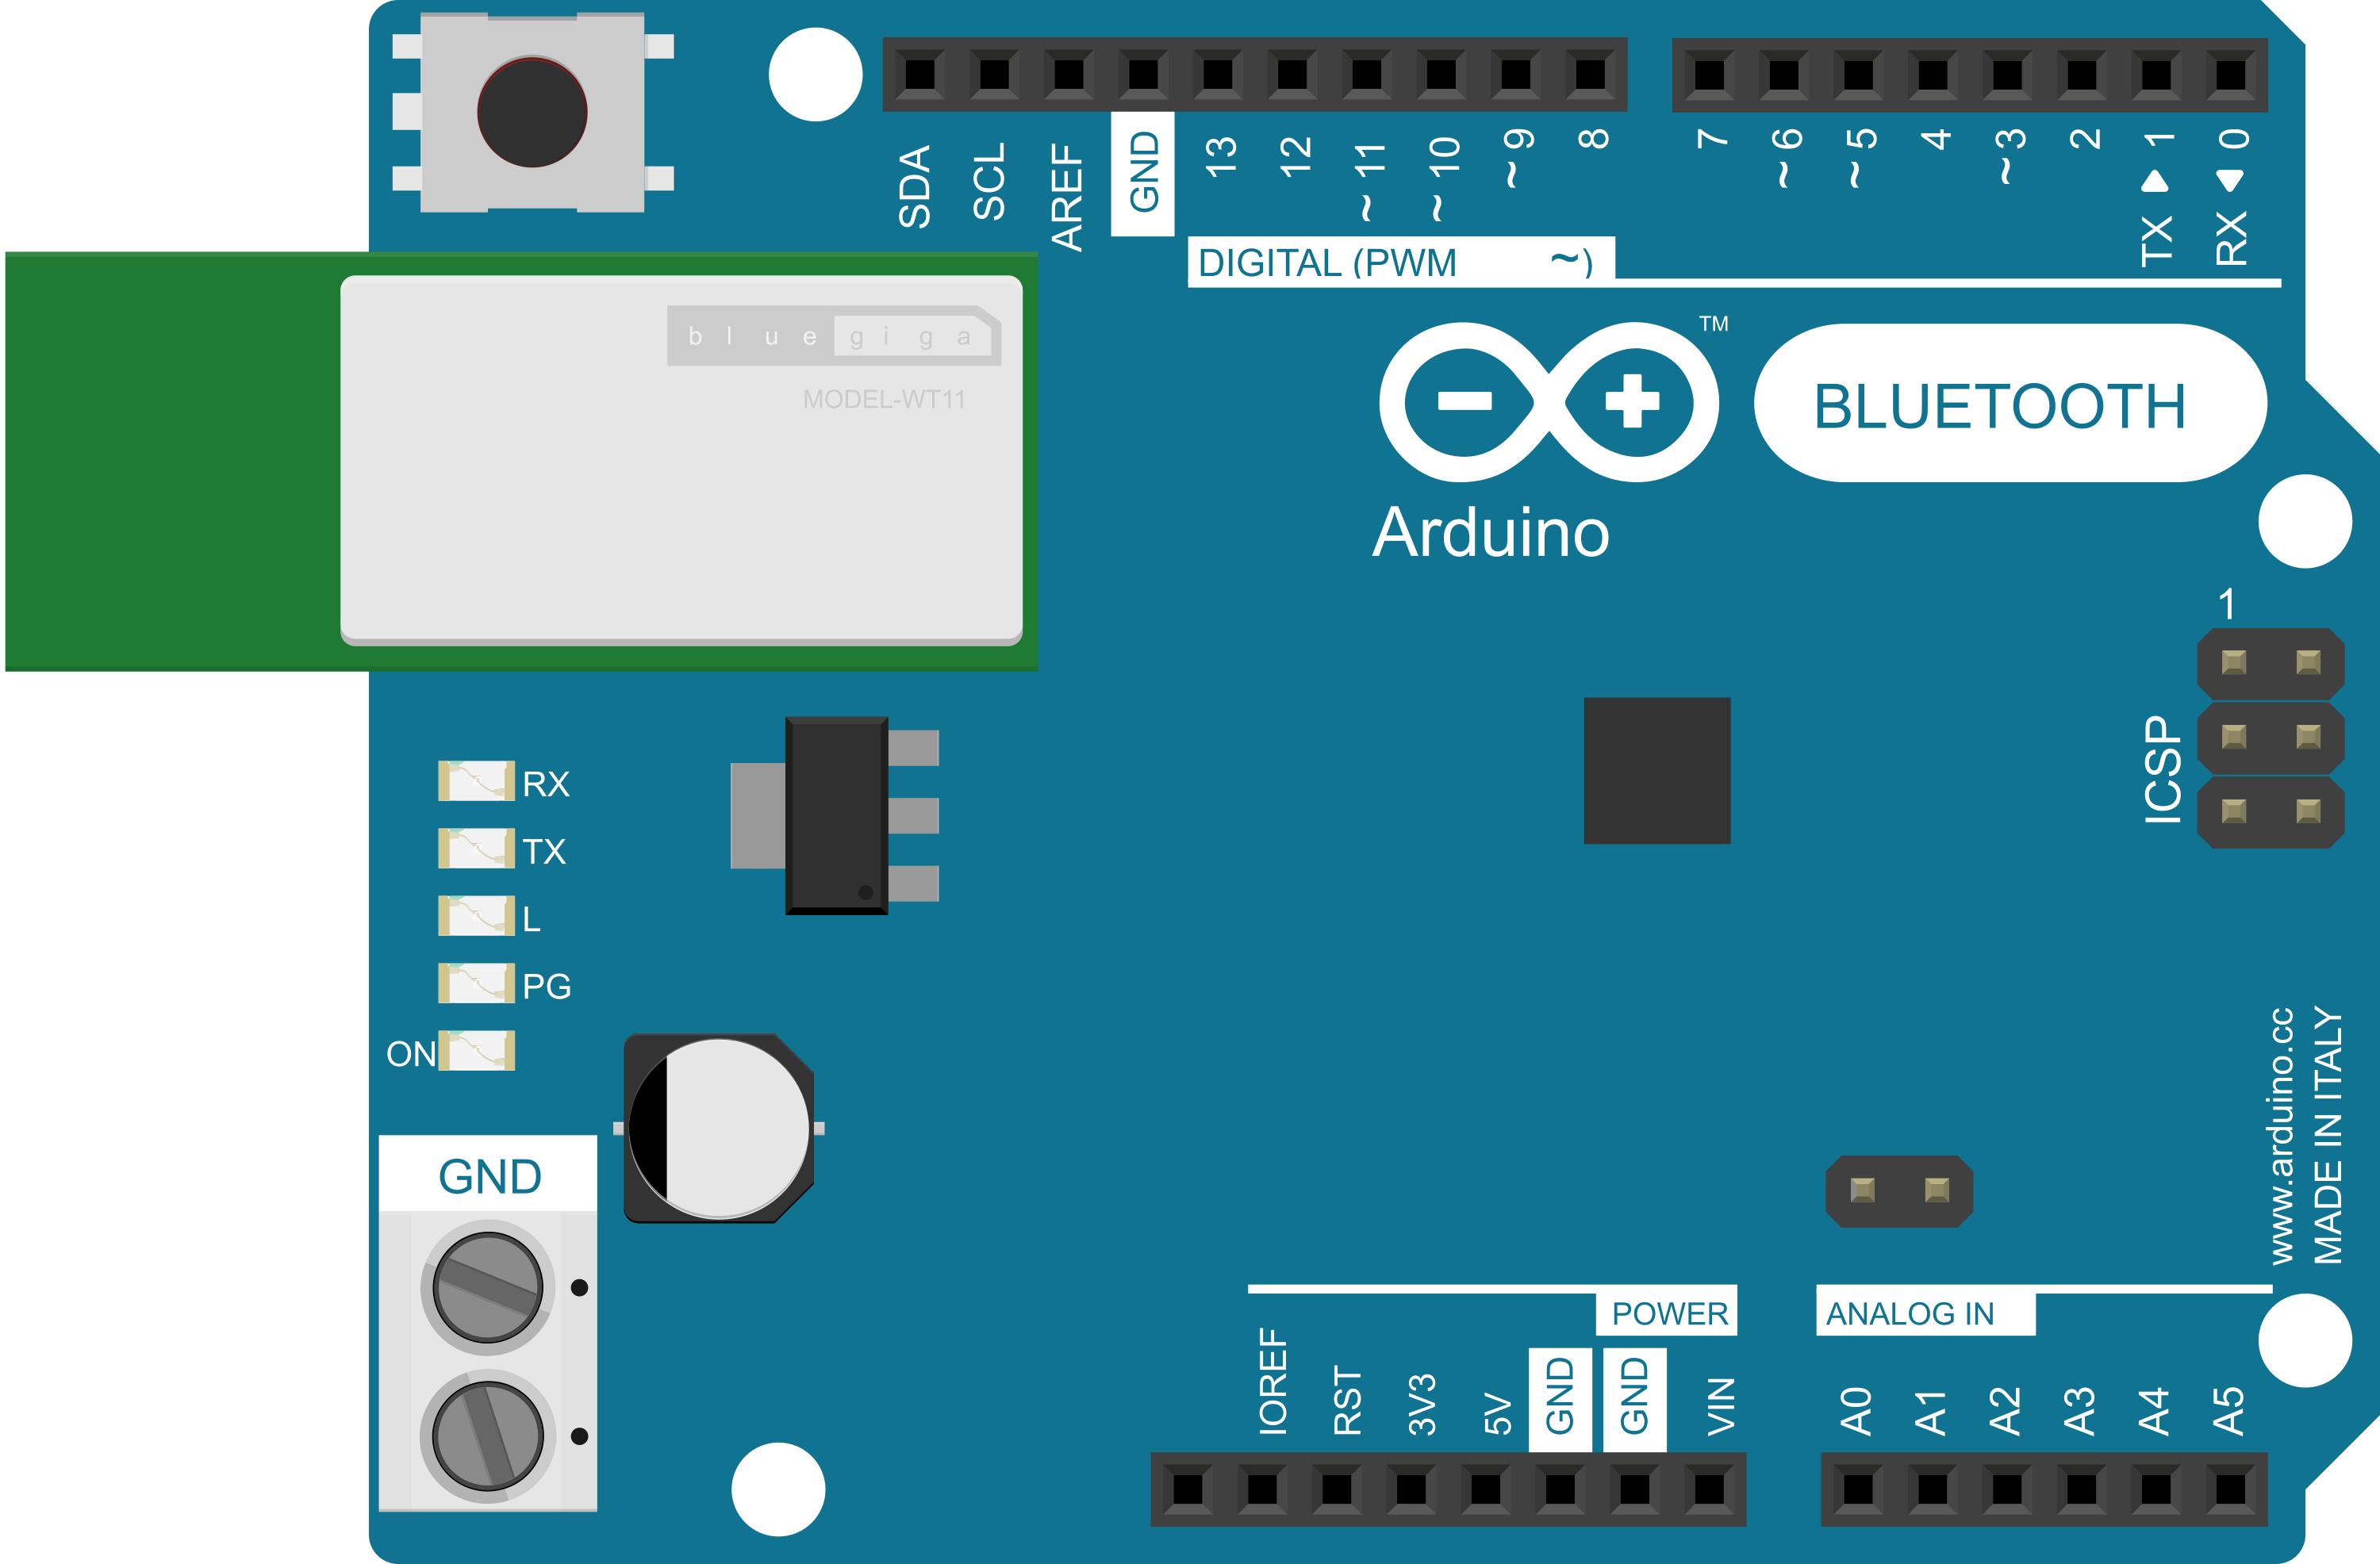
The Arduino BT is a microcontroller board based on the ATmega328P, integrated with a Bluetooth module that enables wireless communication. This board is ideal for projects that require remote control or data exchange without the need for a wired connection. Common applications include home automation, robotics, and wireless sensor networks.
Explore Projects Built with Arduino BT
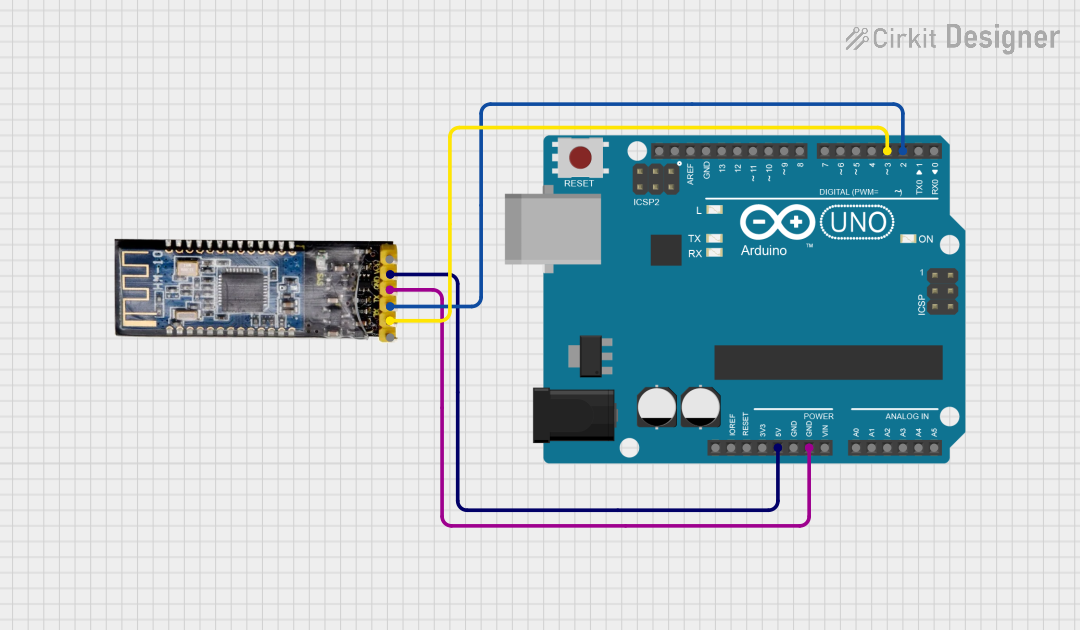
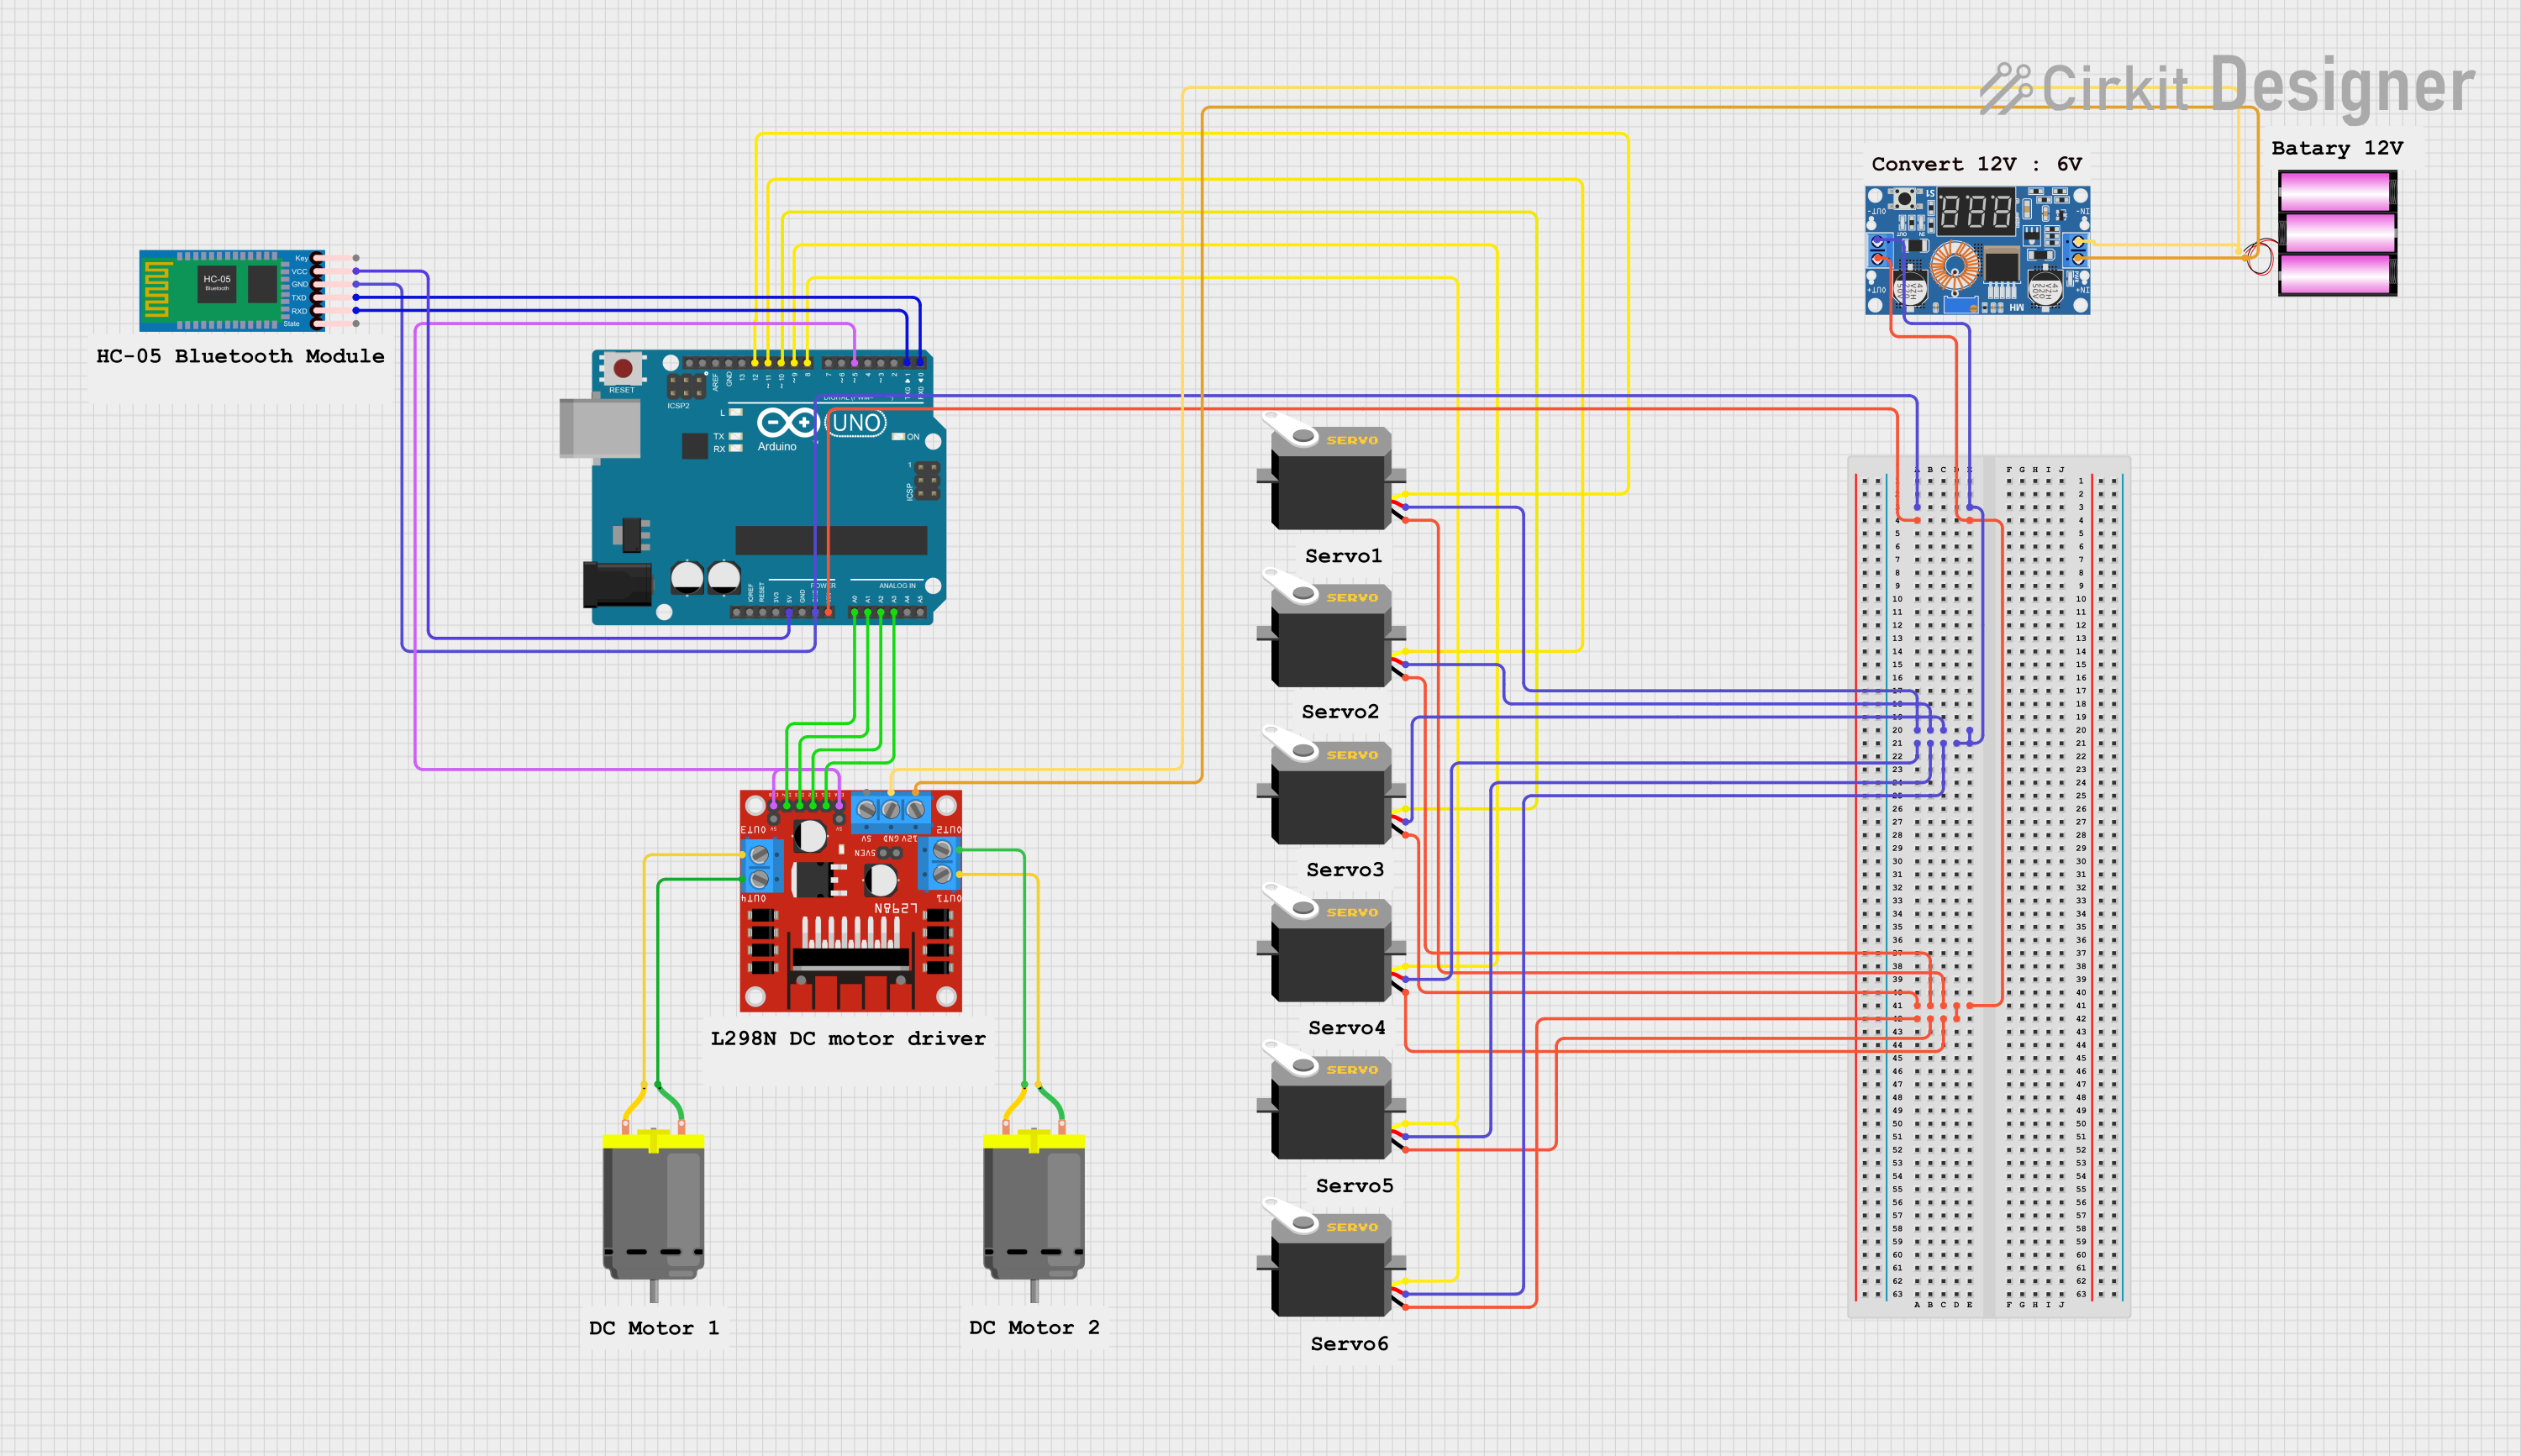
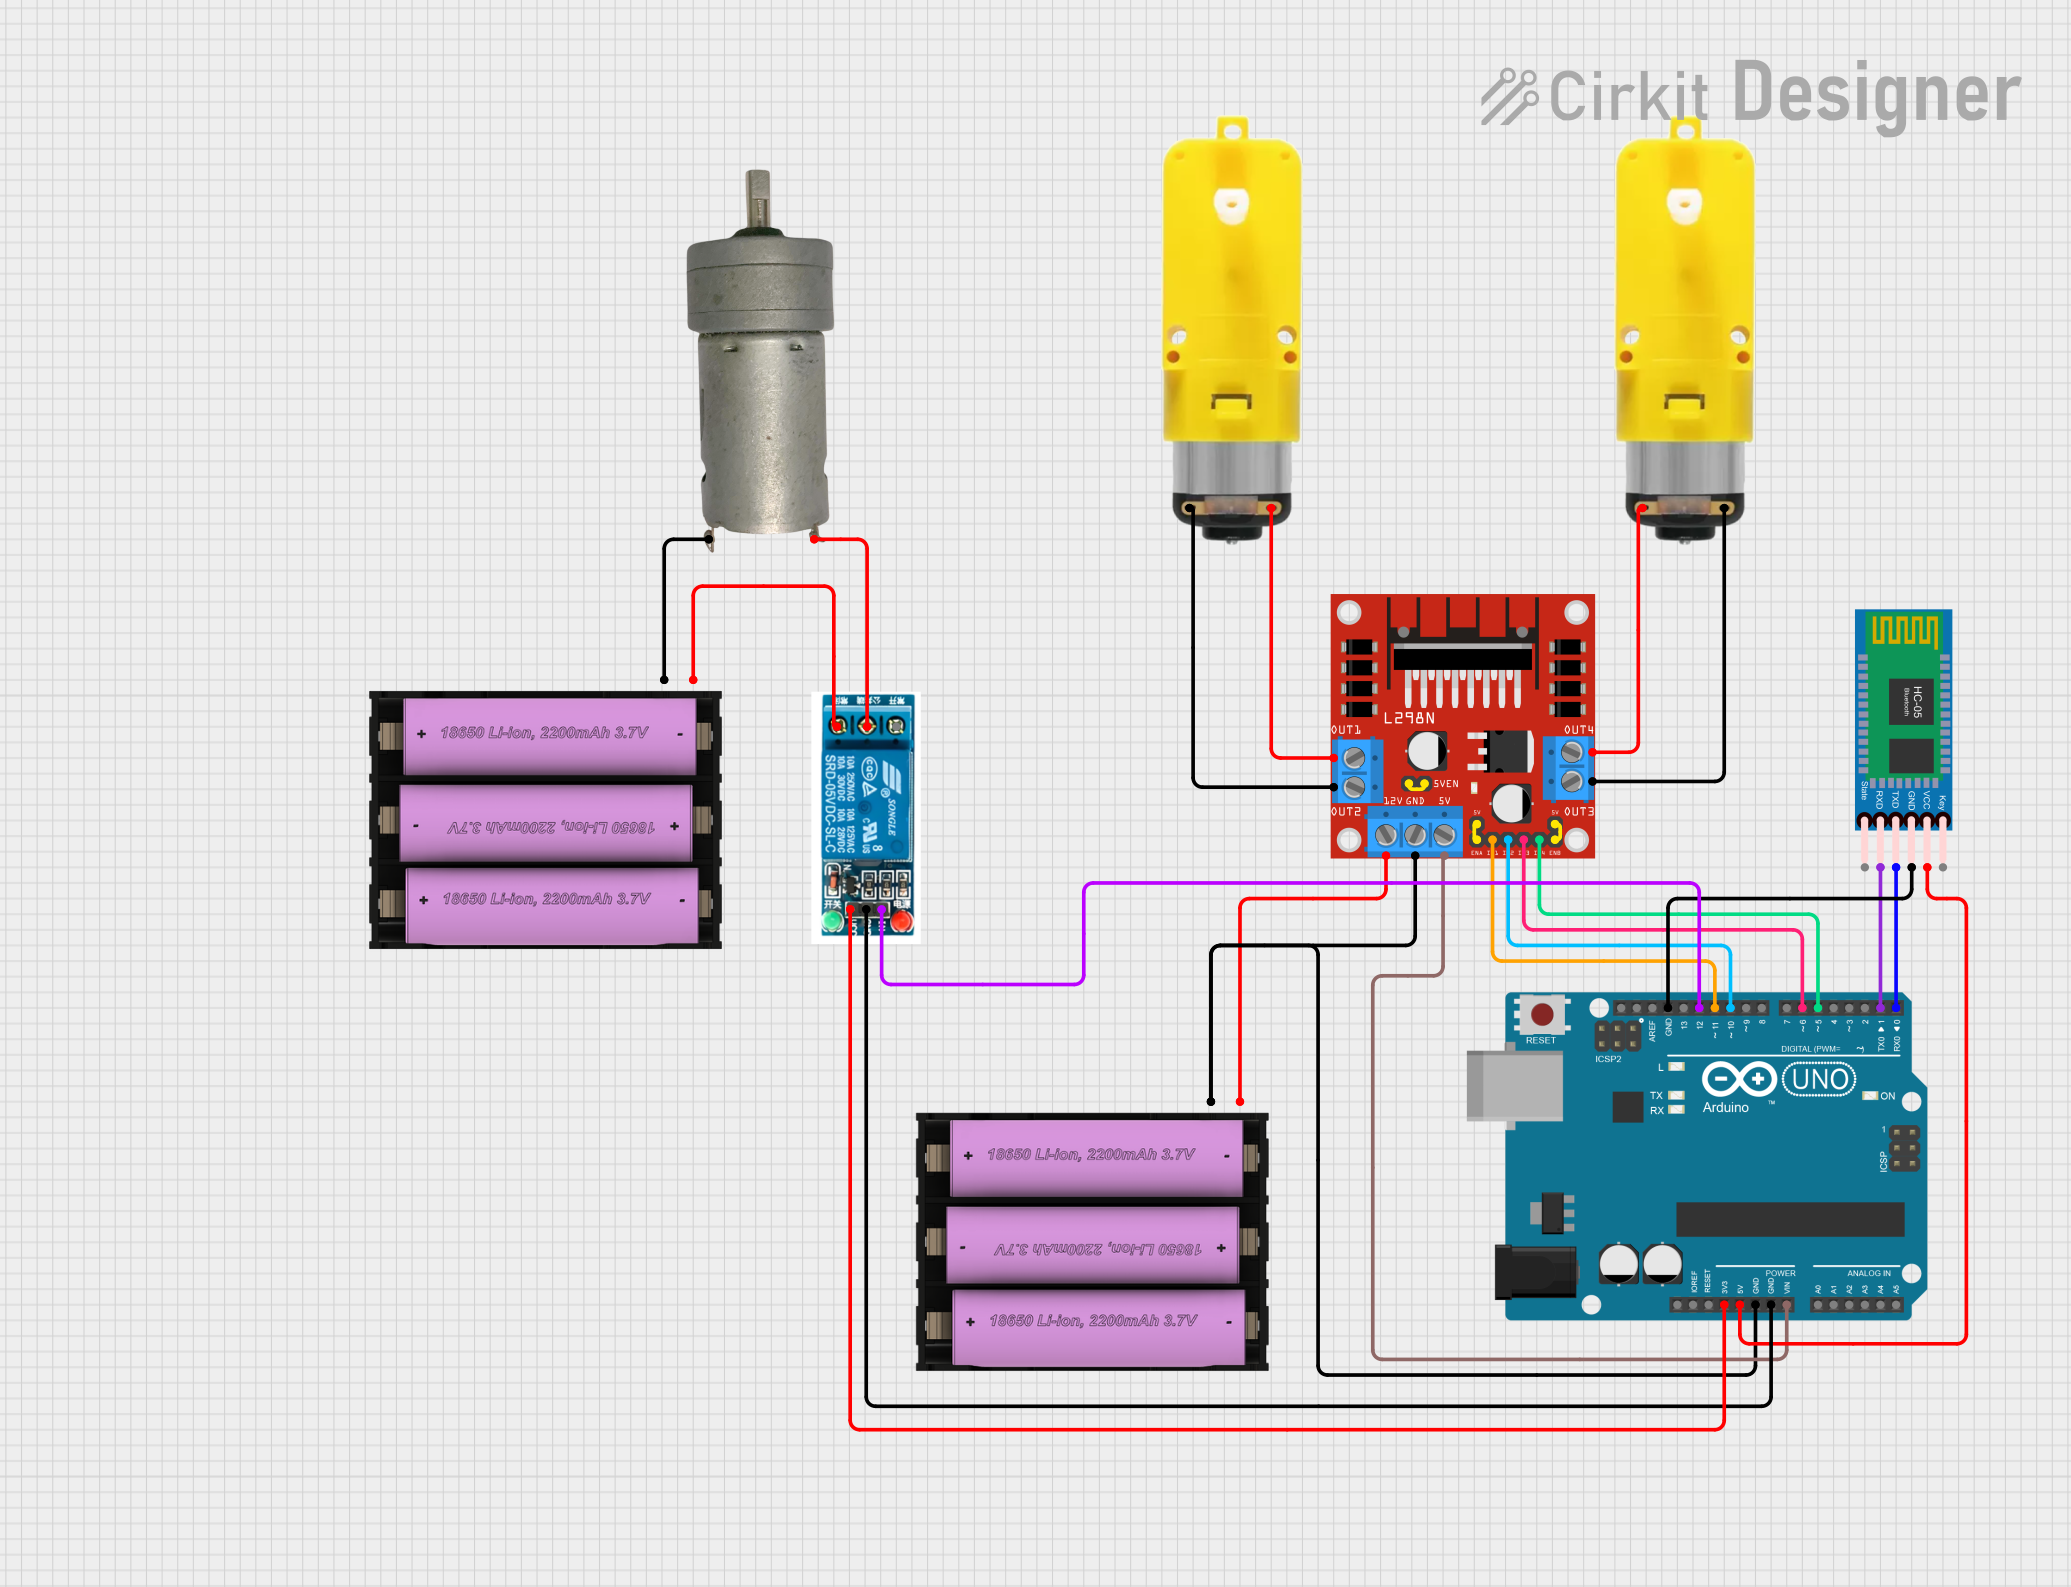
Explore Projects Built with Arduino BT
Technical Specifications
Key Technical Details
- Microcontroller: ATmega328P
- Operating Voltage: 5V
- Input Voltage (recommended): 2.5V - 12V
- Digital I/O Pins: 14 (of which 6 provide PWM output)
- Analog Input Pins: 6
- DC Current per I/O Pin: 40 mA
- Flash Memory: 32 KB (ATmega328P) of which 2 KB used by bootloader
- SRAM: 2 KB (ATmega328P)
- EEPROM: 1 KB (ATmega328P)
- Clock Speed: 16 MHz
- Bluetooth Module: Bluegiga WT11, iWrap 4.0.1 Bluetooth stack
Pin Configuration and Descriptions
| Pin Number | Function | Description |
|---|---|---|
| 1 | TXD | Transmit pin for UART communication |
| 2 | RXD | Receive pin for UART communication |
| 3-8 | Digital Pins | General purpose digital I/O |
| 9-10 | PWM | PWM output for analog-like signal generation |
| 11-16 | Digital Pins | General purpose digital I/O |
| A0-A5 | Analog Input | Analog sensor input pins |
| VIN | Voltage Input | Unregulated external power supply to board |
| 5V | Regulated Power | Output to supply external components |
| GND | Ground | Common ground |
| RESET | Reset | Resets the microcontroller |
Usage Instructions
Setting Up the Arduino BT
Powering the Arduino BT: The board can be powered via the USB connection or with an external power supply. The power source is selected automatically.
Pairing with Bluetooth: Before using the Arduino BT, it must be paired with the Bluetooth device. The default PIN code for pairing is
12345.Programming the Board: Use the Arduino IDE to write and upload sketches to the Arduino BT. Select "Arduino BT" as the board type in the IDE.
Best Practices
- Ensure that the voltage levels on the I/O pins do not exceed the specified limits to prevent damage.
- When using PWM pins, remember that the frequency at which the PWM signal operates is fixed and may need to be adjusted for specific applications.
- Always disconnect the Bluetooth module when uploading new sketches to avoid communication errors.
Example Code for Arduino UNO
// Blink an LED connected to pin 13 on the Arduino BT

void setup() {
  pinMode(13, OUTPUT); // Set pin 13 as an output
}

void loop() {
  digitalWrite(13, HIGH); // Turn the LED on
  delay(1000);            // Wait for a second
  digitalWrite(13, LOW);  // Turn the LED off
  delay(1000);            // Wait for a second
}
Troubleshooting and FAQs
Common Issues
- Unable to Pair: Ensure the device you are trying to pair with is in discovery mode and the correct PIN code is entered.
- Sketch Upload Fails: Check that the correct board and port are selected in the Arduino IDE. Also, ensure the Bluetooth module is disconnected during upload.
FAQs
Q: Can I use the Arduino BT with a battery? A: Yes, the Arduino BT can be powered using a battery within the recommended voltage range.
Q: How do I reset the Arduino BT? A: You can reset the board by pressing the onboard reset button or by sending a break signal over Bluetooth.
Q: What is the range of the Bluetooth connection? A: The range is typically up to 10 meters, but it can vary depending on environmental factors and the Bluetooth class of the connected device.
Q: How can I extend the range of the Bluetooth connection? A: Use an external antenna with the Arduino BT or ensure there are no physical obstructions between the connected devices.
For further assistance, consult the Arduino BT forums and community resources.