How to Use a: Examples, Pinouts, and Specs
Introduction
- The "A" component, manufactured by "a" with part ID "a," is a generic placeholder component commonly used in circuit design examples or as a variable in theoretical discussions. While it does not represent a specific physical component, it serves as a versatile stand-in for various electronic parts during prototyping or educational purposes.
- Common applications include:
- Circuit design tutorials
- Placeholder in schematics
- Educational demonstrations
Explore Projects Built with a
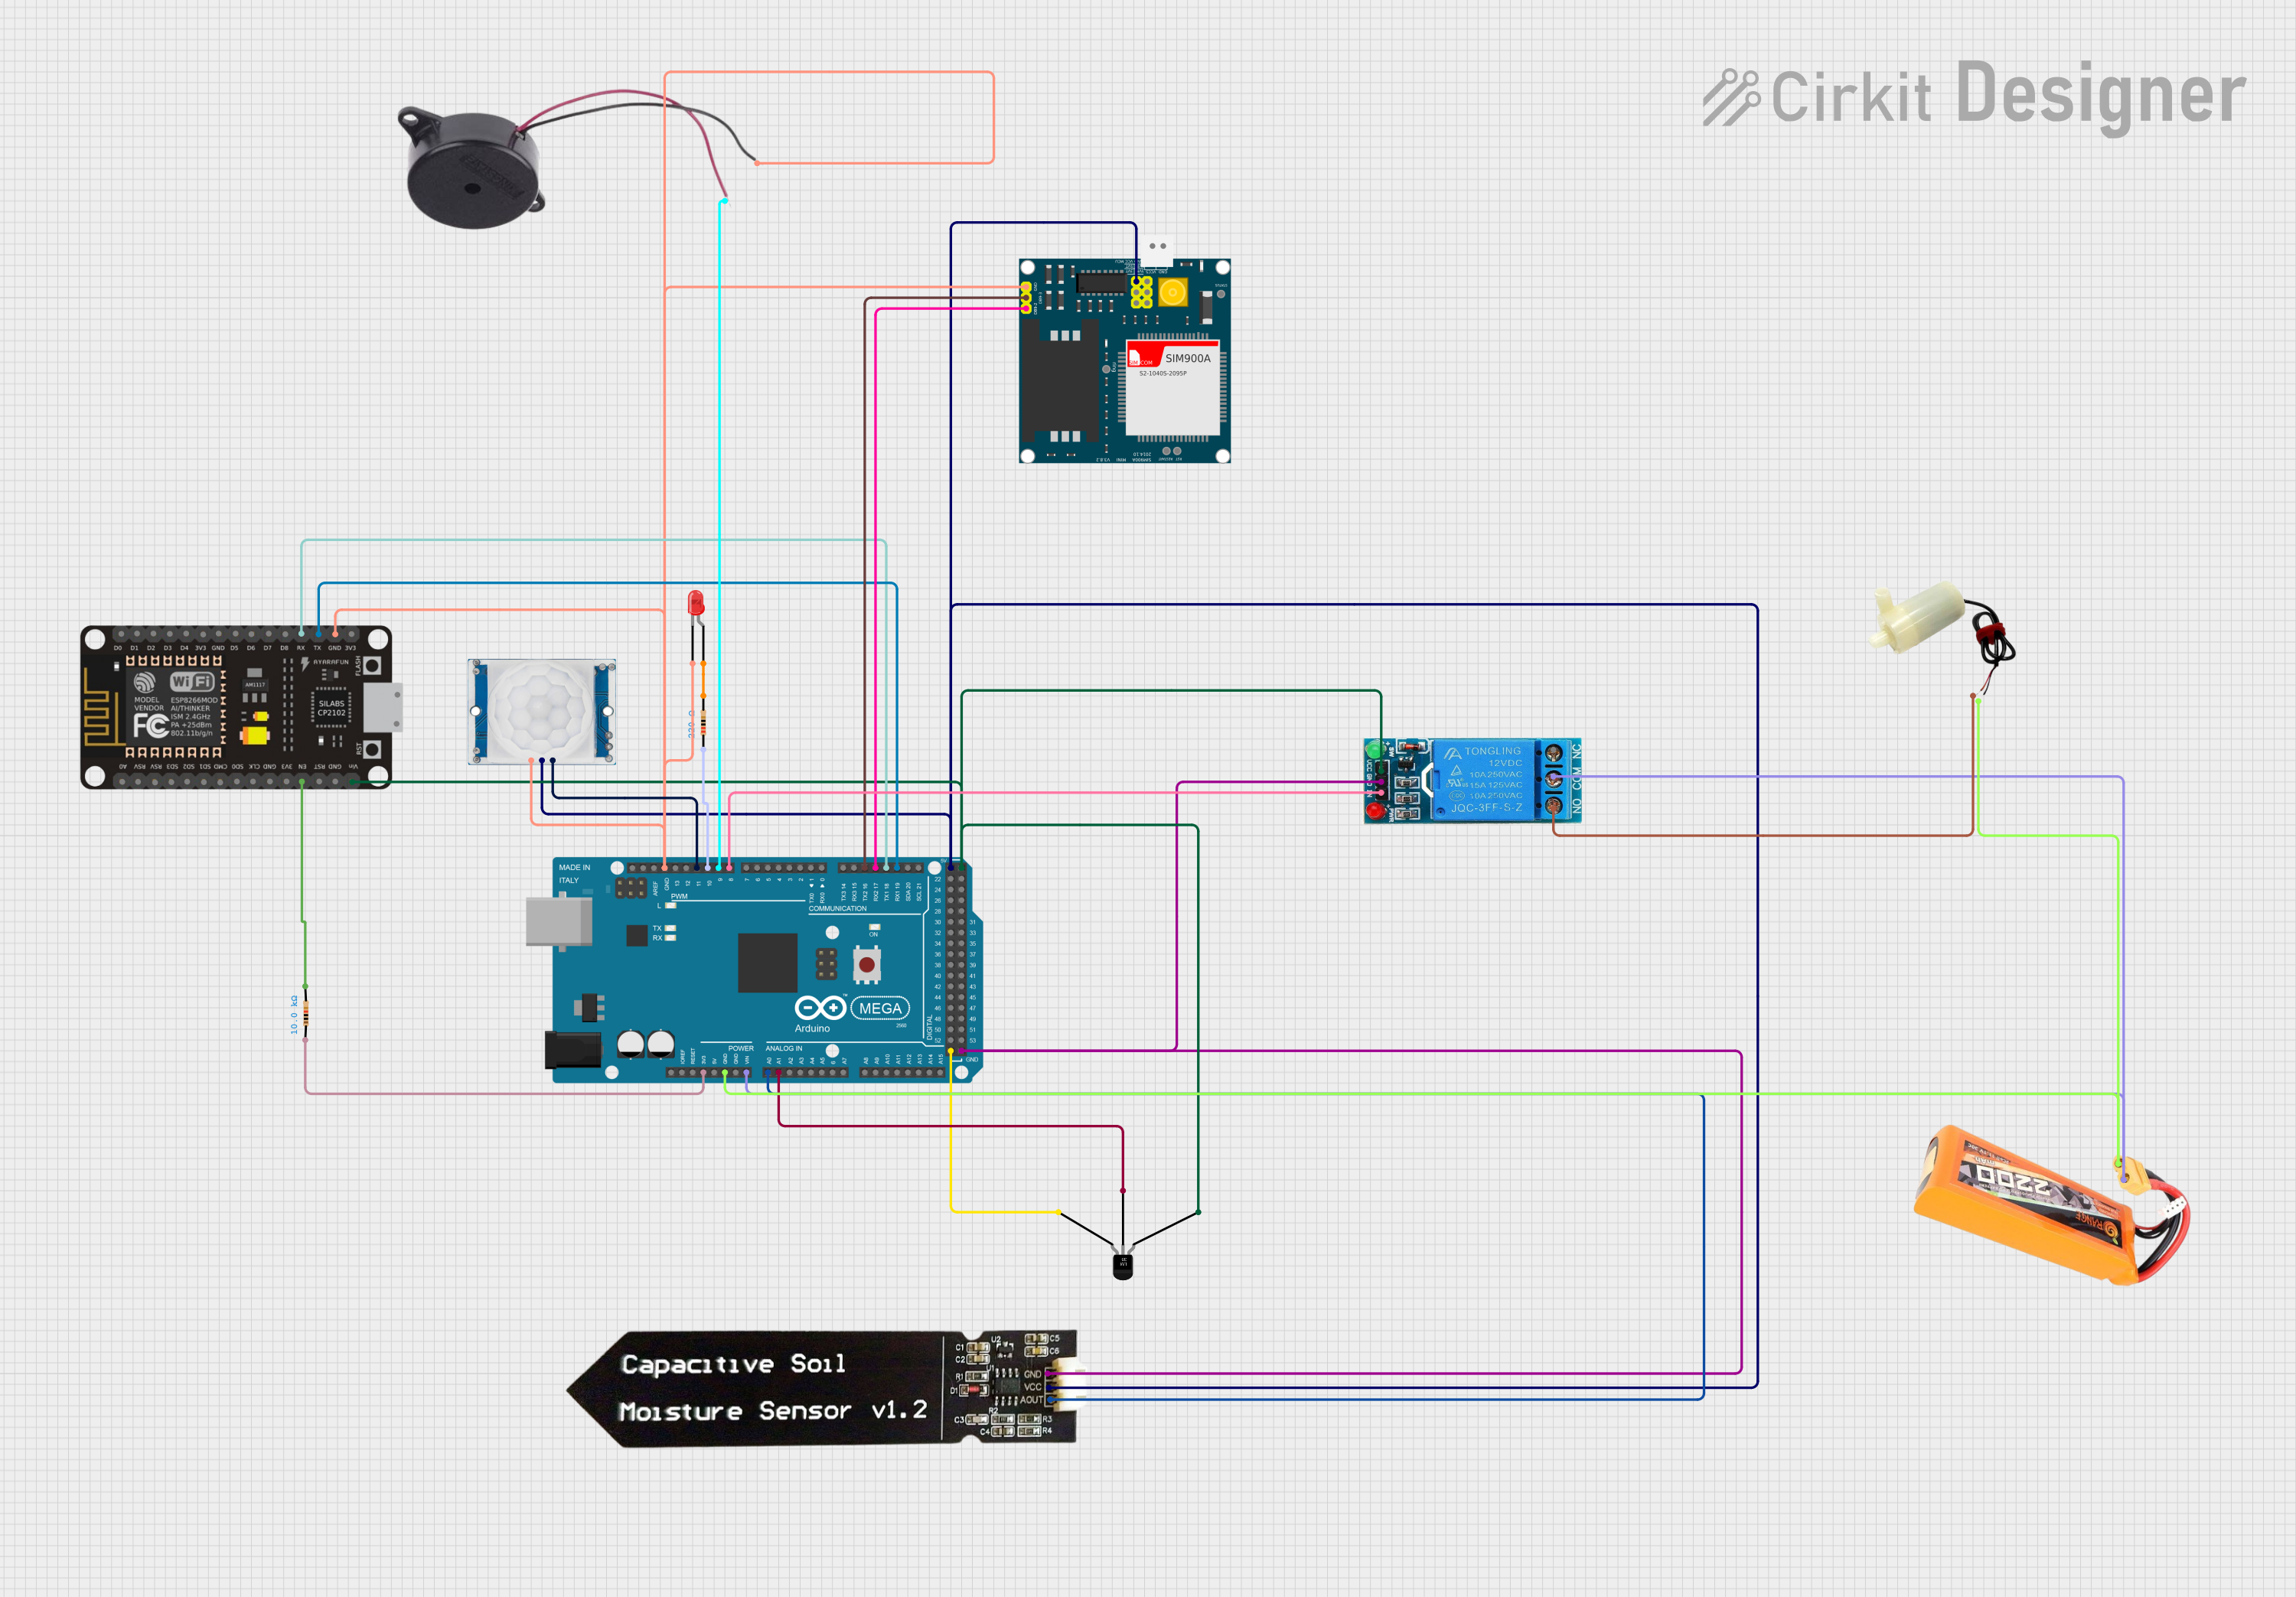
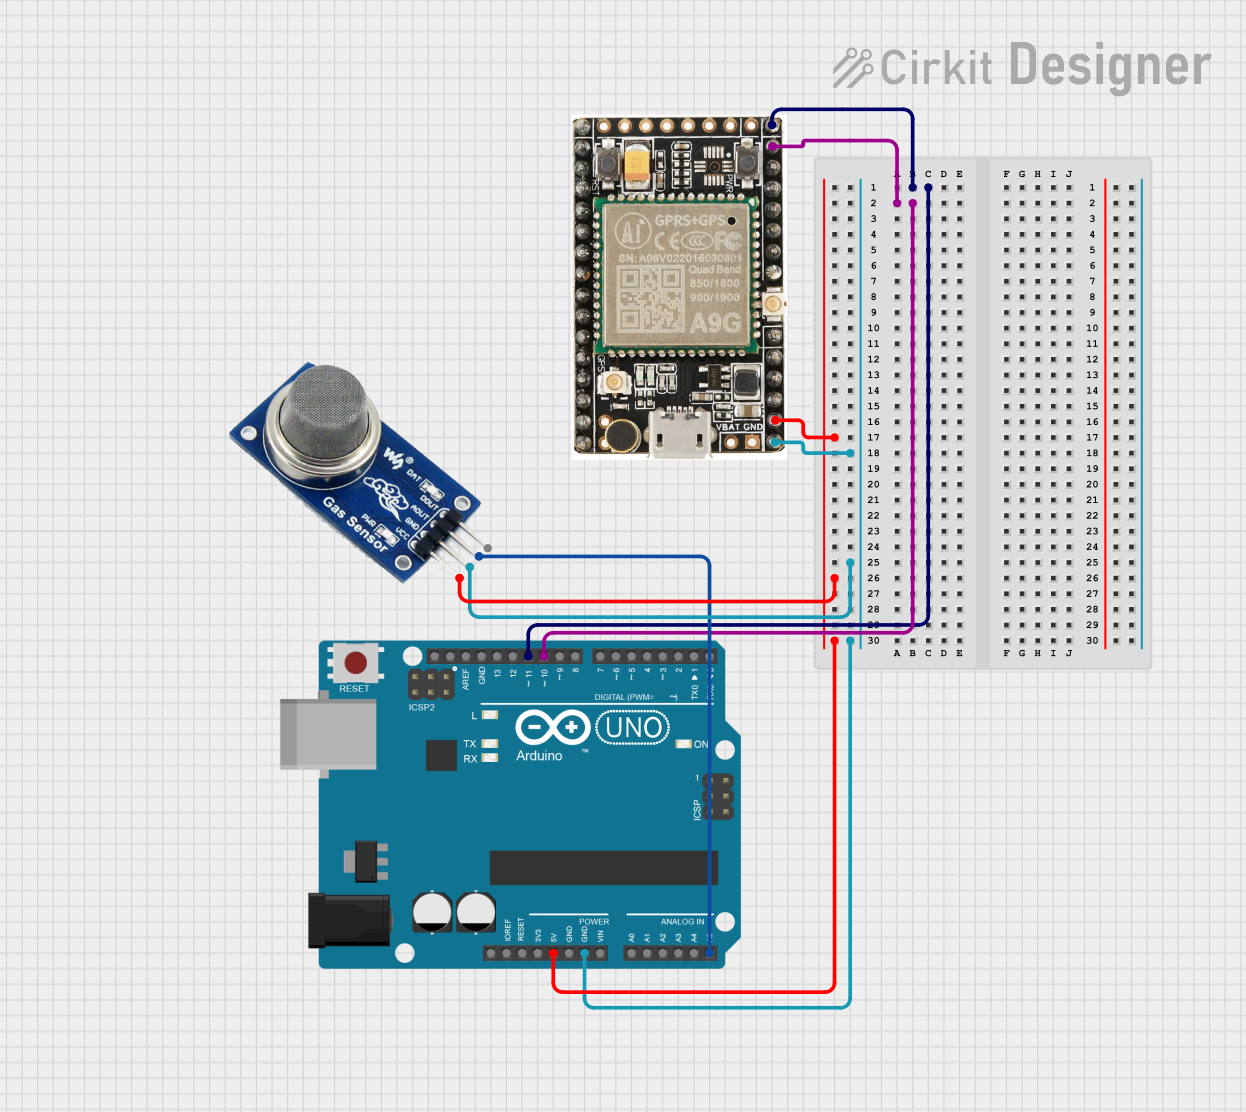
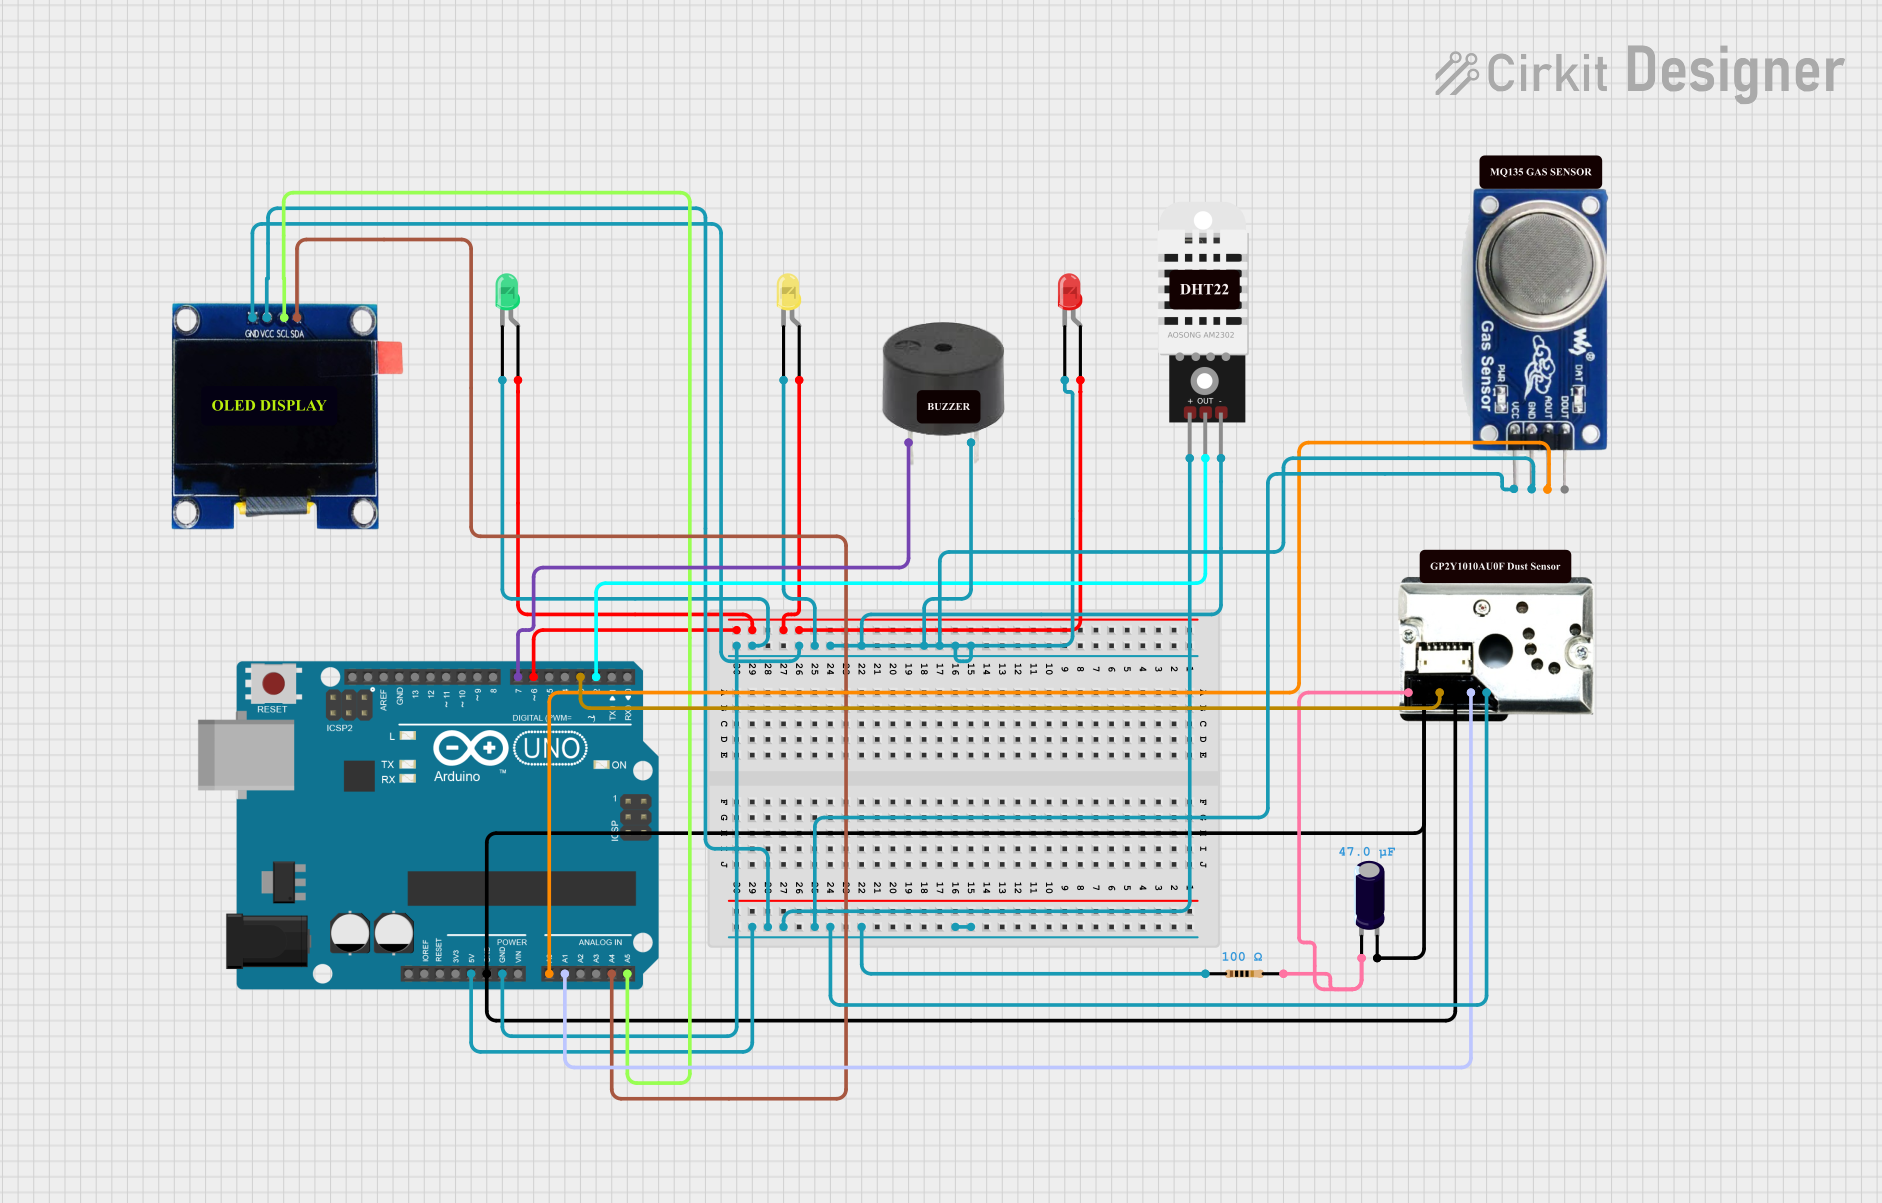
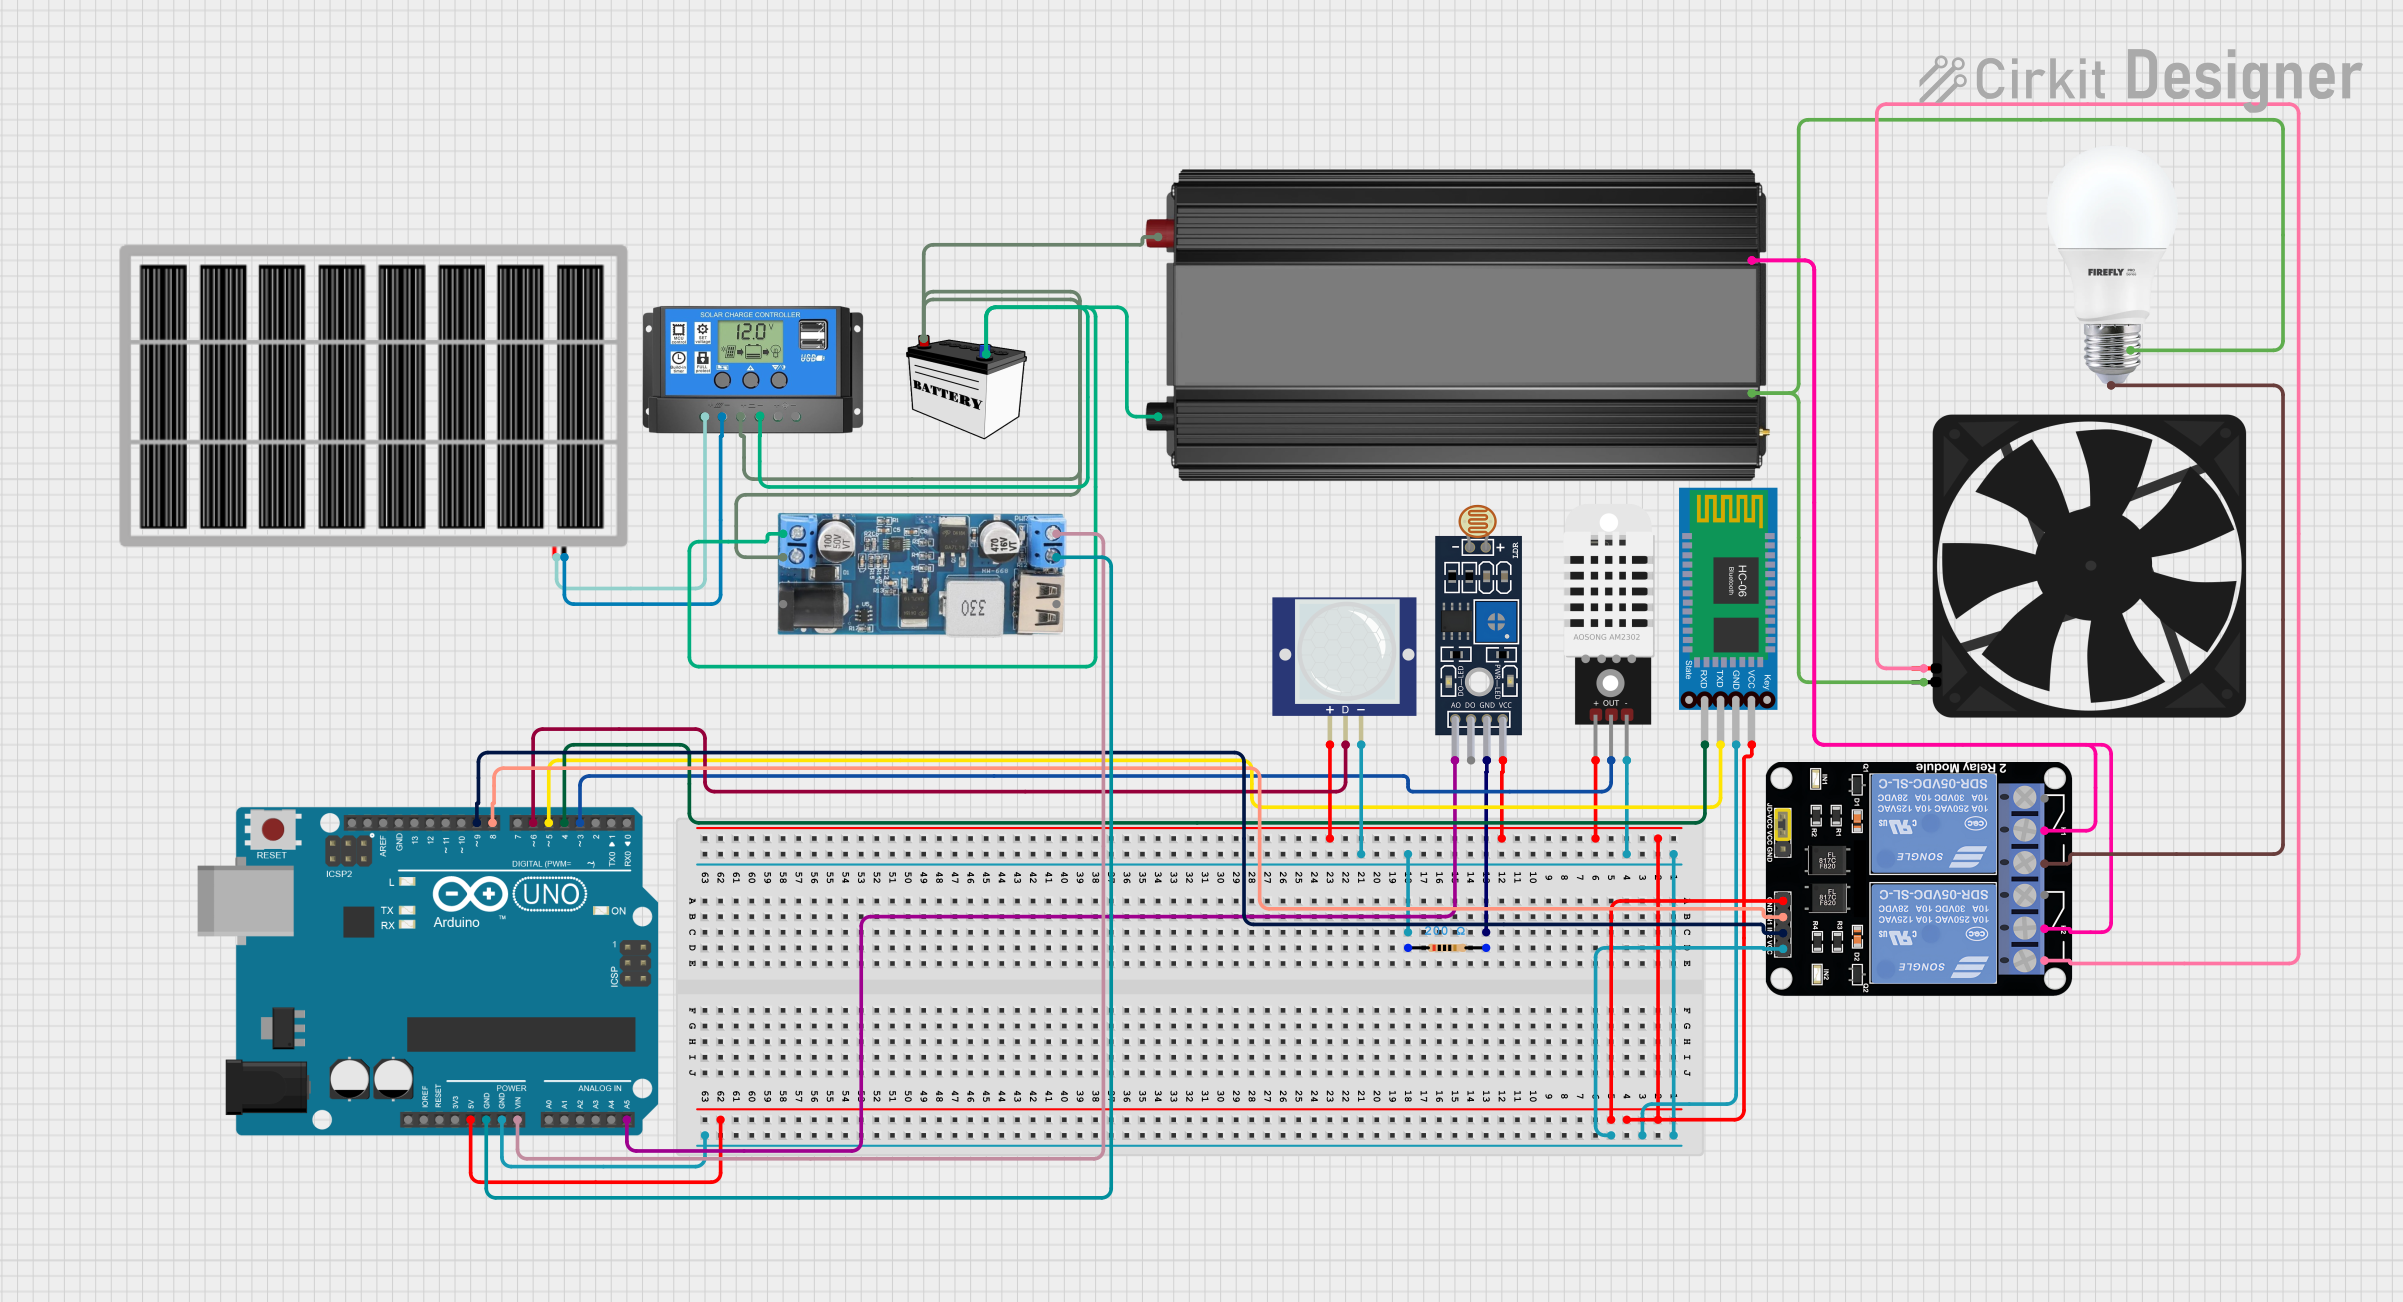
Explore Projects Built with a
Technical Specifications
Since "A" is a generic placeholder, its specifications are context-dependent. Below is an example of how it might be represented in a circuit:
Example Specifications
| Parameter | Value/Range | Description |
|---|---|---|
| Voltage Rating | 0-5V (example) | Typical voltage range for placeholder use |
| Current Rating | 0-20mA (example) | Example current range for low-power use |
| Power Rating | 0-100mW (example) | Example power dissipation limit |
Pin Configuration
The pin configuration of "A" depends on its assumed role in the circuit. Below is an example for a 2-pin placeholder:
| Pin Number | Pin Name | Description |
|---|---|---|
| 1 | IN | Input or positive terminal |
| 2 | OUT | Output or negative terminal |
Usage Instructions
Determine the Role of "A":
- Identify the function of the placeholder in your circuit (e.g., resistor, capacitor, diode).
- Replace "A" with the actual component when finalizing the design.
Connect the Component:
- Follow the schematic to connect "A" to the appropriate pins or terminals.
- Ensure the voltage and current ratings of the actual component match the circuit requirements.
Simulate or Test:
- If using simulation software, assign realistic values to "A" for accurate results.
- For physical circuits, replace "A" with the correct component before powering the circuit.
Example Code for Arduino UNO: If "A" represents an LED, the following code demonstrates how to control it with an Arduino UNO:
// Example code to blink an LED connected to pin 13 const int ledPin = 13; // Pin where the LED is connected void setup() { pinMode(ledPin, OUTPUT); // Set the LED pin as an output } void loop() { digitalWrite(ledPin, HIGH); // Turn the LED on delay(1000); // Wait for 1 second digitalWrite(ledPin, LOW); // Turn the LED off delay(1000); // Wait for 1 second }- Replace the LED with the actual component if "A" represents a different device.
Troubleshooting and FAQs
Common Issues
"A" Does Not Function as Expected:
- Ensure "A" has been replaced with the correct component for the circuit.
- Verify the component's ratings match the circuit requirements.
Simulation Errors:
- Assign realistic values to "A" in the simulation software.
- Double-check the connections and parameters.
Physical Circuit Malfunctions:
- Inspect the wiring and connections for errors.
- Replace "A" with a tested and functional component.
FAQs
Q: Can I use "A" in a final circuit design?
A: No, "A" is a placeholder and must be replaced with a specific component before finalizing the design.
Q: How do I determine the correct component to replace "A"?
A: Refer to the circuit's requirements, such as voltage, current, and functionality, to select the appropriate component.
Q: Can "A" represent multiple components in the same circuit?
A: Yes, but each instance of "A" should be clearly defined and replaced with the correct component during implementation.