How to Use heater t12: Examples, Pinouts, and Specs
Introduction
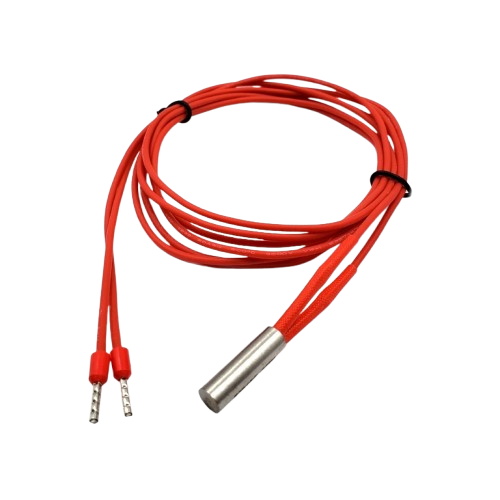
The T12 heater, manufactured by Heater (Part ID: T12), is a highly efficient electric heating element designed for a wide range of applications. It is commonly used in soldering irons, industrial heating systems, and other devices requiring precise and reliable heat transfer. The T12 heater is known for its compact design, rapid heating capabilities, and energy efficiency, making it a popular choice in both consumer and industrial settings.
Explore Projects Built with heater t12


Explore Projects Built with heater t12
Common Applications and Use Cases
- Soldering irons for electronics assembly and repair
- Industrial heating systems for material processing
- Laboratory equipment requiring controlled heating
- Space heaters and small appliances
- Custom heating solutions in prototyping and DIY projects
Technical Specifications
The T12 heater is designed to deliver consistent performance under various operating conditions. Below are its key technical specifications:
| Parameter | Value |
|---|---|
| Manufacturer | Heater |
| Part ID | T12 |
| Operating Voltage | 12V to 24V DC |
| Power Rating | 60W (typical) |
| Heating Element Type | Ceramic core |
| Maximum Temperature | Up to 450°C |
| Heating Time | < 10 seconds to 300°C |
| Dimensions | 4mm diameter, 70mm length |
| Connector Type | 2-pin or 3-pin (varies by model) |
Pin Configuration and Descriptions
The T12 heater typically features a 2-pin or 3-pin connector for electrical connections. Below is the pin configuration for the 2-pin variant:
| Pin | Name | Description |
|---|---|---|
| 1 | Positive (+) | Connect to the positive terminal of the power supply. |
| 2 | Negative (-) | Connect to the negative terminal of the power supply. |
For the 3-pin variant, an additional pin may be used for temperature sensing or grounding:
| Pin | Name | Description |
|---|---|---|
| 1 | Positive (+) | Connect to the positive terminal of the power supply. |
| 2 | Negative (-) | Connect to the negative terminal of the power supply. |
| 3 | Sensor/Ground | Used for temperature feedback or grounding. |
Usage Instructions
How to Use the T12 Heater in a Circuit
- Power Supply Selection: Ensure the power supply matches the operating voltage of the T12 heater (12V to 24V DC). A regulated DC power supply is recommended for stable operation.
- Connection:
- For a 2-pin T12 heater, connect the positive and negative pins to the corresponding terminals of the power supply.
- For a 3-pin T12 heater, connect the additional pin to the temperature sensing circuit or ground, as required.
- Temperature Control: Use a compatible temperature controller or soldering station to regulate the heater's temperature. This ensures safe and efficient operation.
- Mounting: Secure the T12 heater in its designated housing or fixture to ensure proper heat transfer and avoid damage to surrounding components.
Important Considerations and Best Practices
- Avoid Overvoltage: Operating the T12 heater above its rated voltage can cause overheating and damage.
- Use Heat-Resistant Materials: Ensure that the surrounding materials can withstand the high temperatures generated by the heater.
- Temperature Monitoring: If using the 3-pin variant, connect the sensor pin to a temperature monitoring circuit for precise control.
- Cooling Period: Allow the heater to cool down before handling to prevent burns or damage.
- Arduino Integration: The T12 heater can be controlled using an Arduino UNO with a suitable MOSFET or relay module. Below is an example code snippet for controlling the heater:
// Example Arduino code to control a T12 heater using a MOSFET
const int heaterPin = 9; // Pin connected to the MOSFET gate
const int tempSensorPin = A0; // Pin connected to the temperature sensor (if applicable)

void setup() {
  pinMode(heaterPin, OUTPUT); // Set heater pin as output
  pinMode(tempSensorPin, INPUT); // Set temperature sensor pin as input
  Serial.begin(9600); // Initialize serial communication
}

void loop() {
  int tempReading = analogRead(tempSensorPin); // Read temperature sensor value
  float temperature = (tempReading / 1023.0) * 500.0; // Convert to temperature (example)

  Serial.print("Temperature: ");
  Serial.println(temperature);

  if (temperature < 300) { // Turn on heater if temperature is below 300°C
    digitalWrite(heaterPin, HIGH);
  } else { // Turn off heater if temperature exceeds 300°C
    digitalWrite(heaterPin, LOW);
  }

  delay(500); // Delay for stability
}
Troubleshooting and FAQs
Common Issues and Solutions
Heater Not Heating Up
- Cause: Incorrect power supply or loose connections.
- Solution: Verify the power supply voltage and ensure all connections are secure.
Overheating
- Cause: Operating above the rated voltage or lack of temperature control.
- Solution: Use a regulated power supply and a temperature controller.
Uneven Heating
- Cause: Poor contact between the heater and the heated surface.
- Solution: Ensure proper mounting and contact with the surface.
Temperature Sensor Not Working (3-pin variant)
- Cause: Faulty sensor connection or damaged sensor.
- Solution: Check the sensor wiring and replace the sensor if necessary.
FAQs
Q: Can the T12 heater be used with an AC power supply?
A: No, the T12 heater is designed for DC power only. Using AC power may damage the heater.Q: What is the maximum safe operating temperature for the T12 heater?
A: The T12 heater can safely operate up to 450°C. Exceeding this temperature may reduce its lifespan.Q: Can I use the T12 heater without a temperature controller?
A: While possible, it is not recommended. A temperature controller ensures safe and efficient operation.Q: How do I clean the T12 heater?
A: Allow the heater to cool completely, then gently clean it with a soft, dry cloth. Avoid using water or abrasive materials.
This documentation provides a comprehensive guide to understanding, using, and troubleshooting the T12 heater. For further assistance, refer to the manufacturer's support resources.