Cirkit Designer
Your all-in-one circuit design IDE
Home /
Component Documentation
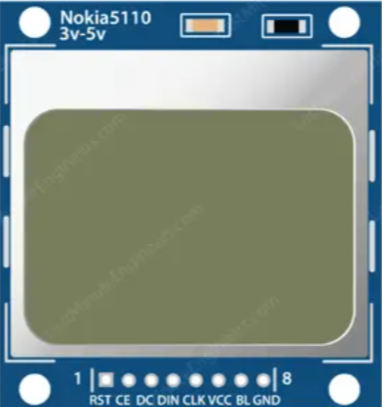
How to Use nokia 5110 lcd: Examples, Pinouts, and Specs
Introduction
The Nokia 5110 LCD is a low-power, monochrome graphic display commonly used in embedded systems and DIY electronics projects. Manufactured by Nokia, this display features a resolution of 84x48 pixels and communicates via an SPI interface. It is widely appreciated for its simplicity, low power consumption, and ease of integration with microcontrollers such as the Arduino UNO.
Explore Projects Built with nokia 5110 lcd
Battery-Powered Arduino Nano with Nokia 5110 LCD and Pushbutton Interface
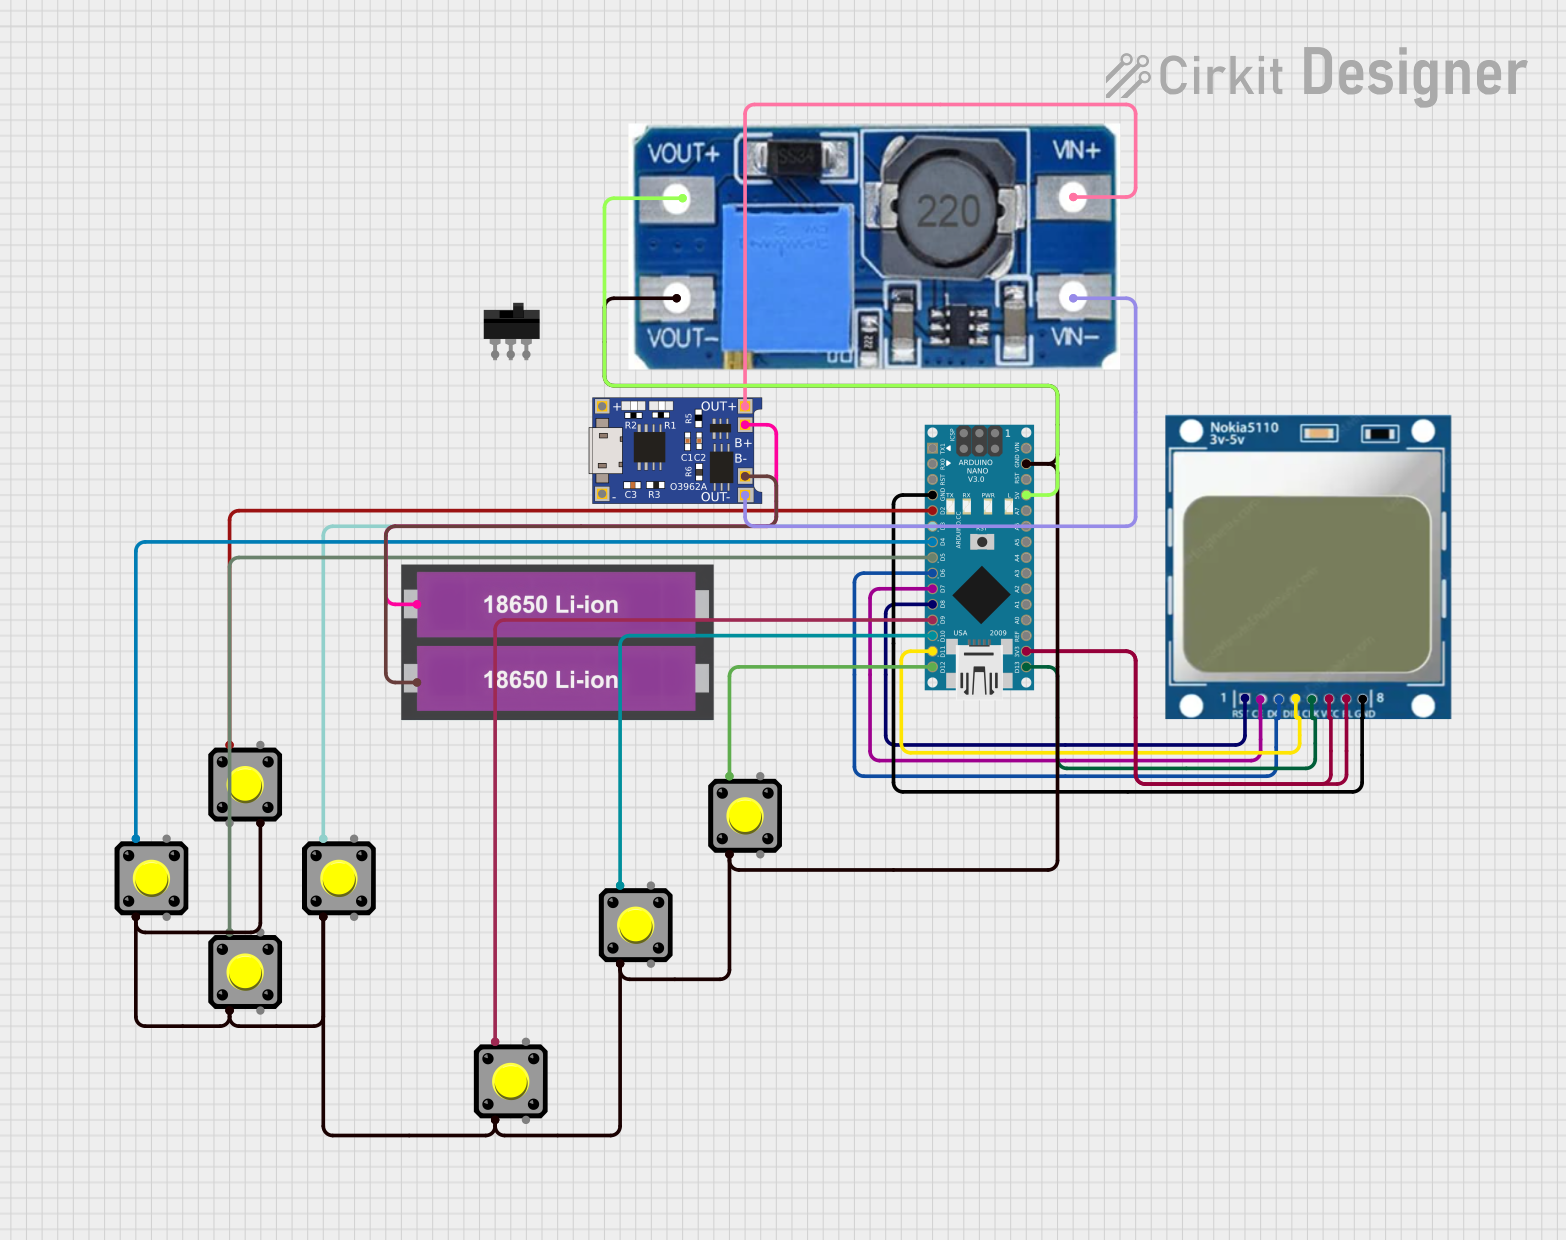
This circuit is a battery-powered system featuring an Arduino Nano that interfaces with a Nokia 5110 LCD and multiple pushbuttons. The TP4056 module charges the 18650 Li-ion batteries, which then power the Arduino through a step-up boost converter. The Arduino controls the LCD display and reads inputs from the pushbuttons for user interaction.
Arduino Nano-Based Dino Jump Game with Nokia 5110 LCD Display

This circuit is a simple game setup using an Arduino Nano, three pushbuttons, and a Nokia 5110 LCD. The Arduino Nano reads input from the pushbuttons to control a jumping character displayed on the LCD, with the game logic and display updates handled by the provided embedded code.
Arduino Nano Controlled Wireless Joystick Interface with LCD Feedback
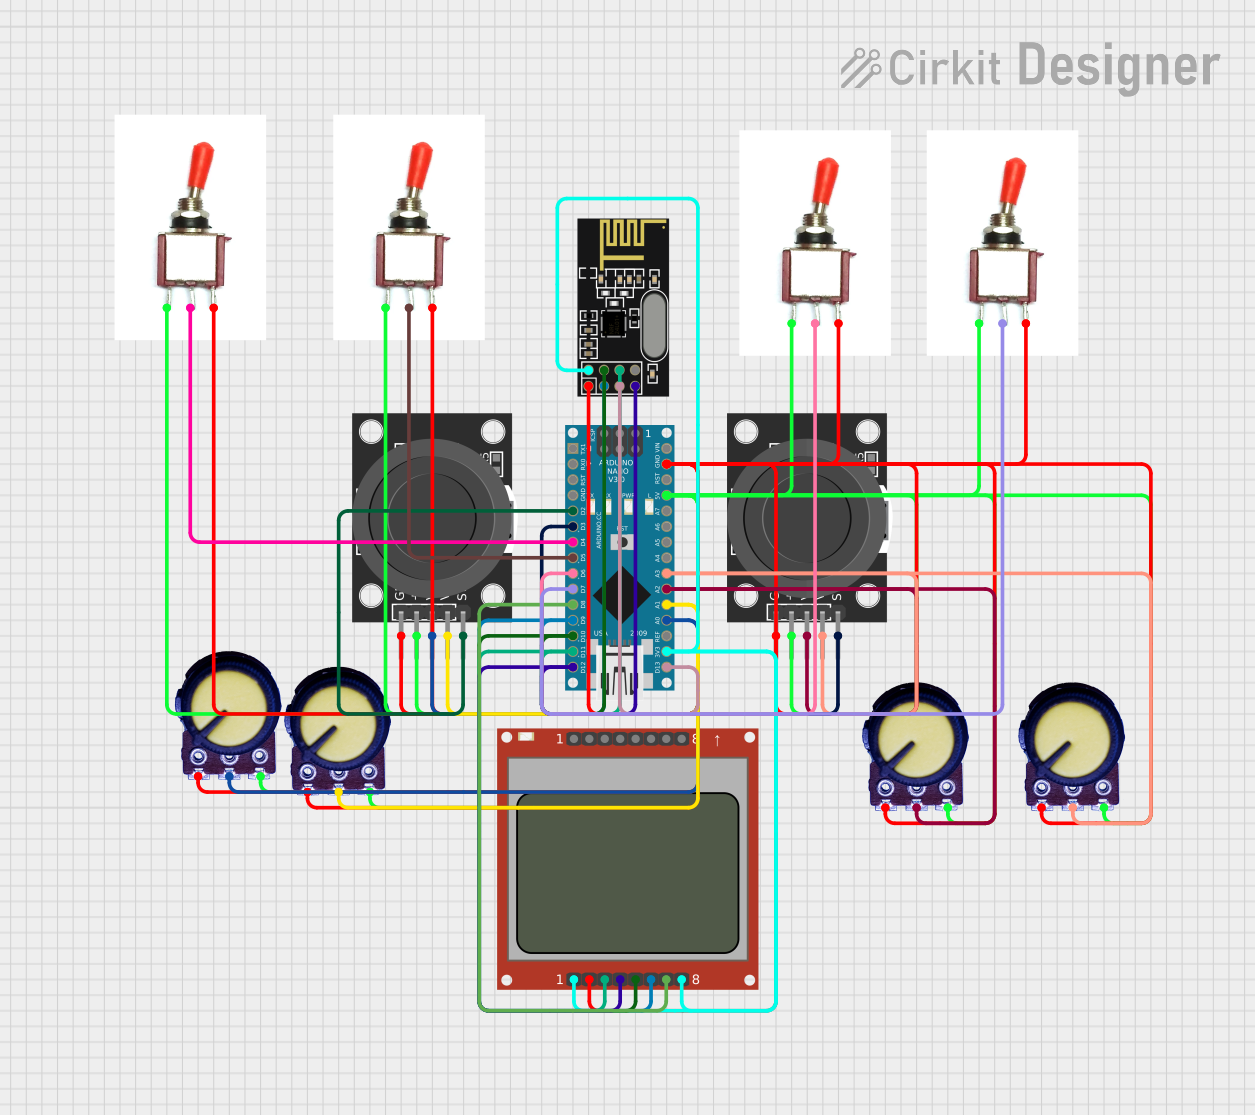
This circuit features an Arduino Nano interfaced with a Nokia 5110 LCD, two KY-023 Dual Axis Joystick Modules, an NRF24L01 wireless module, and multiple potentiometers and toggle switches. The joysticks, potentiometers, and switches are likely used for input control, with their signals read by the Arduino's analog and digital pins. The Arduino controls the LCD display and communicates wirelessly using the NRF24L01, possibly to transmit the input control data or receive commands.
Arduino Nano and I2C LCD Display Power Supply Project

This circuit features an Arduino Nano microcontroller interfaced with a 20x4 I2C LCD panel for display purposes. The LCD panel is powered by a 5V AC-DC power supply unit, and the Arduino Nano communicates with the LCD via I2C protocol using its A5 (SDA) and A1 (SCL) pins.
Explore Projects Built with nokia 5110 lcd
Battery-Powered Arduino Nano with Nokia 5110 LCD and Pushbutton Interface
This circuit is a battery-powered system featuring an Arduino Nano that interfaces with a Nokia 5110 LCD and multiple pushbuttons. The TP4056 module charges the 18650 Li-ion batteries, which then power the Arduino through a step-up boost converter. The Arduino controls the LCD display and reads inputs from the pushbuttons for user interaction.
Arduino Nano-Based Dino Jump Game with Nokia 5110 LCD Display
This circuit is a simple game setup using an Arduino Nano, three pushbuttons, and a Nokia 5110 LCD. The Arduino Nano reads input from the pushbuttons to control a jumping character displayed on the LCD, with the game logic and display updates handled by the provided embedded code.
Arduino Nano Controlled Wireless Joystick Interface with LCD Feedback
This circuit features an Arduino Nano interfaced with a Nokia 5110 LCD, two KY-023 Dual Axis Joystick Modules, an NRF24L01 wireless module, and multiple potentiometers and toggle switches. The joysticks, potentiometers, and switches are likely used for input control, with their signals read by the Arduino's analog and digital pins. The Arduino controls the LCD display and communicates wirelessly using the NRF24L01, possibly to transmit the input control data or receive commands.
Arduino Nano and I2C LCD Display Power Supply Project
This circuit features an Arduino Nano microcontroller interfaced with a 20x4 I2C LCD panel for display purposes. The LCD panel is powered by a 5V AC-DC power supply unit, and the Arduino Nano communicates with the LCD via I2C protocol using its A5 (SDA) and A1 (SCL) pins.
Common Applications and Use Cases
- Embedded Systems: Ideal for displaying simple graphics and text in embedded applications.
- DIY Electronics Projects: Popular among hobbyists for creating custom displays in various projects.
- Prototyping: Useful for rapid prototyping of user interfaces in small devices.
- Educational Projects: Great for learning about SPI communication and display technologies.
Technical Specifications
Key Technical Details
| Parameter | Value |
|---|---|
| Resolution | 84x48 pixels |
| Interface | SPI |
| Operating Voltage | 2.7V to 3.3V |
| Current Consumption | 6-7 mA (typical) |
| Backlight | LED (optional) |
| Dimensions | 43.6mm x 43.1mm x 2.7mm |
Pin Configuration and Descriptions
| Pin | Name | Description |
|---|---|---|
| 1 | RST | Reset pin. Resets the display. |
| 2 | CE | Chip Enable. Active low to enable communication. |
| 3 | DC | Data/Command. Selects data or command mode. |
| 4 | DIN | Data Input. Serial data input. |
| 5 | CLK | Clock. Serial clock input. |
| 6 | VCC | Power Supply. Connect to 3.3V. |
| 7 | BL | Backlight. Connect to ground to enable backlight. |
| 8 | GND | Ground. Connect to ground. |
Usage Instructions
How to Use the Component in a Circuit
- Power Supply: Connect the VCC pin to a 3.3V power supply and the GND pin to ground.
- SPI Communication: Connect the DIN, CLK, and CE pins to the corresponding SPI pins on your microcontroller.
- Control Pins: Connect the RST and DC pins to digital I/O pins on your microcontroller.
- Backlight (Optional): Connect the BL pin to ground to enable the backlight.
Example Circuit Connection with Arduino UNO
| Nokia 5110 Pin | Arduino UNO Pin |
|---|---|
| RST | 8 |
| CE | 7 |
| DC | 6 |
| DIN | 11 (MOSI) |
| CLK | 13 (SCK) |
| VCC | 3.3V |
| BL | GND |
| GND | GND |
Important Considerations and Best Practices
- Voltage Levels: Ensure that the VCC pin is connected to a 3.3V power supply. Using 5V can damage the display.
- Current Limiting: If using the backlight, consider adding a current-limiting resistor to prevent excessive current draw.
- Initialization: Properly initialize the display in your code to ensure correct operation.
Example Code for Arduino UNO
#include <Adafruit_GFX.h>
#include <Adafruit_PCD8544.h>

// Pin configuration
#define RST_PIN 8
#define CE_PIN 7
#define DC_PIN 6
#define DIN_PIN 11
#define CLK_PIN 13

// Create display object
Adafruit_PCD8544 display = Adafruit_PCD8544(CE_PIN, DC_PIN, DIN_PIN, CLK_PIN, RST_PIN);

void setup() {
  // Initialize the display
  display.begin();
  display.setContrast(50); // Set contrast level
  display.clearDisplay();  // Clear the display buffer
  display.display();       // Update the display
}

void loop() {
  // Display text
  display.setTextSize(1);
  display.setTextColor(BLACK);
  display.setCursor(0, 0);
  display.print("Hello, World!");
  display.display(); // Update the display

  delay(2000); // Wait for 2 seconds

  // Clear the display
  display.clearDisplay();
  display.display();
}
Troubleshooting and FAQs
Common Issues Users Might Face
No Display Output:
- Solution: Check all connections, ensure the VCC pin is connected to 3.3V, and verify the initialization code.
Flickering Display:
- Solution: Ensure stable power supply and proper grounding. Check for loose connections.
Backlight Not Working:
- Solution: Verify the BL pin is connected to ground. Check for any current-limiting resistors.
Incorrect Display:
- Solution: Ensure correct pin configuration in the code and proper initialization of the display.
Solutions and Tips for Troubleshooting
- Double-Check Connections: Ensure all connections are secure and correctly mapped.
- Verify Code: Ensure the initialization and pin configuration in the code match your circuit.
- Use a Multimeter: Check voltage levels and continuity of connections.
- Consult Datasheet: Refer to the Nokia 5110 LCD datasheet for detailed technical information.
By following this documentation, users can effectively integrate and utilize the Nokia 5110 LCD display in their projects, ensuring reliable performance and successful outcomes.