How to Use THERMOSTAT: Examples, Pinouts, and Specs
Introduction
A thermostat is a device designed to regulate temperature by controlling heating and cooling systems. It maintains a desired temperature setpoint, ensuring comfort or energy efficiency in residential, commercial, and industrial environments. Thermostats are commonly used in HVAC (Heating, Ventilation, and Air Conditioning) systems, refrigerators, ovens, and other temperature-sensitive applications. Modern thermostats may include programmable features, Wi-Fi connectivity, and smart home integration.
Explore Projects Built with THERMOSTAT


Explore Projects Built with THERMOSTAT
Technical Specifications
Below are the general technical specifications for a typical thermostat. Note that specific models may vary in their ratings and features.
Key Technical Details
- Operating Voltage: 24V AC (common for HVAC systems) or 3V DC (battery-powered models)
- Temperature Range: 0°C to 50°C (32°F to 122°F) for indoor models
- Accuracy: ±0.5°C (±1°F)
- Control Output: Relay or solid-state switch
- Power Source: Battery-powered (e.g., 2x AA batteries) or hardwired
- Connectivity: Optional Wi-Fi or Zigbee for smart thermostats
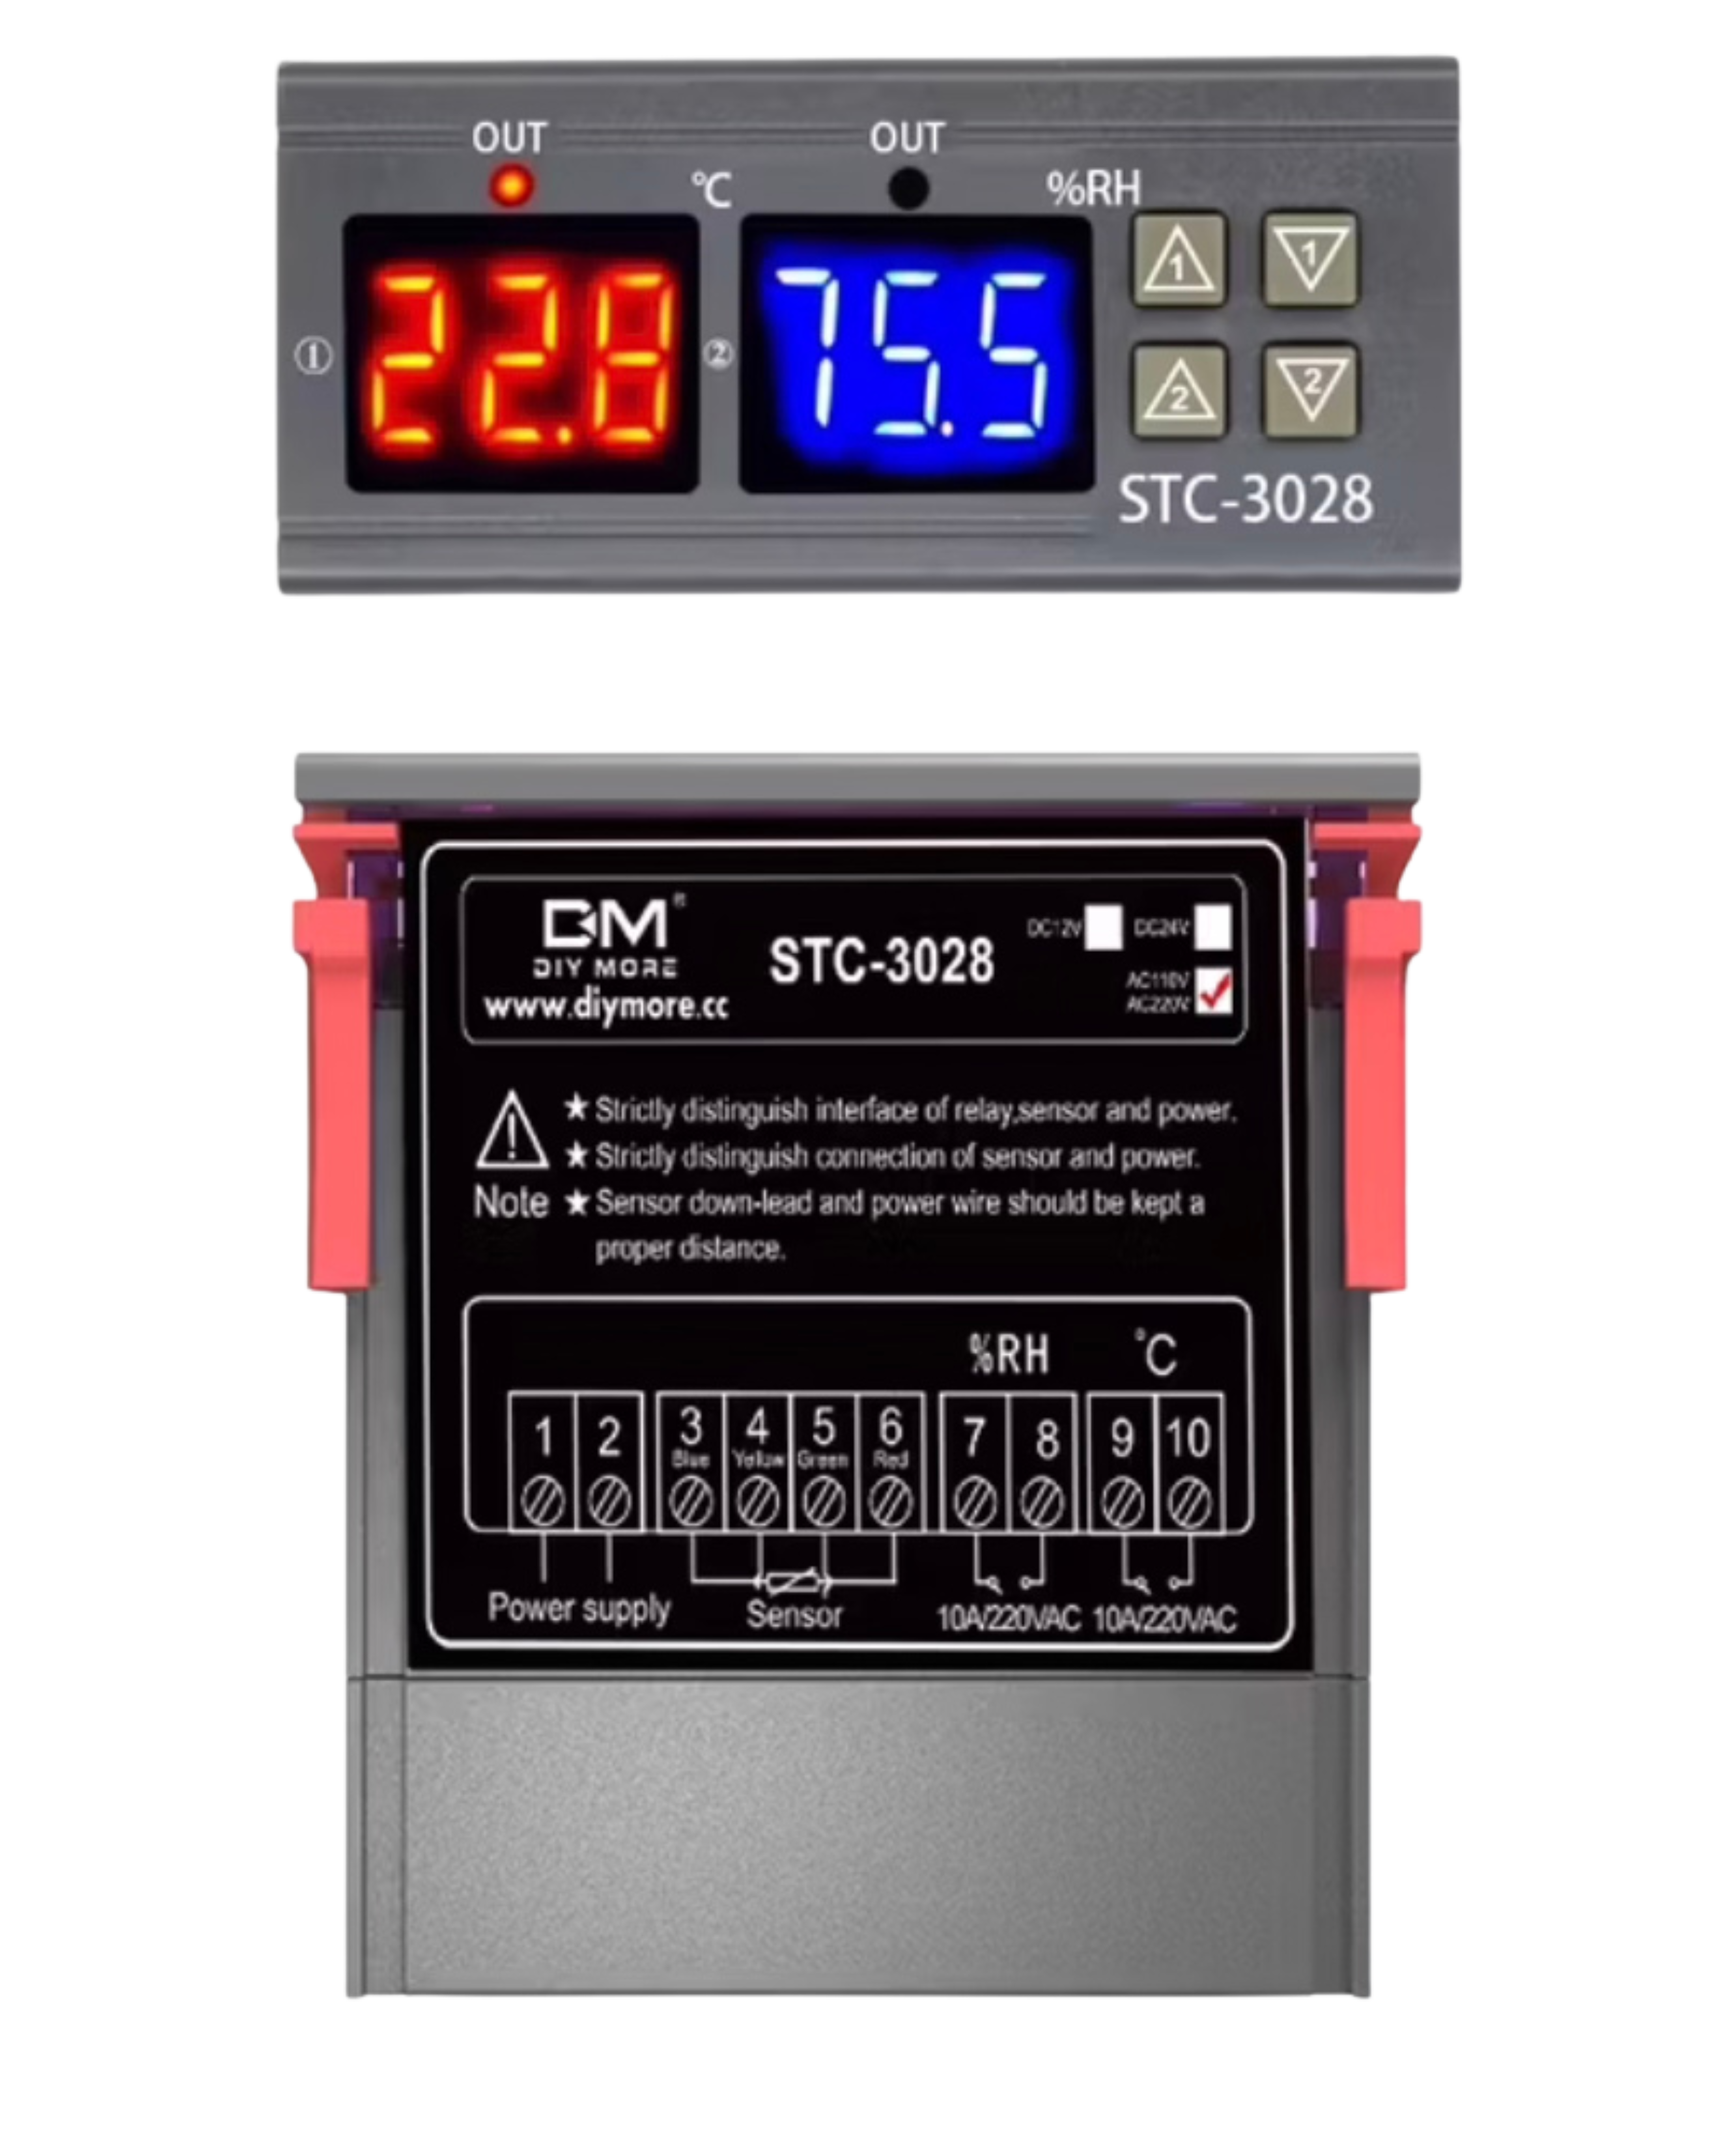
- Display: LCD or LED (for user interface)
Pin Configuration and Descriptions
For a basic thermostat with relay control, the pin configuration is as follows:
| Pin Name | Description |
|---|---|
| R | Power input (24V AC from the transformer) |
| C | Common wire (provides a return path for 24V AC power, used in hardwired models) |
| W | Heating control (connects to the heating system) |
| Y | Cooling control (connects to the air conditioning system) |
| G | Fan control (connects to the fan relay in the HVAC system) |
| O/B | Reversing valve control for heat pump systems (O for cooling, B for heating) |
For smart thermostats, additional pins may include terminals for external sensors or communication modules.
Usage Instructions
How to Use the Thermostat in a Circuit
- Power Connection:
- For hardwired models, connect the
RandCterminals to the 24V AC transformer. - For battery-powered models, insert the required batteries (e.g., AA or AAA) into the battery compartment.
- For hardwired models, connect the
- System Connections:
- Connect the
Wterminal to the heating system. - Connect the
Yterminal to the cooling system. - Connect the
Gterminal to the fan relay. - If using a heat pump, connect the
O/Bterminal to the reversing valve.
- Connect the
- Mounting:
- Mount the thermostat on the wall in a location away from direct sunlight, drafts, or heat sources.
- Ensure the thermostat is level for accurate temperature readings.
- Programming:
- For programmable models, set the desired temperature schedule using the interface.
- For smart models, configure Wi-Fi settings and integrate with a smart home system if applicable.
Important Considerations and Best Practices
- Ensure the thermostat is compatible with your HVAC system (e.g., single-stage, multi-stage, or heat pump).
- Use the common wire (
C) for power if available, as it ensures consistent operation for smart thermostats. - Avoid placing the thermostat near heat sources, windows, or vents to prevent inaccurate temperature readings.
- For smart thermostats, update the firmware regularly to ensure optimal performance and security.
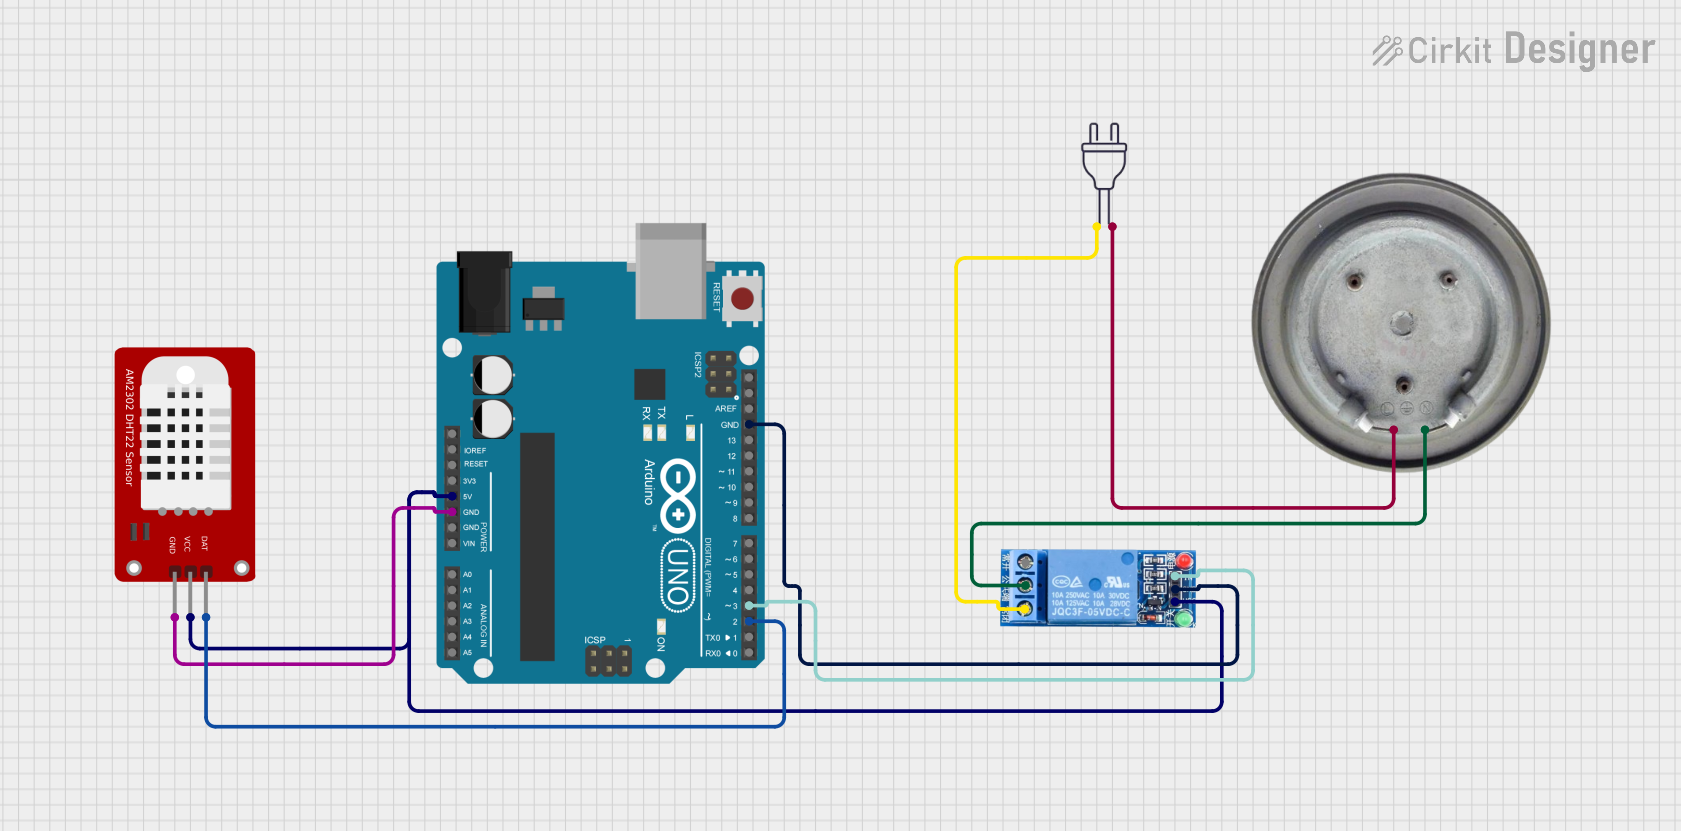
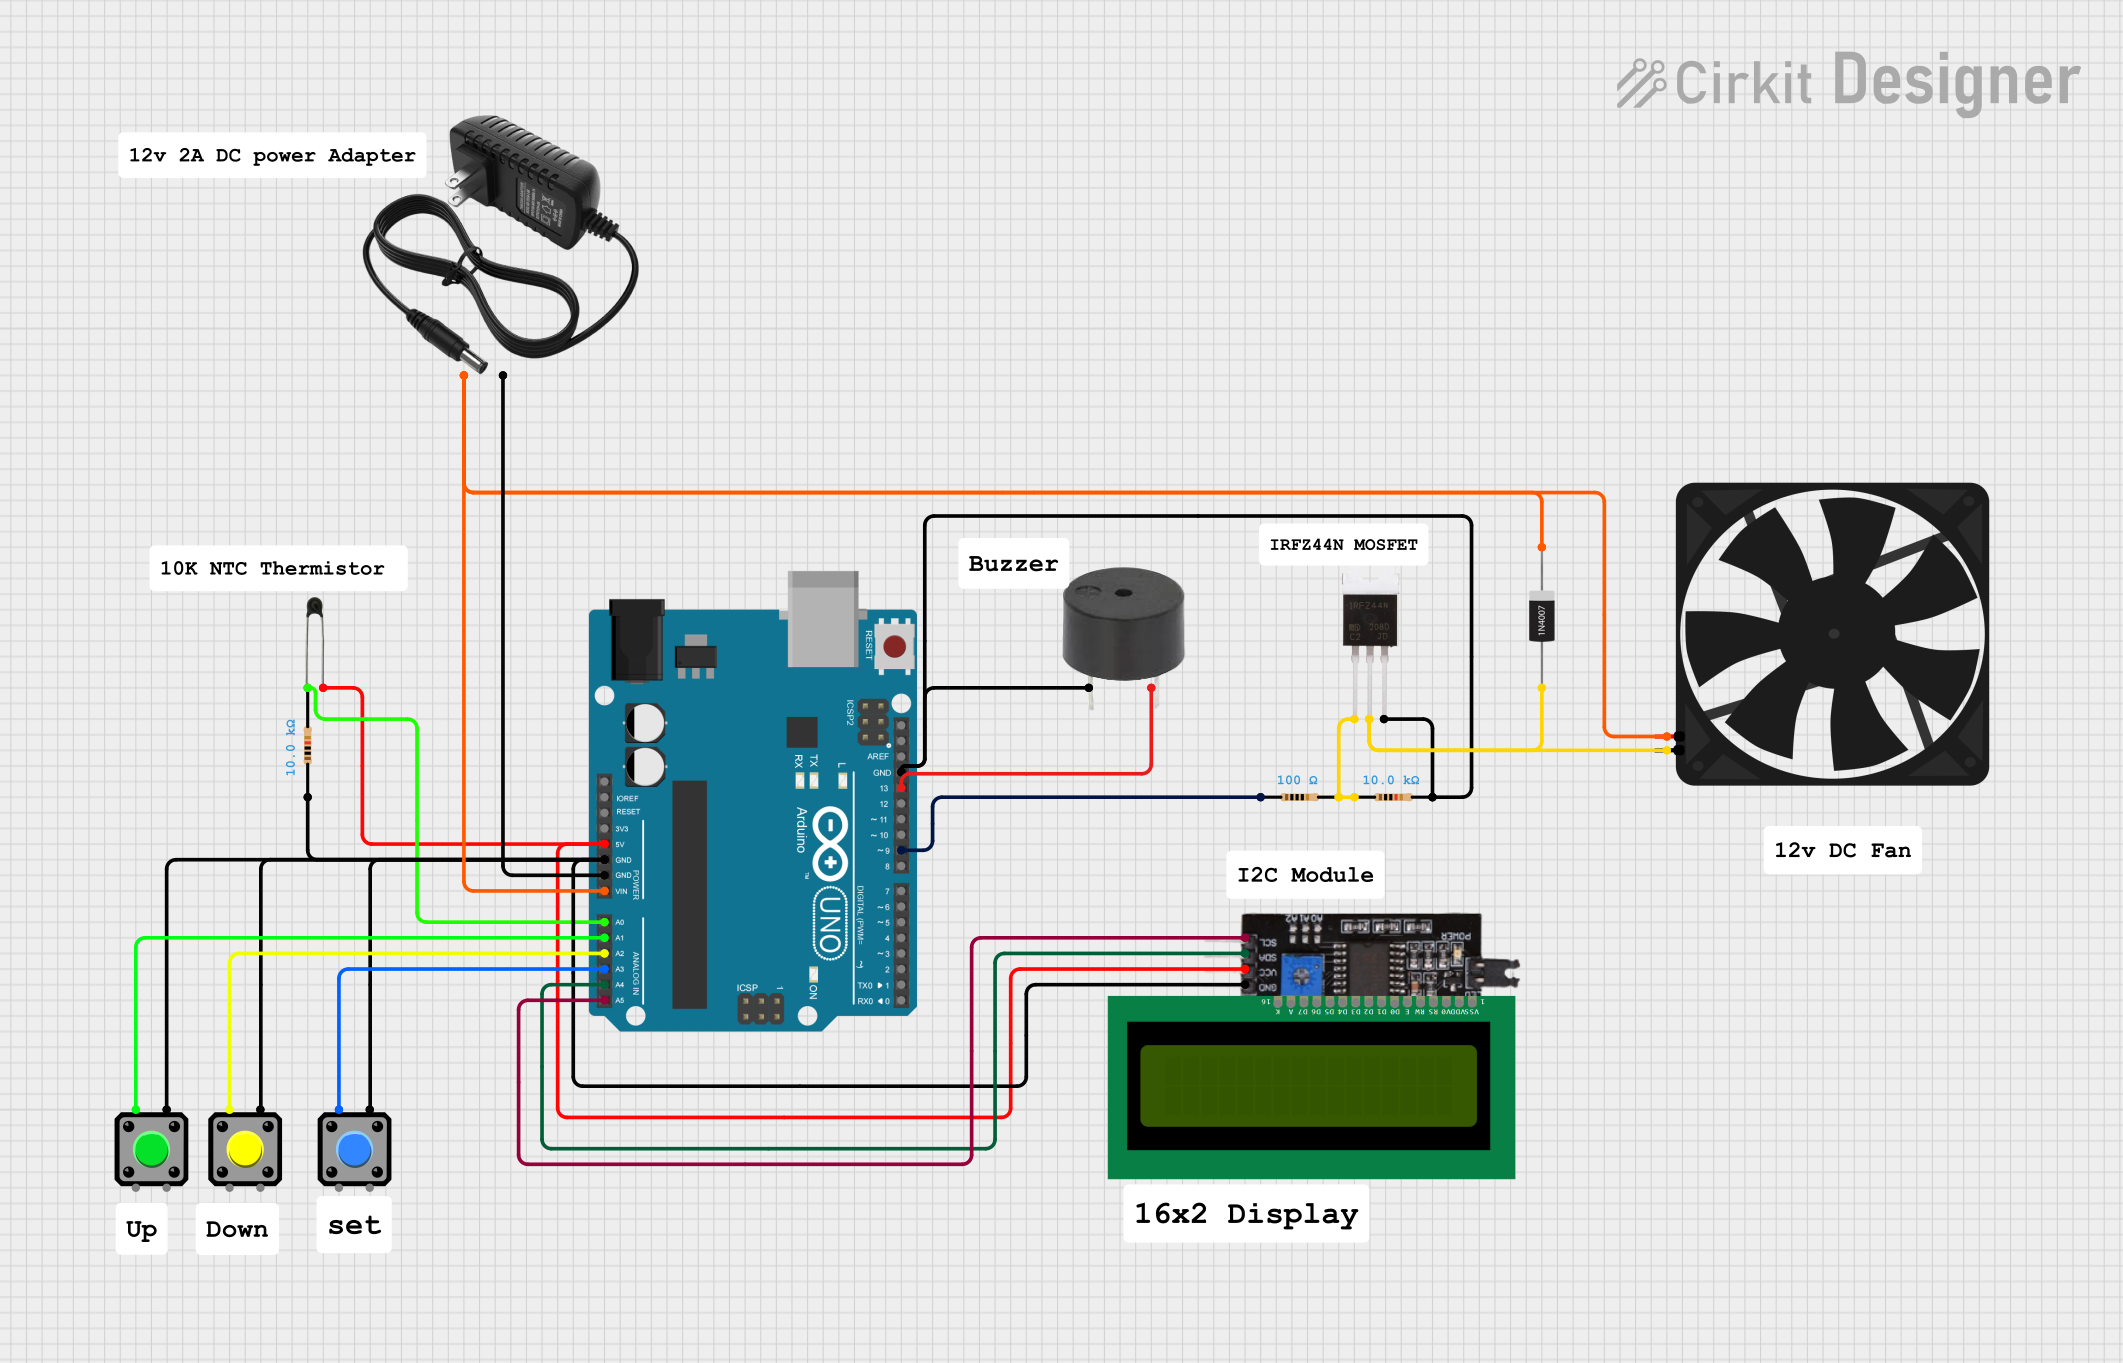
Example: Connecting a Thermostat to an Arduino UNO
A thermostat can be used with an Arduino UNO to monitor and control temperature. Below is an example of reading a thermostat's state using a digital input pin.
// Example: Reading thermostat state with Arduino UNO
// Connect the thermostat's W terminal to Arduino pin 2
// Use a pull-down resistor to ensure stable readings

const int thermostatPin = 2; // Pin connected to the thermostat's W terminal
int thermostatState = 0;     // Variable to store the thermostat state

void setup() {
  pinMode(thermostatPin, INPUT); // Set the thermostat pin as input
  Serial.begin(9600);           // Initialize serial communication
}

void loop() {
  thermostatState = digitalRead(thermostatPin); // Read the thermostat state

  if (thermostatState == HIGH) {
    Serial.println("Heating system is ON"); // Print if heating is active
  } else {
    Serial.println("Heating system is OFF"); // Print if heating is inactive
  }

  delay(1000); // Wait for 1 second before reading again
}
Troubleshooting and FAQs
Common Issues and Solutions
Thermostat Not Powering On:
- Check the power source (batteries or 24V AC connection).
- Ensure the
RandCwires are properly connected for hardwired models. - Replace the batteries if they are depleted.
Inaccurate Temperature Readings:
- Ensure the thermostat is installed in an appropriate location, away from heat sources or drafts.
- Clean the thermostat to remove dust or debris that may affect the sensor.
HVAC System Not Responding:
- Verify the wiring connections to the
W,Y, andGterminals. - Check the HVAC system for faults or tripped breakers.
- Ensure the thermostat is set to the correct mode (heating or cooling).
- Verify the wiring connections to the
Wi-Fi Connection Issues (Smart Thermostats):
- Ensure the thermostat is within range of the Wi-Fi router.
- Restart the thermostat and router to resolve connectivity issues.
- Verify the Wi-Fi credentials and reconfigure if necessary.
FAQs
Can I use a thermostat without a common wire?
- Yes, but only for battery-powered models or with a power extender kit for smart thermostats.
What is the difference between programmable and non-programmable thermostats?
- Programmable thermostats allow users to set temperature schedules, while non-programmable models maintain a fixed setpoint.
Can I install a thermostat myself?
- Yes, if you are comfortable working with electrical wiring. Otherwise, consult a professional HVAC technician.
How do I reset my thermostat?
- Refer to the user manual for specific reset instructions, which may involve removing batteries or pressing a reset button.
By following this documentation, users can effectively install, use, and troubleshoot a thermostat for various applications.