How to Use Power Supply 9V+Center: Examples, Pinouts, and Specs

Introduction
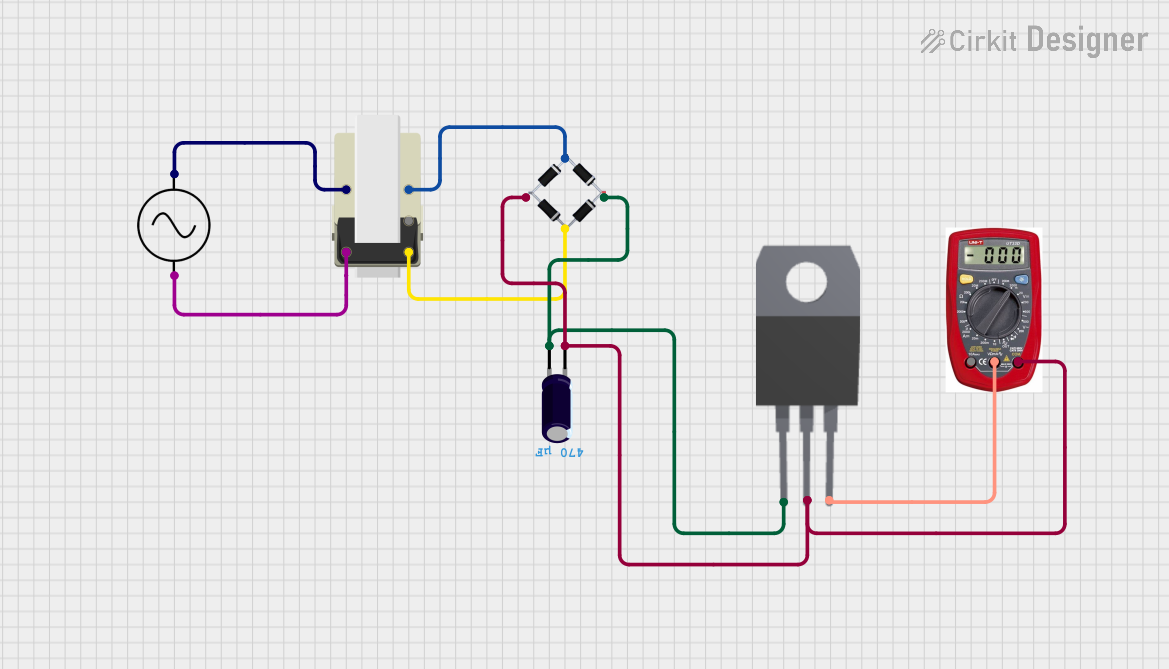
The Power Supply 9V+Center is a reliable and stable power source that delivers a 9V DC output with a center-tapped configuration. This component is widely used in powering electronic circuits, microcontrollers, audio equipment, and other devices requiring a steady 9V supply. Its center-tapped design makes it suitable for applications that need dual voltage rails or grounding flexibility.
Explore Projects Built with Power Supply 9V+Center


Explore Projects Built with Power Supply 9V+Center
Common Applications
- Powering microcontroller boards (e.g., Arduino, Raspberry Pi)
- Audio amplifiers and mixers
- Robotics and embedded systems
- Prototyping and testing electronic circuits
- Battery replacement for 9V-powered devices
Technical Specifications
The following table outlines the key technical details of the Power Supply 9V+Center:
| Parameter | Value |
|---|---|
| Output Voltage | 9V DC |
| Output Configuration | Center-tapped |
| Input Voltage Range | 100-240V AC (depending on model) |
| Maximum Output Current | 1A (varies by model) |
| Connector Type | Barrel jack (5.5mm outer, 2.1mm inner) |
| Polarity | Positive center, negative outer |
| Ripple and Noise | <50mV |
| Efficiency | >80% |
| Operating Temperature | 0°C to 50°C |
Pin Configuration
The Power Supply 9V+Center typically uses a barrel jack connector. Below is the pin configuration:
| Pin | Description |
|---|---|
| Center Pin | Positive terminal (+9V) |
| Outer Sleeve | Negative terminal (Ground, 0V) |
Usage Instructions
How to Use the Power Supply in a Circuit
- Verify Compatibility: Ensure the device or circuit you are powering is designed to operate at 9V DC and does not exceed the maximum current rating of the power supply.
- Connect the Barrel Jack: Insert the barrel jack into the corresponding power input socket of your device. Ensure the polarity matches (center positive).
- Power On: Plug the power supply into a wall outlet and switch it on (if applicable).
- Monitor Operation: Check that the device powers on and operates as expected. Use a multimeter to verify the voltage if needed.
Important Considerations
- Polarity Check: Always confirm the polarity of the power supply matches the device's requirements. Reversing polarity can damage sensitive components.
- Current Rating: Ensure the power supply can provide sufficient current for your device. Overloading the power supply may cause overheating or failure.
- Ventilation: Avoid using the power supply in enclosed or poorly ventilated spaces to prevent overheating.
- Short Circuit Protection: Some models include built-in protection. If not, ensure your circuit has adequate safeguards.
Example: Using with an Arduino UNO
The Power Supply 9V+Center can be used to power an Arduino UNO via its barrel jack input. Below is an example of how to connect and use it:
- Plug the barrel jack of the power supply into the Arduino UNO's power input.
- Ensure the power supply is set to 9V and has a center-positive configuration.
- Power on the supply, and the Arduino UNO will boot up.
Here is a simple Arduino sketch to test the setup:
// Blink an LED connected to pin 13 on the Arduino UNO
// Ensure the Arduino is powered by the 9V+Center power supply

void setup() {
  pinMode(13, OUTPUT); // Set pin 13 as an output
}

void loop() {
  digitalWrite(13, HIGH); // Turn the LED on
  delay(1000);            // Wait for 1 second
  digitalWrite(13, LOW);  // Turn the LED off
  delay(1000);            // Wait for 1 second
}
Troubleshooting and FAQs
Common Issues and Solutions
Device Does Not Power On
- Cause: Incorrect polarity or loose connection.
- Solution: Verify the polarity of the power supply and ensure the barrel jack is securely connected.
Overheating
- Cause: Excessive current draw or poor ventilation.
- Solution: Check the current requirements of your device and ensure the power supply is not overloaded. Improve ventilation around the power supply.
Voltage Drop
- Cause: Long or thin power cables.
- Solution: Use shorter or thicker cables to minimize resistance and voltage drop.
Noise in Circuit
- Cause: Ripple or noise from the power supply.
- Solution: Add a capacitor (e.g., 100µF) across the power input of your circuit to filter out noise.
FAQs
Q: Can I use this power supply with a device requiring less than 9V?
A: No, this power supply is designed to output a fixed 9V. Using it with a lower-voltage device may damage the device. Use a step-down regulator if needed.
Q: Is the power supply safe to use with sensitive electronics?
A: Yes, as long as the voltage and current ratings match your device's requirements. For added safety, check for built-in protections like overcurrent and short circuit protection.
Q: Can I use this power supply outdoors?
A: Most models are not weatherproof. Use indoors or in a protected environment unless specified as outdoor-rated.
Q: How do I test the output voltage?
A: Use a multimeter set to DC voltage mode. Place the positive probe on the center pin and the negative probe on the outer sleeve of the barrel jack.
By following these guidelines, you can safely and effectively use the Power Supply 9V+Center in your projects.