Cirkit Designer Logo
Cirkit Designer
Your all-in-one circuit design IDE
Home / 
Component Documentation

How to Use 3.5 inch TFT Display 320*480 pixels with Touchscreen - SPI - ILI9488 - 3.3V: Examples, Pinouts, and Specs

Image of 3.5 inch TFT Display 320*480 pixels with Touchscreen - SPI - ILI9488 - 3.3V
Cirkit Designer LogoDesign with 3.5 inch TFT Display 320*480 pixels with Touchscreen - SPI - ILI9488 - 3.3V in Cirkit Designer

Introduction

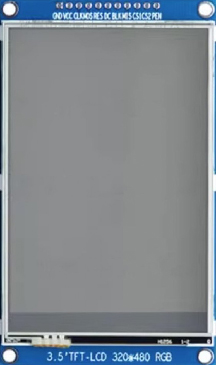
The 3.5-inch TFT Display with a resolution of 320x480 pixels is a versatile and vibrant display module featuring a touchscreen interface. It is powered by the ILI9488 driver IC and communicates via the SPI protocol, ensuring fast and efficient data transfer. Operating at 3.3V, this display is ideal for use with microcontrollers like Arduino, ESP32, and Raspberry Pi.

Explore Projects Built with 3.5 inch TFT Display 320*480 pixels with Touchscreen - SPI - ILI9488 - 3.3V

Use Cirkit Designer to design, explore, and prototype these projects online. Some projects support real-time simulation. Click "Open Project" to start designing instantly!
Arduino Mega 2560 Controlled TFT Touchscreen Interface
Image of Tablero Moto: A project utilizing 3.5 inch TFT Display 320*480 pixels with Touchscreen - SPI - ILI9488 - 3.3V in a practical application
This circuit connects an Arduino Mega 2560 microcontroller to a 3.5-inch 480x320 TFT LCD display. The Arduino provides power, ground, and digital signals to control the display, including data lines for pixel information and control lines for reset, write, and command/data selection. The embedded code initializes the display and configures the Arduino's pins for communication, likely to create a user interface or visual output for a project.
Cirkit Designer LogoOpen Project in Cirkit Designer
ESP32-S3 Controlled ILI9488 TFT LCD Display Interface
Image of IOT_V1: A project utilizing 3.5 inch TFT Display 320*480 pixels with Touchscreen - SPI - ILI9488 - 3.3V in a practical application
This circuit connects an ESP32-S3 microcontroller to an ILI9488 TFT LCD display for graphical output. The ESP32-S3 uses SPI communication to send data to the display, with additional GPIOs for control signals like reset, data/command selection, and touch panel control. The provided code initializes the display and demonstrates basic drawing functions such as text, lines, rectangles, and circles.
Cirkit Designer LogoOpen Project in Cirkit Designer
ESP32-C6 and ST7735S Display: Wi-Fi Controlled TFT Display Module
Image of ESP32-C6sm-ST7735: A project utilizing 3.5 inch TFT Display 320*480 pixels with Touchscreen - SPI - ILI9488 - 3.3V in a practical application
This circuit features an ESP32-C6 microcontroller interfaced with a China ST7735S 160x128 TFT display. The ESP32-C6 controls the display via SPI communication, providing power, ground, and control signals to render graphics and text on the screen.
Cirkit Designer LogoOpen Project in Cirkit Designer
ESP32-S3 and ILI9488 TFT LCD Display for Interactive Graphics
Image of IOT_V1: A project utilizing 3.5 inch TFT Display 320*480 pixels with Touchscreen - SPI - ILI9488 - 3.3V in a practical application
This circuit features an ESP32-S3 microcontroller connected to an ILI9488 TFT LCD display. The ESP32-S3 initializes and controls the display, demonstrating basic graphics and text rendering using the TFT_eSPI library.
Cirkit Designer LogoOpen Project in Cirkit Designer

Explore Projects Built with 3.5 inch TFT Display 320*480 pixels with Touchscreen - SPI - ILI9488 - 3.3V

Use Cirkit Designer to design, explore, and prototype these projects online. Some projects support real-time simulation. Click "Open Project" to start designing instantly!
Image of Tablero Moto: A project utilizing 3.5 inch TFT Display 320*480 pixels with Touchscreen - SPI - ILI9488 - 3.3V in a practical application
Arduino Mega 2560 Controlled TFT Touchscreen Interface
This circuit connects an Arduino Mega 2560 microcontroller to a 3.5-inch 480x320 TFT LCD display. The Arduino provides power, ground, and digital signals to control the display, including data lines for pixel information and control lines for reset, write, and command/data selection. The embedded code initializes the display and configures the Arduino's pins for communication, likely to create a user interface or visual output for a project.
Cirkit Designer LogoOpen Project in Cirkit Designer
Image of IOT_V1: A project utilizing 3.5 inch TFT Display 320*480 pixels with Touchscreen - SPI - ILI9488 - 3.3V in a practical application
ESP32-S3 Controlled ILI9488 TFT LCD Display Interface
This circuit connects an ESP32-S3 microcontroller to an ILI9488 TFT LCD display for graphical output. The ESP32-S3 uses SPI communication to send data to the display, with additional GPIOs for control signals like reset, data/command selection, and touch panel control. The provided code initializes the display and demonstrates basic drawing functions such as text, lines, rectangles, and circles.
Cirkit Designer LogoOpen Project in Cirkit Designer
Image of ESP32-C6sm-ST7735: A project utilizing 3.5 inch TFT Display 320*480 pixels with Touchscreen - SPI - ILI9488 - 3.3V in a practical application
ESP32-C6 and ST7735S Display: Wi-Fi Controlled TFT Display Module
This circuit features an ESP32-C6 microcontroller interfaced with a China ST7735S 160x128 TFT display. The ESP32-C6 controls the display via SPI communication, providing power, ground, and control signals to render graphics and text on the screen.
Cirkit Designer LogoOpen Project in Cirkit Designer
Image of IOT_V1: A project utilizing 3.5 inch TFT Display 320*480 pixels with Touchscreen - SPI - ILI9488 - 3.3V in a practical application
ESP32-S3 and ILI9488 TFT LCD Display for Interactive Graphics
This circuit features an ESP32-S3 microcontroller connected to an ILI9488 TFT LCD display. The ESP32-S3 initializes and controls the display, demonstrating basic graphics and text rendering using the TFT_eSPI library.
Cirkit Designer LogoOpen Project in Cirkit Designer

Common Applications

  • Graphical user interfaces (GUIs) for embedded systems
  • Portable devices and handheld instruments
  • Industrial control panels
  • DIY electronics projects
  • Educational and prototyping purposes

Technical Specifications

Below are the key technical details of the 3.5-inch TFT Display:

Parameter Value
Display Type TFT LCD
Resolution 320x480 pixels
Screen Size 3.5 inches
Driver IC ILI9488
Interface SPI (Serial Peripheral Interface)
Operating Voltage 3.3V
Backlight Voltage 3.3V
Touchscreen Type Resistive
Power Consumption ~50mA (typical)
Viewing Angle ~160°
Operating Temperature -20°C to 70°C

Pin Configuration

The display module typically has an 8-pin interface. Below is the pinout description:

Pin Name Description
1 VCC Power supply input (3.3V)
2 GND Ground
3 CS Chip Select (active low)
4 RESET Reset pin (active low)
5 DC/RS Data/Command control pin (High = Data, Low = Command)
6 SDI/MOSI Serial Data Input / Master Out Slave In (SPI data input)
7 SCK Serial Clock Input (SPI clock)
8 LED Backlight control (connect to 3.3V for constant backlight or PWM for dimming)

Usage Instructions

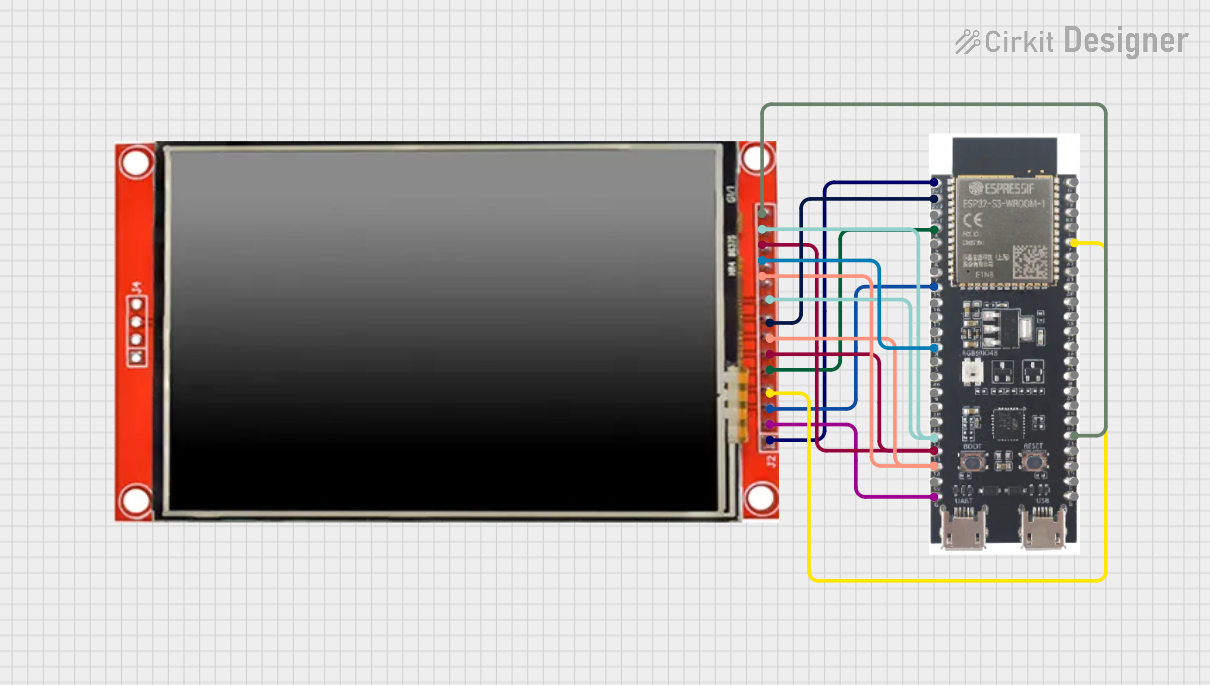
Connecting the Display to an Arduino UNO

To use the 3.5-inch TFT Display with an Arduino UNO, follow these steps:

  1. Wiring: Connect the display pins to the Arduino as shown below:

    Display Pin Arduino Pin
    VCC 3.3V
    GND GND
    CS D10
    RESET D9
    DC/RS D8
    SDI/MOSI D11
    SCK D13
    LED 3.3V
  2. Install Libraries: Download and install the following libraries in the Arduino IDE:

    • Adafruit_GFX (for graphics rendering)
    • Adafruit_ILI9488 (for ILI9488 driver support)
  3. Upload Example Code: Use the following example code to display a simple graphic:

#include <Adafruit_GFX.h>       // Core graphics library
#include <Adafruit_ILI9488.h>   // ILI9488 driver library
#include <SPI.h>                // SPI communication library

// Define pins for the display
#define TFT_CS   10  // Chip Select
#define TFT_RST  9   // Reset
#define TFT_DC   8   // Data/Command

// Create an instance of the display
Adafruit_ILI9488 tft = Adafruit_ILI9488(TFT_CS, TFT_DC, TFT_RST);

void setup() {
  tft.begin();                  // Initialize the display
  tft.fillScreen(ILI9488_BLACK); // Clear the screen with black color

  // Draw a red rectangle
  tft.fillRect(50, 50, 100, 150, ILI9488_RED);

  // Display text
  tft.setCursor(10, 10);
  tft.setTextColor(ILI9488_WHITE);
  tft.setTextSize(2);
  tft.println("Hello, TFT!");
}

void loop() {
  // Nothing to do here
}

Important Considerations

  • Voltage Levels: Ensure the display operates at 3.3V. Using 5V logic levels without a level shifter may damage the module.
  • SPI Speed: Adjust the SPI clock speed if you encounter communication issues. A typical value is 4 MHz.
  • Backlight Control: For adjustable brightness, connect the LED pin to a PWM-capable pin on the microcontroller.

Troubleshooting and FAQs

Common Issues and Solutions

  1. Display Not Turning On:

    • Verify the power connections (VCC and GND).
    • Ensure the backlight (LED pin) is connected to 3.3V or a PWM signal.
  2. No Image or Incorrect Display:

    • Check the SPI connections (CS, RESET, DC, SDI/MOSI, SCK).
    • Ensure the correct pins are defined in the code.
    • Confirm that the Adafruit_ILI9488 library is installed and properly configured.
  3. Touchscreen Not Responding:

    • Ensure the touchscreen library (if required) is installed.
    • Verify the touchscreen pins (if separate) are correctly connected.
  4. Flickering or Artifacts:

    • Reduce the SPI clock speed in the code.
    • Check for loose or poor-quality connections.

FAQs

Q: Can I use this display with a 5V microcontroller?
A: Yes, but you must use level shifters to convert 5V logic to 3.3V to avoid damaging the display.

Q: Does the display support parallel communication?
A: No, this module uses SPI communication only.

Q: Can I control the backlight brightness?
A: Yes, connect the LED pin to a PWM-capable pin on your microcontroller to adjust brightness.

Q: Is the touchscreen resistive or capacitive?
A: The touchscreen is resistive, requiring a slight pressure to register input.

By following this documentation, you can successfully integrate and use the 3.5-inch TFT Display in your projects!