Cirkit Designer Logo
Cirkit Designer
Your all-in-one circuit design IDE
Home / 
Component Documentation

How to Use 3xAAA Battery with Switch (bare wire): Examples, Pinouts, and Specs

Image of 3xAAA Battery with Switch (bare wire)
Cirkit Designer LogoDesign with 3xAAA Battery with Switch (bare wire) in Cirkit Designer

Introduction

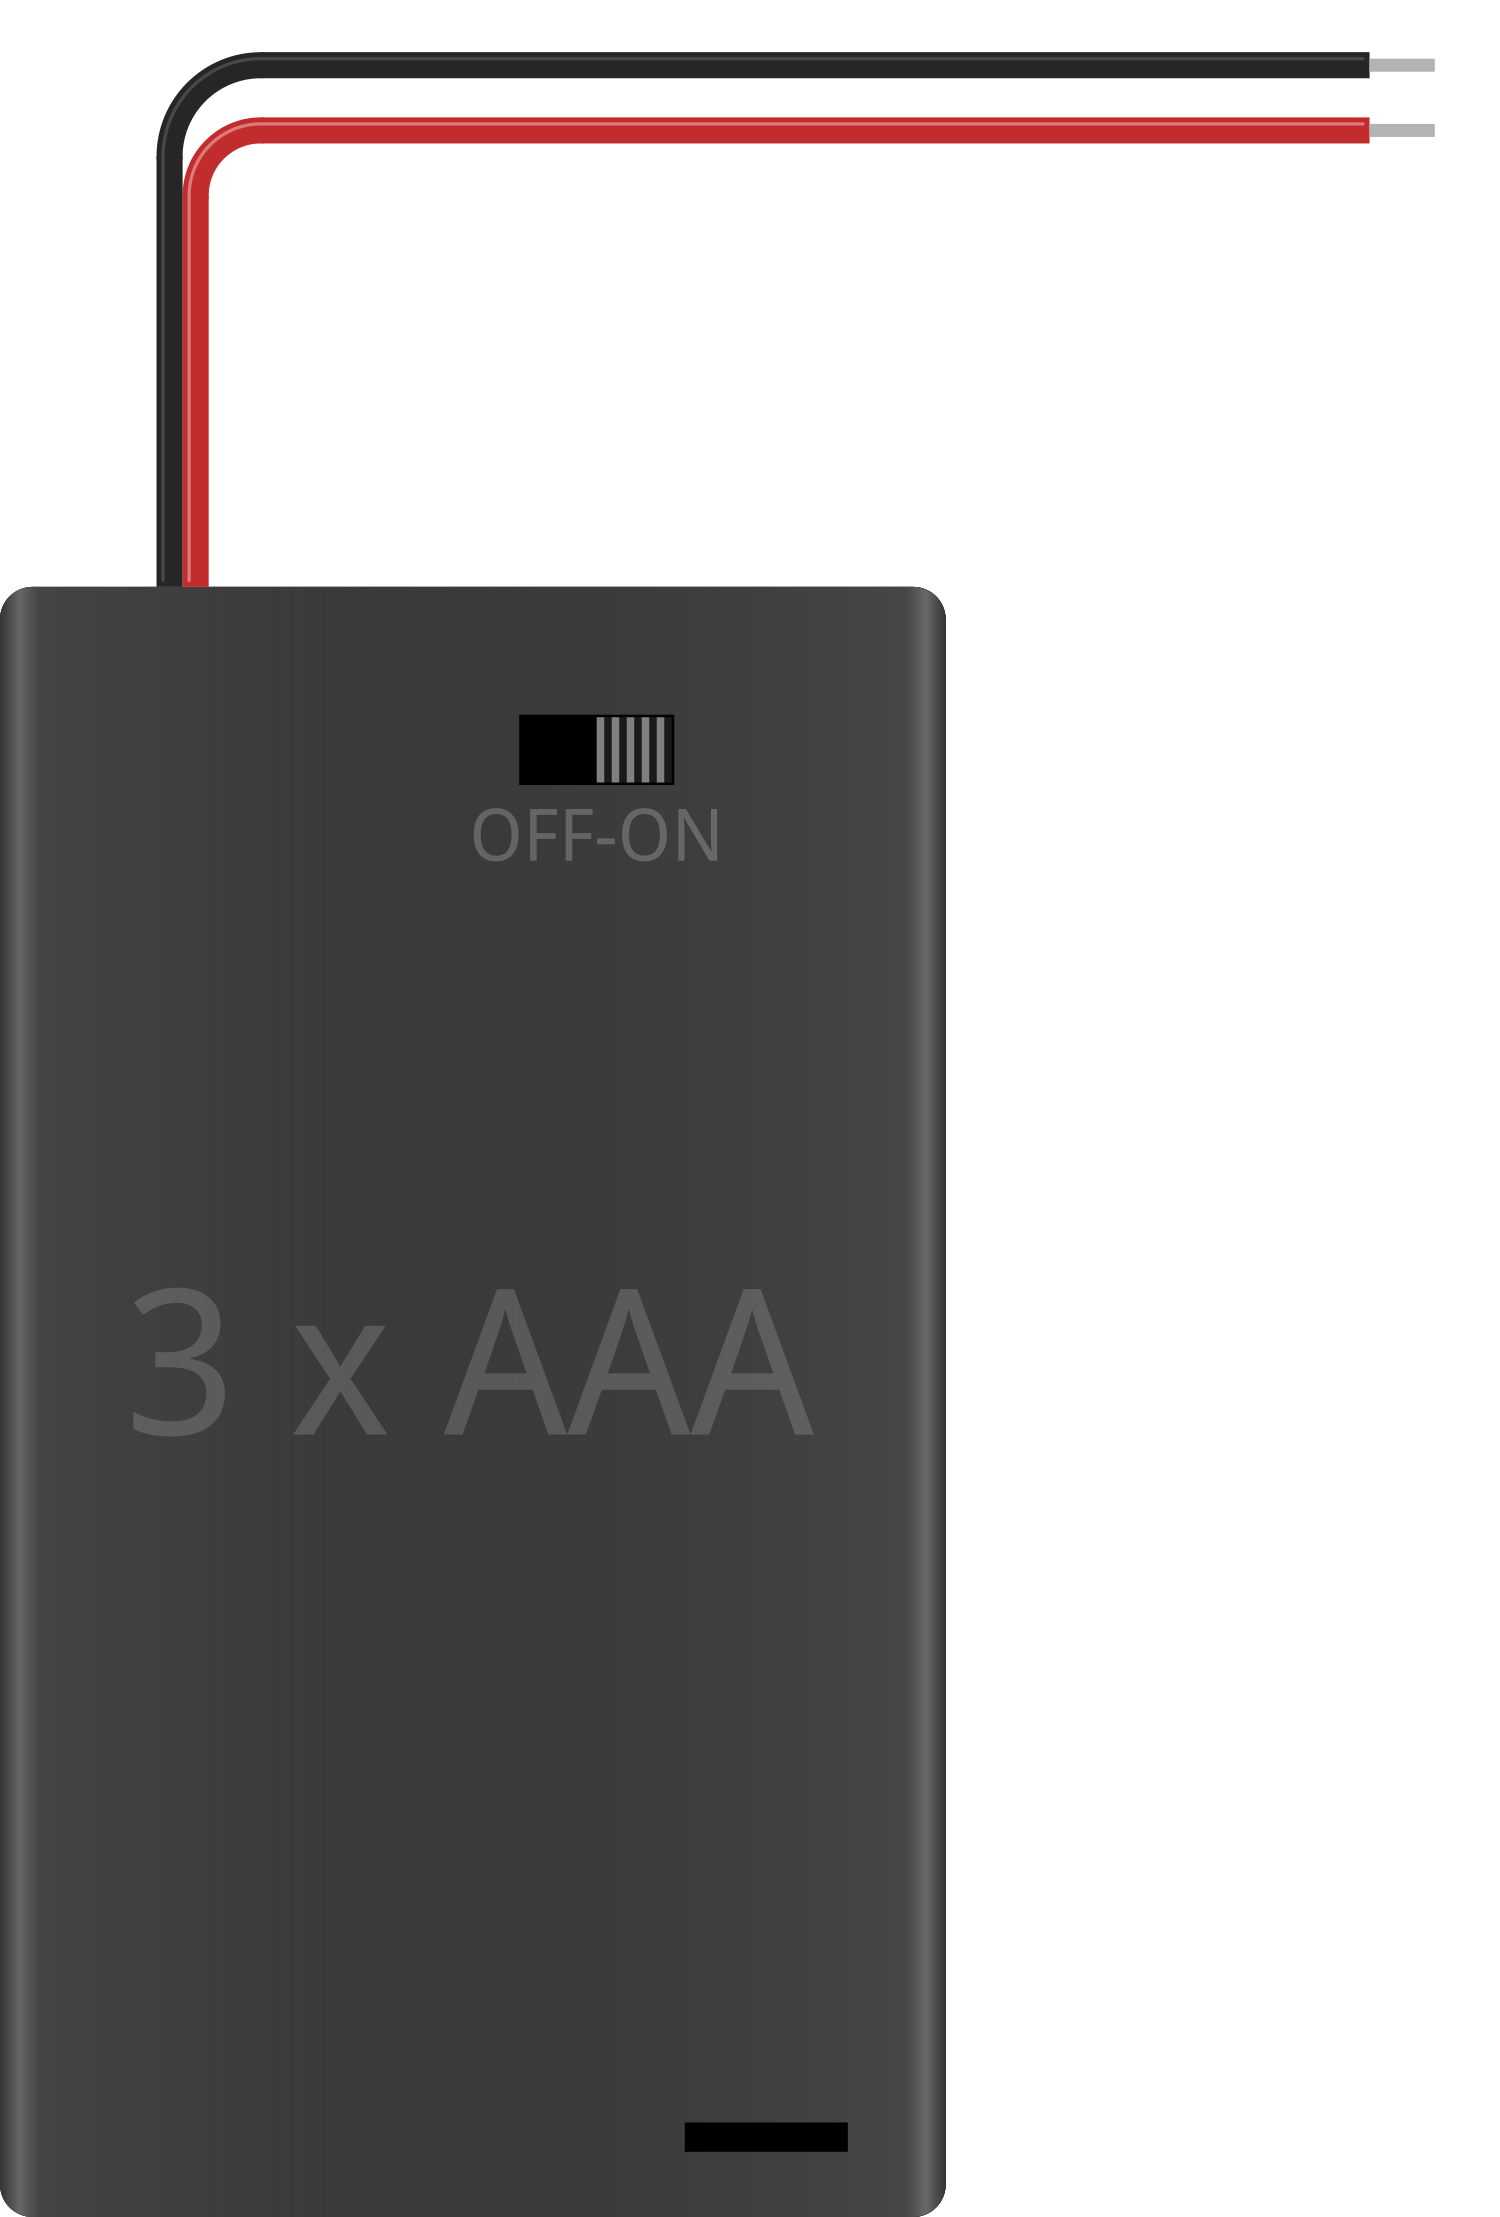
The 3xAAA Battery Holder with Switch is a convenient power solution for portable electronics. It holds three AAA batteries in series, providing a nominal voltage output of 4.5V when using standard alkaline batteries. The built-in switch allows for easy power control without the need to disconnect the battery pack from the circuit. This component is commonly used in DIY projects, educational electronics, and small electronic devices that require a compact and portable power source.

Explore Projects Built with 3xAAA Battery with Switch (bare wire)

Use Cirkit Designer to design, explore, and prototype these projects online. Some projects support real-time simulation. Click "Open Project" to start designing instantly!
Battery-Powered Pushbutton Controlled DC Motor
Image of MOTOR PROJECT: A project utilizing 3xAAA Battery with Switch (bare wire) in a practical application
This circuit uses a 4 x AAA battery pack to power a DC motor, with a pushbutton acting as a switch to control the motor. When the pushbutton is pressed, it completes the circuit, allowing current to flow from the battery pack to the motor, thereby activating it.
Cirkit Designer LogoOpen Project in Cirkit Designer
Battery-Powered Motor Control with Rocker Switch
Image of LED: A project utilizing 3xAAA Battery with Switch (bare wire) in a practical application
This circuit consists of a 3.7V battery, a rocker switch, and a hobby motor. The rocker switch controls the power supply from the battery to the motor, allowing the user to turn the motor on and off.
Cirkit Designer LogoOpen Project in Cirkit Designer
Battery-Powered LED Circuit with Pushbutton Control and Capacitance Smoothing
Image of Coding and Robotics activity 3: A project utilizing 3xAAA Battery with Switch (bare wire) in a practical application
This circuit consists of a 4 x AAA battery mount providing power, two pushbuttons acting as switches, an electrolytic capacitor for smoothing voltage fluctuations, and a red LED as an indicator. The LED lights up when either pushbutton is pressed, with the capacitor likely serving to debounce the pushbutton signal or provide a more stable LED operation. There is no microcontroller in this circuit, indicating a simple, direct-control user interface.
Cirkit Designer LogoOpen Project in Cirkit Designer
Battery-Powered LED Array with Rocker Switch Control
Image of Natt. fr. verkefni: A project utilizing 3xAAA Battery with Switch (bare wire) in a practical application
This circuit consists of a 3.3V battery powering four red LEDs connected in parallel, with a rocker switch controlling the connection to ground. When the switch is closed, all LEDs will light up simultaneously.
Cirkit Designer LogoOpen Project in Cirkit Designer

Explore Projects Built with 3xAAA Battery with Switch (bare wire)

Use Cirkit Designer to design, explore, and prototype these projects online. Some projects support real-time simulation. Click "Open Project" to start designing instantly!
Image of MOTOR PROJECT: A project utilizing 3xAAA Battery with Switch (bare wire) in a practical application
Battery-Powered Pushbutton Controlled DC Motor
This circuit uses a 4 x AAA battery pack to power a DC motor, with a pushbutton acting as a switch to control the motor. When the pushbutton is pressed, it completes the circuit, allowing current to flow from the battery pack to the motor, thereby activating it.
Cirkit Designer LogoOpen Project in Cirkit Designer
Image of LED: A project utilizing 3xAAA Battery with Switch (bare wire) in a practical application
Battery-Powered Motor Control with Rocker Switch
This circuit consists of a 3.7V battery, a rocker switch, and a hobby motor. The rocker switch controls the power supply from the battery to the motor, allowing the user to turn the motor on and off.
Cirkit Designer LogoOpen Project in Cirkit Designer
Image of Coding and Robotics activity 3: A project utilizing 3xAAA Battery with Switch (bare wire) in a practical application
Battery-Powered LED Circuit with Pushbutton Control and Capacitance Smoothing
This circuit consists of a 4 x AAA battery mount providing power, two pushbuttons acting as switches, an electrolytic capacitor for smoothing voltage fluctuations, and a red LED as an indicator. The LED lights up when either pushbutton is pressed, with the capacitor likely serving to debounce the pushbutton signal or provide a more stable LED operation. There is no microcontroller in this circuit, indicating a simple, direct-control user interface.
Cirkit Designer LogoOpen Project in Cirkit Designer
Image of Natt. fr. verkefni: A project utilizing 3xAAA Battery with Switch (bare wire) in a practical application
Battery-Powered LED Array with Rocker Switch Control
This circuit consists of a 3.3V battery powering four red LEDs connected in parallel, with a rocker switch controlling the connection to ground. When the switch is closed, all LEDs will light up simultaneously.
Cirkit Designer LogoOpen Project in Cirkit Designer

Common Applications and Use Cases

  • Portable electronic devices
  • DIY electronics projects
  • Educational kits and robotics
  • Small LED lighting systems
  • Handheld games and toys

Technical Specifications

Key Technical Details

  • Nominal Voltage Output: 4.5V (with alkaline batteries)
  • Battery Type: AAA
  • Number of Batteries: 3
  • Connection Type: Bare wire leads
  • Switch: Built-in, slide type

Pin Configuration and Descriptions

Pin Description
+ Positive lead (red wire)
- Negative lead (black wire)

Usage Instructions

How to Use the Component in a Circuit

  1. Insert three AAA batteries into the holder, ensuring the correct orientation as indicated by the '+' and '-' signs inside the holder.
  2. Connect the red wire (positive lead) to the positive terminal of your circuit.
  3. Connect the black wire (negative lead) to the negative terminal of your circuit.
  4. Use the built-in switch to turn the power supply on or off as needed.

Important Considerations and Best Practices

  • Always check the polarity of the battery holder leads before connecting to your circuit to prevent damage.
  • Do not mix old and new batteries or different types of batteries (alkaline, rechargeable, etc.) in the holder.
  • Remove batteries from the holder when not in use for extended periods to prevent battery leakage and damage.
  • Ensure that the total current draw of your circuit does not exceed the current rating of the AAA batteries used.

Troubleshooting and FAQs

Common Issues Users Might Face

  • Power does not reach the circuit: Check the batteries' orientation and ensure the switch is in the 'ON' position.
  • Intermittent power: Inspect the wire connections for loose contacts or breaks in the wires.
  • Low voltage output: Replace depleted batteries with fresh ones.

Solutions and Tips for Troubleshooting

  • If the device does not power on, verify that the batteries are properly installed and that the switch is turned on.
  • For loose connections, re-solder or use a wire connector to secure the bare wire leads to your circuit.
  • If the voltage output is lower than expected, measure the voltage across the battery terminals to ensure the batteries are not depleted.

FAQs

Q: Can I use rechargeable AAA batteries with this holder? A: Yes, rechargeable AAA batteries can be used, but the nominal voltage may be lower (typically 1.2V per cell, totaling 3.6V for three batteries).

Q: How do I know when to replace the batteries? A: When the device powered by the batteries starts to perform poorly or stops working, it's time to check and possibly replace the batteries.

Q: Is it safe to leave batteries in the holder for long periods? A: It is generally safe, but to prevent potential battery leakage, it is recommended to remove the batteries if the device will not be used for an extended period.

Q: Can I connect multiple battery holders in parallel for more capacity? A: Yes, connecting holders in parallel will increase the capacity (mAh) while maintaining the same voltage. However, ensure all batteries are of the same type and charge level to prevent imbalances.

Example Code for Arduino UNO

// Example code to power an Arduino UNO with the 3xAAA Battery Holder

void setup() {
  // Initialize digital pin LED_BUILTIN as an output.
  pinMode(LED_BUILTIN, OUTPUT);
}

void loop() {
  // Turn the LED on (HIGH is the voltage level)
  digitalWrite(LED_BUILTIN, HIGH);
  // Wait for a second
  delay(1000);
  // Turn the LED off by making the voltage LOW
  digitalWrite(LED_BUILTIN, LOW);
  // Wait for a second
  delay(1000);
}

Note: This example assumes that the 3xAAA Battery Holder is connected to the Arduino UNO's Vin (or 5V if using regulated batteries) and GND pins, and that the built-in switch is turned on. Always ensure that the input voltage is within the acceptable range for your Arduino board.