
How to Use Barcode scanner GM805: Examples, Pinouts, and Specs
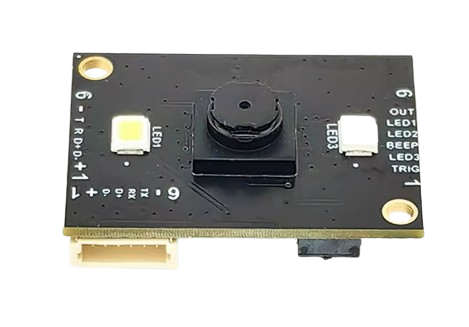
 Design with Barcode scanner GM805 in Cirkit Designer
Introduction
The GM805 is a handheld barcode scanner that utilizes advanced laser technology to read and decode a wide range of barcode formats, including 1D and 2D barcodes. Its ergonomic design and high-speed scanning capabilities make it an excellent choice for applications such as inventory management, retail point-of-sale systems, logistics, and warehouse operations. The GM805 is designed for ease of use, offering plug-and-play functionality with minimal setup required.
Explore Projects Built with Barcode scanner GM805
 Open Project in Cirkit Designer
 Open Project in Cirkit Designer
 Open Project in Cirkit Designer
 Open Project in Cirkit Designer
Explore Projects Built with Barcode scanner GM805
Open Project in Cirkit DesignerOpen Project in Cirkit DesignerOpen Project in Cirkit DesignerOpen Project in Cirkit DesignerTechnical Specifications
The GM805 barcode scanner is built to deliver reliable performance in demanding environments. Below are its key technical specifications:
General Specifications
| Parameter | Value |
|---|---|
| Technology | Laser-based scanning |
| Supported Barcodes | 1D (e.g., UPC, EAN, Code 39, etc.), 2D (e.g., QR Code, Data Matrix) |
| Scan Speed | Up to 300 scans per second |
| Connectivity | USB, RS232, or Bluetooth (model-dependent) |
| Operating Voltage | 5V DC (via USB) |
| Power Consumption | 1.5W (typical) |
| Dimensions | 170mm x 70mm x 90mm |
| Weight | 200g |
| Operating Temperature | 0°C to 50°C |
| Storage Temperature | -20°C to 70°C |
| Humidity | 5% to 95% (non-condensing) |
Pin Configuration (for RS232 Model)
The GM805 RS232 model uses a DB9 connector for communication. Below is the pin configuration:
| Pin Number | Signal Name | Description |
|---|---|---|
| 1 | DCD | Data Carrier Detect |
| 2 | RXD | Receive Data |
| 3 | TXD | Transmit Data |
| 4 | DTR | Data Terminal Ready |
| 5 | GND | Ground |
| 6 | DSR | Data Set Ready |
| 7 | RTS | Request to Send |
| 8 | CTS | Clear to Send |
| 9 | RI | Ring Indicator |
Usage Instructions
How to Use the GM805 in a Circuit
Powering the Scanner:
- For USB models, connect the scanner directly to a USB port on your computer or microcontroller. The scanner will draw power from the USB connection.
- For RS232 models, ensure a 5V DC power supply is connected to the appropriate pins.
Connecting to a Host Device:
- USB models are plug-and-play and require no additional drivers for most operating systems.
- For RS232 models, connect the DB9 connector to the host device's serial port. Configure the baud rate and other serial communication parameters as specified in the user manual.
Scanning Barcodes:
- Point the scanner at the barcode and press the trigger button. Ensure the laser beam fully covers the barcode for accurate reading.
- The decoded data will be sent to the host device via the selected communication interface.
Using with Arduino UNO:
- The GM805 can be connected to an Arduino UNO via a USB-to-serial adapter or directly through the USB interface (if supported). Below is an example code snippet for reading barcode data via serial communication:
// Example code for interfacing GM805 barcode scanner with Arduino UNO
// This code assumes the scanner is connected via a USB-to-serial adapter
// or directly to the Arduino's serial pins.

void setup() {
  Serial.begin(9600); // Initialize serial communication at 9600 baud
  Serial.println("GM805 Barcode Scanner Ready");
}

void loop() {
  if (Serial.available() > 0) {
    // Read data from the scanner
    String barcodeData = Serial.readStringUntil('\n');

    // Print the scanned barcode data to the Serial Monitor
    Serial.print("Scanned Barcode: ");
    Serial.println(barcodeData);
  }
}
Important Considerations and Best Practices
- Ensure the scanner's lens is clean and free of dust or smudges for optimal performance.
- Avoid exposing the scanner to direct sunlight or reflective surfaces, as this may interfere with the laser beam.
- When using the RS232 model, verify that the baud rate and other communication settings match those of the host device.
- For wireless models, ensure the scanner is within the specified range of the Bluetooth receiver.
Troubleshooting and FAQs
Common Issues and Solutions
Scanner Does Not Power On:
- Ensure the USB or RS232 cable is securely connected to the host device.
- Verify that the host device is supplying power (5V DC) to the scanner.
Scanner Fails to Read Barcodes:
- Check if the barcode is damaged or poorly printed.
- Ensure the scanner is held at the correct distance and angle from the barcode.
- Clean the scanner's lens to remove any dirt or smudges.
No Data Received on Host Device:
- For RS232 models, verify the serial communication settings (baud rate, parity, etc.).
- Check the cable connections and ensure the correct COM port is selected on the host device.
Scanner Beeps but No Data is Displayed:
- This may indicate that the barcode format is not supported. Refer to the user manual to enable additional barcode symbologies.
FAQs
Q: Can the GM805 scan barcodes on screens (e.g., smartphones)?
A: The GM805 is primarily designed for printed barcodes. For scanning barcodes on screens, consider a model with enhanced optical capabilities.
Q: Is the GM805 compatible with macOS and Linux?
A: Yes, the USB model is plug-and-play and works with macOS, Linux, and Windows without additional drivers.
Q: How do I reset the scanner to factory settings?
A: Refer to the user manual for a special barcode that can be scanned to reset the scanner to its default configuration.
Q: What is the maximum scanning distance?
A: The GM805 can scan barcodes from a distance of up to 30cm, depending on the barcode size and quality.
By following this documentation, users can effectively integrate and operate the GM805 barcode scanner in various applications.