How to Use Lilypad Arduino: Examples, Pinouts, and Specs
Introduction
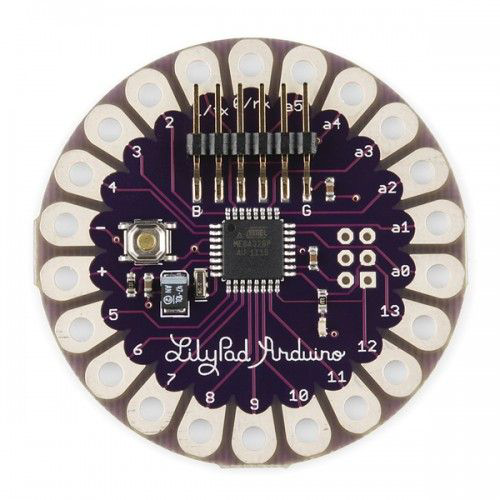
The Lilypad Arduino is a wearable microcontroller designed specifically for e-textiles and soft circuits. Its compact, circular design allows it to be easily sewn into fabric using conductive thread, making it ideal for creating interactive garments and wearable technology. The Lilypad Arduino is compatible with a wide range of sensors, actuators, and other electronic components, enabling users to build creative and functional projects.
Explore Projects Built with Lilypad Arduino

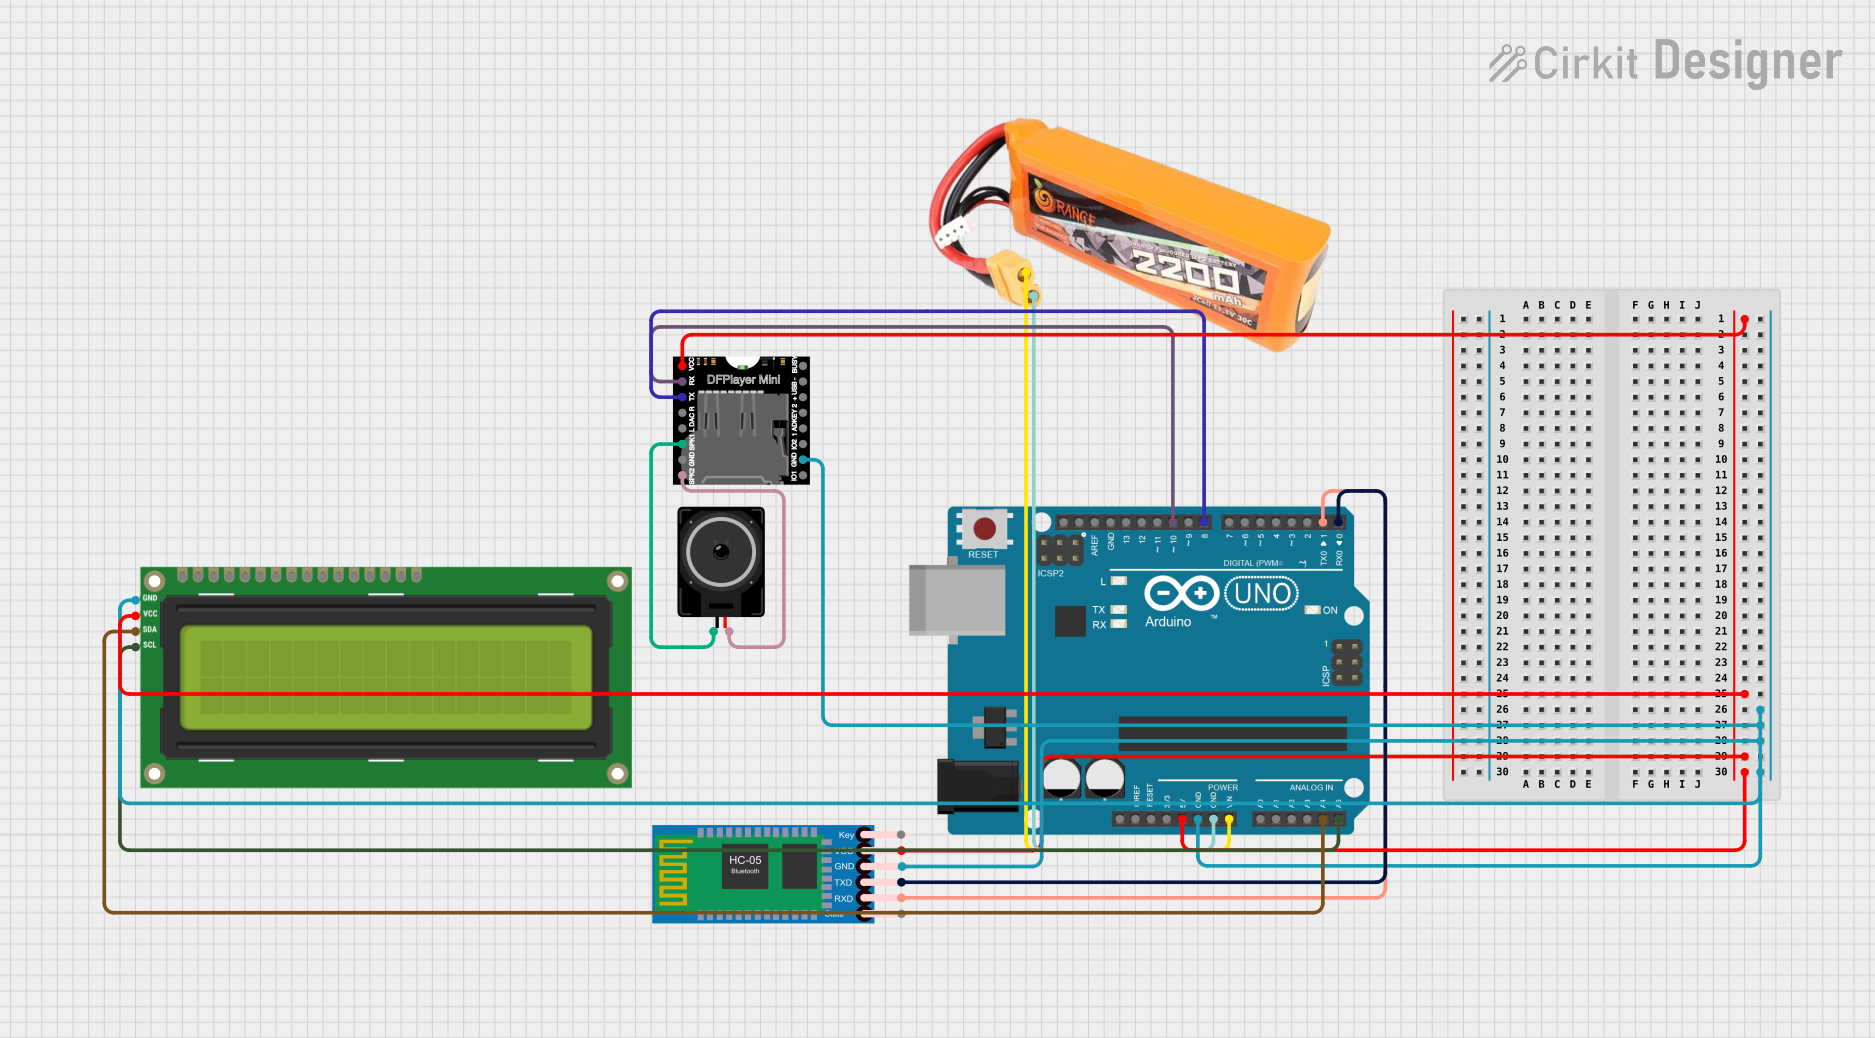
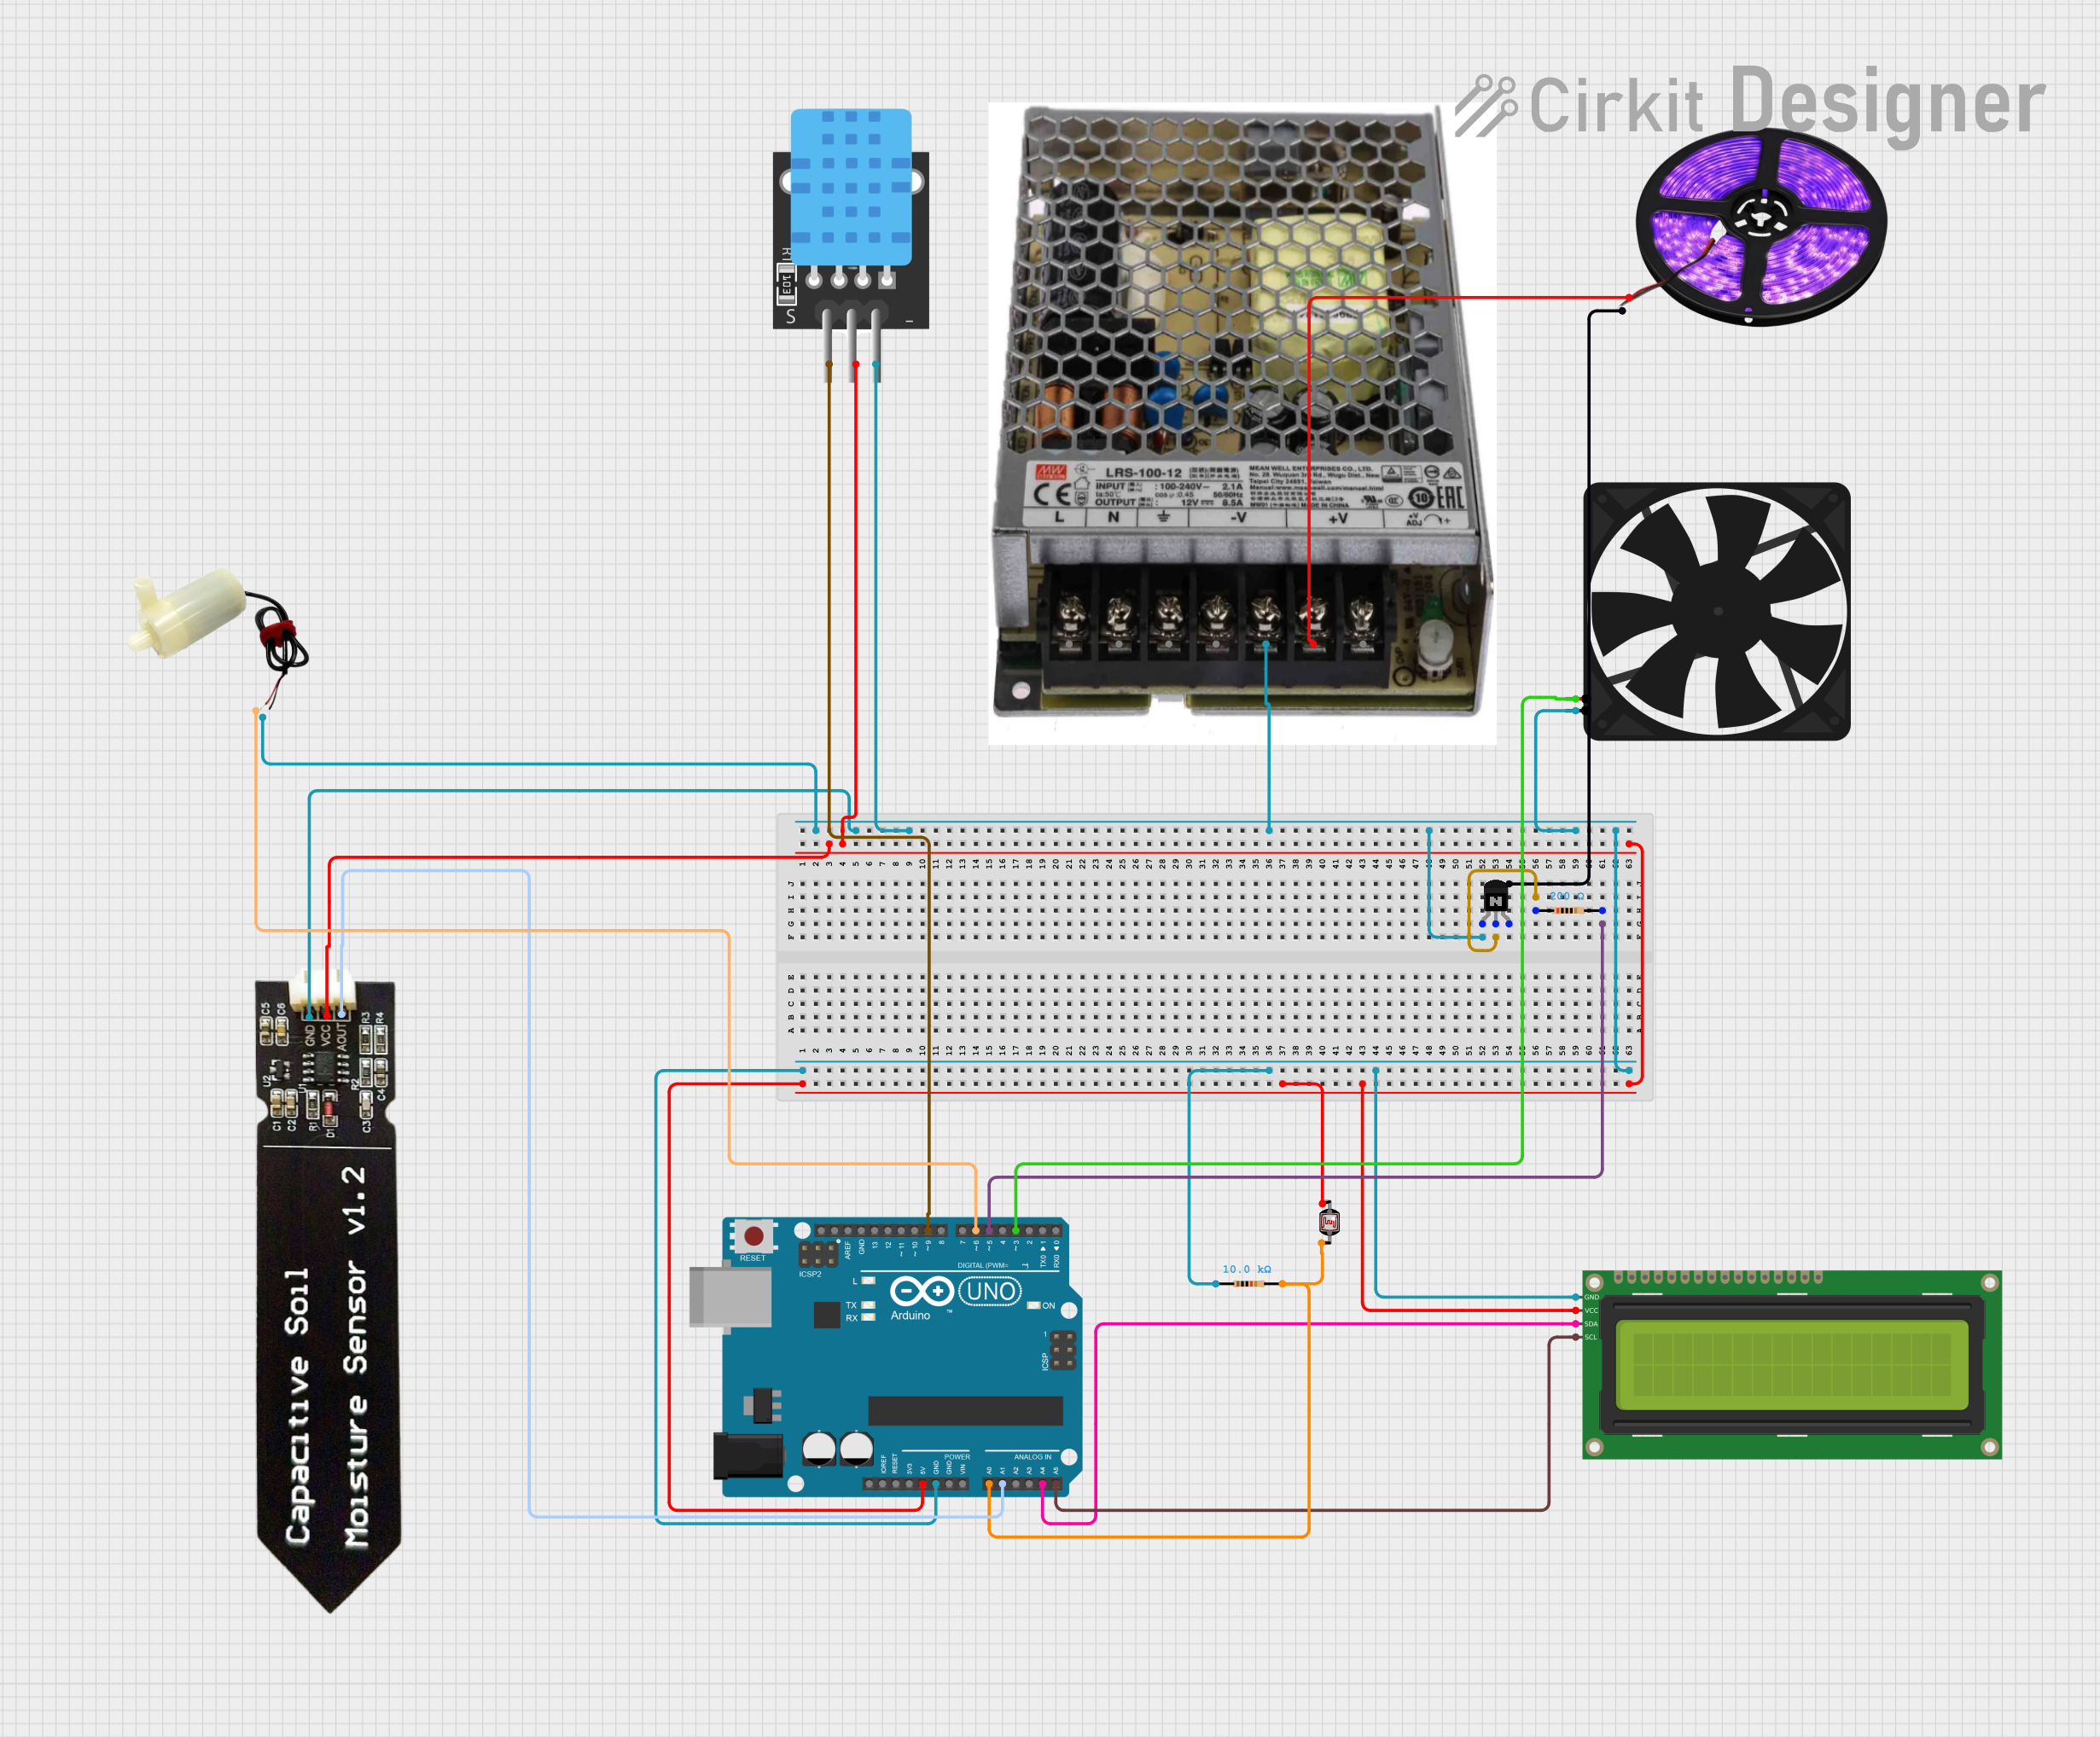
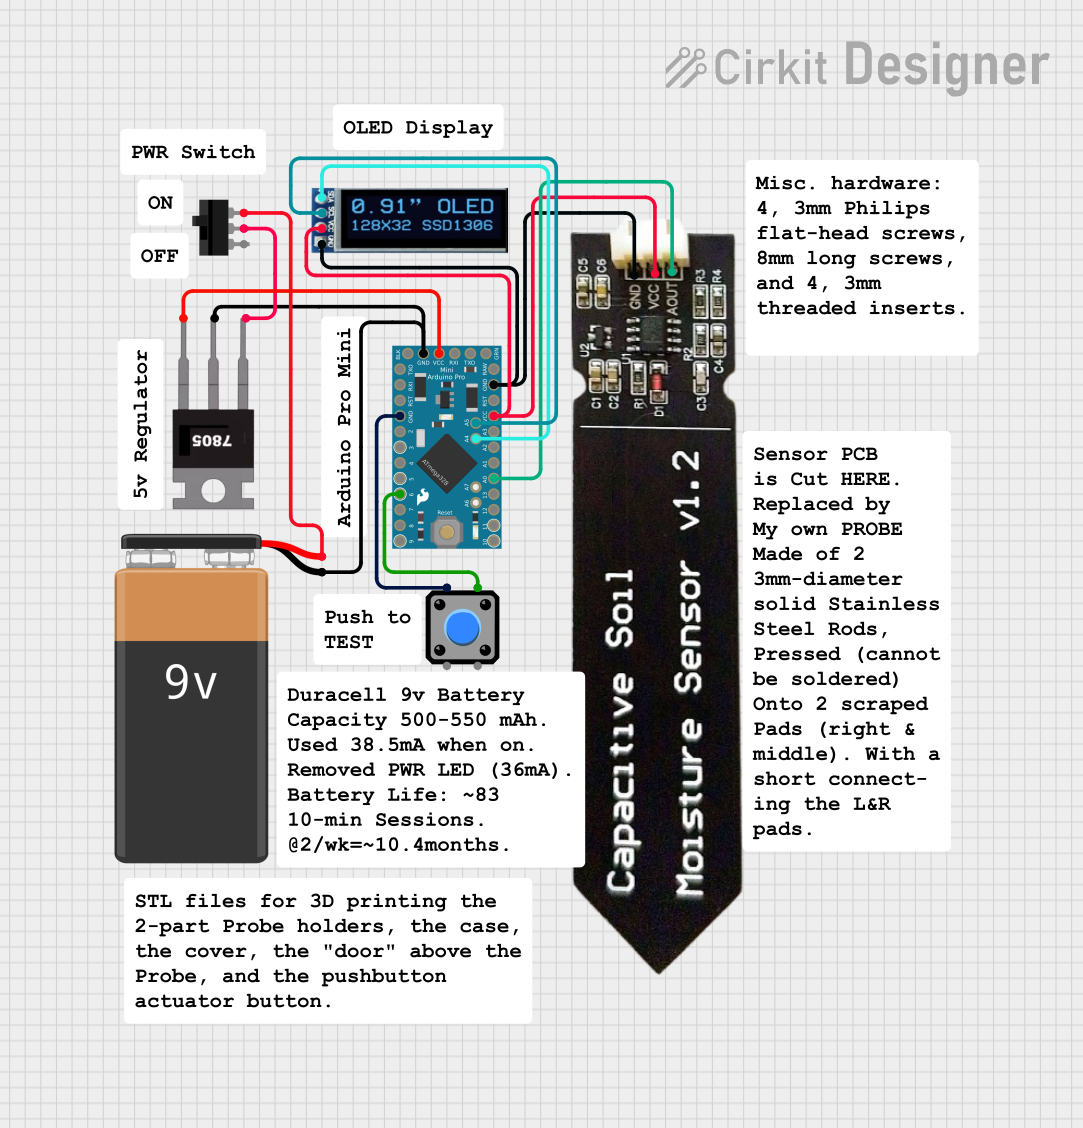
Explore Projects Built with Lilypad Arduino
Common Applications and Use Cases
- Wearable technology, such as interactive clothing and accessories
- E-textiles for fashion, art, and design projects
- Prototyping soft circuits and fabric-based electronics
- Educational projects to teach electronics and programming in a creative way
Technical Specifications
- Microcontroller: ATmega328P
- Operating Voltage: 2.7V - 5.5V
- Input Voltage: 2.7V - 5.5V
- Digital I/O Pins: 14 (6 of which provide PWM output)
- Analog Input Pins: 6
- Flash Memory: 32 KB (2 KB used by bootloader)
- SRAM: 2 KB
- EEPROM: 1 KB
- Clock Speed: 8 MHz
- Dimensions: 50 mm (diameter)
- Weight: 5 g
Pin Configuration and Descriptions
The Lilypad Arduino features a circular layout with pins distributed around its edge for easy sewing. Below is a table describing the pin configuration:
| Pin | Type | Description |
|---|---|---|
| 0-13 | Digital I/O | General-purpose digital input/output pins. Pins 3, 5, 6, 9, 10, and 11 support PWM. |
| A0-A5 | Analog Input | Analog input pins for reading sensor data (0-1023 range). |
| + | Power (+) | Positive power connection for supplying voltage to the board. |
| - | Ground (-) | Ground connection for completing the circuit. |
| RST | Reset | Resets the microcontroller. |
Usage Instructions
How to Use the Lilypad Arduino in a Circuit
Powering the Lilypad:
- The Lilypad Arduino can be powered using a coin cell battery, a LiPo battery, or an external power supply (2.7V - 5.5V).
- Connect the positive terminal of the power source to the
+pin and the negative terminal to the-pin.
Connecting Components:
- Use conductive thread to sew components (e.g., LEDs, sensors, or actuators) to the corresponding pins on the Lilypad.
- Ensure that the thread connections are tight and do not cross to avoid short circuits.
Programming the Lilypad:
- Connect the Lilypad to your computer using an FTDI USB-to-serial adapter.
- Open the Arduino IDE, select "Lilypad Arduino" as the board, and upload your code.
Important Considerations and Best Practices
- Conductive Thread: Use high-quality conductive thread to ensure reliable connections. Avoid fraying or overlapping threads to prevent short circuits.
- Power Management: Be mindful of the power requirements of your components. Use a suitable power source to avoid overloading the board.
- Sewing Tips: Secure the Lilypad firmly to the fabric to prevent movement, which could damage the connections.
- Code Optimization: Since the Lilypad runs at 8 MHz and has limited memory, write efficient code to maximize performance.
Example Code for Arduino UNO Compatibility
The following example demonstrates how to blink an LED connected to pin 5 of the Lilypad Arduino:
// This code blinks an LED connected to pin 5 of the Lilypad Arduino.
// The LED will turn on for 1 second and off for 1 second in a loop.

void setup() {
  pinMode(5, OUTPUT); // Set pin 5 as an output pin
}

void loop() {
  digitalWrite(5, HIGH); // Turn the LED on
  delay(1000);           // Wait for 1 second
  digitalWrite(5, LOW);  // Turn the LED off
  delay(1000);           // Wait for 1 second
}
Troubleshooting and FAQs
Common Issues and Solutions
The Lilypad is not powering on:
- Check the power source and ensure it is properly connected to the
+and-pins. - Verify that the battery is charged or the external power supply is functioning.
- Check the power source and ensure it is properly connected to the
Code is not uploading:
- Ensure the FTDI adapter is properly connected to the Lilypad and your computer.
- Select the correct COM port and board type in the Arduino IDE.
- Press the reset button on the Lilypad just before uploading the code.
Components are not working as expected:
- Check the connections made with conductive thread for tightness and continuity.
- Verify that the components are connected to the correct pins and are compatible with the Lilypad's voltage.
Short circuits or erratic behavior:
- Inspect the conductive thread for overlapping or frayed connections.
- Use insulating fabric or tape to separate threads that are close to each other.
FAQs
Q: Can I wash garments with a Lilypad Arduino sewn in?
A: Yes, but you must remove the power source and ensure all components are washable. Hand washing is recommended to avoid damaging the electronics.
Q: What sensors are compatible with the Lilypad Arduino?
A: The Lilypad is compatible with a wide range of sensors, including temperature, light, accelerometers, and touch sensors.
Q: Can I use regular wires instead of conductive thread?
A: Yes, regular wires can be used for prototyping, but conductive thread is preferred for wearable applications.
Q: How do I debug my Lilypad project?
A: Use the Arduino IDE's Serial Monitor to print debug messages. Connect the Lilypad to your computer via the FTDI adapter for serial communication.