How to Use Adafruit Latching Mini Relay FeatherWing: Examples, Pinouts, and Specs
Introduction
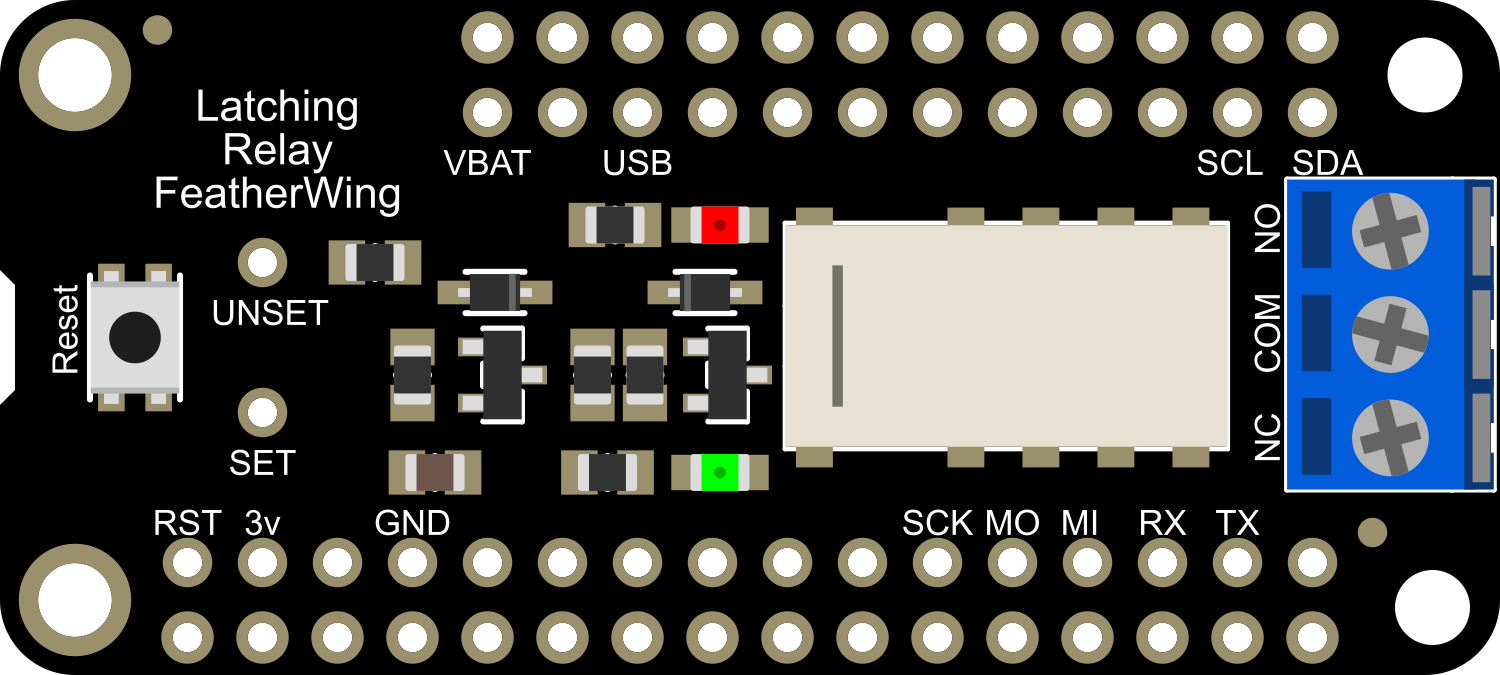
The Adafruit Latching Mini Relay FeatherWing is a compact relay board designed to interface seamlessly with Adafruit Feather microcontrollers. This relay allows users to control high-power devices, such as lights, motors, or appliances, using low-power signals from a Feather board. Its latching functionality ensures that the relay maintains its state (on or off) even when power is removed, making it particularly suitable for battery-powered or energy-efficient applications.
Explore Projects Built with Adafruit Latching Mini Relay FeatherWing


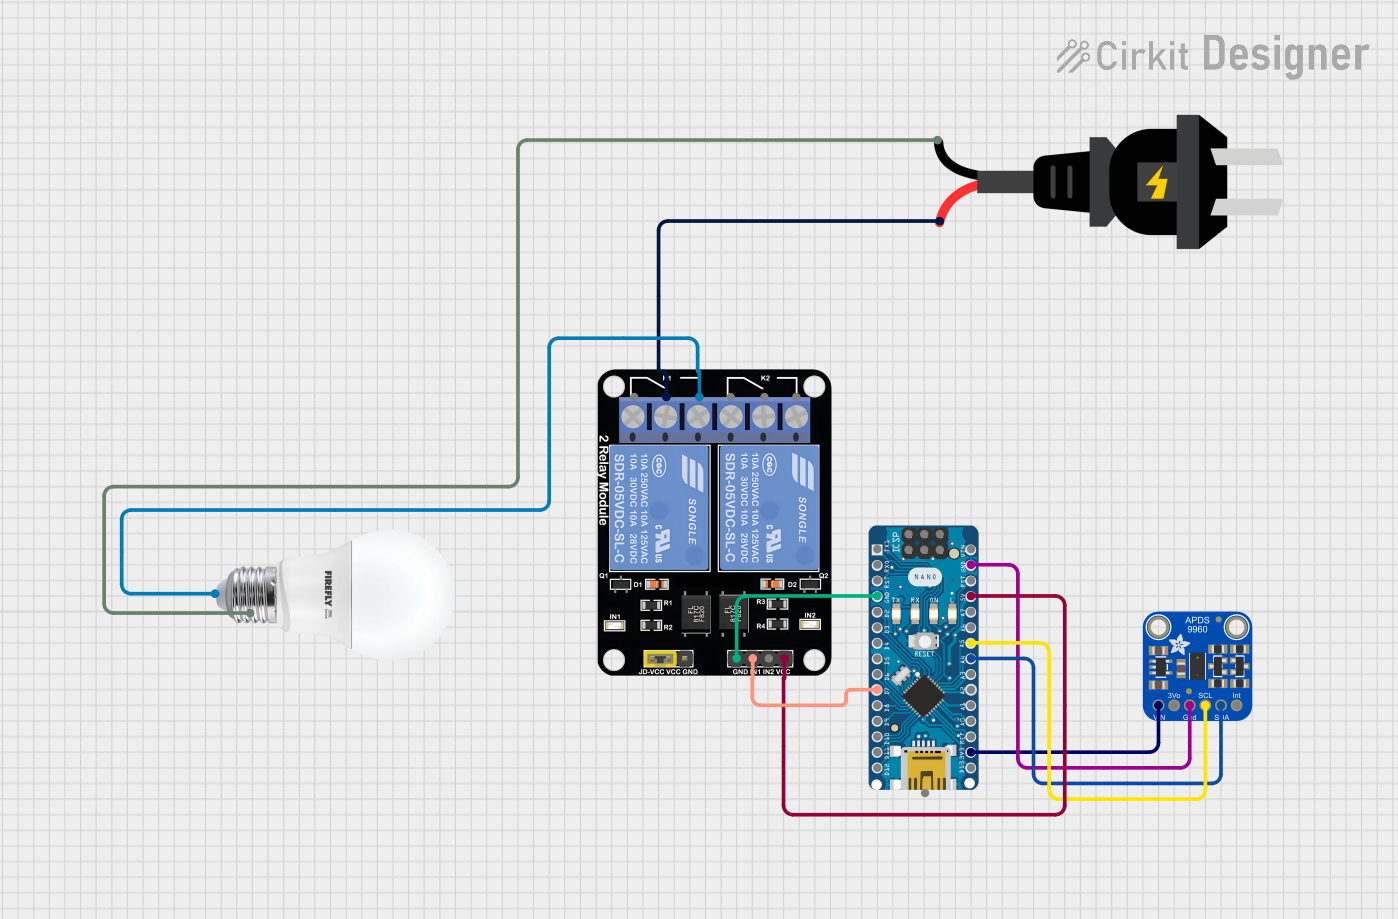
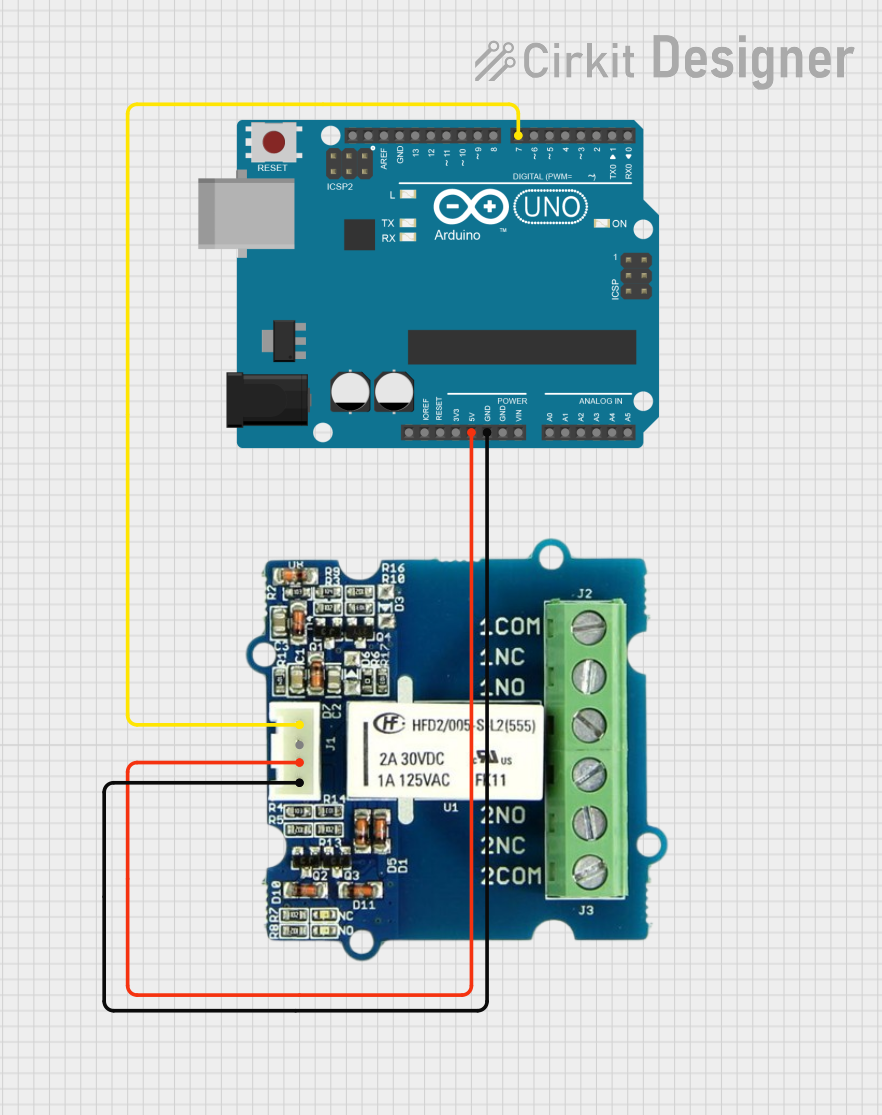
Explore Projects Built with Adafruit Latching Mini Relay FeatherWing
Common Applications and Use Cases
- Home automation systems (e.g., controlling lights or fans)
- Battery-powered IoT devices
- Robotics and motor control
- Energy-efficient switching applications
- Industrial control systems
Technical Specifications
The Adafruit Latching Mini Relay FeatherWing is designed for ease of use and reliable operation. Below are its key technical details:
Key Technical Details
- Relay Type: Latching (bi-stable)
- Operating Voltage: 3.3V or 5V (compatible with Feather boards)
- Maximum Switching Voltage: 120V AC / 60V DC
- Maximum Switching Current: 2A
- Control Signal: Low-power digital signal from Feather microcontroller
- Dimensions: 51mm x 23mm x 8mm (2" x 0.9" x 0.3")
- Weight: 5.5g
Pin Configuration and Descriptions
The FeatherWing has a simple pinout for easy integration with Feather boards. Below is the pin configuration:
| Pin | Description |
|---|---|
| GND | Ground connection for the relay module. |
| VIN | Power input (3.3V or 5V, depending on the Feather board used). |
| SET | Digital input to set the relay to the "ON" state. |
| RESET | Digital input to reset the relay to the "OFF" state. |
| COM | Common terminal for the relay's switching circuit. |
| NO | Normally Open terminal; connected to COM when the relay is in the "ON" state. |
| NC | Normally Closed terminal; connected to COM when the relay is in the "OFF" state. |
Usage Instructions
How to Use the Component in a Circuit
- Connect the FeatherWing to a Feather Board:
- Align the FeatherWing's headers with the Feather microcontroller's pins and solder them securely.
- Power the Relay:
- Ensure the Feather board is powered via USB or a battery. The FeatherWing will draw power from the Feather's VIN pin.
- Connect the Load:
- Attach the device you want to control (e.g., a light or motor) to the relay's COM and NO (or NC) terminals.
- For example, connect one wire of the load to COM and the other to NO for normally open operation.
- Control the Relay:
- Use the Feather's GPIO pins to send signals to the SET and RESET pins of the relay to toggle its state.
Important Considerations and Best Practices
- Voltage and Current Ratings: Ensure the load connected to the relay does not exceed the maximum ratings (120V AC / 60V DC, 2A).
- Latching Behavior: Remember that the relay will maintain its state even if power is removed. Use the RESET pin to return it to the "OFF" state when needed.
- Isolation: The relay provides electrical isolation between the Feather board and the high-power load, but always exercise caution when working with high voltages.
- Debouncing: If you are using mechanical switches to control the relay, consider implementing software debouncing to avoid erratic behavior.
Example Code for Arduino UNO-Compatible Feather Boards
Below is an example of how to control the Adafruit Latching Mini Relay FeatherWing using an Arduino-compatible Feather board:
// Example code to control the Adafruit Latching Mini Relay FeatherWing
// Connect SET to pin 5 and RESET to pin 6 on the Feather board

#define RELAY_SET_PIN 5   // Pin connected to the SET input of the relay
#define RELAY_RESET_PIN 6 // Pin connected to the RESET input of the relay

void setup() {
  pinMode(RELAY_SET_PIN, OUTPUT);   // Configure SET pin as output
  pinMode(RELAY_RESET_PIN, OUTPUT); // Configure RESET pin as output

  // Initialize relay to OFF state
  digitalWrite(RELAY_SET_PIN, LOW);
  digitalWrite(RELAY_RESET_PIN, HIGH);
  delay(100); // Allow time for the relay to switch
  digitalWrite(RELAY_RESET_PIN, LOW);
}

void loop() {
  // Turn the relay ON
  digitalWrite(RELAY_SET_PIN, HIGH);
  delay(100); // Allow time for the relay to switch
  digitalWrite(RELAY_SET_PIN, LOW);

  delay(5000); // Keep the relay ON for 5 seconds

  // Turn the relay OFF
  digitalWrite(RELAY_RESET_PIN, HIGH);
  delay(100); // Allow time for the relay to switch
  digitalWrite(RELAY_RESET_PIN, LOW);

  delay(5000); // Keep the relay OFF for 5 seconds
}
Troubleshooting and FAQs
Common Issues and Solutions
Relay Does Not Switch:
- Cause: Insufficient power supply or incorrect wiring.
- Solution: Verify that the Feather board is powered and the SET/RESET pins are connected correctly.
Relay Stays in the Same State:
- Cause: The SET or RESET signal is not being sent properly.
- Solution: Check the GPIO pin configuration in your code and ensure the correct pins are used.
Load Does Not Operate:
- Cause: Load exceeds the relay's voltage or current rating.
- Solution: Ensure the load is within the relay's maximum ratings (120V AC / 60V DC, 2A).
Intermittent Operation:
- Cause: Noise or insufficient debounce in the control signal.
- Solution: Add software debouncing or use capacitors to filter noise.
FAQs
Q: Can I use this relay with a 12V load?
- A: Yes, as long as the load's current does not exceed 2A and the voltage is within 60V DC or 120V AC.
Q: Does the relay consume power when idle?
- A: No, the latching relay only consumes power momentarily when switching states.
Q: Can I control the relay with a 3.3V Feather board?
- A: Yes, the relay is compatible with both 3.3V and 5V Feather boards.
Q: How do I reset the relay to its default state after a power loss?
- A: Use the RESET pin to return the relay to the "OFF" state after power is restored.