How to Use Pushbutton: Examples, Pinouts, and Specs
Introduction
A pushbutton is a fundamental electronic component that operates as a momentary switch. It is designed to make or break an electrical connection when pressed, returning to its original state when released. Pushbuttons are ubiquitous in electronic devices, serving as inputs for user commands, initiating processes, or as part of control panels. They are simple to use, reliable, and can be found in a variety of applications ranging from consumer electronics to industrial machinery.
Explore Projects Built with Pushbutton


Explore Projects Built with Pushbutton
Technical Specifications
Key Technical Details
- Contact Type: Momentary
- Contact Rating: Typically 50 mA at 12 VDC (varies by model)
- Bounce Time: 5-30 ms (depends on quality)
- Operating Temperature Range: -20°C to +70°C (may vary by model)
- Mechanical Life: Typically 1 million cycles (varies by model)
- Electrical Life: Typically 100,000 cycles (varies by model)
Pin Configuration and Descriptions
| Pin Number | Description |
|---|---|
| 1 | Normally Open (NO) |
| 2 | Common (COM) |
| 3 | Normally Closed (NC) |
- Normally Open (NO): This pin is disconnected from the common pin by default and gets connected when the button is pressed.
- Common (COM): This pin is the common terminal to which the NO or NC pins will connect.
- Normally Closed (NC): This pin is connected to the common pin by default and gets disconnected when the button is pressed.
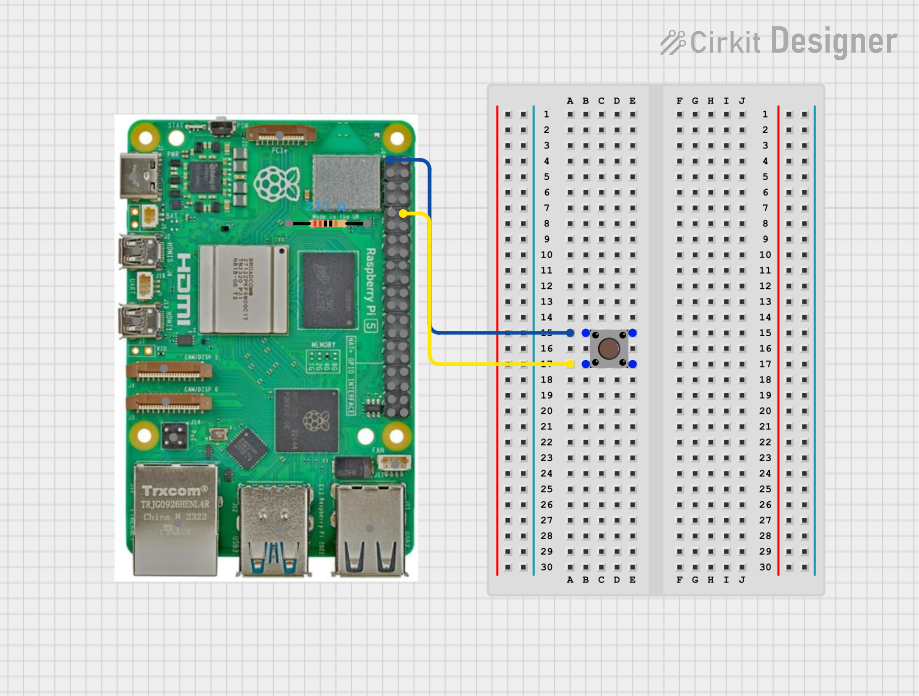
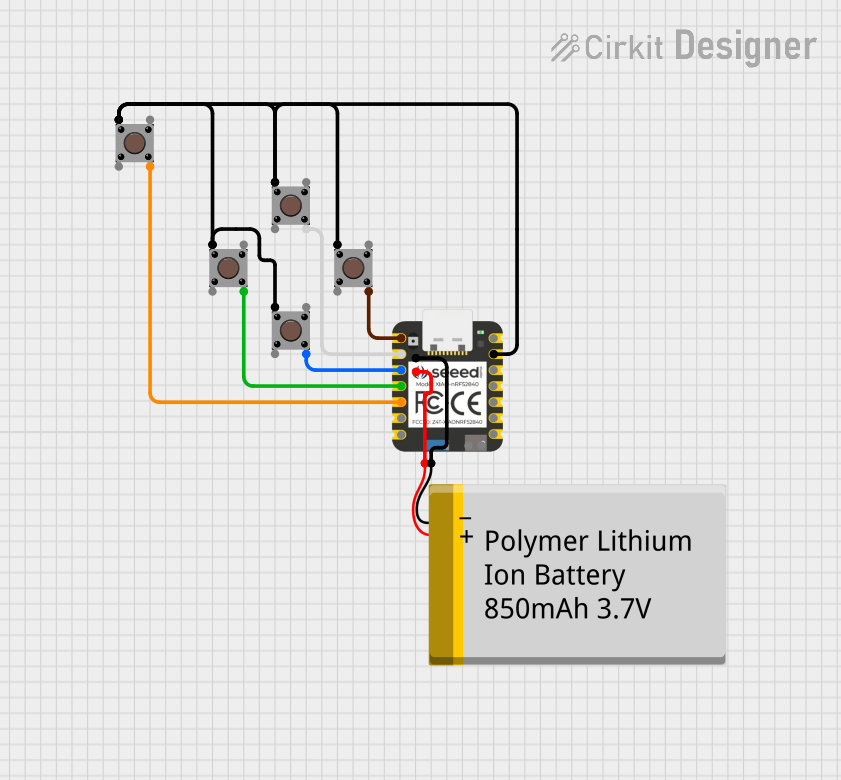
Usage Instructions
How to Use the Pushbutton in a Circuit
- Identify the Pins: Determine which pins are NO, COM, and NC.
- Wiring: Connect the COM pin to one side of the power source or signal line. Connect the NO or NC pin to the circuit where control is needed.
- Debouncing: Implement a debouncing mechanism either through hardware (e.g., RC circuit) or software to prevent false triggering due to contact bounce.
Important Considerations and Best Practices
- Voltage and Current Ratings: Do not exceed the voltage and current ratings of the pushbutton to avoid damage.
- Debouncing: Always account for debouncing to ensure reliable operation.
- Mounting: Secure the pushbutton firmly to prevent movement that could cause intermittent connections.
- Testing: Test the pushbutton functionality before finalizing the circuit to ensure it operates as expected.
Example Code for Arduino UNO
// Define the pin connected to the pushbutton
const int buttonPin = 2;
// Define the pin for the LED
const int ledPin =  13;
// Variable for storing the pushbutton status
int buttonState = 0;

void setup() {
  // Initialize the LED pin as an output
  pinMode(ledPin, OUTPUT);
  // Initialize the pushbutton pin as an input
  pinMode(buttonPin, INPUT);
}

void loop(){
  // Read the state of the pushbutton value
  buttonState = digitalRead(buttonPin);

  // Check if the pushbutton is pressed. If it is, the buttonState is HIGH
  if (buttonState == HIGH) {
    // Turn on the LED
    digitalWrite(ledPin, HIGH);
  } else {
    // Turn off the LED
    digitalWrite(ledPin, LOW);
  }
}
Troubleshooting and FAQs
Common Issues
- Pushbutton does not respond: Ensure the pushbutton is correctly wired and that the pins are not damaged.
- Intermittent responses: Check for loose connections or solder joints. Also, consider if debouncing is properly implemented.
- Pushbutton stuck in pressed state: This may be due to a mechanical issue. Inspect the pushbutton for any obstructions or damage.
Solutions and Tips for Troubleshooting
- Check Connections: Verify that all connections are secure and that the pushbutton is wired correctly.
- Debounce the Button: Implement a debounce algorithm in software or use a hardware debounce circuit.
- Replace if Necessary: If the pushbutton is damaged or worn out, it may need to be replaced.
FAQs
Q: Can I use a pushbutton with higher voltage and current ratings than my circuit requires? A: Yes, using a pushbutton with higher ratings is generally safe. However, using one with lower ratings than required can lead to failure or unsafe conditions.
Q: How do I know if my pushbutton requires debouncing? A: Most mechanical pushbuttons will require debouncing due to the inherent contact bounce they produce. If you notice multiple triggers for a single press, you need debouncing.
Q: Is it possible to use a pushbutton without an external pull-up or pull-down resistor? A: Yes, many microcontrollers, including the Arduino, have internal pull-up resistors that can be enabled through software.