How to Use Módulo: Examples, Pinouts, and Specs
Introduction
A Módulo is a self-contained unit of functionality that integrates various electronic components and circuitry into a single package. It is designed to simplify complex designs and facilitate seamless integration into larger systems. Modules are widely used in electronics to provide pre-assembled and pre-tested functionality, reducing development time and effort.
Explore Projects Built with Módulo
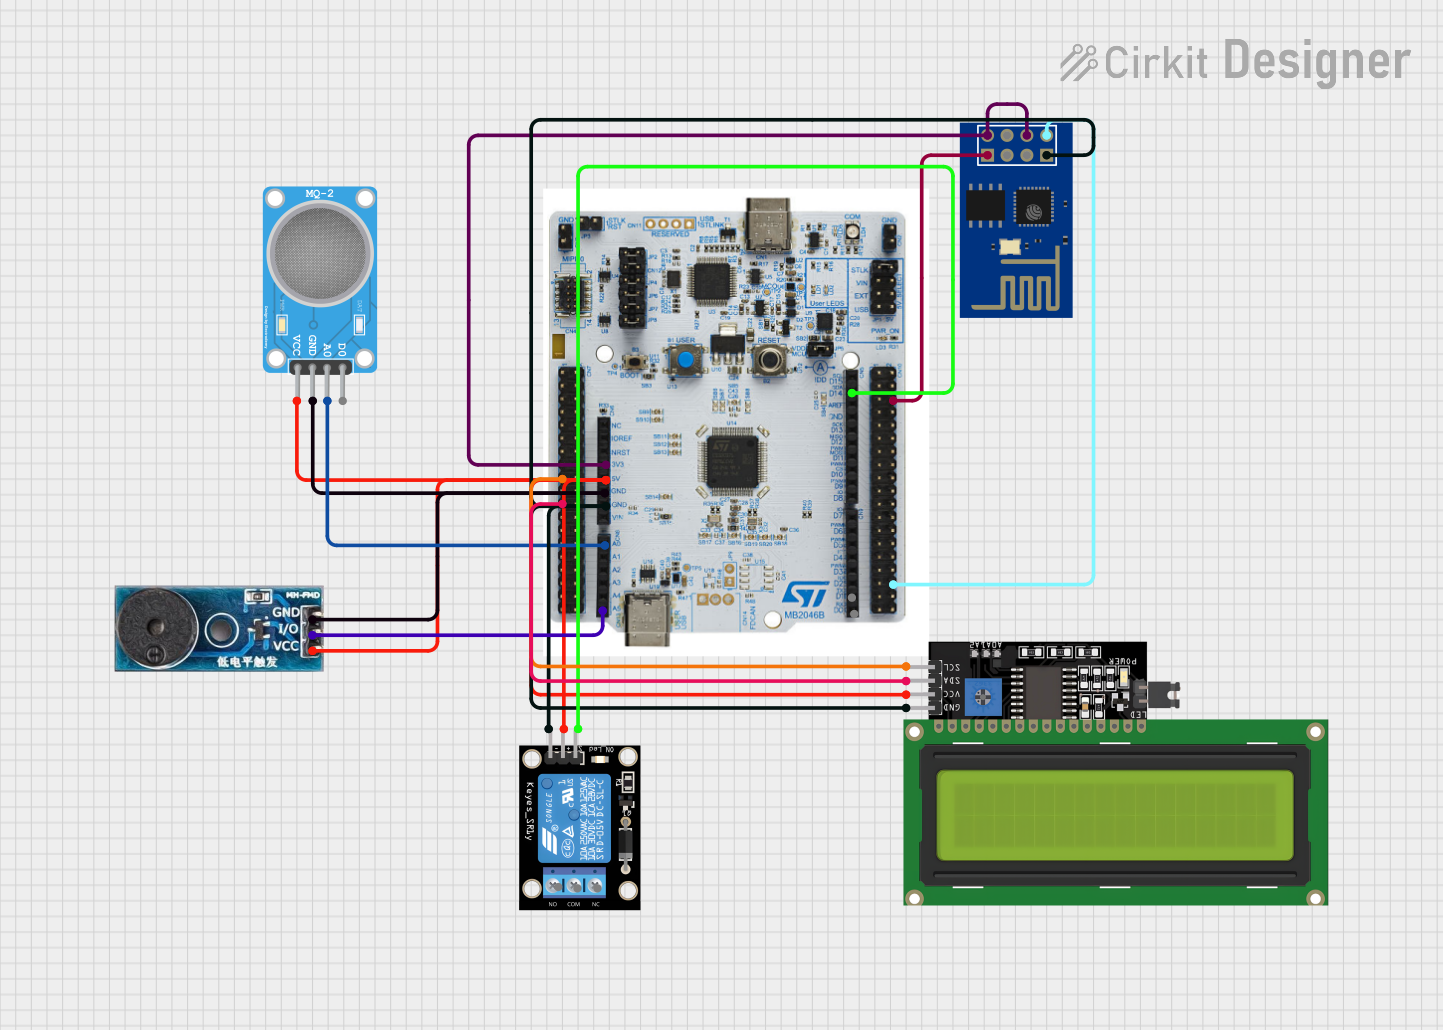
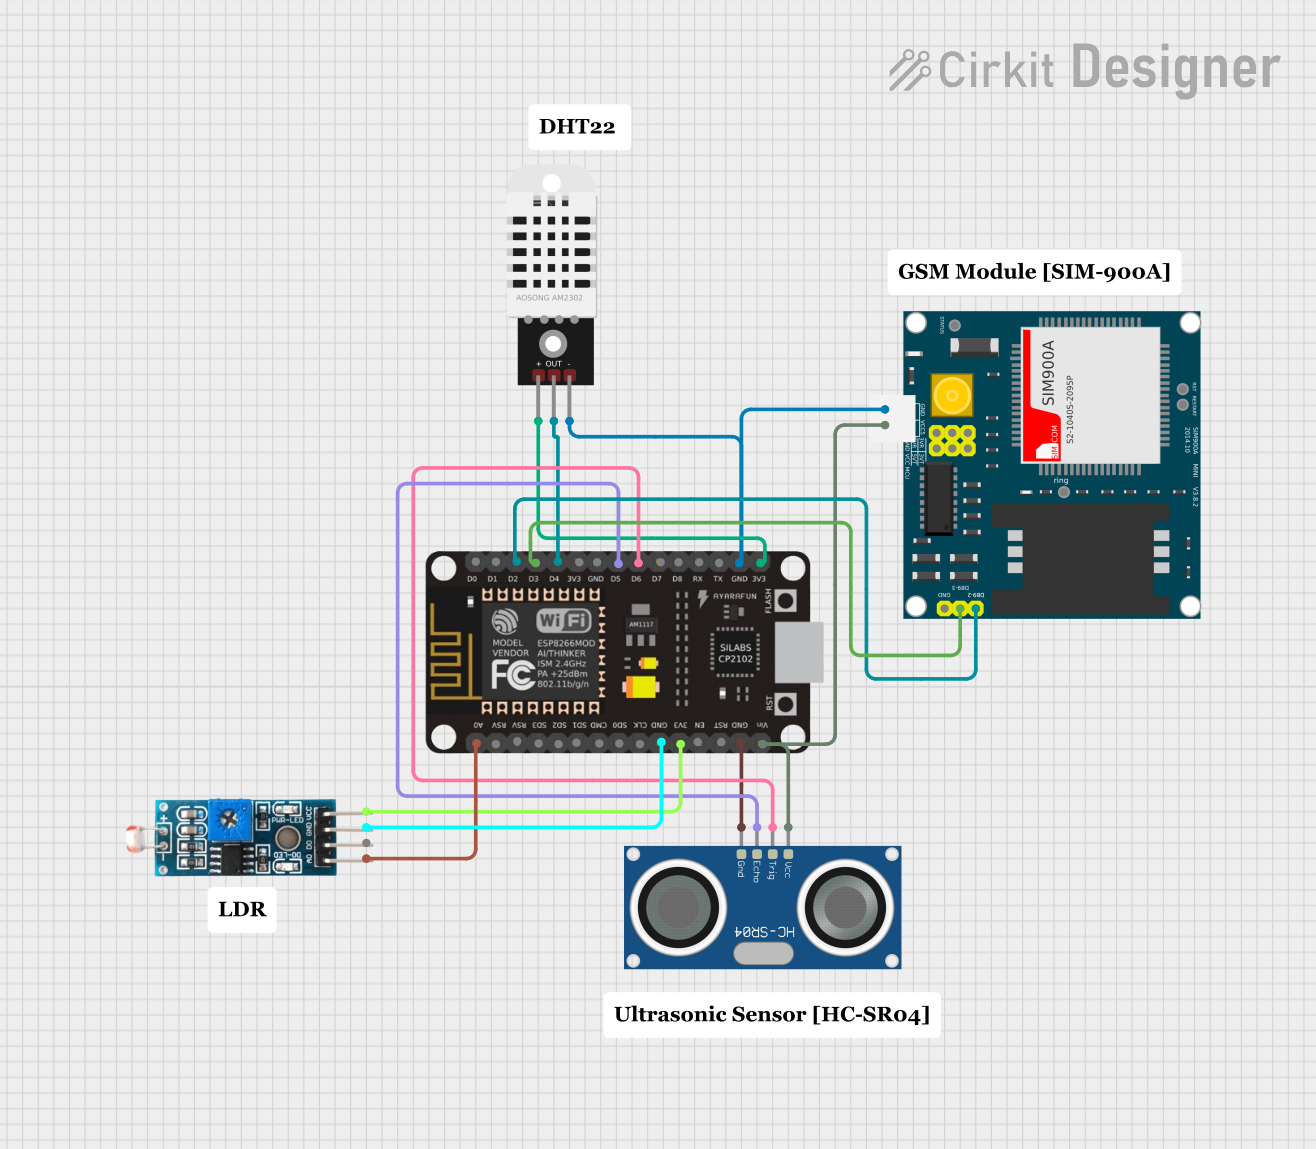

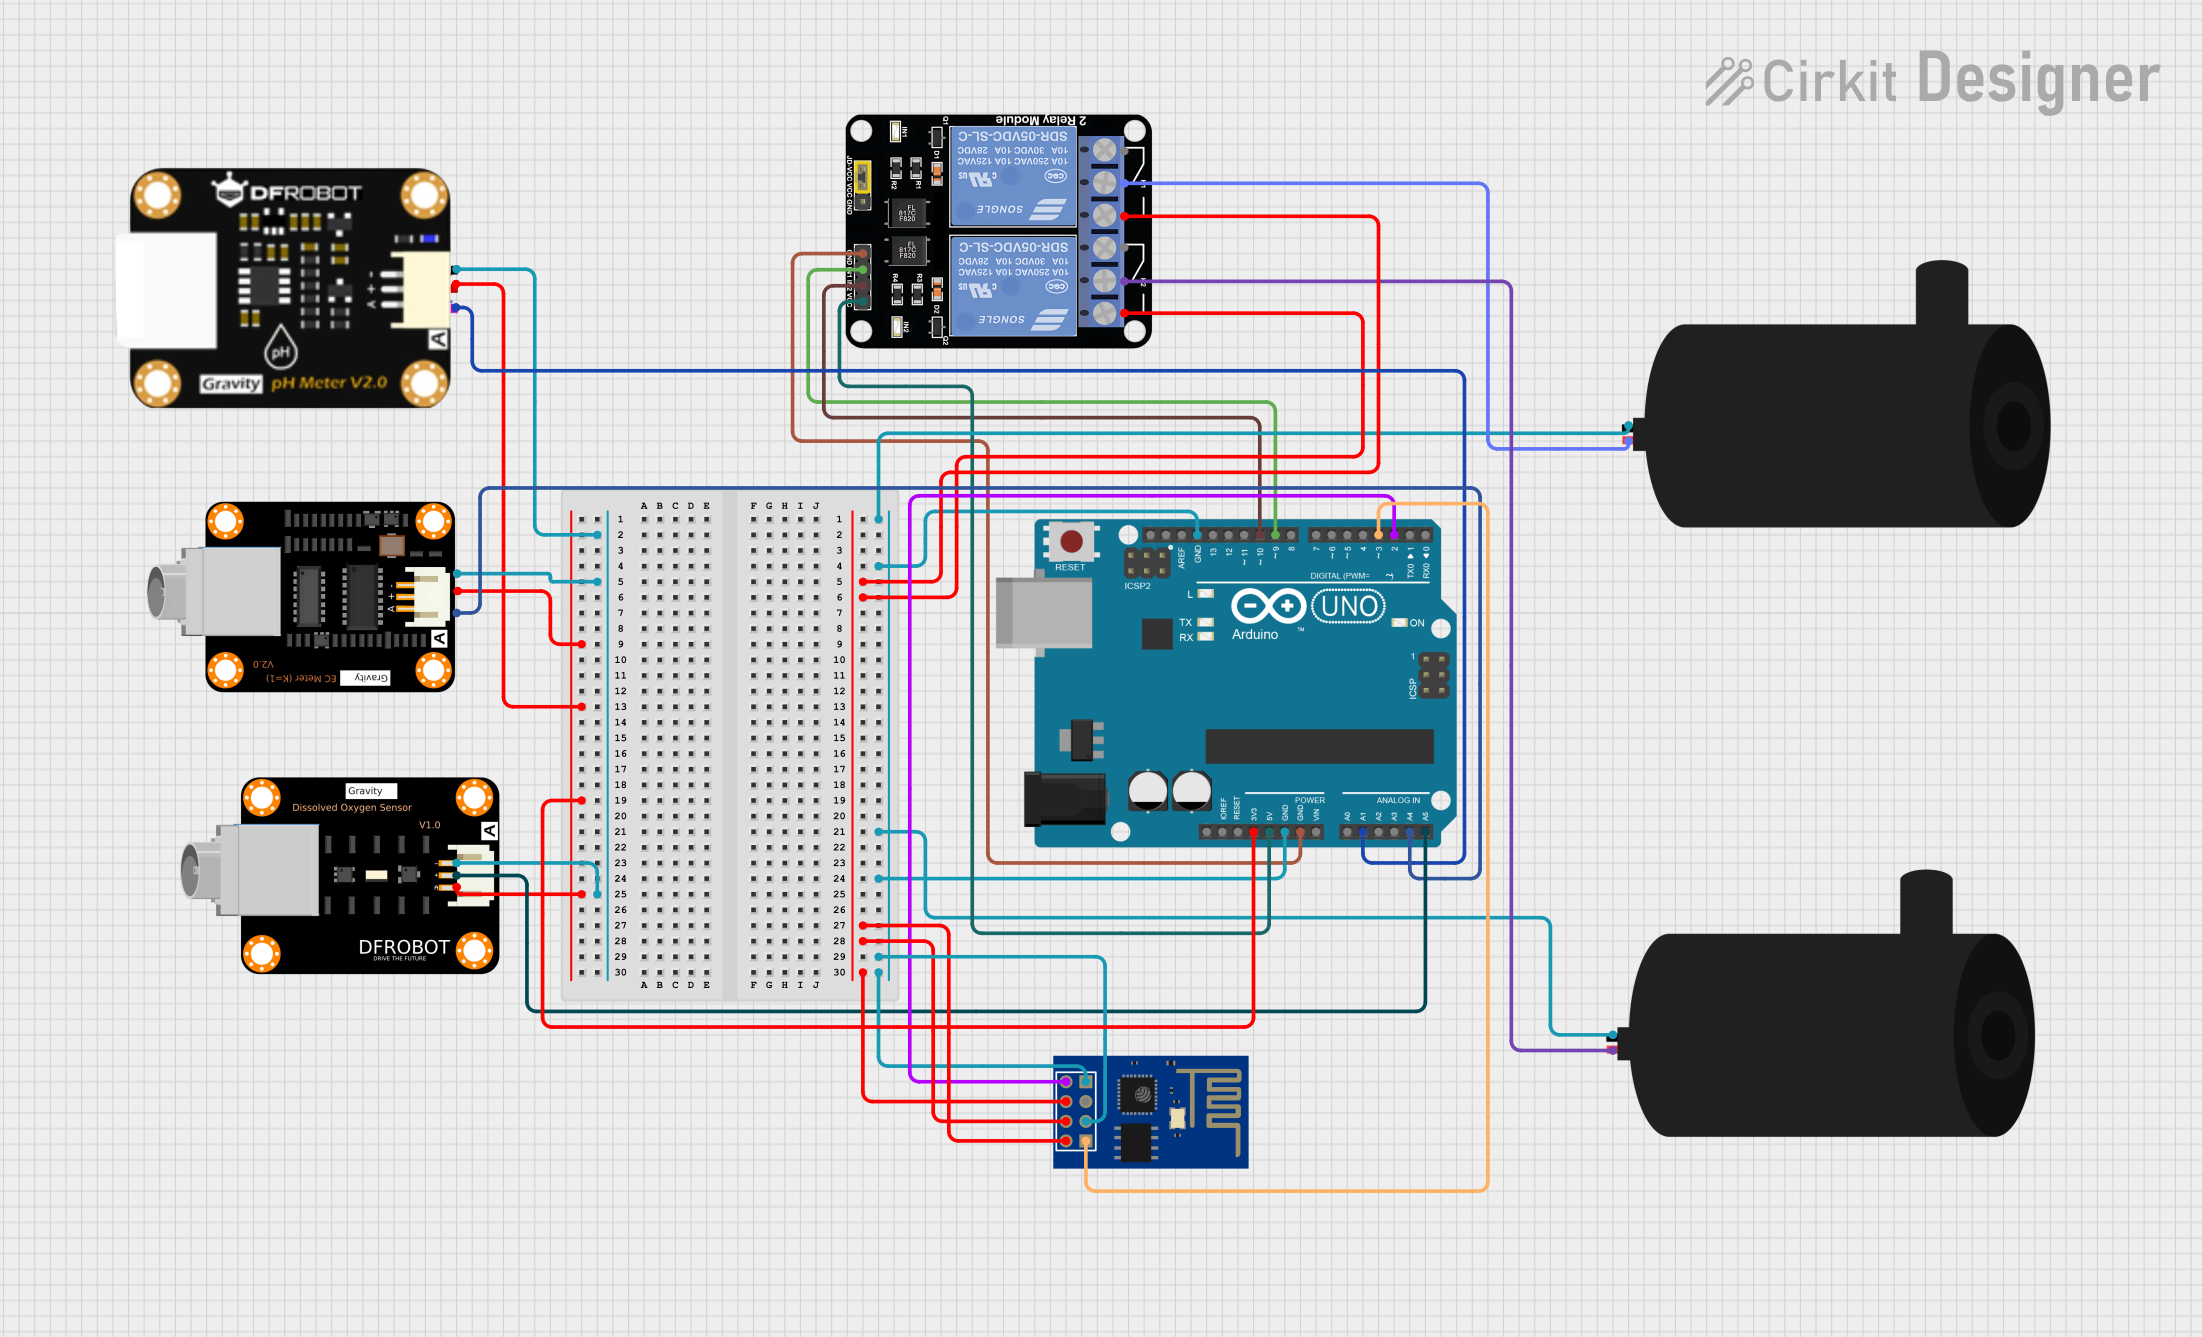
Explore Projects Built with Módulo
Common Applications and Use Cases
- Prototyping and rapid development of electronic systems
- Adding specific functionality (e.g., communication, sensing, or power management) to a project
- Educational purposes for learning and experimenting with electronics
- Integration into IoT devices, robotics, and automation systems
Technical Specifications
The technical specifications of a Módulo can vary depending on its type and purpose. Below is an example of a generic module's specifications:
General Specifications
| Parameter | Value/Range |
|---|---|
| Operating Voltage | 3.3V to 5V |
| Current Consumption | 10mA to 500mA (depending on type) |
| Communication Protocol | I2C, SPI, UART, or GPIO |
| Dimensions | Varies (e.g., 25mm x 25mm) |
| Operating Temperature | -40°C to +85°C |
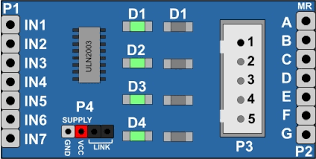
Pin Configuration and Descriptions
The pin configuration of a Módulo depends on its functionality. Below is an example of a generic module with 6 pins:
| Pin Number | Pin Name | Description |
|---|---|---|
| 1 | VCC | Power supply input (3.3V or 5V) |
| 2 | GND | Ground connection |
| 3 | SDA | Data line for I2C communication |
| 4 | SCL | Clock line for I2C communication |
| 5 | TX | Transmit pin for UART communication |
| 6 | RX | Receive pin for UART communication |
Usage Instructions
How to Use the Módulo in a Circuit
- Power the Module: Connect the
VCCpin to a 3.3V or 5V power source, depending on the module's requirements. Connect theGNDpin to the ground of your circuit. - Establish Communication: Depending on the module's communication protocol:
- For I2C, connect the
SDAandSCLpins to the corresponding pins on your microcontroller. - For UART, connect the
TXandRXpins to the microcontroller's UART pins.
- For I2C, connect the
- Configure the Microcontroller: Use the appropriate library or code to initialize and communicate with the module.
- Test the Module: Verify the module's functionality by running a simple test program.
Important Considerations and Best Practices
- Voltage Compatibility: Ensure the module's operating voltage matches your circuit's power supply.
- Pin Connections: Double-check all connections to avoid damage to the module or other components.
- Libraries: Use manufacturer-recommended libraries for easier integration and reliable performance.
- Noise Reduction: Add decoupling capacitors near the power pins to reduce electrical noise.
Example: Using a Módulo with Arduino UNO
Below is an example of how to use a generic I2C-based module with an Arduino UNO:
#include <Wire.h> // Include the Wire library for I2C communication

#define MODULE_ADDRESS 0x3C // Replace with the module's I2C address

void setup() {
  Wire.begin(); // Initialize I2C communication
  Serial.begin(9600); // Start serial communication for debugging
  Serial.println("Initializing module...");

  // Send initialization command to the module
  Wire.beginTransmission(MODULE_ADDRESS);
  Wire.write(0x00); // Example command to initialize the module
  Wire.endTransmission();

  Serial.println("Module initialized.");
}

void loop() {
  // Example: Read data from the module
  Wire.requestFrom(MODULE_ADDRESS, 1); // Request 1 byte of data
  if (Wire.available()) {
    int data = Wire.read(); // Read the received data
    Serial.print("Data received: ");
    Serial.println(data);
  }

  delay(1000); // Wait for 1 second before the next read
}
Troubleshooting and FAQs
Common Issues and Solutions
Module Not Responding
- Cause: Incorrect wiring or power supply.
- Solution: Verify all connections and ensure the module is powered correctly.
Communication Failure
- Cause: Incorrect I2C address or UART baud rate.
- Solution: Check the module's datasheet for the correct address or baud rate and update your code accordingly.
Unstable Operation
- Cause: Electrical noise or insufficient power supply.
- Solution: Add decoupling capacitors and ensure the power supply can handle the module's current requirements.
FAQs
Q: Can I use a 5V module with a 3.3V microcontroller?
A: It depends on the module. Some modules have built-in level shifters, while others require external components to match voltage levels.
Q: How do I find the I2C address of my module?
A: Use an I2C scanner program to detect the module's address. Many Arduino examples include an I2C scanner sketch.
Q: Can I connect multiple modules to the same microcontroller?
A: Yes, as long as the modules use different addresses (for I2C) or separate communication pins (for UART/SPI).
By following this documentation, you can effectively integrate and troubleshoot a Módulo in your electronic projects.