Cirkit Designer Logo
Cirkit Designer
Your all-in-one circuit design IDE
Home / 
Component Documentation

How to Use Battery Level Indicator: Examples, Pinouts, and Specs

Image of Battery Level Indicator
Cirkit Designer LogoDesign with Battery Level Indicator in Cirkit Designer

Introduction

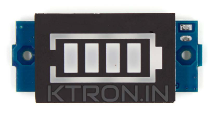
A battery level indicator is an essential device that allows users to monitor the charge status of a battery. It provides a visual representation, often through LEDs or an LCD display, indicating how much power remains before the battery needs recharging. This component is widely used in portable electronics, electric vehicles, and renewable energy systems to prevent unexpected power loss and to manage battery health effectively.

Explore Projects Built with Battery Level Indicator

Use Cirkit Designer to design, explore, and prototype these projects online. Some projects support real-time simulation. Click "Open Project" to start designing instantly!
Arduino Nano Battery Monitor with Bluetooth and LCD Display
Image of ard: A project utilizing Battery Level Indicator in a practical application
This circuit is a battery monitoring system using an Arduino Nano, which reads the battery voltage and displays it on an LCD screen. It also communicates the battery status via a Bluetooth module, lights up LEDs to indicate charge levels, and sounds a buzzer if the battery level falls below 30%.
Cirkit Designer LogoOpen Project in Cirkit Designer
Battery-Powered Li-ion Charger with Digital Volt/Ammeter and Buzzer Alert
Image of multimeter: A project utilizing Battery Level Indicator in a practical application
This circuit is a battery charging and monitoring system for a Li-ion battery using a TP4056 charger module. It includes a digital volt/ammeter to display the battery voltage and current, and features LEDs and a piezo buzzer for status indication. The circuit also incorporates switches for controlling the power and monitoring functions.
Cirkit Designer LogoOpen Project in Cirkit Designer
ESP32 Battery Voltage Monitor with OLED Display and Touch Sensor
Image of Battery Monitor: A project utilizing Battery Level Indicator in a practical application
This circuit is a battery-powered system that monitors and displays the battery voltage on a 0.96" OLED screen using an ESP32 microcontroller. It includes a TP4056 for battery charging, an MT3608 for voltage boosting, and a touch sensor for user interaction.
Cirkit Designer LogoOpen Project in Cirkit Designer
ESP32-WROOM Bluetooth-Enabled Battery-Powered Button Interface with OLED Display
Image of Bluetooth Page Turner: A project utilizing Battery Level Indicator in a practical application
This circuit is a Bluetooth-enabled battery monitoring and control system using an ESP32 microcontroller. It features multiple push buttons for user input, an OLED display for showing battery voltage and percentage, and a blue LED for status indication. The system also includes a LiPo charger/booster and a USB Type C power delivery module for power management.
Cirkit Designer LogoOpen Project in Cirkit Designer

Explore Projects Built with Battery Level Indicator

Use Cirkit Designer to design, explore, and prototype these projects online. Some projects support real-time simulation. Click "Open Project" to start designing instantly!
Image of ard: A project utilizing Battery Level Indicator in a practical application
Arduino Nano Battery Monitor with Bluetooth and LCD Display
This circuit is a battery monitoring system using an Arduino Nano, which reads the battery voltage and displays it on an LCD screen. It also communicates the battery status via a Bluetooth module, lights up LEDs to indicate charge levels, and sounds a buzzer if the battery level falls below 30%.
Cirkit Designer LogoOpen Project in Cirkit Designer
Image of multimeter: A project utilizing Battery Level Indicator in a practical application
Battery-Powered Li-ion Charger with Digital Volt/Ammeter and Buzzer Alert
This circuit is a battery charging and monitoring system for a Li-ion battery using a TP4056 charger module. It includes a digital volt/ammeter to display the battery voltage and current, and features LEDs and a piezo buzzer for status indication. The circuit also incorporates switches for controlling the power and monitoring functions.
Cirkit Designer LogoOpen Project in Cirkit Designer
Image of Battery Monitor: A project utilizing Battery Level Indicator in a practical application
ESP32 Battery Voltage Monitor with OLED Display and Touch Sensor
This circuit is a battery-powered system that monitors and displays the battery voltage on a 0.96" OLED screen using an ESP32 microcontroller. It includes a TP4056 for battery charging, an MT3608 for voltage boosting, and a touch sensor for user interaction.
Cirkit Designer LogoOpen Project in Cirkit Designer
Image of Bluetooth Page Turner: A project utilizing Battery Level Indicator in a practical application
ESP32-WROOM Bluetooth-Enabled Battery-Powered Button Interface with OLED Display
This circuit is a Bluetooth-enabled battery monitoring and control system using an ESP32 microcontroller. It features multiple push buttons for user input, an OLED display for showing battery voltage and percentage, and a blue LED for status indication. The system also includes a LiPo charger/booster and a USB Type C power delivery module for power management.
Cirkit Designer LogoOpen Project in Cirkit Designer

Common Applications and Use Cases

  • Portable electronic devices (e.g., mobile phones, laptops)
  • Electric vehicles (e.g., electric cars, e-bikes)
  • Renewable energy systems (e.g., solar power banks)
  • DIY electronics projects involving battery management

Technical Specifications

Key Technical Details

  • Voltage Range: The range of input voltage the indicator can measure.
  • Current Consumption: The amount of current the indicator itself consumes.
  • Accuracy: The precision of the battery level readings.
  • Display Type: The method of displaying the battery level (e.g., LED, LCD).
  • Operating Temperature: The range of temperatures over which the device can operate reliably.

Pin Configuration and Descriptions

Pin Number Name Description
1 VCC Connect to the positive terminal of the battery or power supply.
2 GND Connect to the ground terminal of the battery or power system.
3 BAT Connect to the battery's positive terminal for level sensing.
4 OUT Output pin that can be used to drive an external circuit or microcontroller.

Usage Instructions

How to Use the Component in a Circuit

  1. Connect Power: Attach the VCC and GND pins to your power supply or battery, ensuring that the voltage is within the specified range.
  2. Battery Sensing: Connect the BAT pin to the positive terminal of the battery you wish to monitor.
  3. Output Utilization: If your model has an OUT pin, you can connect it to a microcontroller or external circuit to take action based on the battery level.

Important Considerations and Best Practices

  • Voltage Matching: Ensure that the battery voltage is within the indicator's operating range to prevent damage.
  • Isolation: If using with sensitive electronics, consider isolating the battery level indicator to prevent noise interference.
  • Calibration: Some indicators may require calibration for accurate readings. Follow the manufacturer's instructions for this process.

Troubleshooting and FAQs

Common Issues Users Might Face

  • Inaccurate Readings: If the indicator shows incorrect levels, check for proper calibration and ensure that the connections are secure.
  • No Display: Ensure that the power supply is within the operating range and that all connections are correct.

Solutions and Tips for Troubleshooting

  • Check Connections: Loose or incorrect connections are often the cause of issues. Double-check all wiring.
  • Power Supply: Verify that the power supply is stable and within the specified voltage range.
  • Refer to Manufacturer's Guide: For model-specific issues, consult the documentation provided by the manufacturer.

FAQs

  • Q: Can I use the battery level indicator for any type of battery?
    • A: It depends on the indicator's voltage range and the type of battery. Always check compatibility before use.
  • Q: How do I know if my battery level indicator is calibrated correctly?
    • A: Compare the indicator's reading with a known, accurate voltage source or multimeter.

Example Code for Arduino UNO

// Code to read battery level from an analog battery level indicator
// and display it on the Arduino Serial Monitor.

const int batteryPin = A0; // Pin connected to the battery level indicator

void setup() {
  Serial.begin(9600);
}

void loop() {
  int sensorValue = analogRead(batteryPin); // Read the analog value
  float voltage = sensorValue * (5.0 / 1023.0); // Convert to voltage
  Serial.print("Battery Voltage: ");
  Serial.println(voltage);
  delay(1000); // Wait for a second before the next read
}

Note: The above code assumes that the battery level indicator's output is connected to an analog pin on the Arduino UNO and that the battery voltage does not exceed the microcontroller's maximum voltage rating. Adjust the code as necessary for your specific setup and ensure that any voltage levels are safe for your microcontroller.