Cirkit Designer Logo
Cirkit Designer
Your all-in-one circuit design IDE
Home / 
Component Documentation

How to Use Tofsense-M LIDAR: Examples, Pinouts, and Specs

Image of Tofsense-M LIDAR
Cirkit Designer LogoDesign with Tofsense-M LIDAR in Cirkit Designer

Introduction

The Tofsense-M LIDAR, manufactured by Nooploop, is a compact and high-performance Time-of-Flight (ToF) sensor designed for precise distance measurement and 3D mapping. By emitting light pulses and calculating the time it takes for the light to return after hitting an object, the Tofsense-M provides accurate and reliable distance data. Its small size, low power consumption, and high resolution make it ideal for applications in robotics, drones, autonomous vehicles, industrial automation, and smart devices.

Explore Projects Built with Tofsense-M LIDAR

Use Cirkit Designer to design, explore, and prototype these projects online. Some projects support real-time simulation. Click "Open Project" to start designing instantly!
Arduino UNO Controlled Dual TF LUNA LIDAR Distance Measurement System
Image of LIDAR_UNO: A project utilizing Tofsense-M LIDAR in a practical application
This circuit is designed to measure distances using two TF LUNA LIDAR sensors, which are interfaced with an Arduino UNO microcontroller via I2C communication. The Arduino is programmed to read distance measurements from the LIDAR sensors and output the data serially. The entire system is powered by a 5V battery, ensuring portability and ease of use.
Cirkit Designer LogoOpen Project in Cirkit Designer
ESP32-CAM and TF LUNA LIDAR Battery-Powered Distance Measurement System
Image of PBL: A project utilizing Tofsense-M LIDAR in a practical application
This circuit features an ESP32 CAM module interfaced with a TF LUNA LIDAR sensor for distance measurement. The ESP32 CAM provides power to the LIDAR sensor and facilitates communication via its RX and TX GPIOs. A Polymer Lithium Ion Battery powers the circuit through a Step Up Boost Converter that elevates the voltage to the required levels for the ESP32 CAM and LIDAR sensor.
Cirkit Designer LogoOpen Project in Cirkit Designer
Raspberry Pi 5 Controlled Robotic Vehicle with LIDAR and Camera Module
Image of Autonomous Car: A project utilizing Tofsense-M LIDAR in a practical application
This circuit features a Raspberry Pi 5 connected to a camera module and a TF LUNA LIDAR sensor for visual and distance sensing capabilities. A Mini 360 Buck Converter is used to regulate power from a Li-ion battery to the Raspberry Pi and an Adafruit Motor Shield, which controls four DC motors. The Arduino UNO microcontroller appears to be unused in the current configuration.
Cirkit Designer LogoOpen Project in Cirkit Designer
Raspberry Pi 5 Controlled Robotic Vehicle with LIDAR and IMU
Image of Rover: A project utilizing Tofsense-M LIDAR in a practical application
This circuit features a Raspberry Pi 5 as the central controller, interfaced with a TF LUNA LIDAR sensor for distance measurement and an MPU-6050 for motion tracking via I2C communication. It also includes two L298 motor drivers powered by a 12V battery to control four DC motors, with the Raspberry Pi's GPIO pins used to manage the direction and speed of the motors.
Cirkit Designer LogoOpen Project in Cirkit Designer

Explore Projects Built with Tofsense-M LIDAR

Use Cirkit Designer to design, explore, and prototype these projects online. Some projects support real-time simulation. Click "Open Project" to start designing instantly!
Image of LIDAR_UNO: A project utilizing Tofsense-M LIDAR in a practical application
Arduino UNO Controlled Dual TF LUNA LIDAR Distance Measurement System
This circuit is designed to measure distances using two TF LUNA LIDAR sensors, which are interfaced with an Arduino UNO microcontroller via I2C communication. The Arduino is programmed to read distance measurements from the LIDAR sensors and output the data serially. The entire system is powered by a 5V battery, ensuring portability and ease of use.
Cirkit Designer LogoOpen Project in Cirkit Designer
Image of PBL: A project utilizing Tofsense-M LIDAR in a practical application
ESP32-CAM and TF LUNA LIDAR Battery-Powered Distance Measurement System
This circuit features an ESP32 CAM module interfaced with a TF LUNA LIDAR sensor for distance measurement. The ESP32 CAM provides power to the LIDAR sensor and facilitates communication via its RX and TX GPIOs. A Polymer Lithium Ion Battery powers the circuit through a Step Up Boost Converter that elevates the voltage to the required levels for the ESP32 CAM and LIDAR sensor.
Cirkit Designer LogoOpen Project in Cirkit Designer
Image of Autonomous Car: A project utilizing Tofsense-M LIDAR in a practical application
Raspberry Pi 5 Controlled Robotic Vehicle with LIDAR and Camera Module
This circuit features a Raspberry Pi 5 connected to a camera module and a TF LUNA LIDAR sensor for visual and distance sensing capabilities. A Mini 360 Buck Converter is used to regulate power from a Li-ion battery to the Raspberry Pi and an Adafruit Motor Shield, which controls four DC motors. The Arduino UNO microcontroller appears to be unused in the current configuration.
Cirkit Designer LogoOpen Project in Cirkit Designer
Image of Rover: A project utilizing Tofsense-M LIDAR in a practical application
Raspberry Pi 5 Controlled Robotic Vehicle with LIDAR and IMU
This circuit features a Raspberry Pi 5 as the central controller, interfaced with a TF LUNA LIDAR sensor for distance measurement and an MPU-6050 for motion tracking via I2C communication. It also includes two L298 motor drivers powered by a 12V battery to control four DC motors, with the Raspberry Pi's GPIO pins used to manage the direction and speed of the motors.
Cirkit Designer LogoOpen Project in Cirkit Designer

Common Applications

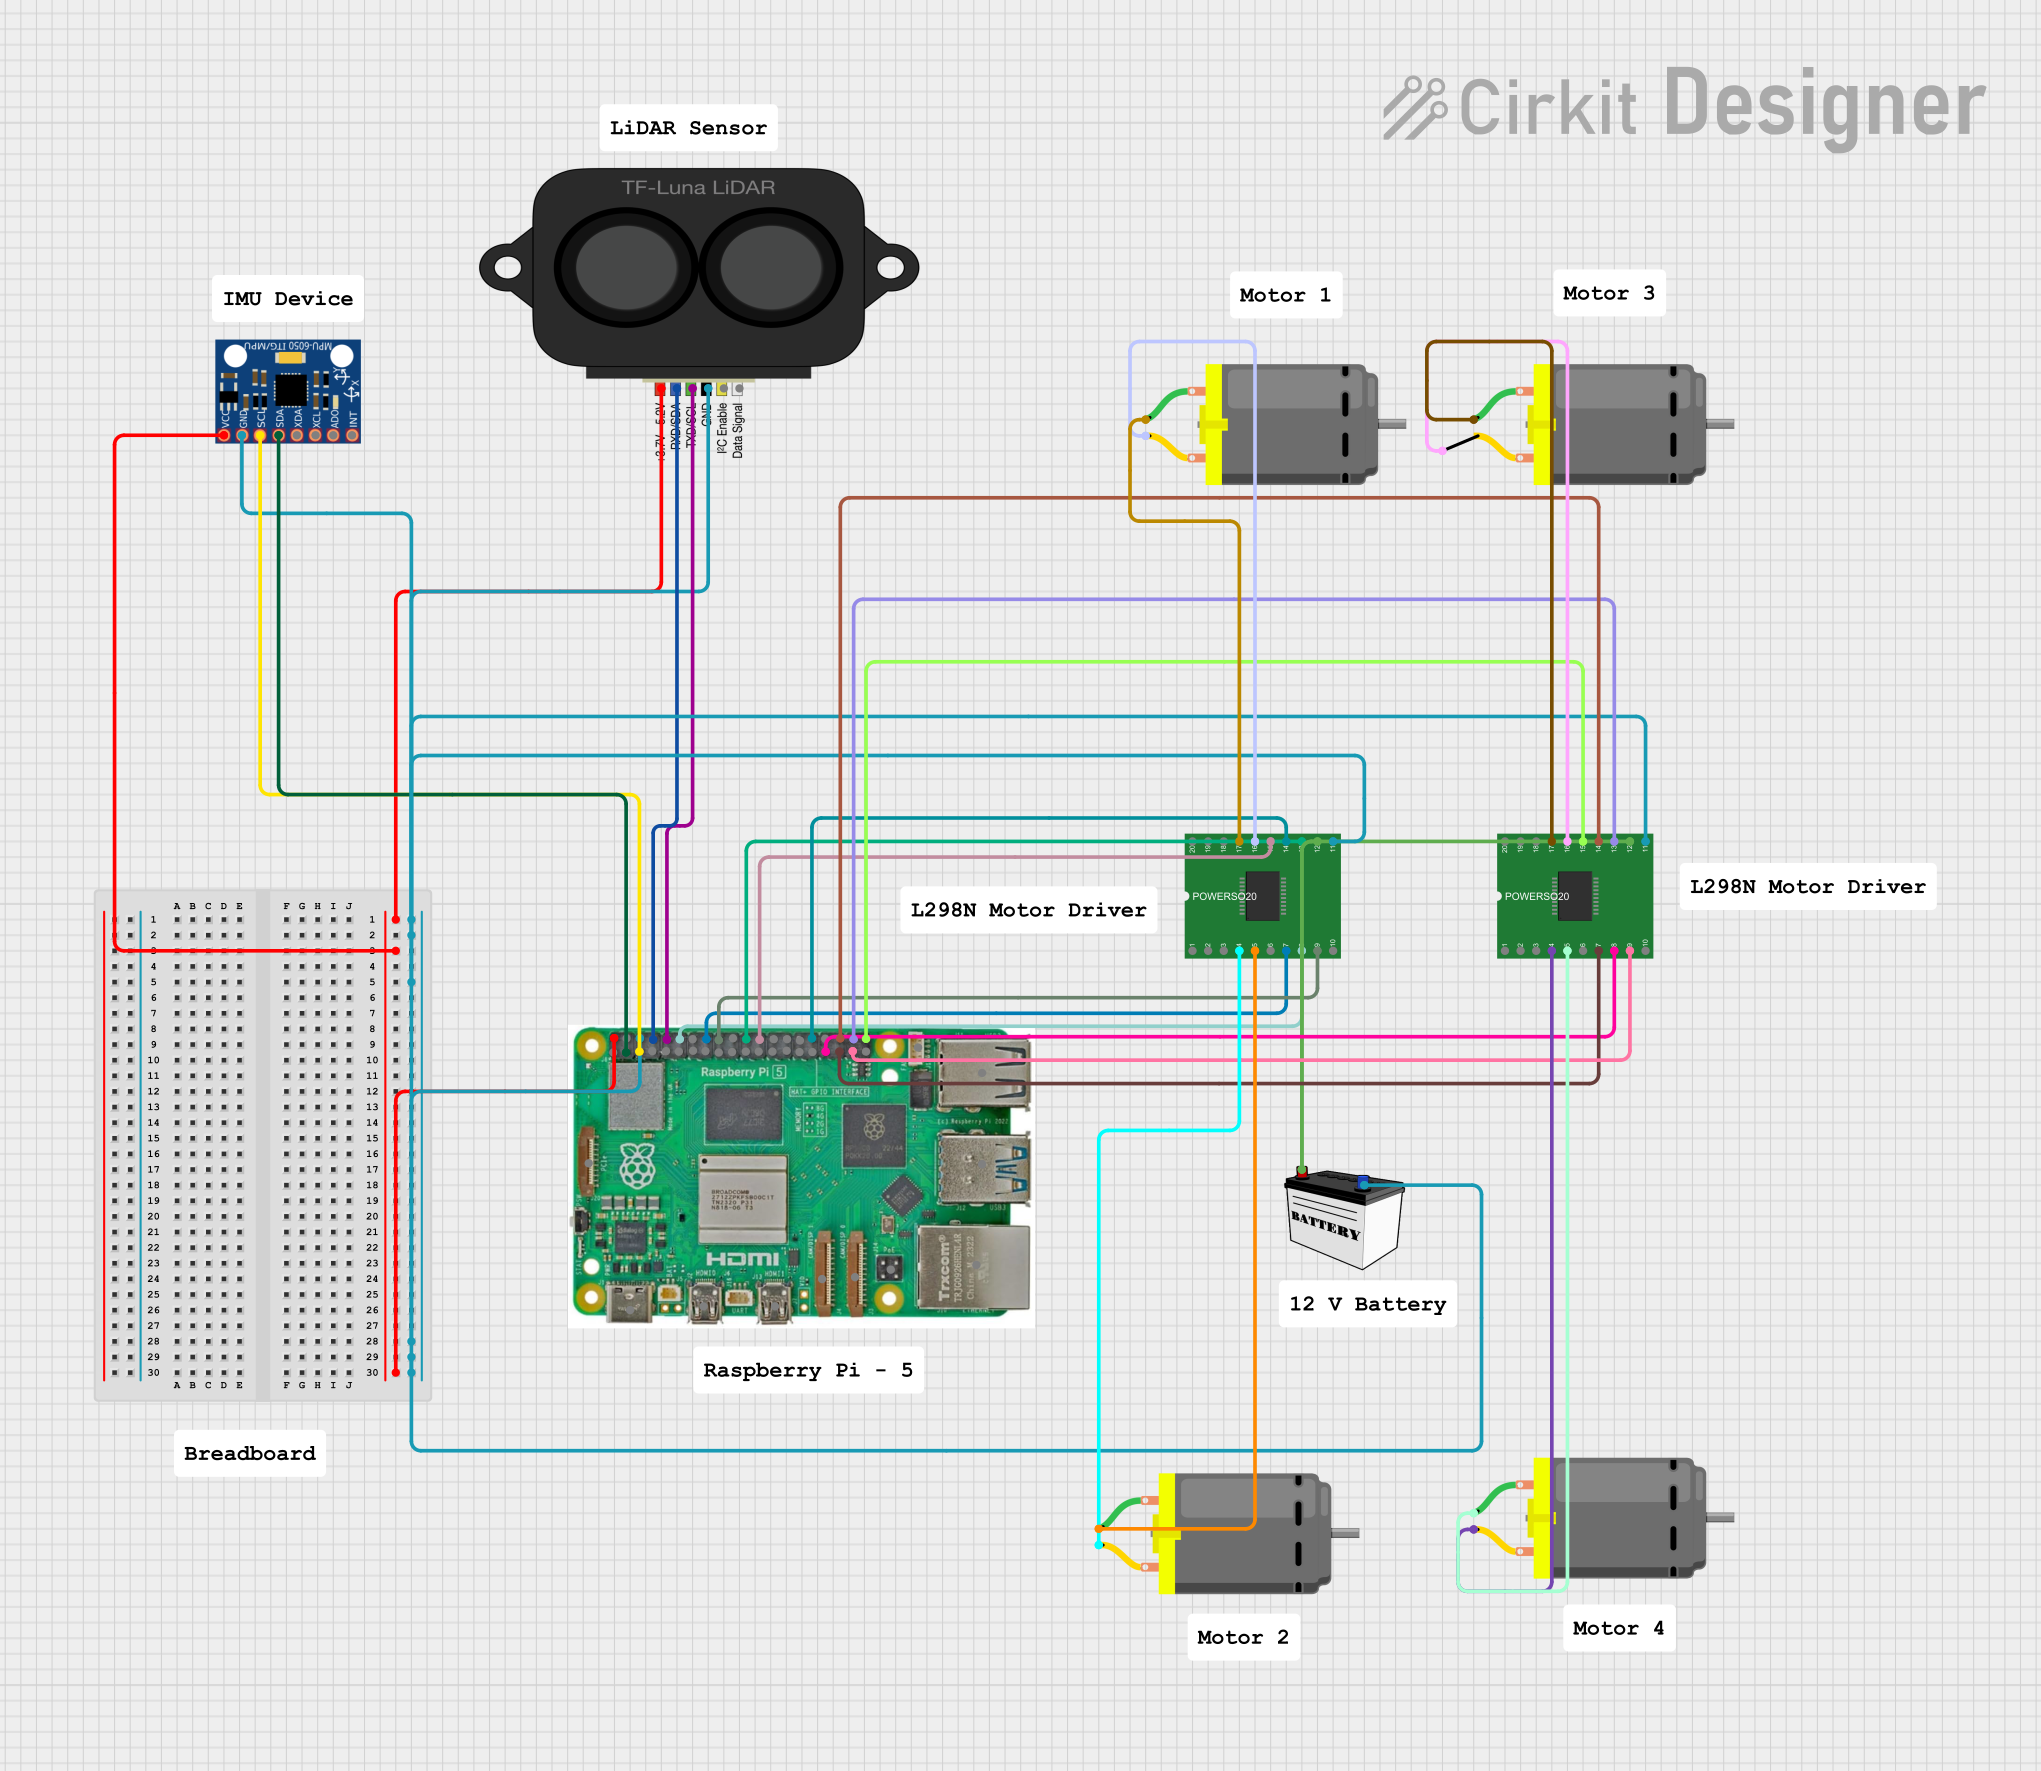
  • Obstacle detection and avoidance in robotics and drones
  • 3D mapping and environmental scanning
  • Industrial automation and object positioning
  • Smart home devices for motion detection and presence sensing
  • Autonomous vehicle navigation and collision avoidance

Technical Specifications

The Tofsense-M LIDAR is designed to deliver high accuracy and performance in a variety of environments. Below are its key technical specifications:

Parameter Specification
Measurement Range 0.1 m to 6 m
Accuracy ±2 cm
Resolution 1 mm
Field of View (FoV) 27°
Operating Voltage 5 V DC
Power Consumption ≤ 0.5 W
Communication Interface UART (3.3V TTL)
Operating Temperature -10°C to 60°C
Dimensions 30 mm × 30 mm × 12 mm
Weight 10 g

Pin Configuration

The Tofsense-M LIDAR features a 4-pin interface for power and communication. The pinout is as follows:

Pin Name Description
1 VCC Power supply input (5 V DC)
2 GND Ground
3 TX UART Transmit (3.3V TTL)
4 RX UART Receive (3.3V TTL)

Usage Instructions

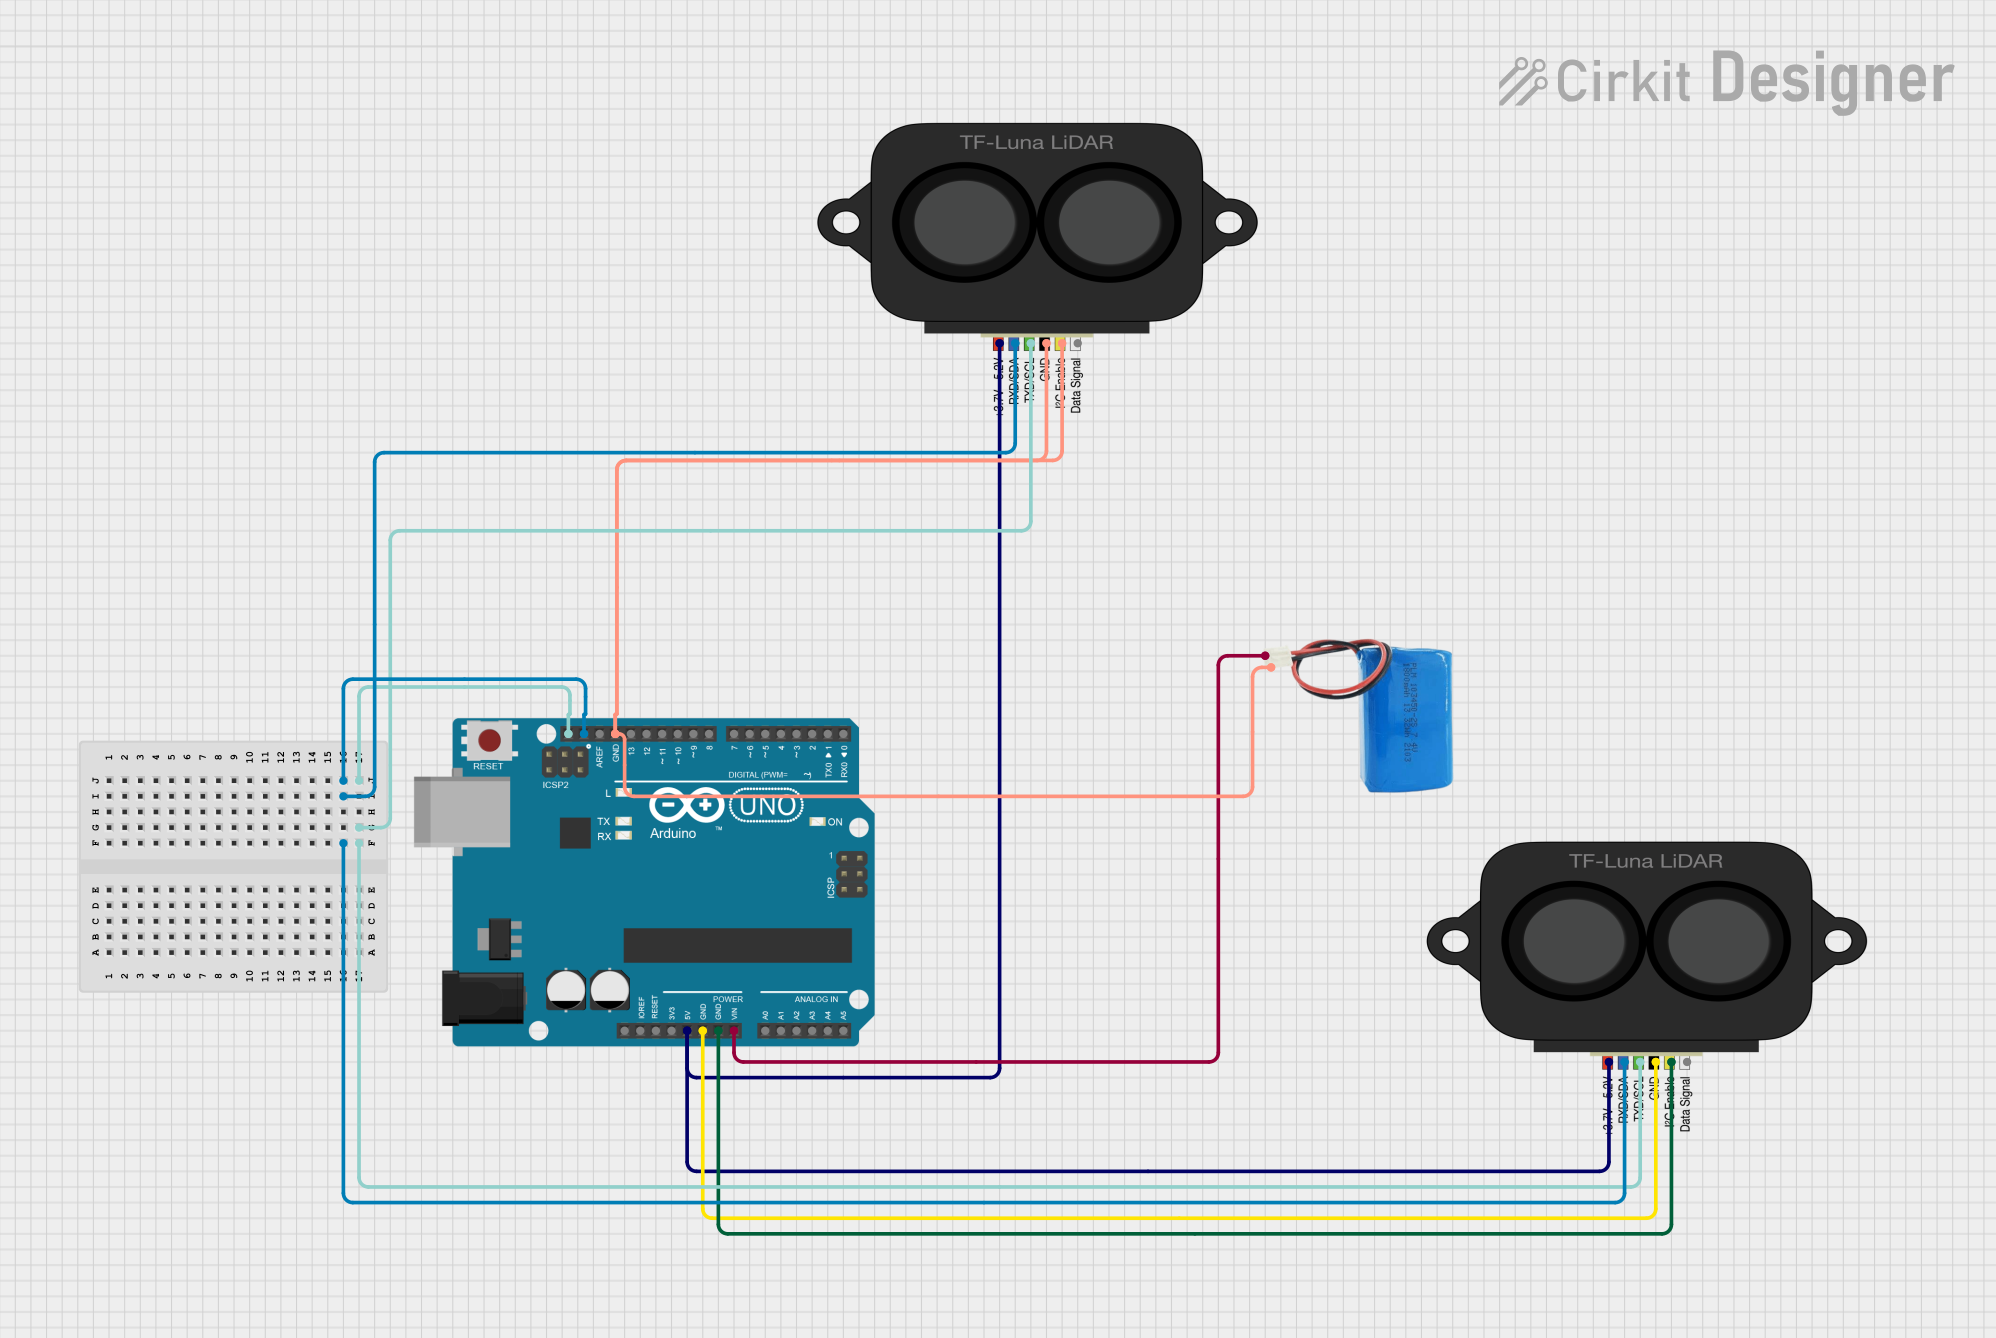
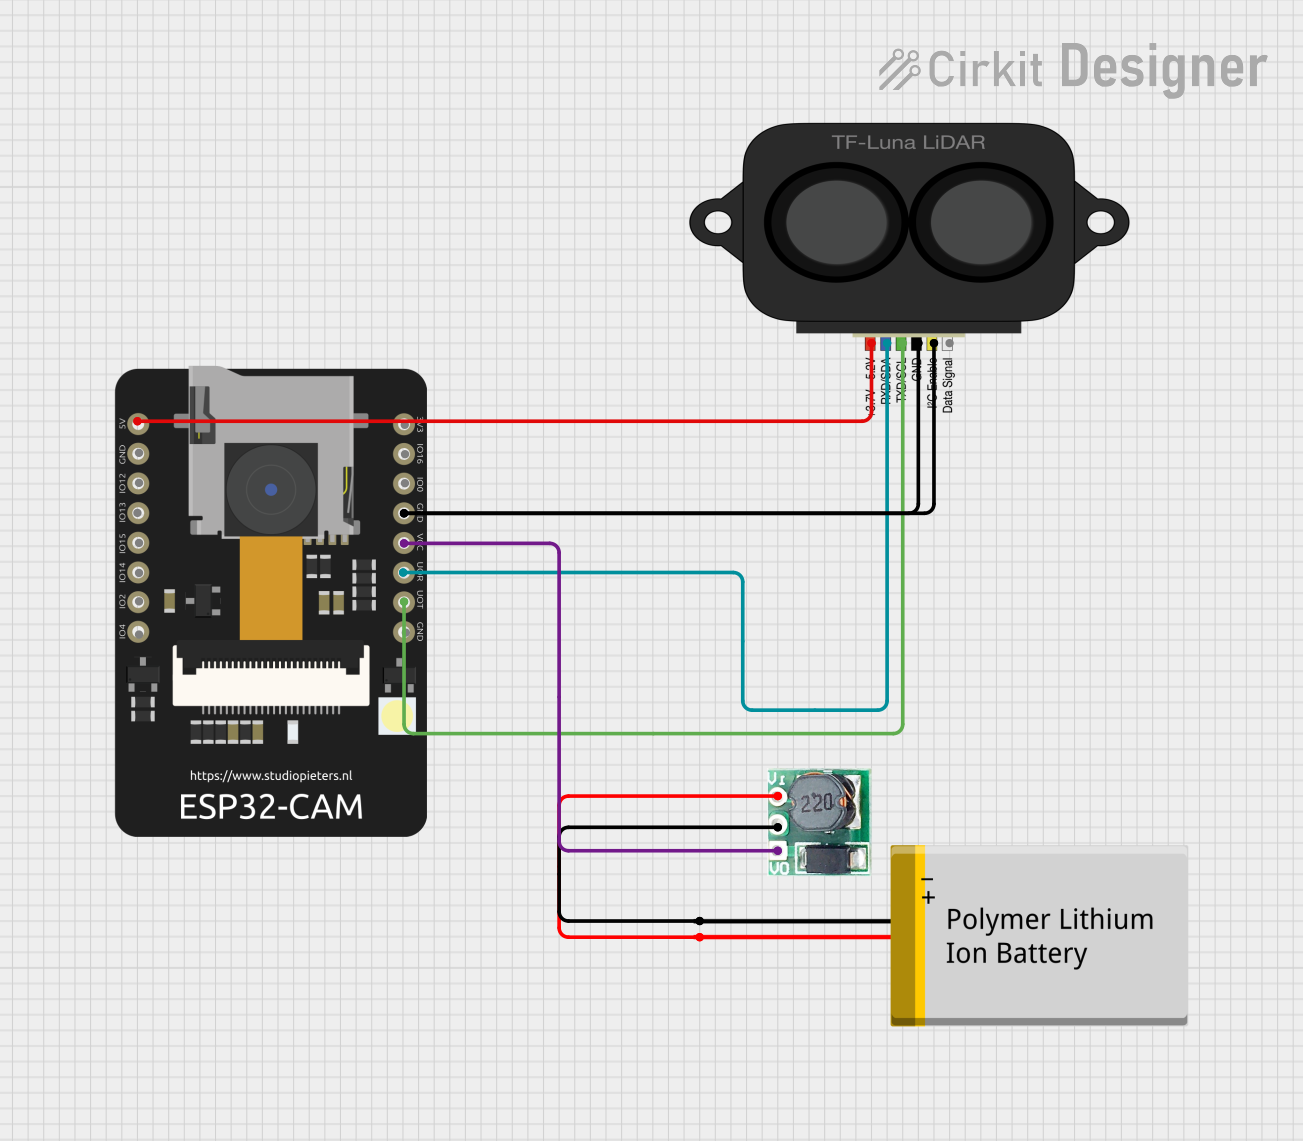
Connecting the Tofsense-M LIDAR

To use the Tofsense-M LIDAR in a circuit, follow these steps:

  1. Connect the VCC pin to a 5V power source.
  2. Connect the GND pin to the ground of your circuit.
  3. Connect the TX pin of the Tofsense-M to the RX pin of your microcontroller (e.g., Arduino UNO).
  4. Connect the RX pin of the Tofsense-M to the TX pin of your microcontroller.

Important Considerations

  • Ensure that the UART communication voltage level is 3.3V. If your microcontroller operates at 5V logic, use a level shifter to avoid damaging the sensor.
  • Avoid exposing the sensor to direct sunlight or highly reflective surfaces, as this may affect measurement accuracy.
  • Mount the sensor securely to minimize vibrations, which can interfere with readings.

Example Code for Arduino UNO

Below is an example Arduino sketch to interface with the Tofsense-M LIDAR and read distance data:

#include <SoftwareSerial.h>

// Define the RX and TX pins for SoftwareSerial
SoftwareSerial lidarSerial(10, 11); // RX = Pin 10, TX = Pin 11

void setup() {
  Serial.begin(9600);               // Initialize Serial Monitor at 9600 baud
  lidarSerial.begin(115200);        // Initialize LIDAR communication at 115200 baud
  Serial.println("Tofsense-M LIDAR Initialized");
}

void loop() {
  if (lidarSerial.available()) {    // Check if data is available from the LIDAR
    String distanceData = "";       // Variable to store the received data
    while (lidarSerial.available()) {
      char c = lidarSerial.read();  // Read each character from the LIDAR
      distanceData += c;            // Append the character to the data string
    }
    Serial.print("Distance: ");     // Print the distance data to the Serial Monitor
    Serial.println(distanceData);
  }
  delay(100);                       // Add a small delay to avoid flooding the Serial Monitor
}

Notes on the Code

  • The SoftwareSerial library is used to communicate with the Tofsense-M LIDAR on pins 10 and 11 of the Arduino UNO.
  • Ensure the LIDAR's baud rate matches the one specified in the code (115200 in this case).
  • Use the Serial Monitor to view the distance data in real time.

Troubleshooting and FAQs

Common Issues

  1. No Data Received from the Sensor

    • Verify the wiring connections, especially the TX and RX pins.
    • Ensure the baud rate in your code matches the LIDAR's default baud rate (115200).
    • Check if the sensor is powered correctly (5V on the VCC pin).
  2. Inaccurate or Fluctuating Measurements

    • Avoid placing the sensor near highly reflective or transparent surfaces.
    • Ensure the sensor is mounted securely to reduce vibrations.
    • Check for obstructions in the sensor's field of view.
  3. Communication Errors

    • If using a 5V microcontroller, ensure a level shifter is used for the UART pins.
    • Verify that the UART pins are not swapped (TX to RX and RX to TX).

FAQs

Q: Can the Tofsense-M LIDAR measure distances beyond 6 meters?
A: No, the maximum measurement range of the Tofsense-M is 6 meters. For longer ranges, consider other LIDAR models.

Q: Is the Tofsense-M suitable for outdoor use?
A: The Tofsense-M can operate in outdoor environments, but direct sunlight or extreme temperatures may affect its performance.

Q: Can I use multiple Tofsense-M sensors in the same system?
A: Yes, but ensure each sensor has a unique communication channel or address to avoid conflicts.

By following this documentation, you can effectively integrate the Tofsense-M LIDAR into your projects and troubleshoot common issues with ease.