How to Use MCB 1 Phase schneider: Examples, Pinouts, and Specs

Introduction
The MCB 1 Phase Schneider is a miniature circuit breaker designed for single-phase electrical circuits. Manufactured by Schneider Electric, this component provides automatic protection by disconnecting the circuit in the event of an overload or short circuit. It ensures safety and reliability in residential, commercial, and industrial electrical installations.
Explore Projects Built with MCB 1 Phase schneider
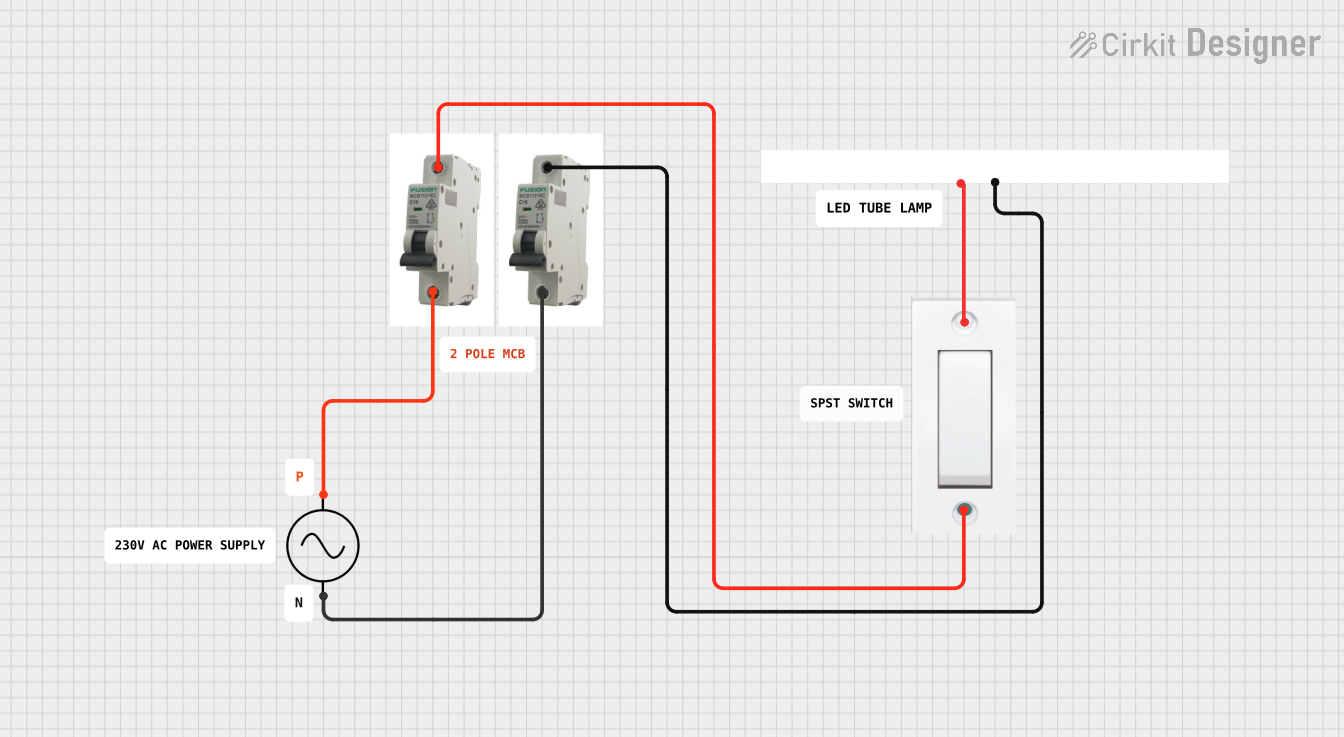
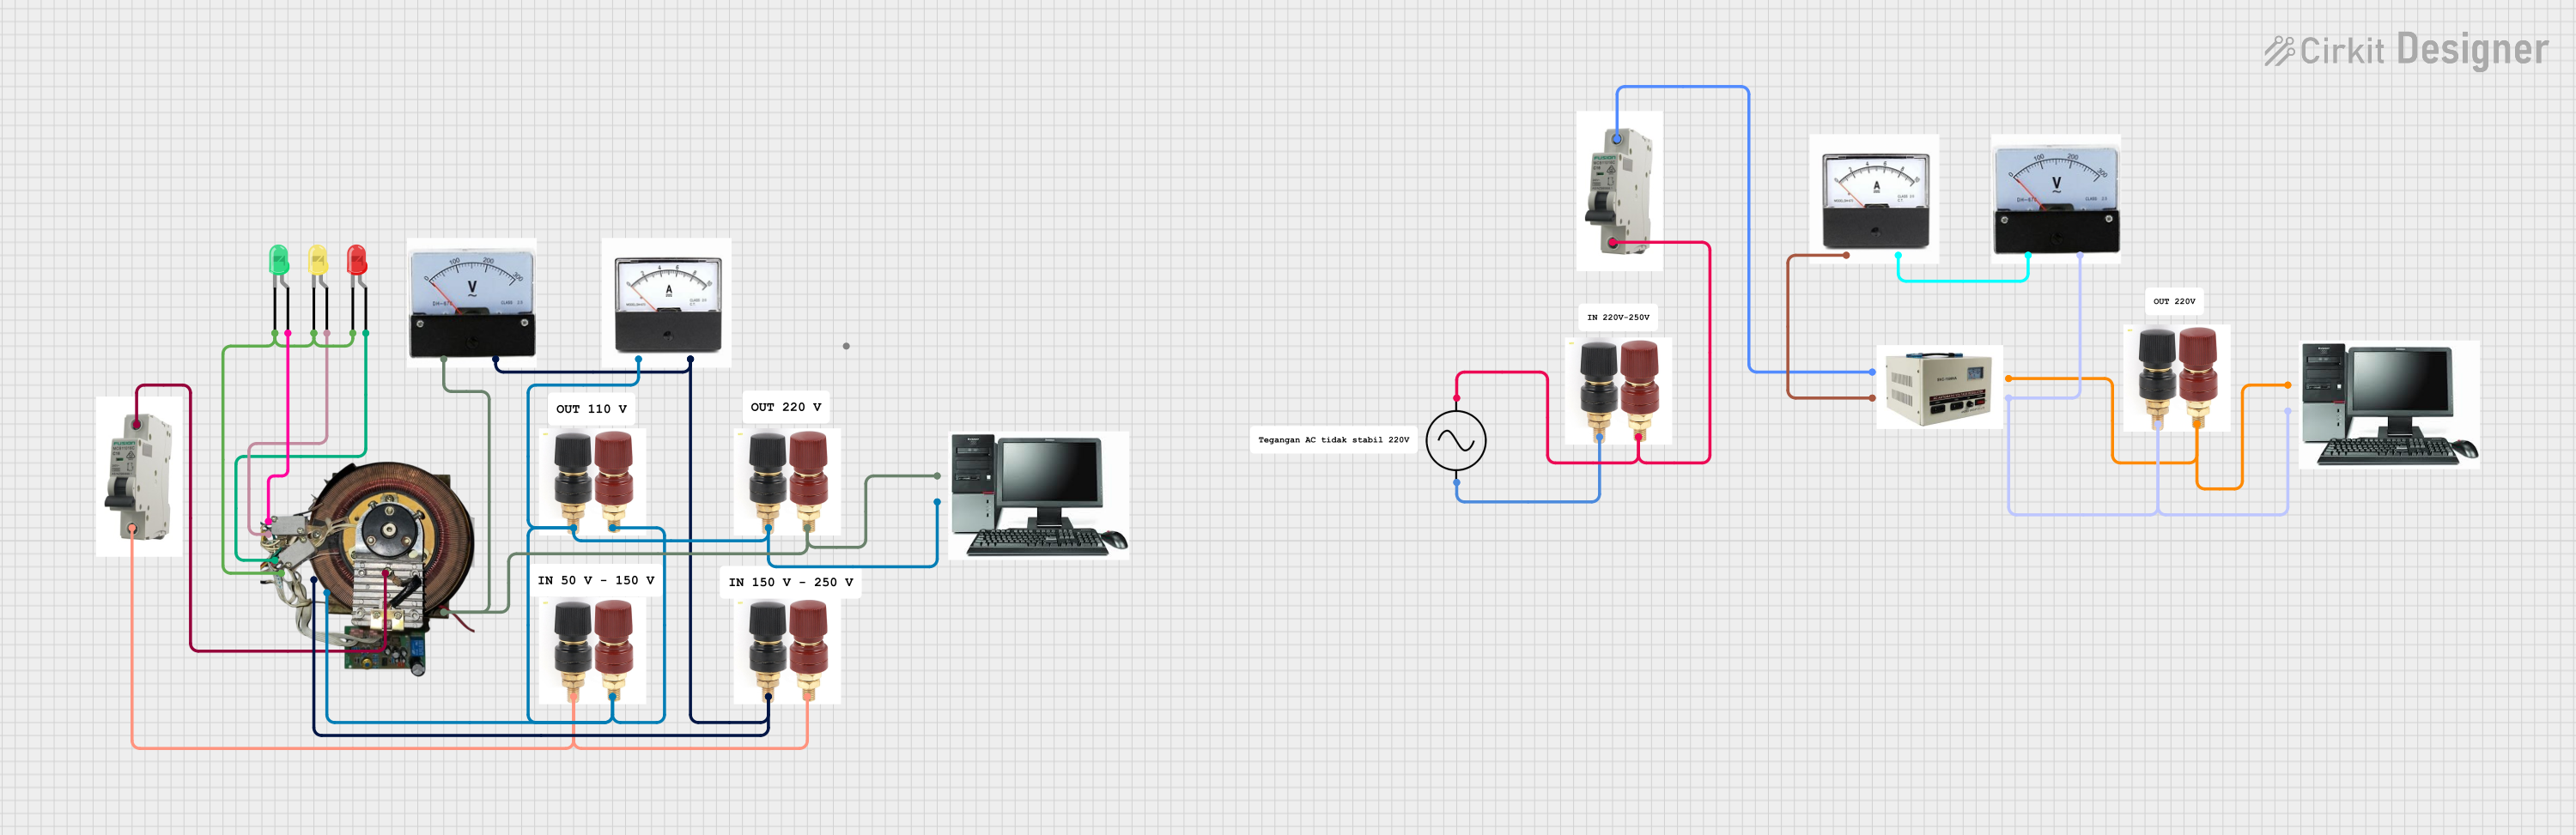

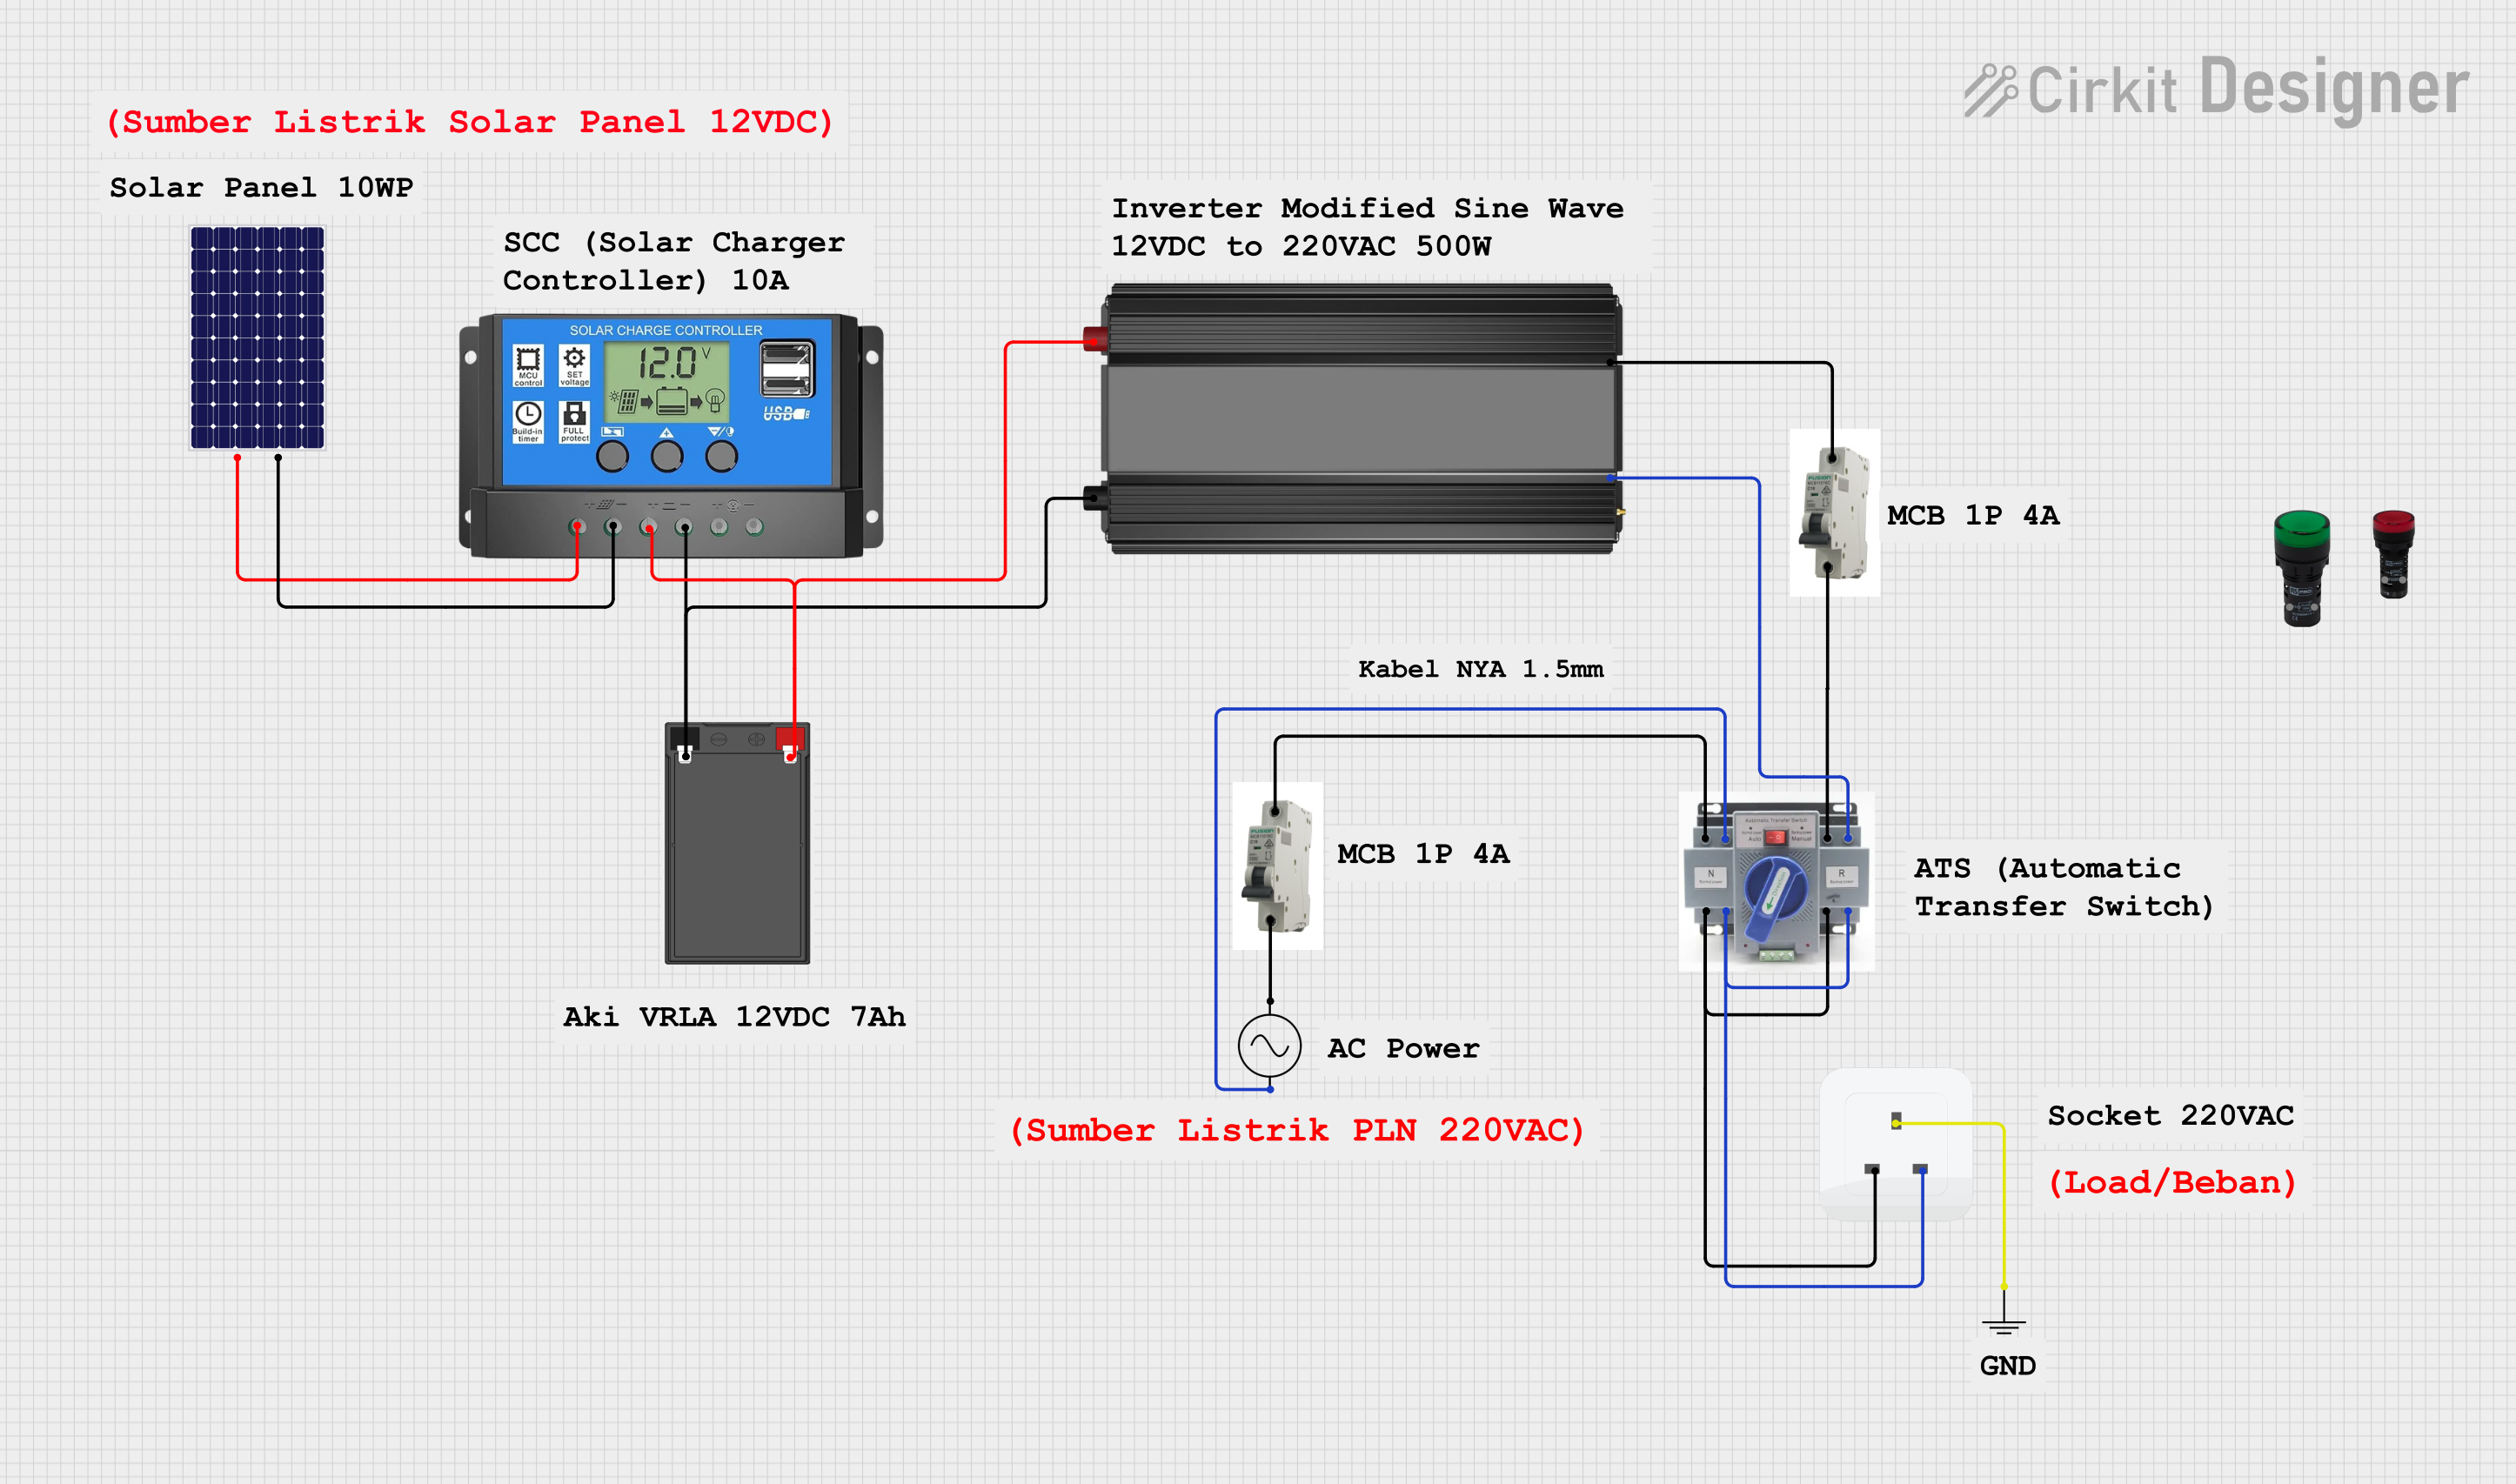
Explore Projects Built with MCB 1 Phase schneider
Common Applications and Use Cases
- Protection of single-phase electrical circuits in homes and offices
- Overload and short circuit protection for lighting and power outlets
- Use in distribution boards for residential and commercial buildings
- Industrial applications requiring single-phase circuit protection
Technical Specifications
The following table outlines the key technical specifications of the MCB 1 Phase Schneider:
| Parameter | Value |
|---|---|
| Manufacturer | Schneider Electric |
| Part ID | MCB 1 Phase Schneider |
| Rated Voltage | 230/240 V AC |
| Rated Current | 6 A, 10 A, 16 A, 20 A, 32 A, 40 A (varies by model) |
| Breaking Capacity | 6 kA |
| Number of Poles | 1 (Single Phase) |
| Tripping Curve | B, C, or D (depending on application) |
| Frequency | 50/60 Hz |
| Mounting Type | DIN Rail |
| Operating Temperature | -5°C to +55°C |
| Standards Compliance | IEC 60898-1 |
Pin Configuration and Descriptions
The MCB 1 Phase Schneider does not have traditional pins but instead features terminal connections for input and output wiring. The table below describes the terminal configuration:
| Terminal | Description |
|---|---|
| Line (Input) | Connects to the incoming live wire from the power source. |
| Load (Output) | Connects to the outgoing live wire to the protected circuit. |
| Neutral | Not applicable (neutral wire bypasses the MCB). |
Usage Instructions
How to Use the MCB in a Circuit
Mounting the MCB:
- Install the MCB on a standard DIN rail inside a distribution board or enclosure.
- Ensure the MCB is securely locked into place.
Wiring the MCB:
- Connect the incoming live wire (line) to the input terminal of the MCB.
- Connect the outgoing live wire (load) to the output terminal of the MCB.
- Ensure all connections are tight and secure to prevent loose contacts.
Testing the MCB:
- After installation, switch on the MCB and test its functionality by simulating an overload or short circuit condition.
- Verify that the MCB trips and disconnects the circuit as expected.
Resetting the MCB:
- After a trip, switch the MCB to the "OFF" position.
- Identify and resolve the cause of the overload or short circuit.
- Switch the MCB back to the "ON" position to restore power.
Important Considerations and Best Practices
- Always ensure the MCB's rated current matches the load requirements of the circuit.
- Use the appropriate tripping curve (B, C, or D) based on the application:
- B Curve: For residential and light commercial loads.
- C Curve: For moderate inductive loads like motors.
- D Curve: For heavy inductive loads with high inrush currents.
- Avoid exceeding the MCB's rated voltage and current to prevent damage.
- Regularly inspect the MCB for signs of wear, damage, or overheating.
- Ensure proper grounding of the electrical system for safety.
Arduino UNO Integration
The MCB 1 Phase Schneider is not directly compatible with Arduino UNO or other microcontrollers, as it is designed for high-voltage AC circuits. However, it can be used in conjunction with relays or sensors to monitor and control electrical circuits indirectly.
For example, you can use a current sensor with an Arduino to monitor the load on a circuit protected by the MCB. Below is a sample Arduino code snippet for monitoring current using a current sensor:
// Include necessary libraries
#include <Wire.h>

// Define the analog pin connected to the current sensor
const int currentSensorPin = A0;

// Define a threshold for overload detection (adjust as needed)
const float overloadThreshold = 10.0; // Example: 10 Amps

void setup() {
  Serial.begin(9600); // Initialize serial communication
  pinMode(currentSensorPin, INPUT); // Set the sensor pin as input
}

void loop() {
  // Read the analog value from the current sensor
  int sensorValue = analogRead(currentSensorPin);

  // Convert the sensor value to current (adjust the formula for your sensor)
  float current = sensorValue * (5.0 / 1023.0) * 20.0;
  // Example: Assuming a sensor with 20A max range and 5V output

  // Print the current value to the serial monitor
  Serial.print("Current: ");
  Serial.print(current);
  Serial.println(" A");

  // Check if the current exceeds the overload threshold
  if (current > overloadThreshold) {
    Serial.println("Overload detected! Take action.");
    // Add code here to trigger an alert or take corrective action
  }

  delay(1000); // Wait for 1 second before the next reading
}
Troubleshooting and FAQs
Common Issues and Solutions
MCB Trips Frequently:
- Cause: Overload or short circuit in the connected circuit.
- Solution: Check the connected devices and wiring for faults. Ensure the total load does not exceed the MCB's rated current.
MCB Does Not Trip During a Fault:
- Cause: Faulty MCB or incorrect installation.
- Solution: Verify the wiring and ensure the MCB is functioning correctly. Replace the MCB if necessary.
MCB Feels Hot to the Touch:
- Cause: Loose connections or excessive load.
- Solution: Tighten all terminal connections and reduce the load on the circuit.
Difficulty Resetting the MCB:
- Cause: Persistent fault in the circuit.
- Solution: Identify and resolve the fault before attempting to reset the MCB.
FAQs
Q1: Can the MCB 1 Phase Schneider be used for DC circuits?
A1: No, this MCB is designed for AC circuits only. For DC applications, use a DC-rated circuit breaker.
Q2: How do I choose the correct MCB rating for my circuit?
A2: Calculate the total load current of the circuit and select an MCB with a slightly higher rated current. Ensure the MCB's tripping curve matches the application.
Q3: Can I use this MCB for three-phase circuits?
A3: No, this is a single-phase MCB. For three-phase circuits, use a three-phase MCB.
Q4: How often should I inspect the MCB?
A4: Perform a visual inspection every 6-12 months and test its functionality annually to ensure proper operation.