How to Use front light: Examples, Pinouts, and Specs

Introduction
A front light is an essential electrical component commonly used in various devices and vehicles to provide illumination. It is designed to enhance visibility in the dark and is often used in applications such as bicycle headlights, car headlamps, flashlights, and portable lighting devices. The front light can come in various forms, including LED, halogen, and incandescent bulbs, each with its own set of characteristics suitable for different applications.
Explore Projects Built with front light
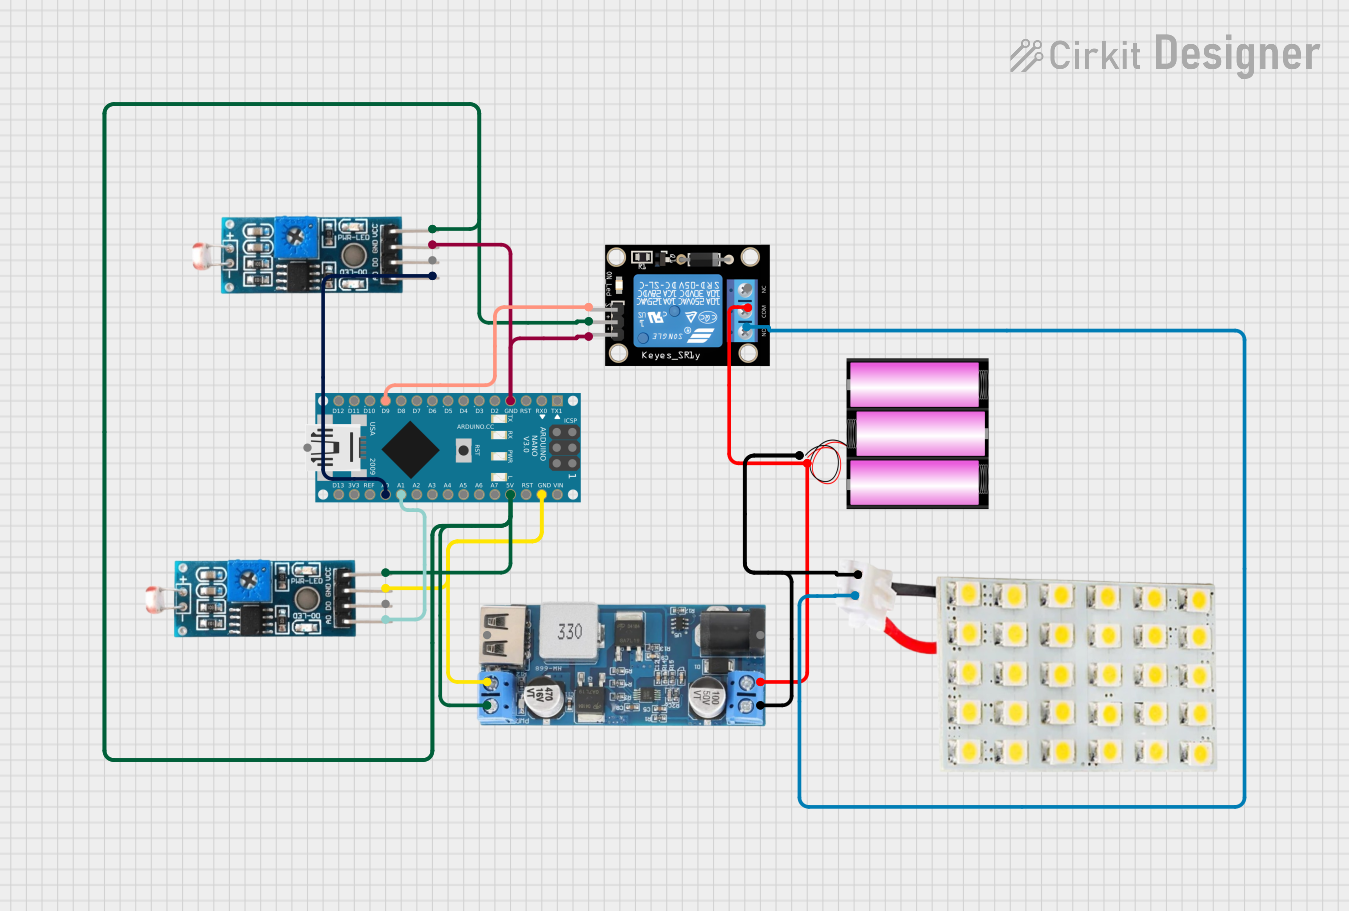

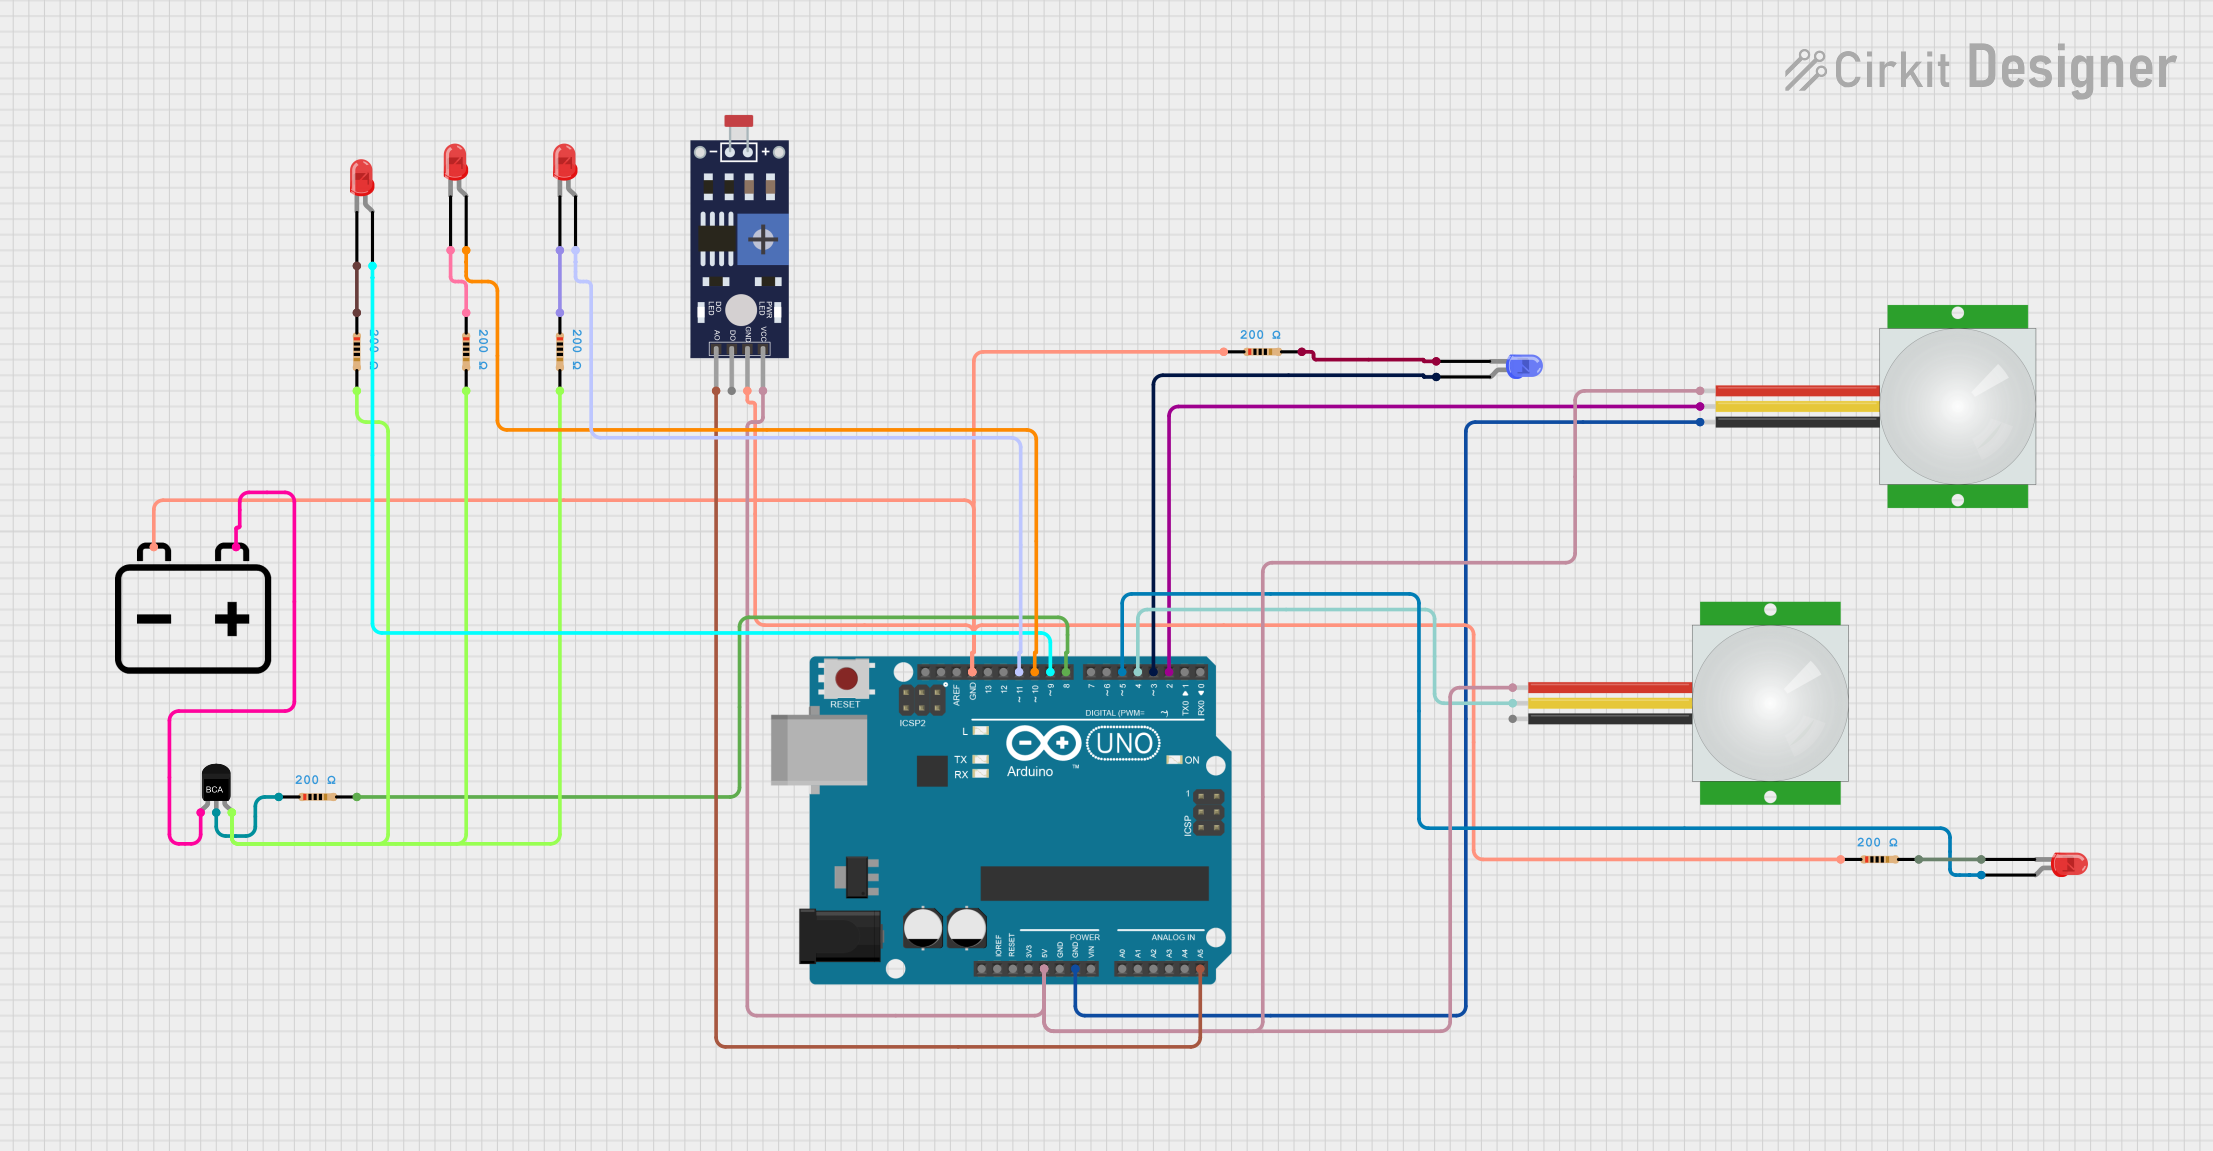

Explore Projects Built with front light
Technical Specifications
General Characteristics
- Type of Light: LED / Halogen / Incandescent (Specify as per the model)
- Luminous Intensity: Measured in lumens (lm)
- Color Temperature: Measured in Kelvin (K)
- Power Consumption: Measured in watts (W)
- Rated Voltage: Measured in volts (V)
- Rated Current: Measured in amperes (A)
- Lifespan: Measured in hours (h)
Pin Configuration and Descriptions
| Pin Number | Description | Voltage (V) | Current (A) |
|---|---|---|---|
| 1 | Power (+) | X.X | X.X |
| 2 | Ground (-) | 0 | X.X |
Replace X.X with the appropriate values for the specific front light model.
Usage Instructions
Connecting to a Circuit
- Power Supply: Ensure that the power supply matches the rated voltage and current of the front light.
- Wiring: Connect the positive terminal of the power supply to Pin 1 (Power +) and the negative terminal to Pin 2 (Ground -).
- Switch: Incorporate a switch between the power supply and the front light to control the on/off state.
Best Practices
- Use a current-limiting resistor if the front light is an LED and the power supply exceeds the rated forward voltage.
- Ensure proper heat dissipation for high-power front lights to prevent overheating.
- Use appropriate connectors and ensure secure connections to prevent short circuits.
Example Code for Arduino UNO
// Define the pin connected to the front light
const int frontLightPin = 9; // PWM pin for dimming capability

void setup() {
  // Set the front light pin as an output
  pinMode(frontLightPin, OUTPUT);
}

void loop() {
  // Turn on the front light at full brightness
  analogWrite(frontLightPin, 255);
  delay(5000); // Keep the light on for 5 seconds

  // Dim the front light to half brightness
  analogWrite(frontLightPin, 127);
  delay(5000); // Keep the light dimmed for 5 seconds

  // Turn off the front light
  analogWrite(frontLightPin, 0);
  delay(5000); // Keep the light off for 5 seconds
}
Note: The above code assumes the use of a PWM-capable pin for dimming an LED front light. If the front light is not dimmable or not an LED, use digitalWrite(frontLightPin, HIGH) or digitalWrite(frontLightPin, LOW) for on and off states, respectively.
Troubleshooting and FAQs
Common Issues
- Light Not Turning On: Check connections, ensure power supply is at the correct voltage and current, and verify that the front light is not damaged.
- Flickering Light: Ensure stable power supply and check for loose connections.
- Overheating: Ensure adequate heat dissipation and check if the current exceeds the rated specification.
FAQs
Q: Can I use a higher voltage power supply with the front light? A: No, using a higher voltage than the rated specification can damage the front light.
Q: Is it necessary to use a current-limiting resistor with an LED front light? A: Yes, to prevent damage to the LED, a current-limiting resistor is recommended if the power supply voltage exceeds the LED's forward voltage.
Q: How can I adjust the brightness of the front light?
A: For LED front lights, use a PWM-capable pin and the analogWrite() function to adjust brightness. For other types of lights, a variable resistor or a dedicated dimmer circuit may be required.
This documentation provides a general overview and technical details for a front light component. For specific models, refer to the manufacturer's datasheet for precise information.