How to Use PS2 Controller Receiver: Examples, Pinouts, and Specs
Introduction
The PS2 Controller Receiver is a device designed to receive signals from a PlayStation 2 (PS2) controller. It acts as an intermediary, enabling the controller to communicate with a computer, gaming console, or microcontroller for input control. This component is widely used in gaming setups, robotics, and DIY projects where precise input control is required.
Explore Projects Built with PS2 Controller Receiver

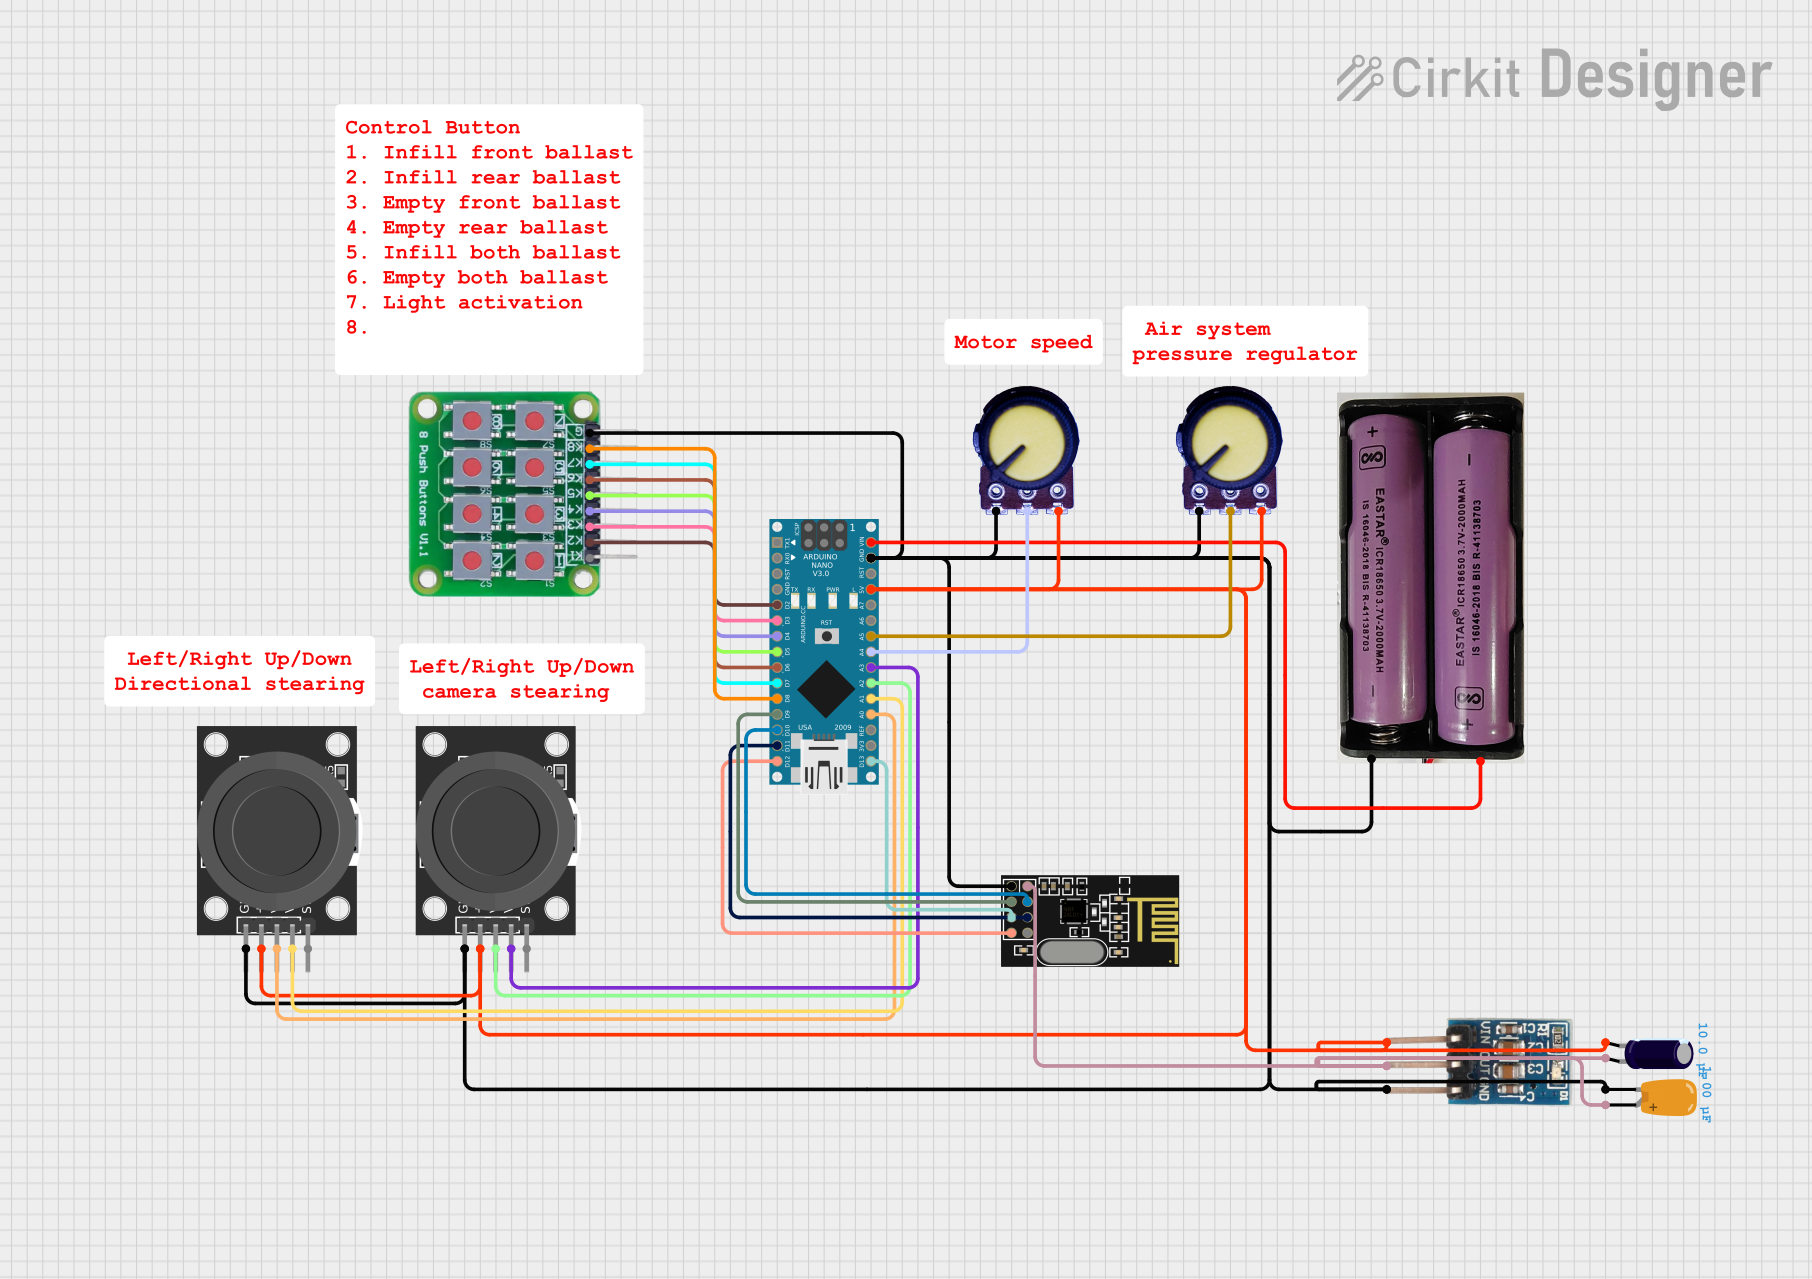
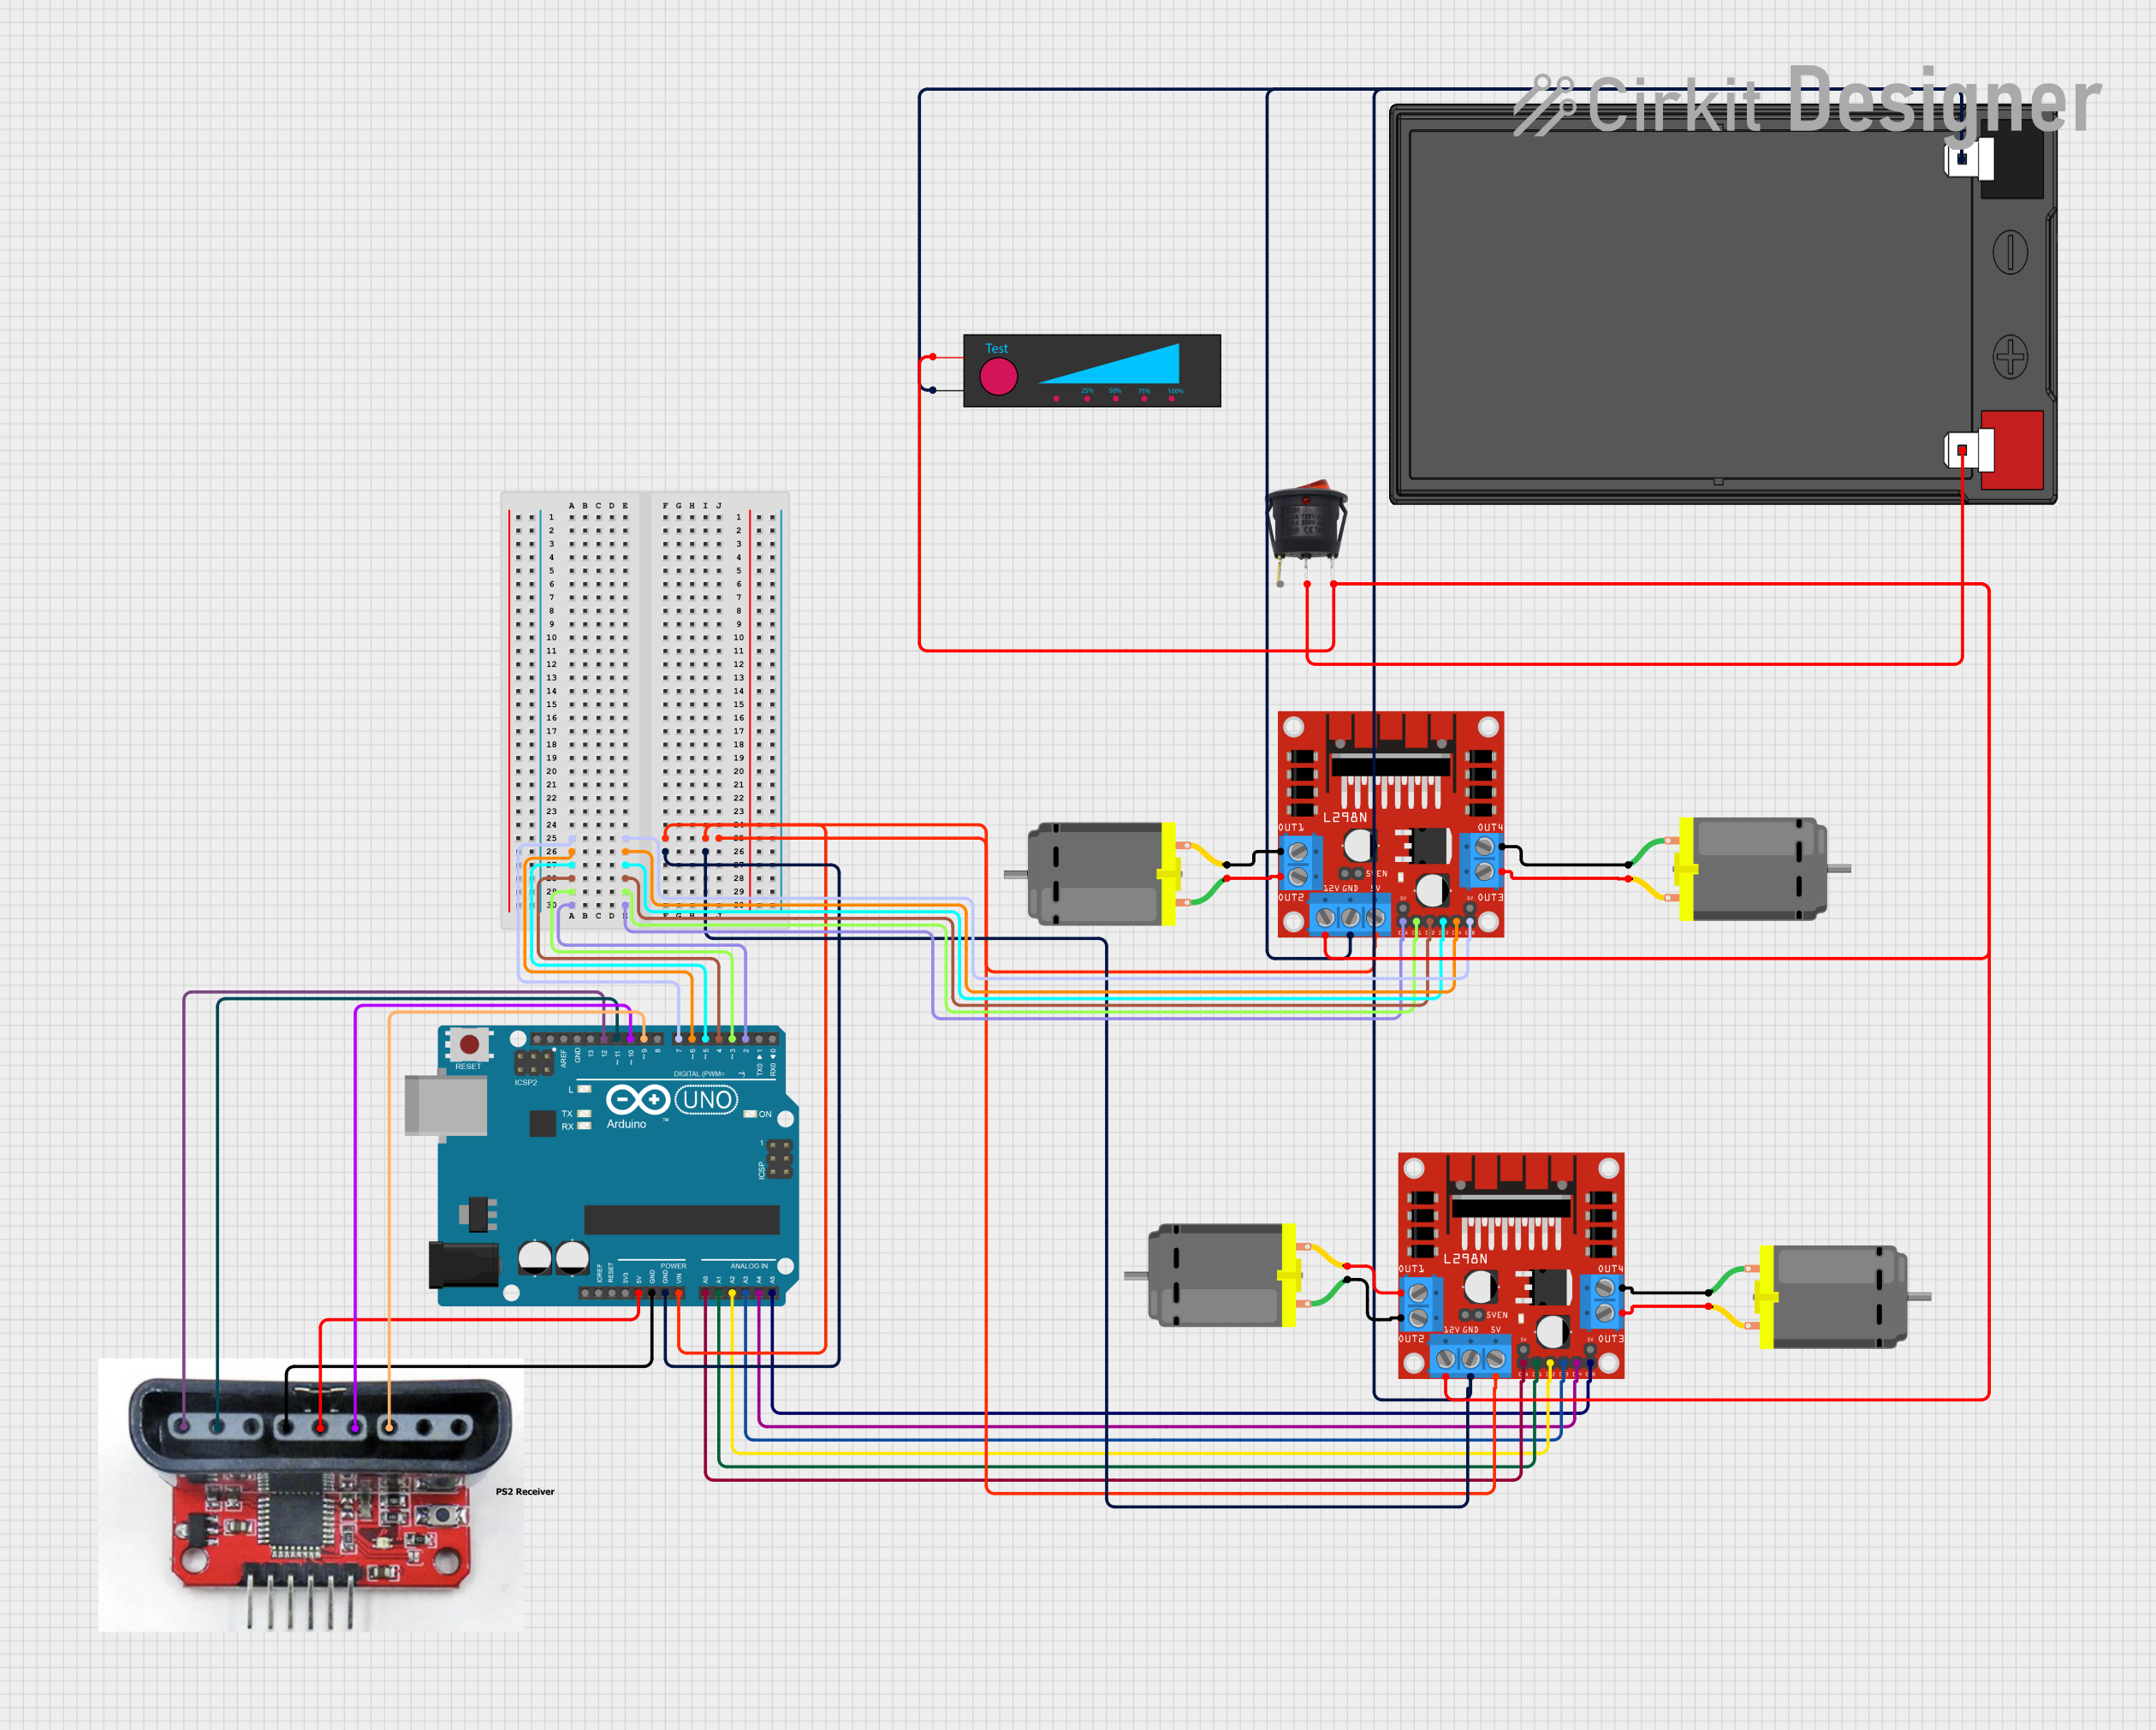
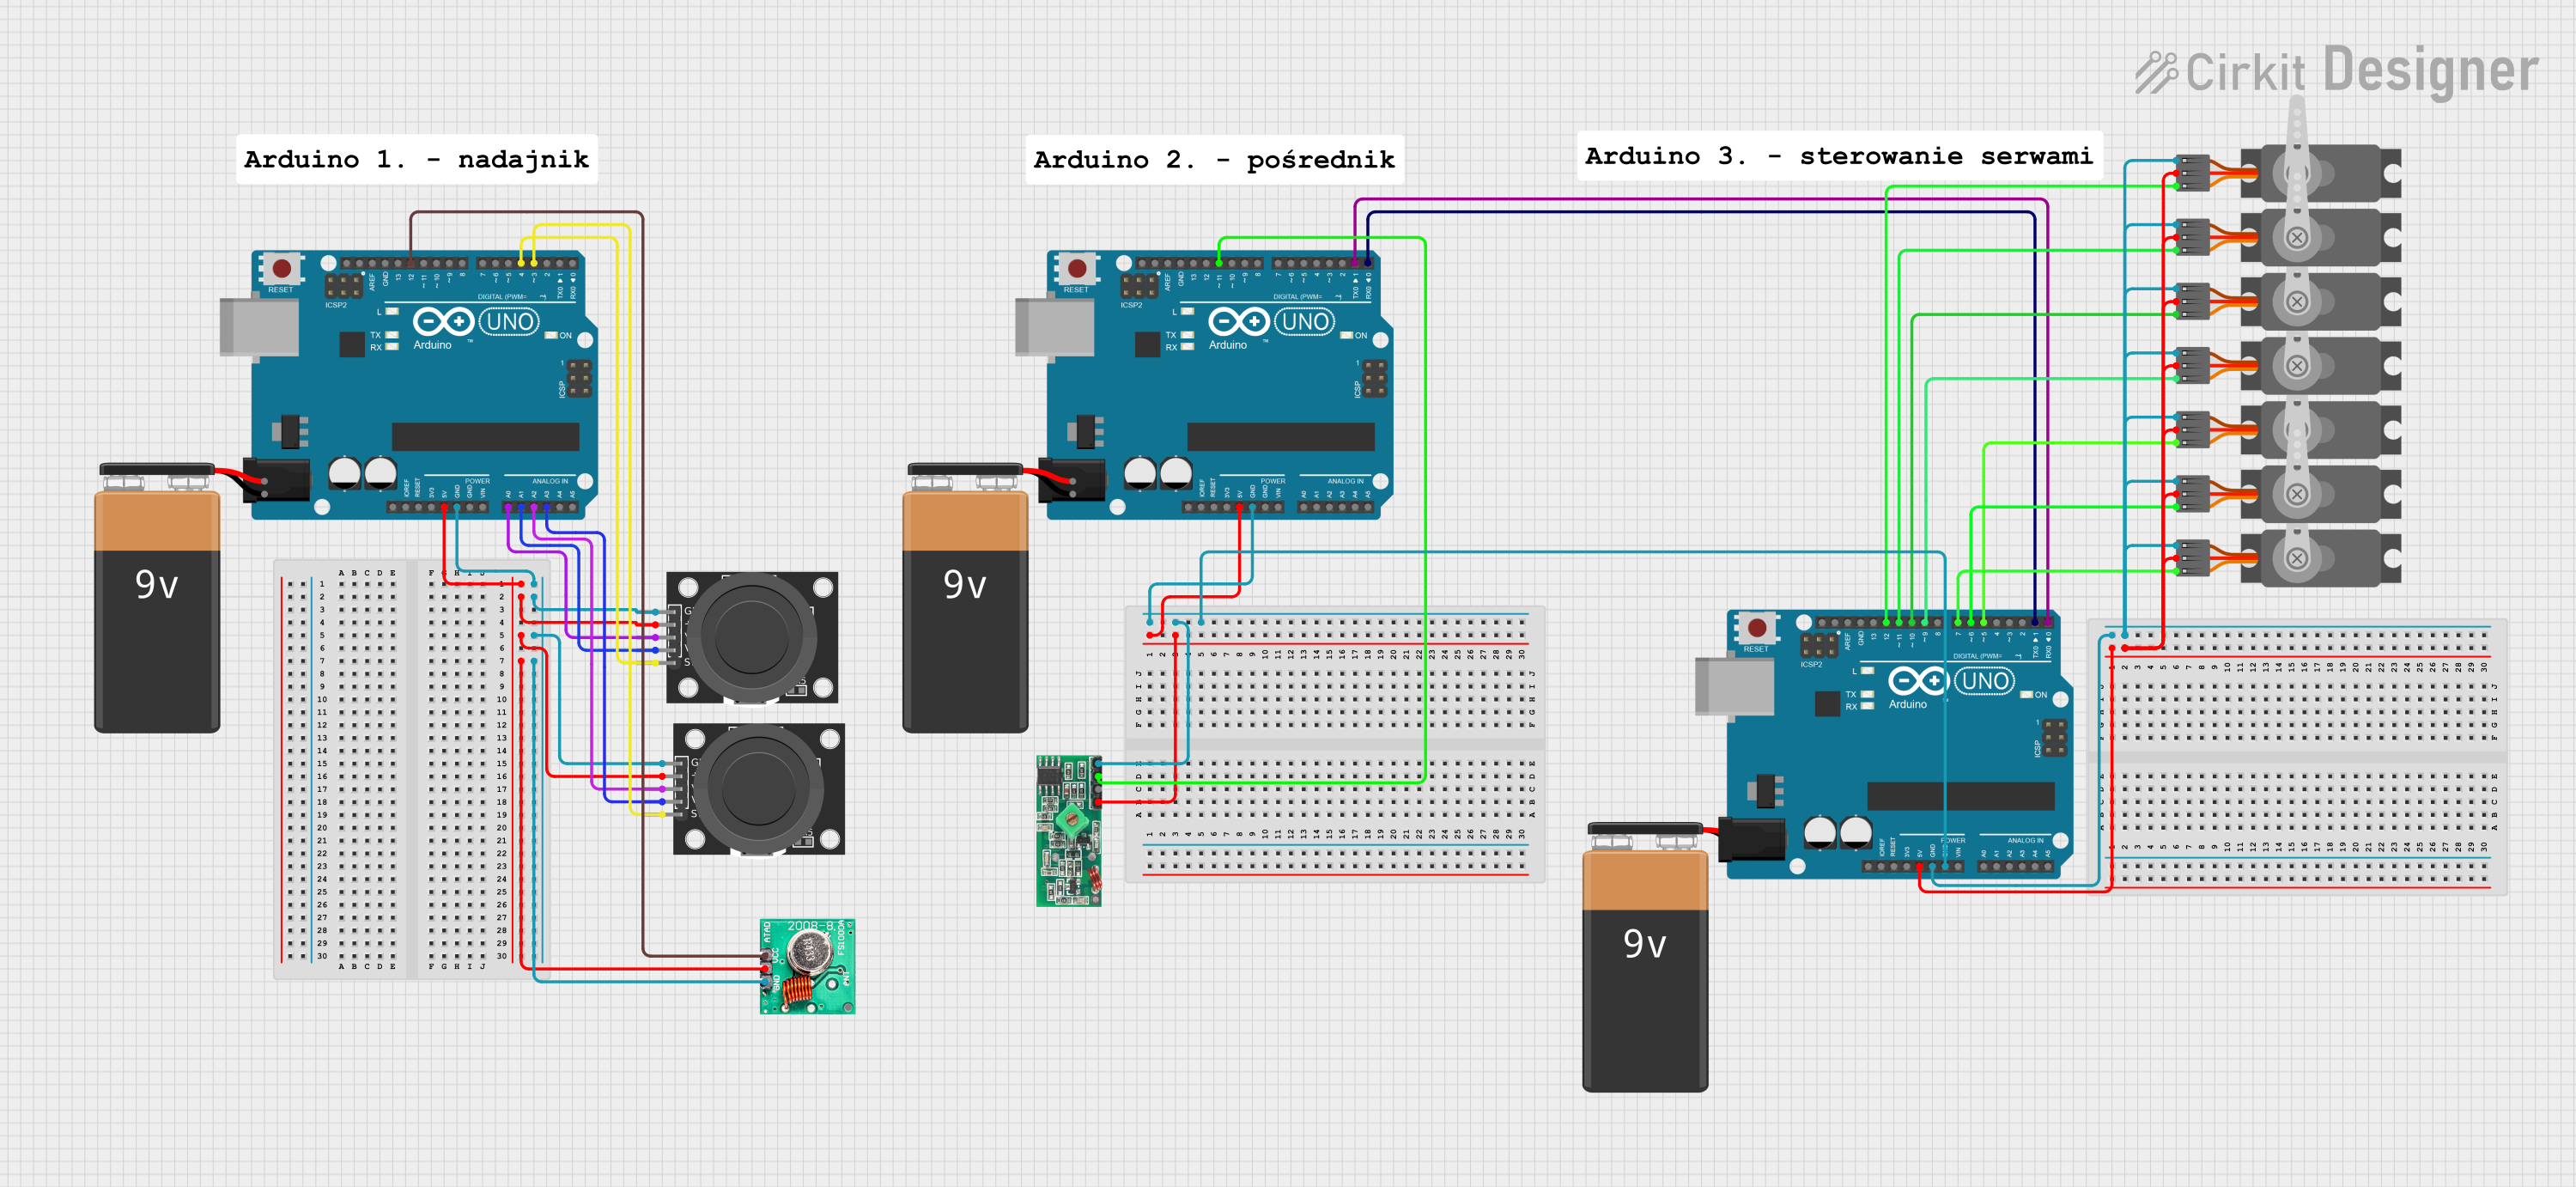
Explore Projects Built with PS2 Controller Receiver
Common Applications and Use Cases
- Gaming systems to interface PS2 controllers with consoles or PCs.
- Robotics projects requiring joystick or button-based control.
- DIY projects involving custom input devices.
- Retro gaming setups or emulators.
Technical Specifications
The PS2 Controller Receiver is designed to handle the proprietary PS2 communication protocol. Below are its key specifications:
| Parameter | Value |
|---|---|
| Operating Voltage | 3.3V to 5V |
| Communication Protocol | Serial (SPI-like, proprietary) |
| Data Rate | Up to 250 kbps |
| Operating Temperature | -10°C to 70°C |
| Dimensions | Varies by model (e.g., 20x15 mm) |
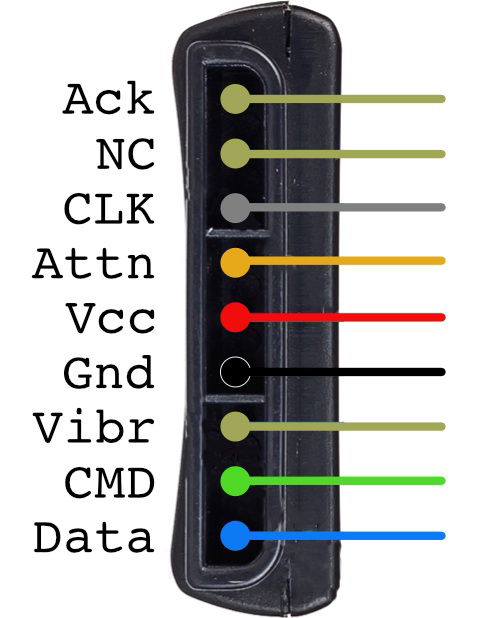
Pin Configuration and Descriptions
The PS2 Controller Receiver typically has a 6-pin interface. Below is the pinout:
| Pin | Name | Description |
|---|---|---|
| 1 | VCC | Power supply input (3.3V to 5V). |
| 2 | GND | Ground connection. |
| 3 | DATA | Serial data line for receiving data from the PS2 controller. |
| 4 | CMD | Command line for sending instructions to the PS2 controller. |
| 5 | ATT (SEL) | Attention line to select the controller for communication. |
| 6 | CLK | Clock line for synchronizing data transfer between the controller and receiver. |
Usage Instructions
How to Use the Component in a Circuit
- Power the Receiver: Connect the VCC pin to a 3.3V or 5V power source and the GND pin to the ground.
- Connect the PS2 Controller: Plug the PS2 controller into the receiver's input port.
- Interface with a Microcontroller: Connect the DATA, CMD, ATT, and CLK pins to the corresponding pins on your microcontroller or system.
- Write Code for Communication: Use a library or custom code to send and receive data using the PS2 protocol.
Important Considerations and Best Practices
- Ensure the power supply voltage matches the receiver's operating range (3.3V to 5V).
- Use pull-up resistors on the DATA and CMD lines if required by your microcontroller.
- Keep the CLK line stable to avoid communication errors.
- Avoid long cable runs between the receiver and the microcontroller to minimize signal degradation.
Example: Connecting to an Arduino UNO
Below is an example of how to connect and use the PS2 Controller Receiver with an Arduino UNO:
Wiring
| PS2 Receiver Pin | Arduino Pin |
|---|---|
| VCC | 5V |
| GND | GND |
| DATA | Pin 12 |
| CMD | Pin 11 |
| ATT (SEL) | Pin 10 |
| CLK | Pin 13 |
Code Example
#include <PS2X_lib.h> // Include the PS2X library for PS2 communication

PS2X ps2x; // Create PS2X object

// Setup pins for PS2 communication
#define PS2_DAT 12  // Data pin
#define PS2_CMD 11  // Command pin
#define PS2_SEL 10  // Attention pin
#define PS2_CLK 13  // Clock pin

void setup() {
  Serial.begin(9600); // Start serial communication for debugging

  // Initialize the PS2 controller
  int error = ps2x.config_gamepad(PS2_CLK, PS2_CMD, PS2_SEL, PS2_DAT);

  if (error == 0) {
    Serial.println("PS2 Controller successfully connected!");
  } else {
    Serial.println("Error connecting to PS2 Controller.");
  }
}

void loop() {
  ps2x.read_gamepad(); // Read data from the PS2 controller

  // Example: Check if the X button is pressed
  if (ps2x.ButtonPressed(PSB_CROSS)) {
    Serial.println("X button pressed!");
  }

  delay(100); // Add a small delay to avoid flooding the serial monitor
}
Troubleshooting and FAQs
Common Issues and Solutions
No Response from the Controller
- Cause: Incorrect wiring or loose connections.
- Solution: Double-check all connections and ensure the pins are correctly mapped.
Data Transmission Errors
- Cause: Unstable clock signal or long cables.
- Solution: Use shorter cables and ensure the CLK line is stable.
Controller Not Detected
- Cause: Incompatible controller or incorrect initialization.
- Solution: Verify the controller is a genuine PS2 controller and check the initialization code.
Random Button Presses Detected
- Cause: Electrical noise or insufficient pull-up resistors.
- Solution: Add pull-up resistors to the DATA and CMD lines.
FAQs
Q: Can I use the PS2 Controller Receiver with a 3.3V microcontroller?
A: Yes, the receiver supports 3.3V operation. Ensure all signal lines are compatible with 3.3V logic levels.
Q: Is the PS2 Controller Receiver compatible with wireless PS2 controllers?
A: Yes, as long as the wireless receiver is connected to the PS2 Receiver's input port.
Q: Can I use multiple PS2 controllers with one receiver?
A: No, the PS2 protocol supports only one controller per receiver.
Q: Do I need a library to use the PS2 Controller Receiver?
A: While not mandatory, using a library like PS2X simplifies communication and reduces development time.