Cirkit Designer Logo
Cirkit Designer
Your all-in-one circuit design IDE
Home / 
Component Documentation

How to Use WeMos D1 Mini Micro SD Shield: Examples, Pinouts, and Specs
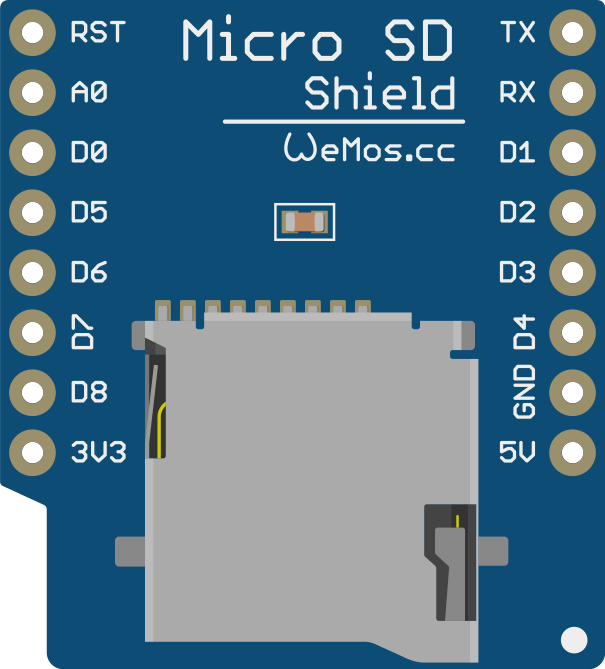

Image of WeMos D1 Mini Micro SD Shield
Cirkit Designer LogoDesign with WeMos D1 Mini Micro SD Shield in Cirkit Designer

Introduction

The WeMos D1 Mini Micro SD Shield is an add-on module designed specifically for the WeMos D1 Mini, a popular ESP8266-based development board. This shield enables seamless integration of a Micro SD card, allowing users to store and retrieve data efficiently. It is ideal for IoT projects that require data logging, file storage, or media playback.

Explore Projects Built with WeMos D1 Mini Micro SD Shield

Use Cirkit Designer to design, explore, and prototype these projects online. Some projects support real-time simulation. Click "Open Project" to start designing instantly!
I2C-Controlled OLED Display with External EEPROM and Interactive Pushbuttons
Image of godmode: A project utilizing WeMos D1 Mini Micro SD Shield in a practical application
This is a microcontroller-based interactive device featuring a Wemos D1 Mini, an OLED display, external EEPROM, and an I/O expander. It includes user input buttons and status LEDs, with potential MIDI interface capabilities.
Cirkit Designer LogoOpen Project in Cirkit Designer
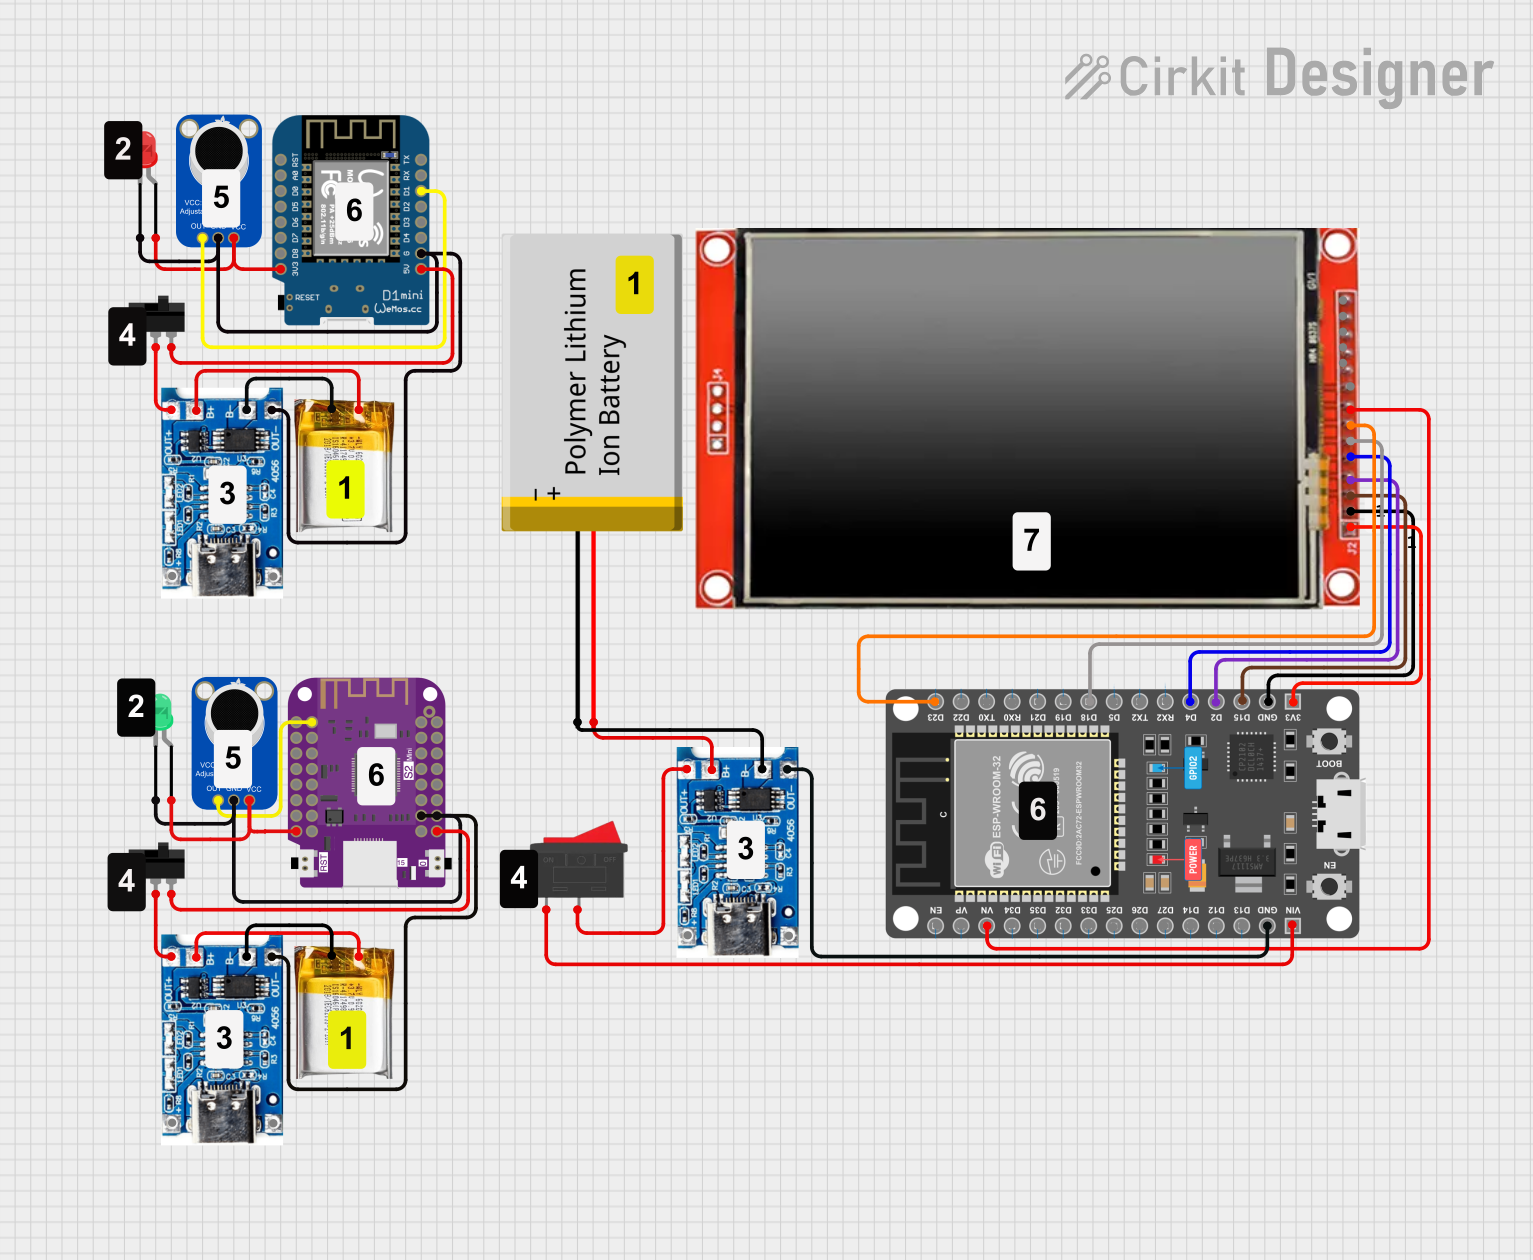
Dual-Microcontroller Audio Processing System with Visual Indicators and Battery Management
Image of proto thesis 2: A project utilizing WeMos D1 Mini Micro SD Shield in a practical application
This is a portable audio-visual device featuring two Wemos microcontrollers for processing, Adafruit MAX4466 microphone amplifiers for audio input, and an LCD TFT screen for display. It includes power management with TP4056 modules and LiPo batteries, and user-controlled toggle and rocker switches.
Cirkit Designer LogoOpen Project in Cirkit Designer
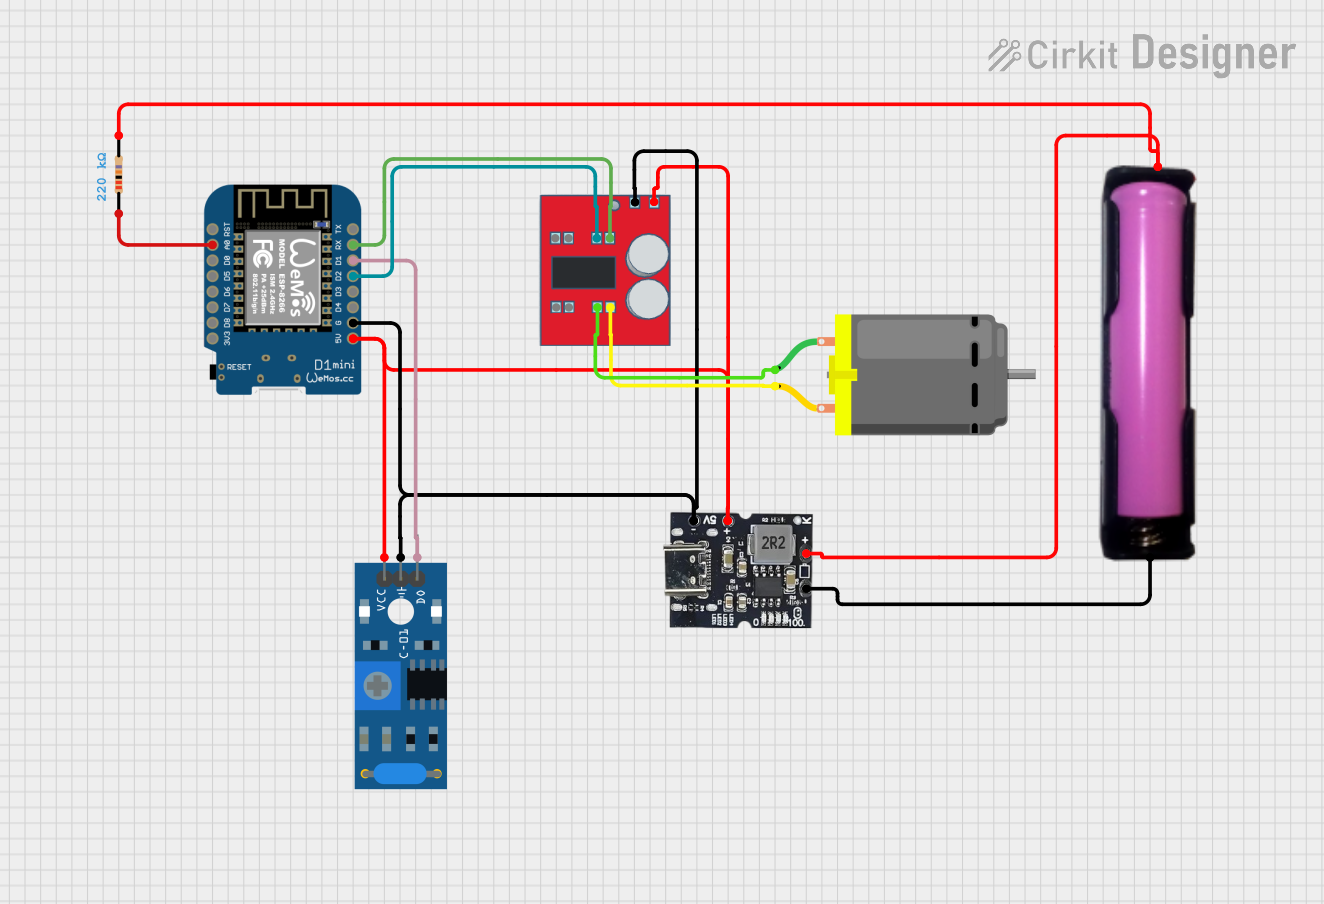
Wi-Fi Controlled Vibration-Sensing Robot with Battery Monitoring
Image of Vibration Trash: A project utilizing WeMos D1 Mini Micro SD Shield in a practical application
This circuit features a Wemos D1 Mini microcontroller connected to a MX1508 DC Motor Driver for controlling a DC motor, a SW-420 Vibration Sensor for detecting vibrations, and a Type-c Power Bank Module with an 18650 battery holder for power supply. The microcontroller monitors the vibration sensor and controls the motor driver based on the sensor's output, while also measuring the battery voltage through an ADC pin with a connected resistor for voltage scaling. The embedded code enables WiFi connectivity, OTA updates, and integration with Home Assistant for remote monitoring and control.
Cirkit Designer LogoOpen Project in Cirkit Designer
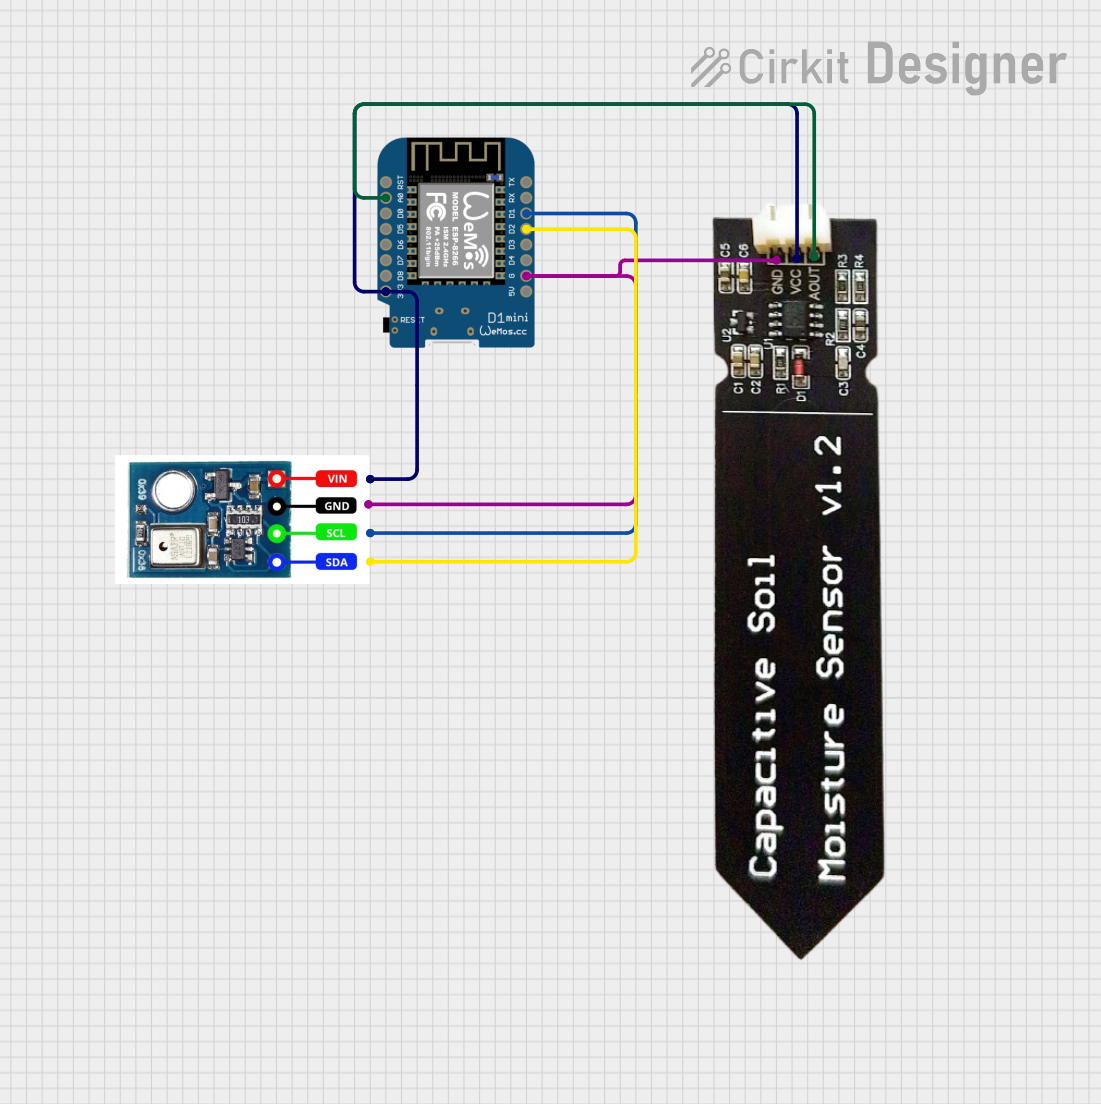
Wemos D1 Mini Based Soil Moisture and Temperature Monitoring System
Image of pfe2: A project utilizing WeMos D1 Mini Micro SD Shield in a practical application
This circuit features a Wemos D1 Mini microcontroller connected to an AHT10 temperature and humidity sensor and a capacitive soil moisture sensor. The AHT10 communicates with the Wemos D1 Mini via I2C (with SDA connected to D2 and SCL to D1), while the soil moisture sensor's analog output is connected to the A0 pin of the Wemos D1 Mini. Both sensors and the microcontroller share a common power supply, with the 3V3 pin of the Wemos D1 Mini providing power to the sensors.
Cirkit Designer LogoOpen Project in Cirkit Designer

Explore Projects Built with WeMos D1 Mini Micro SD Shield

Use Cirkit Designer to design, explore, and prototype these projects online. Some projects support real-time simulation. Click "Open Project" to start designing instantly!
Image of godmode: A project utilizing WeMos D1 Mini Micro SD Shield in a practical application
I2C-Controlled OLED Display with External EEPROM and Interactive Pushbuttons
This is a microcontroller-based interactive device featuring a Wemos D1 Mini, an OLED display, external EEPROM, and an I/O expander. It includes user input buttons and status LEDs, with potential MIDI interface capabilities.
Cirkit Designer LogoOpen Project in Cirkit Designer
Image of proto thesis 2: A project utilizing WeMos D1 Mini Micro SD Shield in a practical application
Dual-Microcontroller Audio Processing System with Visual Indicators and Battery Management
This is a portable audio-visual device featuring two Wemos microcontrollers for processing, Adafruit MAX4466 microphone amplifiers for audio input, and an LCD TFT screen for display. It includes power management with TP4056 modules and LiPo batteries, and user-controlled toggle and rocker switches.
Cirkit Designer LogoOpen Project in Cirkit Designer
Image of Vibration Trash: A project utilizing WeMos D1 Mini Micro SD Shield in a practical application
Wi-Fi Controlled Vibration-Sensing Robot with Battery Monitoring
This circuit features a Wemos D1 Mini microcontroller connected to a MX1508 DC Motor Driver for controlling a DC motor, a SW-420 Vibration Sensor for detecting vibrations, and a Type-c Power Bank Module with an 18650 battery holder for power supply. The microcontroller monitors the vibration sensor and controls the motor driver based on the sensor's output, while also measuring the battery voltage through an ADC pin with a connected resistor for voltage scaling. The embedded code enables WiFi connectivity, OTA updates, and integration with Home Assistant for remote monitoring and control.
Cirkit Designer LogoOpen Project in Cirkit Designer
Image of pfe2: A project utilizing WeMos D1 Mini Micro SD Shield in a practical application
Wemos D1 Mini Based Soil Moisture and Temperature Monitoring System
This circuit features a Wemos D1 Mini microcontroller connected to an AHT10 temperature and humidity sensor and a capacitive soil moisture sensor. The AHT10 communicates with the Wemos D1 Mini via I2C (with SDA connected to D2 and SCL to D1), while the soil moisture sensor's analog output is connected to the A0 pin of the Wemos D1 Mini. Both sensors and the microcontroller share a common power supply, with the 3V3 pin of the Wemos D1 Mini providing power to the sensors.
Cirkit Designer LogoOpen Project in Cirkit Designer

Common Applications and Use Cases

  • Data logging for IoT sensors (e.g., temperature, humidity, or motion sensors)
  • Storing configuration files or firmware updates
  • Media storage for audio or image playback
  • File-based communication between devices
  • Projects requiring large data storage beyond the ESP8266's onboard memory

Technical Specifications

The WeMos D1 Mini Micro SD Shield is compact and easy to use, with the following key specifications:

Specification Details
Operating Voltage 3.3V (compatible with the WeMos D1 Mini)
Communication Protocol SPI (Serial Peripheral Interface)
Micro SD Card Support Up to 32GB (FAT16/FAT32 file systems)
Dimensions 28mm x 28mm
Weight ~3g

Pin Configuration and Descriptions

The shield connects directly to the WeMos D1 Mini via its pin headers. Below is the pin mapping for the Micro SD Shield:

Pin on Shield Function Description
D5 SCK (Clock) SPI clock signal
D6 MISO (Master In Slave Out) Data output from the SD card to the microcontroller
D7 MOSI (Master Out Slave In) Data input from the microcontroller to the SD card
D8 CS (Chip Select) Selects the SD card for communication
3V3 Power 3.3V power supply
GND Ground Common ground

Usage Instructions

How to Use the Shield in a Circuit

  1. Attach the Shield: Plug the Micro SD Shield directly onto the WeMos D1 Mini. Ensure the pin headers are aligned correctly.
  2. Insert the Micro SD Card: Insert a formatted Micro SD card (FAT16 or FAT32) into the shield's slot.
  3. Connect to Power: Power the WeMos D1 Mini via USB or an external power source.
  4. Write Code: Use the Arduino IDE or other compatible environments to write code for reading/writing data to the SD card.

Important Considerations and Best Practices

  • Formatting: Ensure the Micro SD card is formatted to FAT16 or FAT32 before use.
  • Voltage Compatibility: The shield operates at 3.3V. Avoid using 5V power sources directly.
  • SPI Pins: The shield uses the SPI pins (D5, D6, D7, D8) on the WeMos D1 Mini. Ensure these pins are not used for other peripherals in your project.
  • Library Requirement: Use the SD or SdFat library in the Arduino IDE for interfacing with the SD card.

Example Code for Arduino UNO

Below is an example code snippet to initialize the SD card and write data to a file:

#include <SPI.h>
#include <SD.h>

// Define the Chip Select (CS) pin for the SD card
const int chipSelect = D8;

void setup() {
  // Initialize serial communication for debugging
  Serial.begin(115200);
  while (!Serial) {
    ; // Wait for the serial port to connect
  }

  // Initialize the SD card
  Serial.print("Initializing SD card...");
  if (!SD.begin(chipSelect)) {
    Serial.println("Card failed, or not present.");
    // Stop further execution if SD card initialization fails
    while (1);
  }
  Serial.println("Card initialized.");

  // Create or open a file on the SD card
  File dataFile = SD.open("data.txt", FILE_WRITE);

  // Check if the file opened successfully
  if (dataFile) {
    dataFile.println("Hello, SD card!"); // Write data to the file
    dataFile.close();                   // Close the file
    Serial.println("Data written to file.");
  } else {
    Serial.println("Error opening file.");
  }
}

void loop() {
  // Nothing to do here
}

Notes on the Code

  • Replace D8 with the appropriate CS pin if using a different setup.
  • Ensure the SD library is installed in the Arduino IDE (Sketch > Include Library > Manage Libraries).

Troubleshooting and FAQs

Common Issues

  1. SD Card Initialization Fails

    • Cause: Incorrect wiring or incompatible SD card format.
    • Solution: Verify the shield is properly connected to the WeMos D1 Mini. Ensure the SD card is formatted to FAT16 or FAT32.
  2. File Not Opening

    • Cause: Incorrect file path or insufficient permissions.
    • Solution: Double-check the file name and ensure the SD card is not write-protected.
  3. Data Corruption

    • Cause: Power loss during file operations.
    • Solution: Avoid removing power while writing to the SD card. Use proper shutdown procedures.
  4. SPI Pin Conflicts

    • Cause: Other peripherals using the same SPI pins.
    • Solution: Reassign SPI pins for other peripherals or use a multiplexer.

FAQs

Q: Can I use a 64GB Micro SD card with this shield?
A: No, the shield supports Micro SD cards up to 32GB formatted as FAT16 or FAT32.

Q: Is the shield compatible with other ESP8266 boards?
A: The shield is designed for the WeMos D1 Mini but may work with other ESP8266 boards with proper wiring.

Q: How do I check if the SD card is full?
A: Use the SD.usedBytes() and SD.totalBytes() functions (if supported by your library) to monitor storage usage.

Q: Can I use this shield with 5V logic boards like Arduino UNO?
A: No, the shield is designed for 3.3V logic. Using it with 5V logic boards may damage the shield or SD card.