Cirkit Designer
Your all-in-one circuit design IDE
Home /
Component Documentation
How to Use Soil Sensor: Examples, Pinouts, and Specs
Introduction
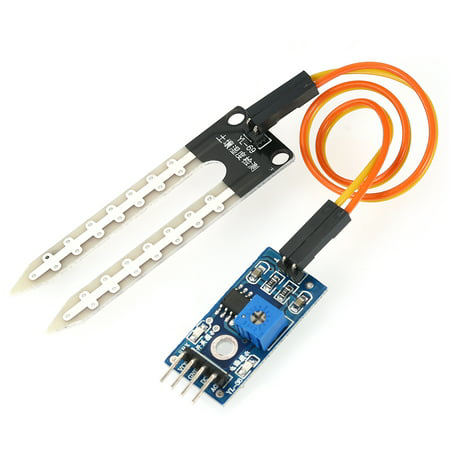
The Soil Sensor (Manufacturer Part ID: Soil Sensor) is a device designed to measure the moisture content in the soil. Manufactured in China, this sensor is widely used in agricultural and gardening applications to monitor and optimize watering schedules. By providing real-time data on soil moisture levels, it helps in maintaining the health of plants and conserving water.
Explore Projects Built with Soil Sensor
Arduino Nano-Based Smart Soil Monitoring System with Wi-Fi Connectivity
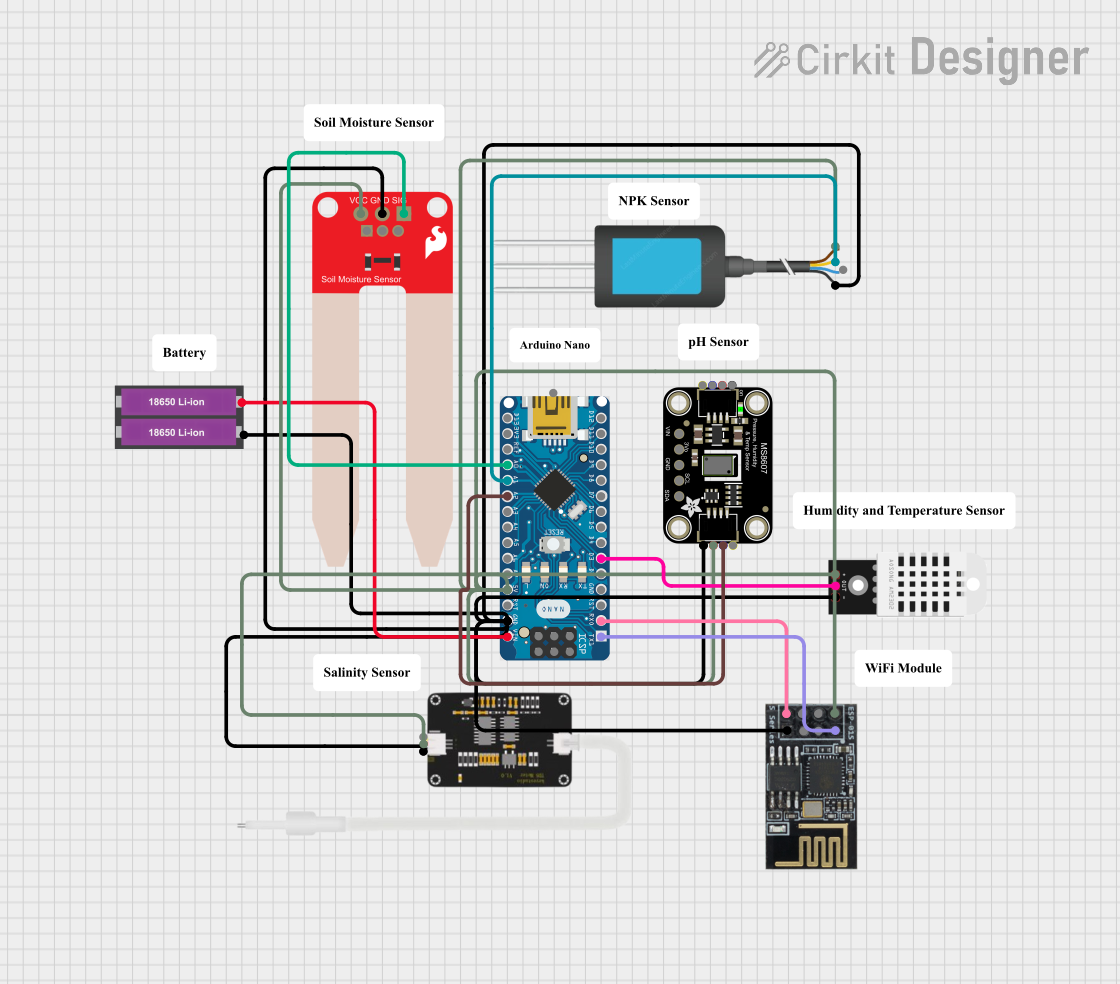
This circuit is a smart soil monitoring system that uses an Arduino Nano to collect data from various sensors, including a DHT22 for temperature and humidity, a SparkFun Soil Moisture Sensor, an NPK Soil Sensor, a TDS Sensor, and an Adafruit MS8607 PHT Sensor. The data is transmitted wirelessly via an ESP8266 WiFi module, and the system is powered by two 18650 Li-ion batteries.
Arduino-Controlled Soil Monitoring and Motor Management System
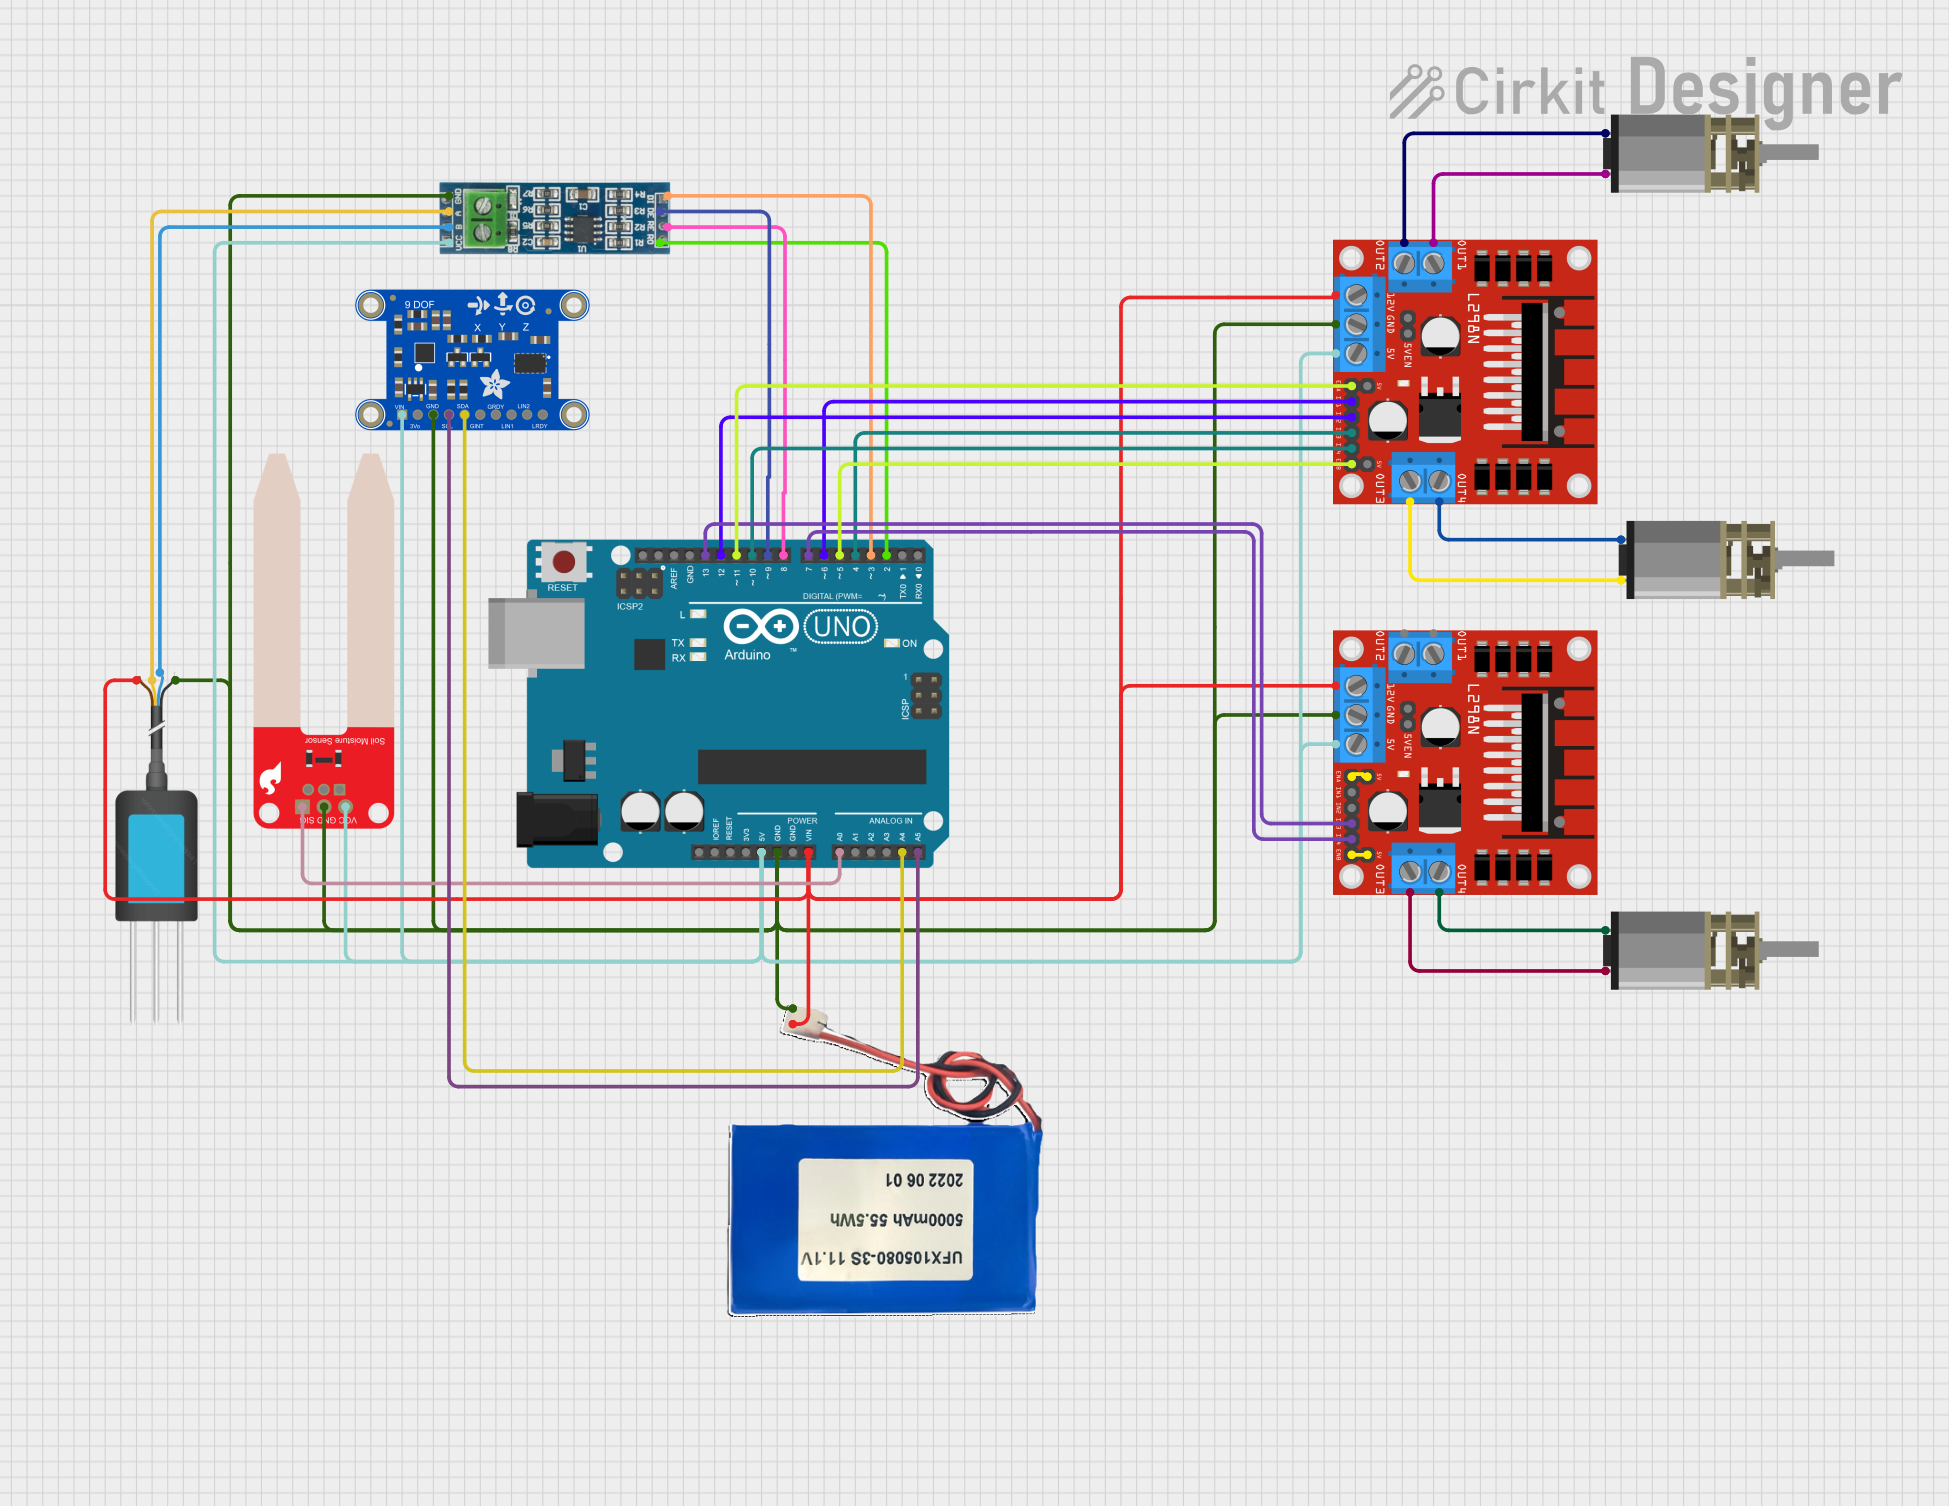
This is a multi-functional agricultural or environmental monitoring and control system. It uses soil sensors for data collection, an IMU for orientation tracking, and motor drivers for actuating mechanisms, all managed by an Arduino UNO. Communication capabilities are extended with an RS-485 module, and the system is powered by a rechargeable Li-ion battery.
ESP32-Based Smart Soil Moisture and Temperature Monitoring System with Solar Power
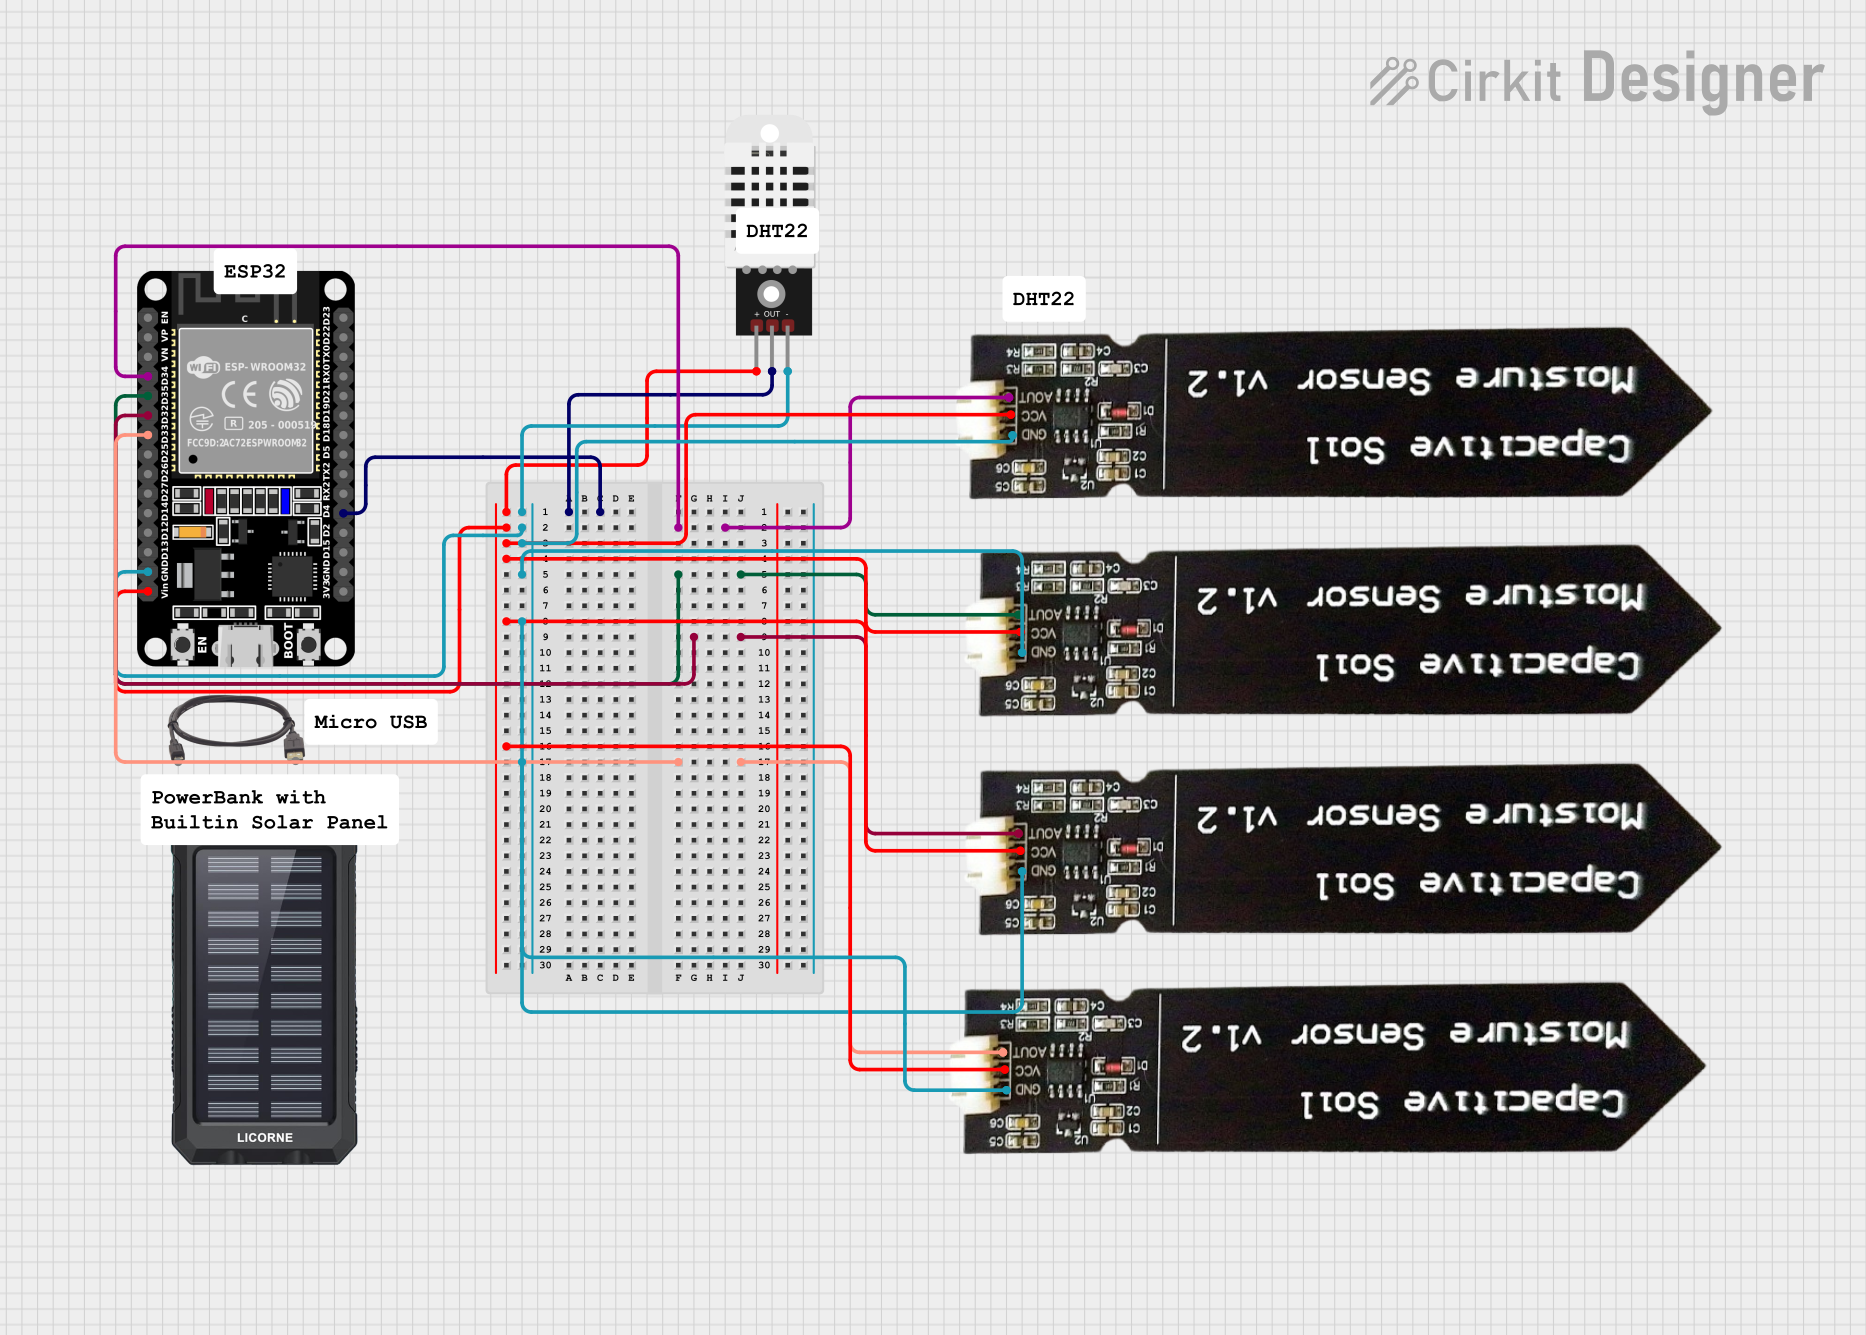
This circuit is a soil moisture and environmental monitoring system using an ESP32 microcontroller. It integrates multiple capacitive soil moisture sensors and a DHT22 temperature and humidity sensor to collect data, which can be processed or transmitted by the ESP32. The system is powered by a solar charger power bank, ensuring sustainable operation.
Arduino-Based Smart Irrigation System with Soil Moisture and pH Sensors, GSM Connectivity, and Battery Power
This circuit is an automated soil monitoring and irrigation system. It uses an Arduino UNO to read data from a soil moisture sensor and a pH meter, and controls a water pump via a relay module. The system can also communicate data through a SIM 800L GSM module.
Explore Projects Built with Soil Sensor
Arduino Nano-Based Smart Soil Monitoring System with Wi-Fi Connectivity
This circuit is a smart soil monitoring system that uses an Arduino Nano to collect data from various sensors, including a DHT22 for temperature and humidity, a SparkFun Soil Moisture Sensor, an NPK Soil Sensor, a TDS Sensor, and an Adafruit MS8607 PHT Sensor. The data is transmitted wirelessly via an ESP8266 WiFi module, and the system is powered by two 18650 Li-ion batteries.
Arduino-Controlled Soil Monitoring and Motor Management System
This is a multi-functional agricultural or environmental monitoring and control system. It uses soil sensors for data collection, an IMU for orientation tracking, and motor drivers for actuating mechanisms, all managed by an Arduino UNO. Communication capabilities are extended with an RS-485 module, and the system is powered by a rechargeable Li-ion battery.
ESP32-Based Smart Soil Moisture and Temperature Monitoring System with Solar Power
This circuit is a soil moisture and environmental monitoring system using an ESP32 microcontroller. It integrates multiple capacitive soil moisture sensors and a DHT22 temperature and humidity sensor to collect data, which can be processed or transmitted by the ESP32. The system is powered by a solar charger power bank, ensuring sustainable operation.
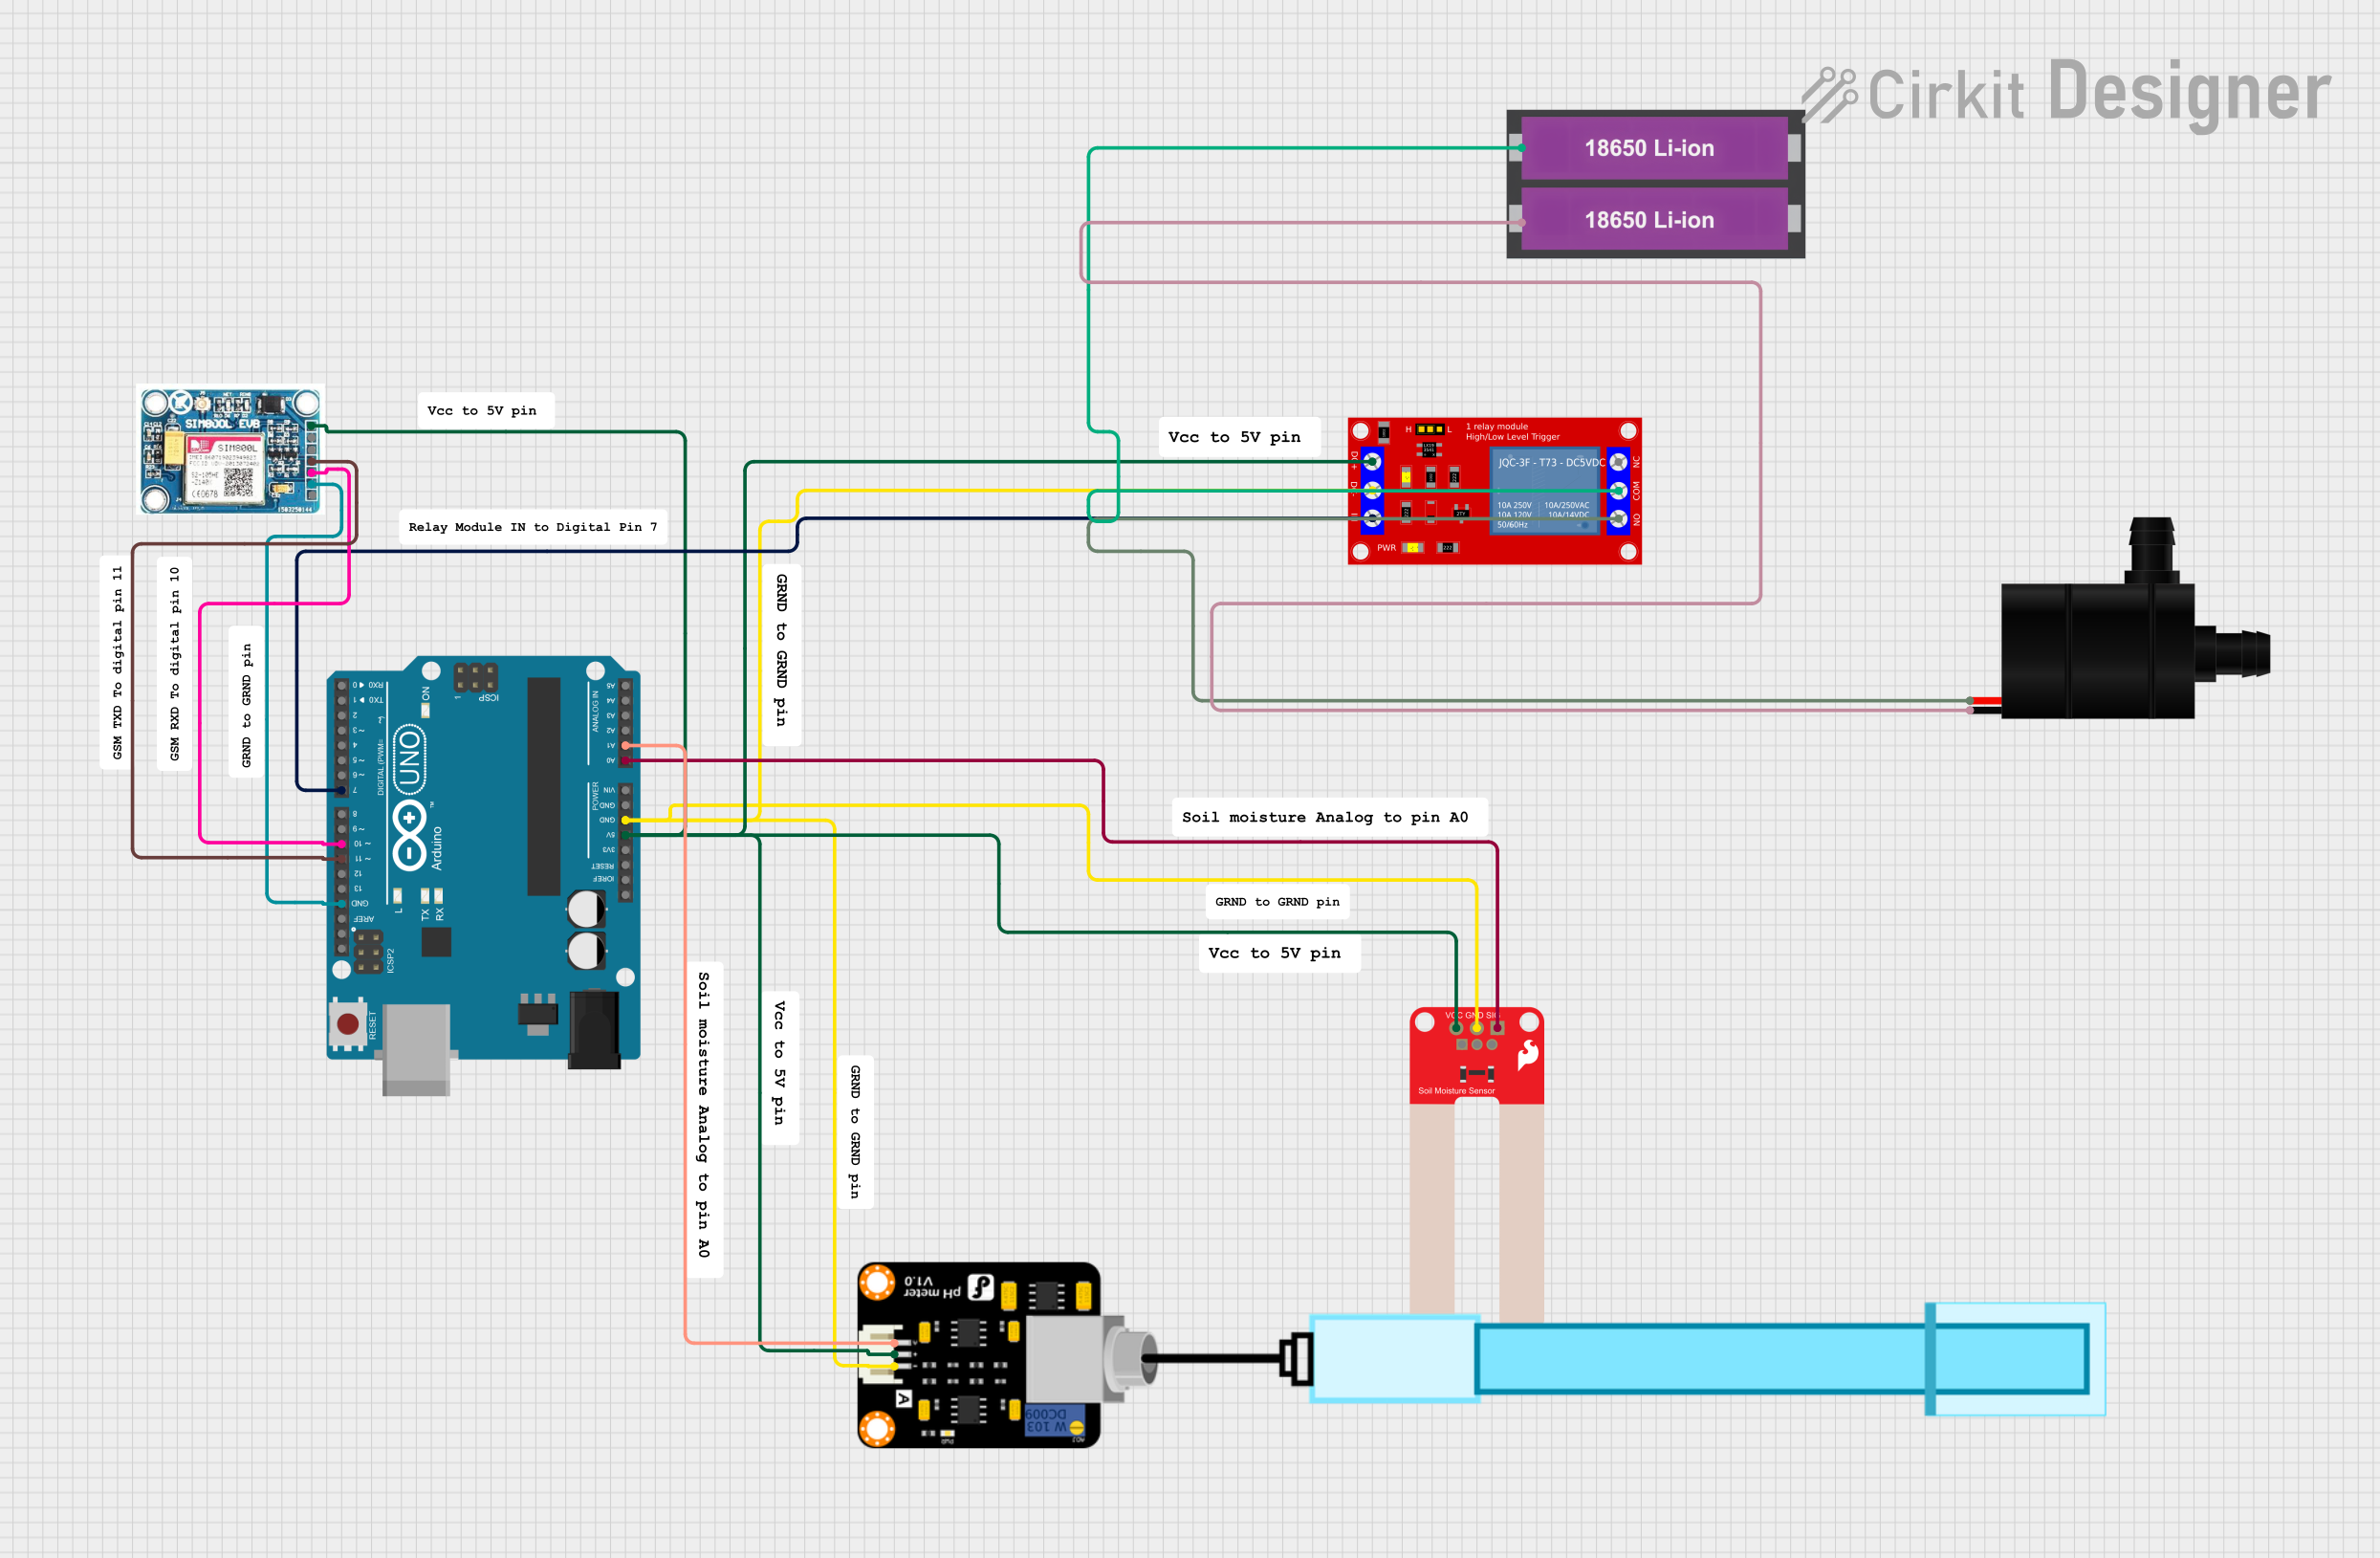
Arduino-Based Smart Irrigation System with Soil Moisture and pH Sensors, GSM Connectivity, and Battery Power
This circuit is an automated soil monitoring and irrigation system. It uses an Arduino UNO to read data from a soil moisture sensor and a pH meter, and controls a water pump via a relay module. The system can also communicate data through a SIM 800L GSM module.
Technical Specifications
Key Technical Details
| Parameter | Value |
|---|---|
| Operating Voltage | 3.3V - 5V |
| Operating Current | < 20mA |
| Output Type | Analog and Digital |
| Interface | 4-pin (VCC, GND, A0, D0) |
| Dimensions | 60mm x 20mm x 5mm |
| Material | Corrosion-resistant metal |
Pin Configuration and Descriptions
| Pin | Name | Description |
|---|---|---|
| 1 | VCC | Power supply pin. Connect to 3.3V or 5V. |
| 2 | GND | Ground pin. Connect to the ground of the circuit. |
| 3 | A0 | Analog output pin. Provides an analog voltage proportional to soil moisture. |
| 4 | D0 | Digital output pin. Provides a high/low signal based on a threshold setting. |
Usage Instructions
How to Use the Component in a Circuit
Powering the Sensor:
- Connect the VCC pin to a 3.3V or 5V power supply.
- Connect the GND pin to the ground of your circuit.
Reading Analog Values:
- Connect the A0 pin to an analog input pin on your microcontroller (e.g., Arduino UNO).
Reading Digital Values:
- Connect the D0 pin to a digital input pin on your microcontroller.
- Adjust the threshold using the onboard potentiometer.
Important Considerations and Best Practices
- Placement: Insert the sensor probes into the soil at the desired depth. Ensure the probes are fully in contact with the soil for accurate readings.
- Corrosion: The sensor is made of corrosion-resistant metal, but prolonged exposure to moisture can still cause degradation. Regularly check and clean the probes.
- Calibration: Calibrate the sensor for your specific soil type and moisture range for more accurate readings.
- Power Supply: Ensure a stable power supply to avoid fluctuations in readings.
Sample Arduino Code
// Soil Sensor Example Code
// This code reads the analog value from the soil sensor and prints it to the serial monitor.

const int soilSensorPin = A0; // Analog pin connected to the soil sensor
int soilMoistureValue = 0;    // Variable to store the sensor value

void setup() {
  Serial.begin(9600); // Initialize serial communication at 9600 baud rate
}

void loop() {
  soilMoistureValue = analogRead(soilSensorPin); // Read the analog value from the sensor
  Serial.print("Soil Moisture Value: ");
  Serial.println(soilMoistureValue); // Print the value to the serial monitor
  delay(1000); // Wait for 1 second before taking another reading
}
Troubleshooting and FAQs
Common Issues Users Might Face
Inconsistent Readings:
- Solution: Ensure the sensor is properly inserted into the soil and the probes are clean. Check for stable power supply.
No Output:
- Solution: Verify all connections. Ensure the VCC and GND pins are correctly connected. Check the sensor with a multimeter.
Corrosion on Probes:
- Solution: Regularly clean the probes with a soft cloth. Avoid leaving the sensor in wet soil for extended periods.
Solutions and Tips for Troubleshooting
- Check Connections: Ensure all wires are securely connected and there are no loose connections.
- Power Supply: Use a stable power supply to avoid fluctuations in sensor readings.
- Calibration: Calibrate the sensor for your specific soil type to improve accuracy.
- Environmental Factors: Consider environmental factors such as temperature and humidity, which may affect sensor readings.
By following this documentation, users can effectively utilize the Soil Sensor in their projects, ensuring accurate soil moisture measurements and optimal plant care.