How to Use pH probe module: Examples, Pinouts, and Specs
Introduction
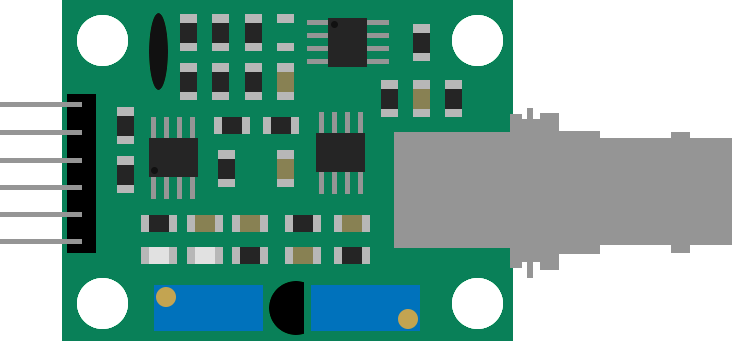
The DIY MORE PH-4502C pH probe module is a versatile sensor designed to measure the acidity or alkalinity (pH) of a solution. It is widely used in applications such as water quality monitoring, aquariums, hydroponics, and laboratory experiments. The module provides an analog output that can be easily interfaced with microcontrollers like Arduino, making it suitable for both hobbyists and professionals.
This module includes a pH electrode and a signal conditioning circuit, ensuring accurate and stable readings. Its compact design and ease of use make it an excellent choice for real-time pH monitoring in various environments.
Explore Projects Built with pH probe module
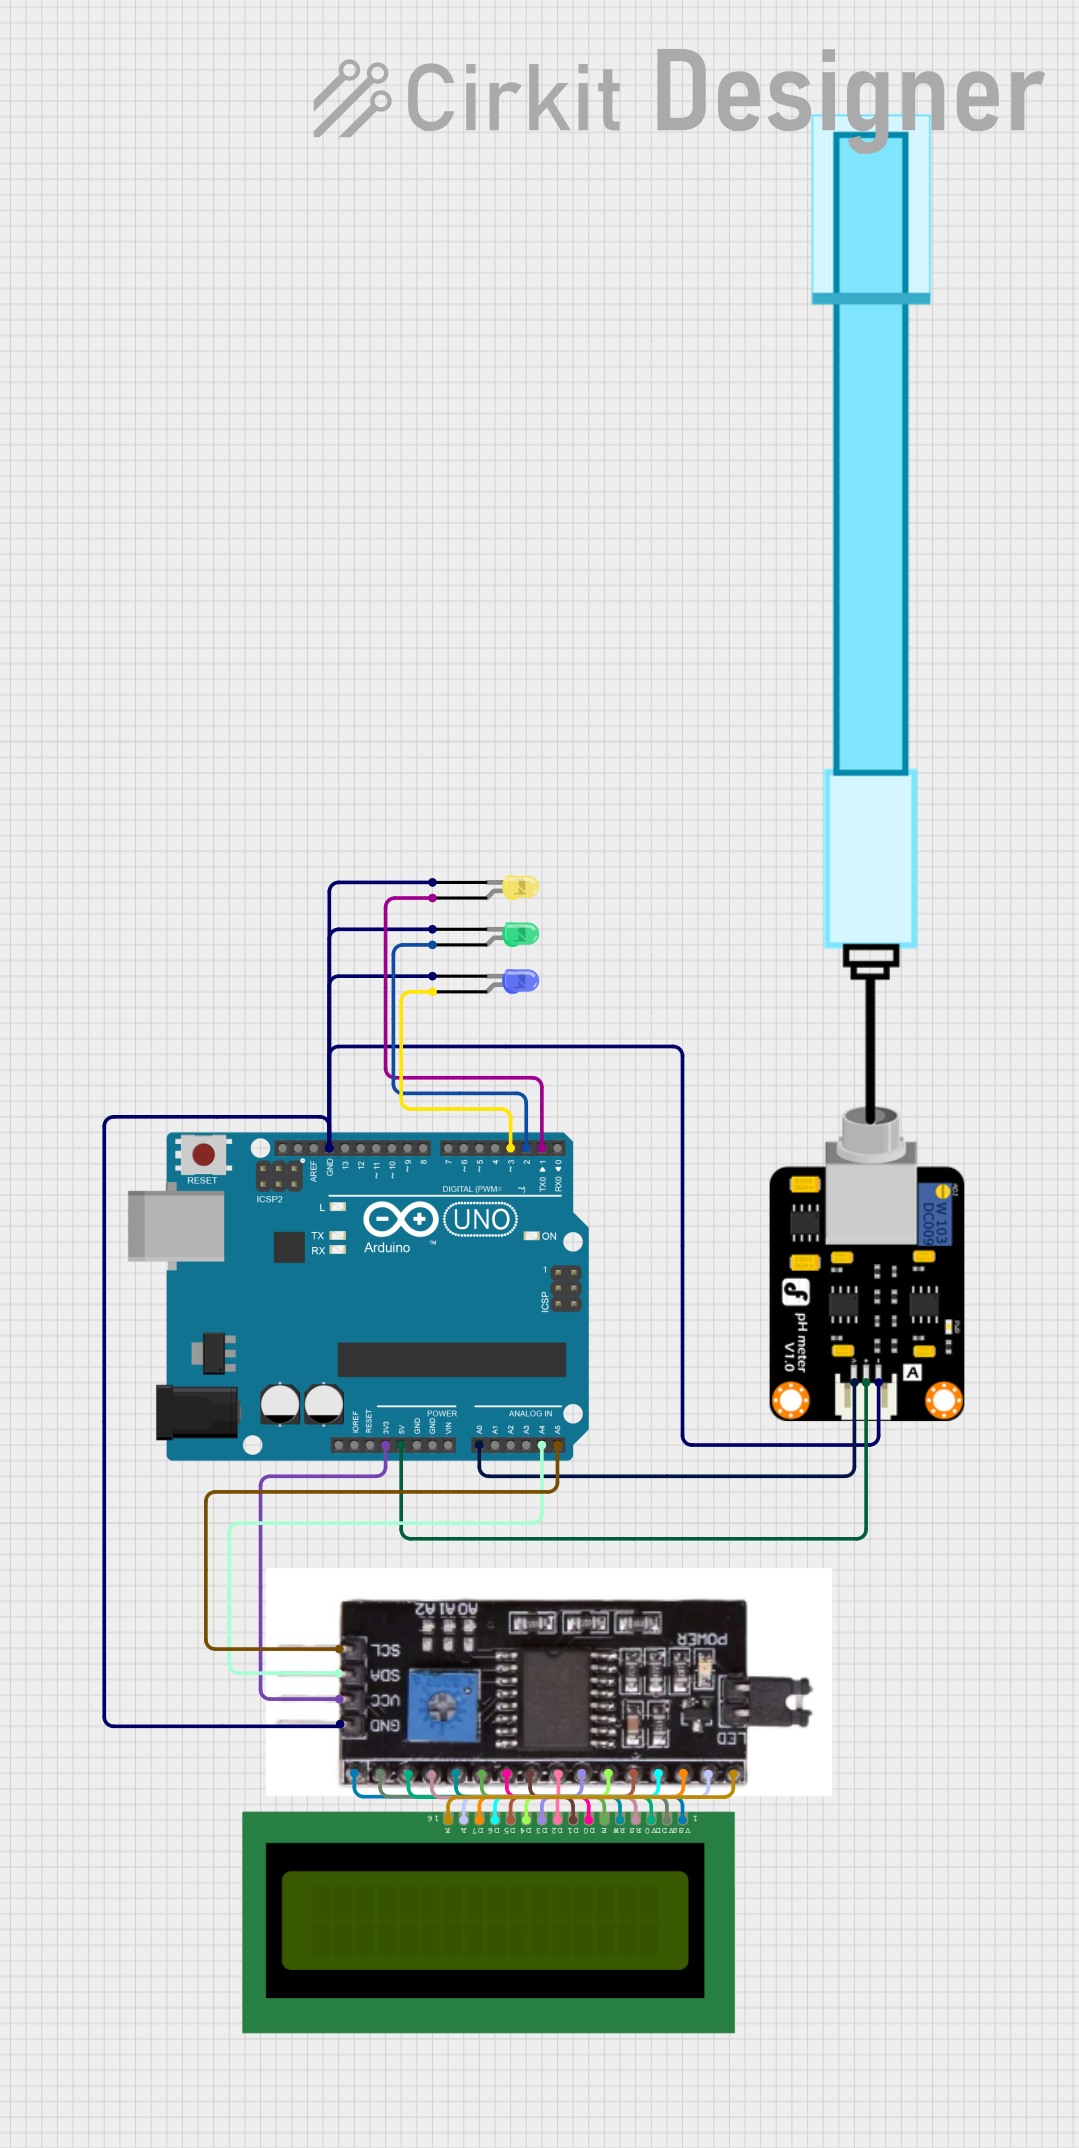
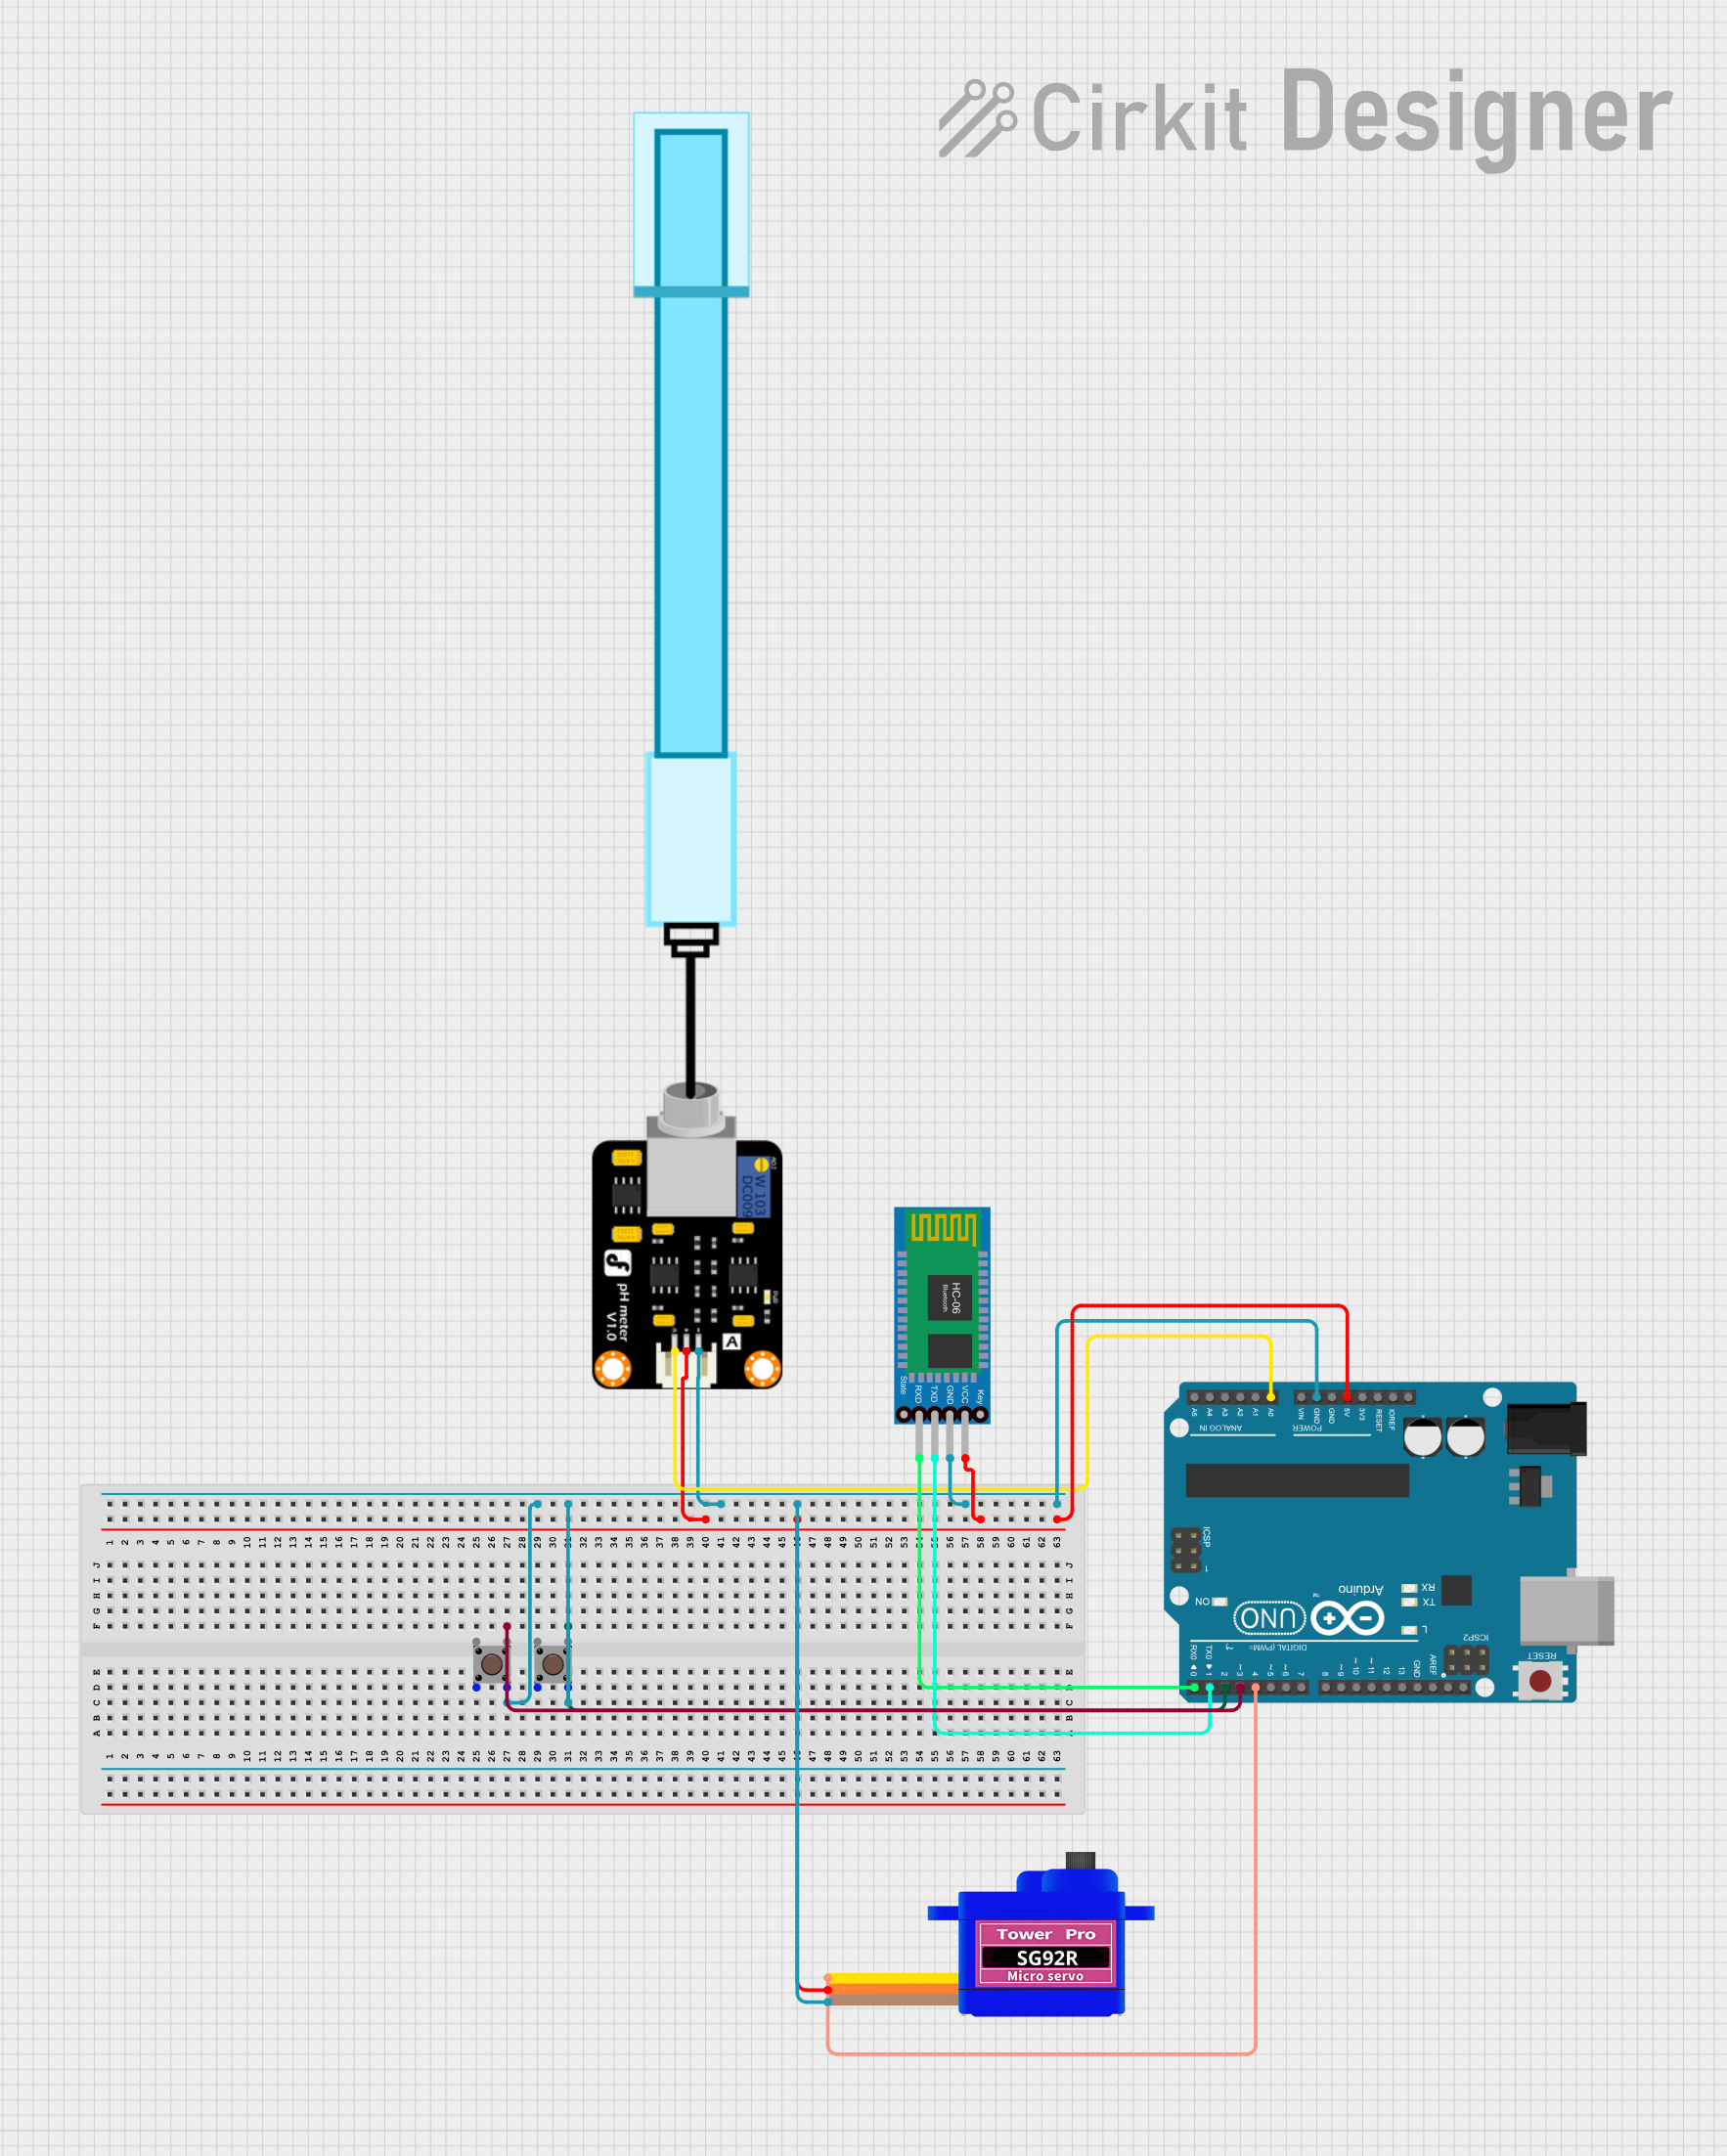
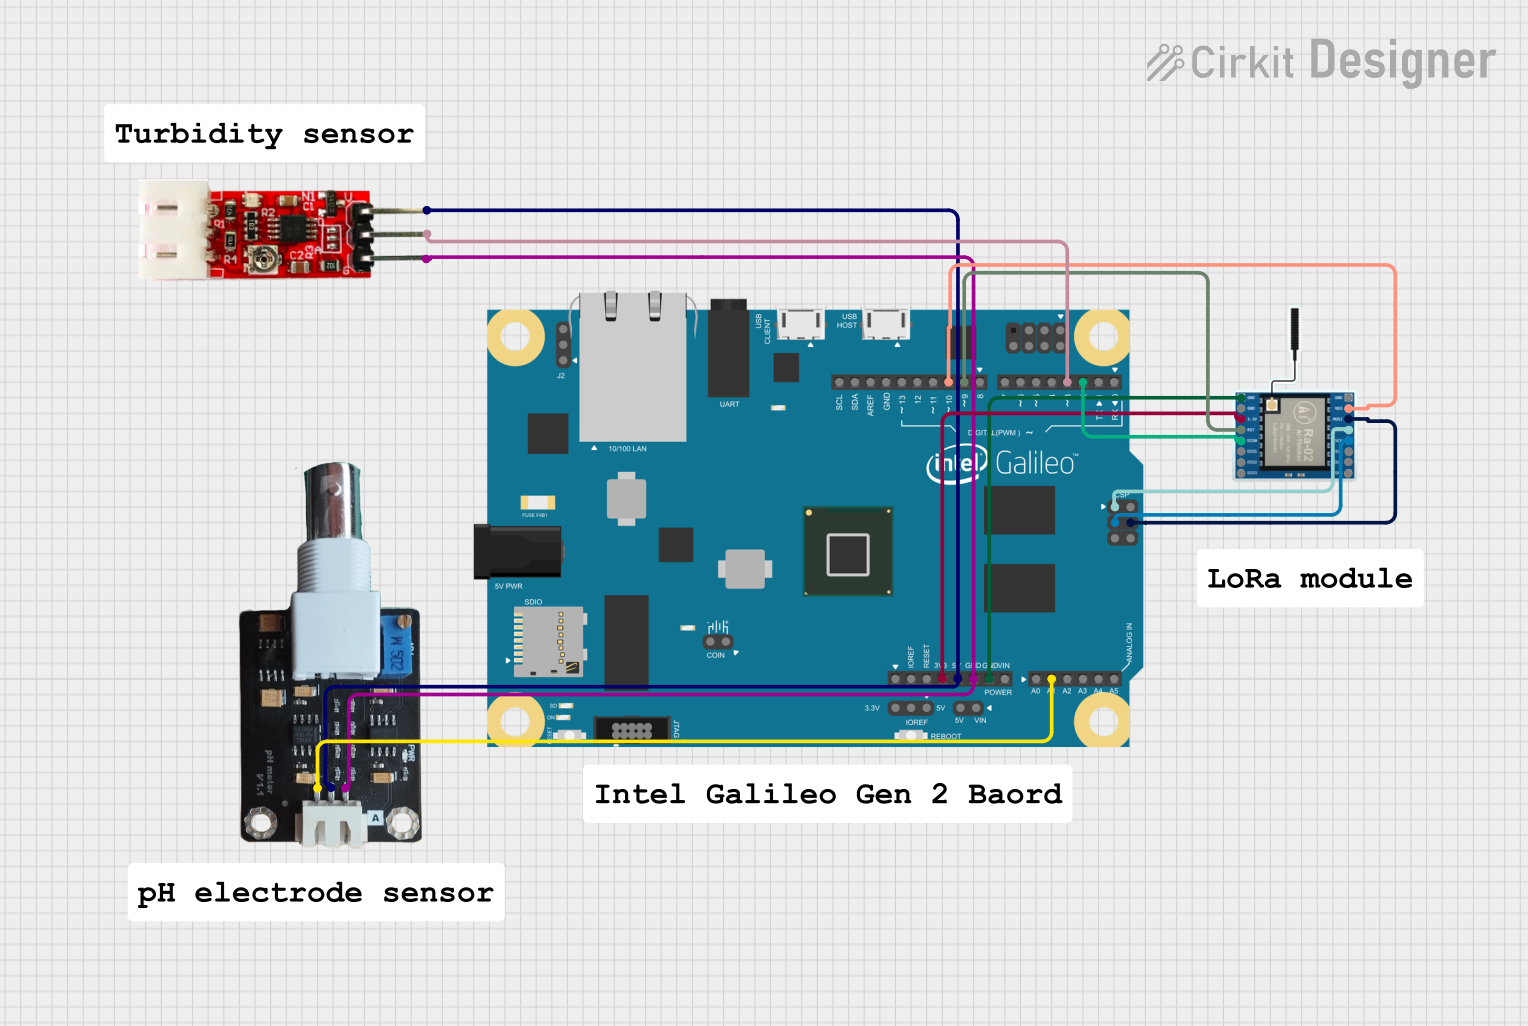
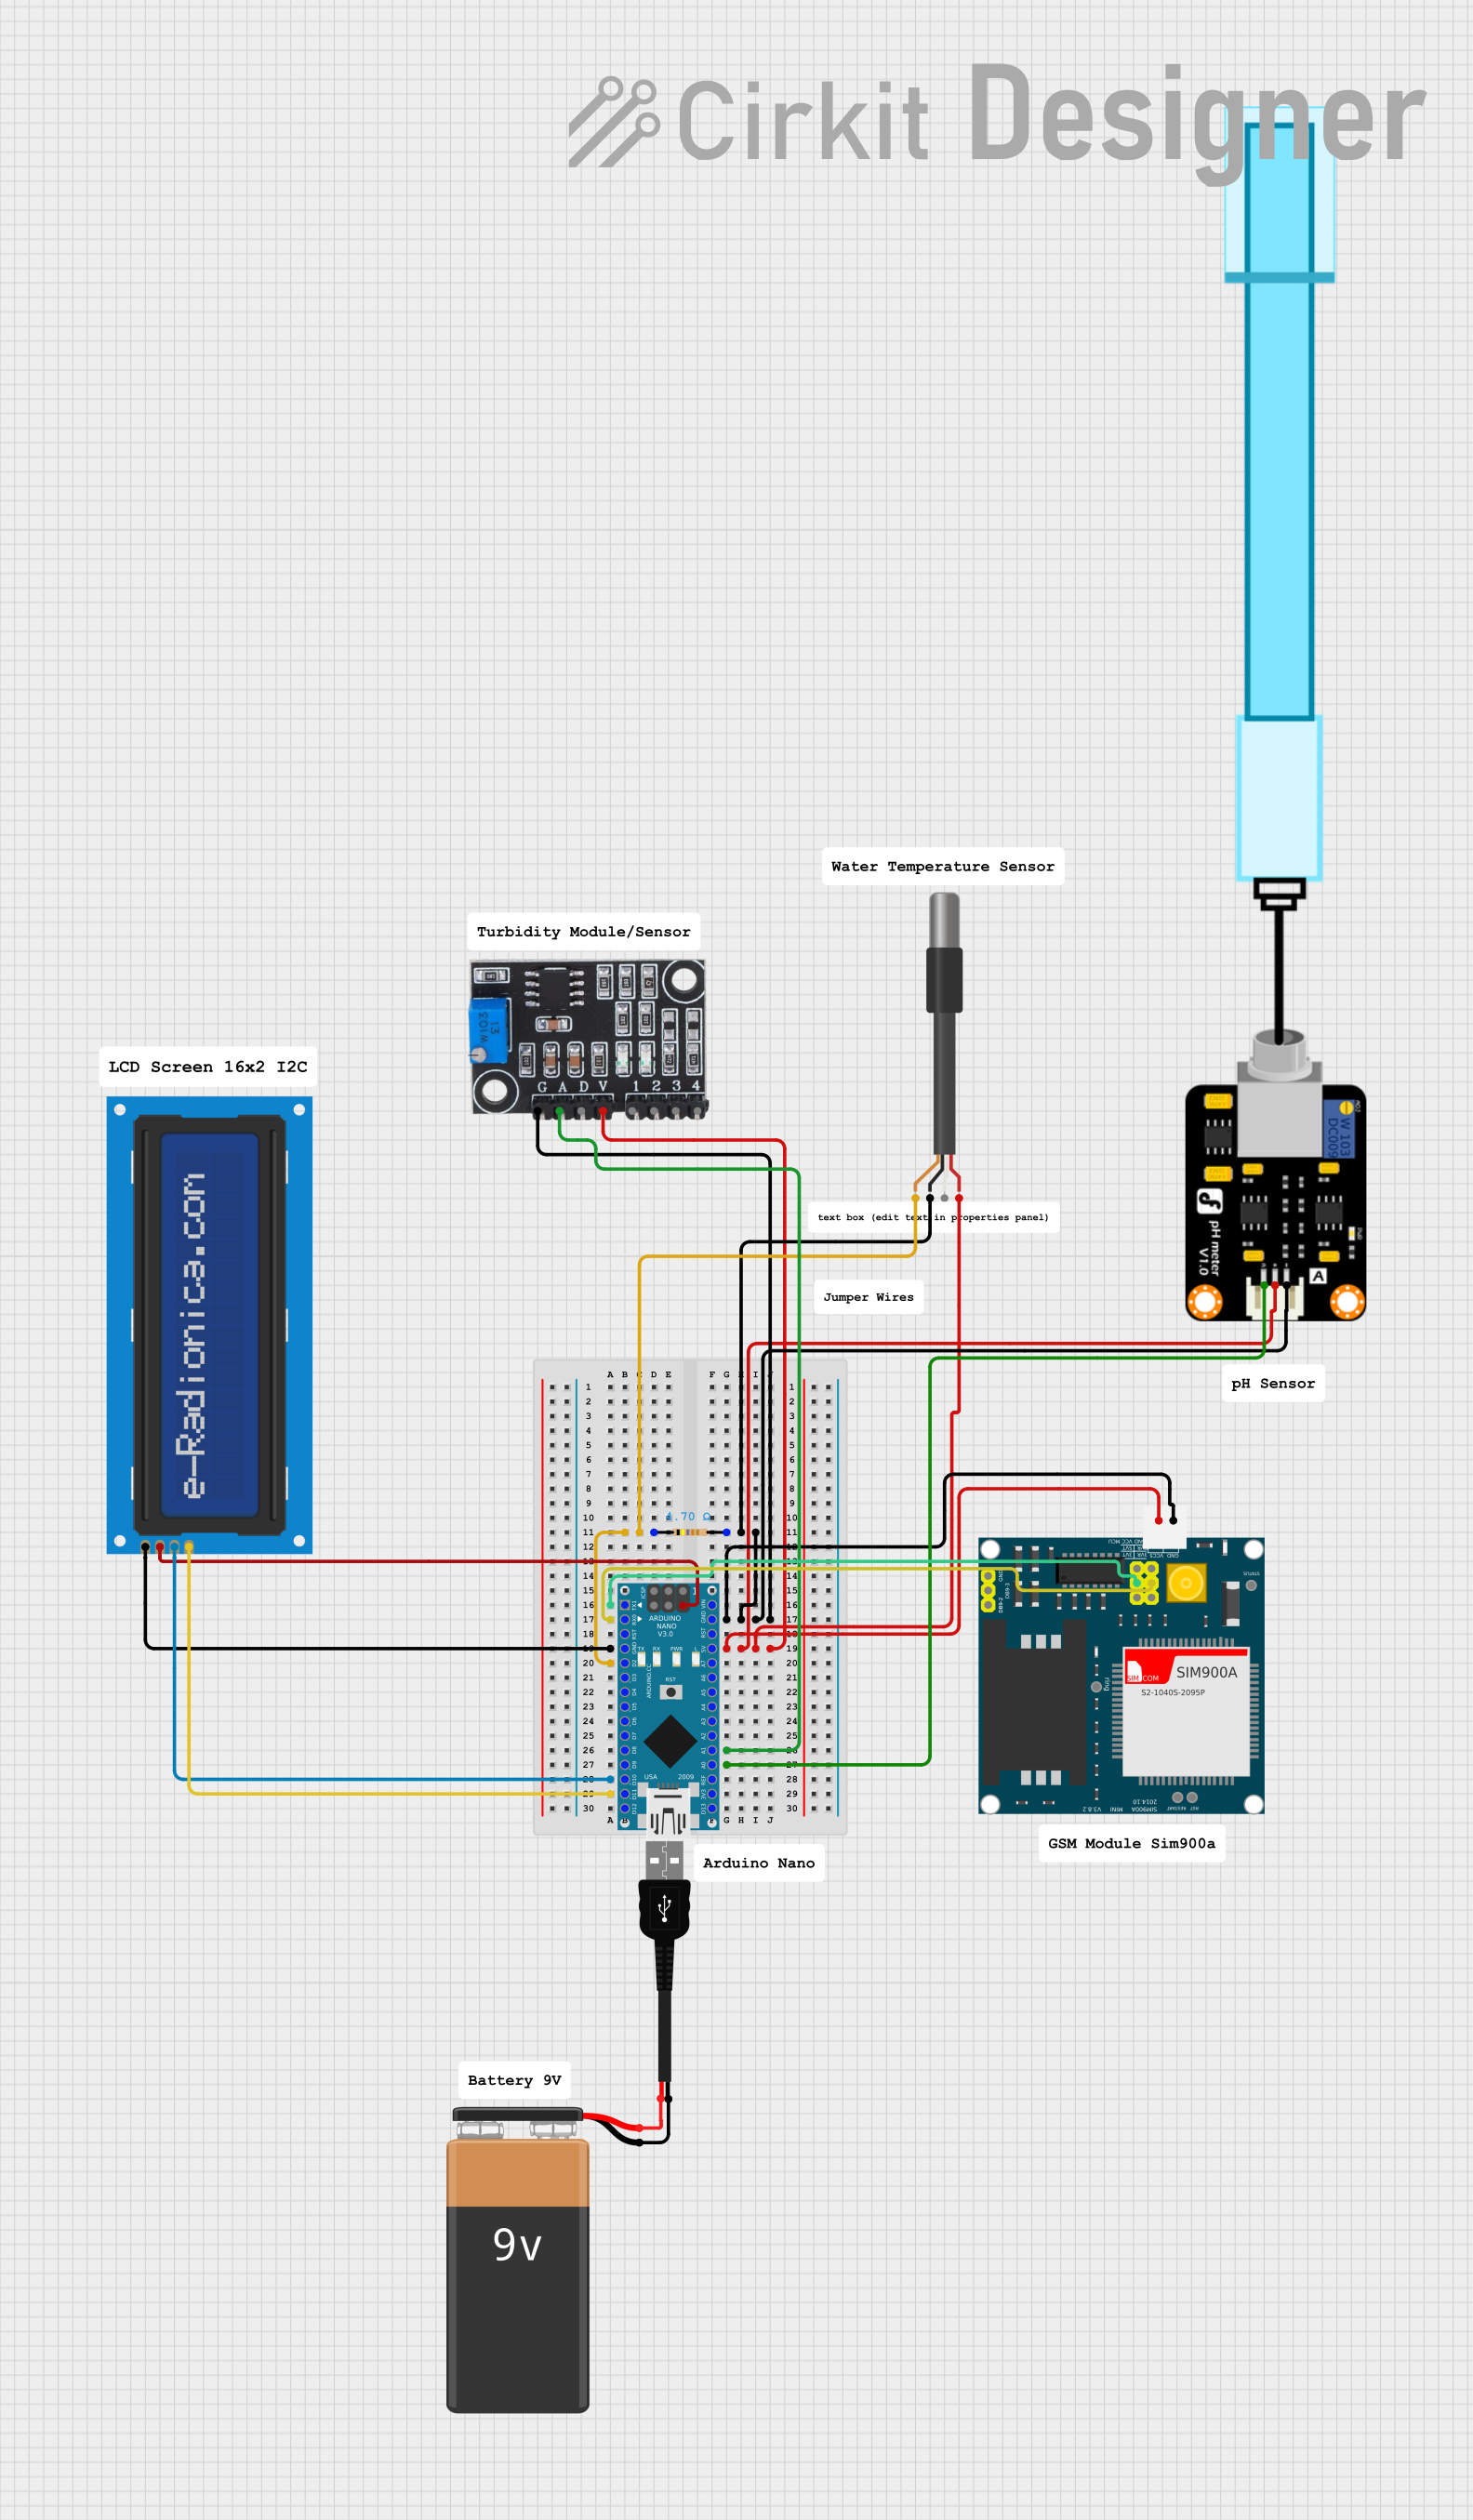
Explore Projects Built with pH probe module
Technical Specifications
Key Technical Details
| Parameter | Specification |
|---|---|
| Manufacturer | DIY MORE |
| Part ID | PH-4502C |
| Operating Voltage | 5V DC |
| Output Signal | Analog (0-3V) |
| Measurement Range | 0 to 14 pH |
| Accuracy | ±0.1 pH (at 25°C) |
| Operating Temperature | 0°C to 60°C |
| Response Time | ≤1 minute |
| Calibration | Two-point calibration (pH 4.0 and pH 7.0) |
| Dimensions (Module) | 42mm x 32mm x 20mm |
Pin Configuration and Descriptions
pH Probe Module Pins
| Pin Name | Description |
|---|---|
| VCC | Power supply input (5V DC) |
| GND | Ground connection |
| DO | Digital output (not used in most applications) |
| AO | Analog output (0-3V, proportional to pH value) |
pH Electrode Connector
| Pin Name | Description |
|---|---|
| BNC | Connects to the pH electrode |
Usage Instructions
How to Use the PH-4502C in a Circuit
- Power the Module: Connect the VCC pin to a 5V DC power source and the GND pin to ground.
- Connect the pH Electrode: Attach the pH electrode to the BNC connector on the module.
- Read the Analog Output: Connect the AO pin to an analog input pin on your microcontroller (e.g., Arduino).
- Calibrate the Module:
- Immerse the pH electrode in a standard buffer solution (e.g., pH 7.0).
- Adjust the potentiometer on the module until the output voltage corresponds to the expected value.
- Repeat the process with a second buffer solution (e.g., pH 4.0 or pH 10.0) for two-point calibration.
- Measure pH: Place the electrode in the solution to be tested and read the analog output. Convert the voltage to a pH value using the calibration data.
Important Considerations and Best Practices
- Electrode Maintenance: Rinse the pH electrode with distilled water after each use to prevent contamination.
- Avoid Drying: Store the electrode in a pH storage solution when not in use to maintain accuracy.
- Temperature Compensation: For precise measurements, consider the effect of temperature on pH readings.
- Avoid Overvoltage: Ensure the module is powered with a stable 5V DC supply to prevent damage.
Example Code for Arduino UNO
// Example code to read pH values using the PH-4502C module with Arduino UNO
// Connect AO pin of the module to A0 pin of Arduino UNO

#define PH_PIN A0  // Analog pin connected to the AO pin of the module

void setup() {
  Serial.begin(9600);  // Initialize serial communication at 9600 baud
  pinMode(PH_PIN, INPUT);  // Set the pH pin as input
}

void loop() {
  int sensorValue = analogRead(PH_PIN);  // Read the analog value from the module
  float voltage = sensorValue * (5.0 / 1023.0);  // Convert ADC value to voltage
  float pH = 3.5 * voltage;  // Convert voltage to pH (calibration may vary)

  // Print the pH value to the Serial Monitor
  Serial.print("pH Value: ");
  Serial.println(pH);

  delay(1000);  // Wait for 1 second before the next reading
}
Troubleshooting and FAQs
Common Issues and Solutions
| Issue | Possible Cause | Solution |
|---|---|---|
| Unstable or fluctuating readings | Electrode not properly rinsed | Rinse the electrode with distilled water. |
| Incorrect pH values | Calibration not performed | Perform two-point calibration. |
| No output or constant value | Loose or damaged connections | Check all connections and wiring. |
| Electrode not responding | Electrode dried out | Soak the electrode in storage solution. |
FAQs
Can I use the PH-4502C module with a 3.3V microcontroller?
- No, the module requires a 5V power supply for proper operation. However, you can use a level shifter to interface the analog output with a 3.3V microcontroller.
How often should I calibrate the module?
- Calibration should be performed before each use for critical applications or at least once a week for general use.
What is the lifespan of the pH electrode?
- The electrode typically lasts 1-2 years with proper maintenance and storage.
Can the module measure pH in high-temperature solutions?
- The module operates within 0°C to 60°C. For higher temperatures, use a specialized high-temperature pH electrode.
By following this documentation, users can effectively integrate and operate the DIY MORE PH-4502C pH probe module in their projects.