How to Use Rectangular Speaker: Examples, Pinouts, and Specs
Introduction
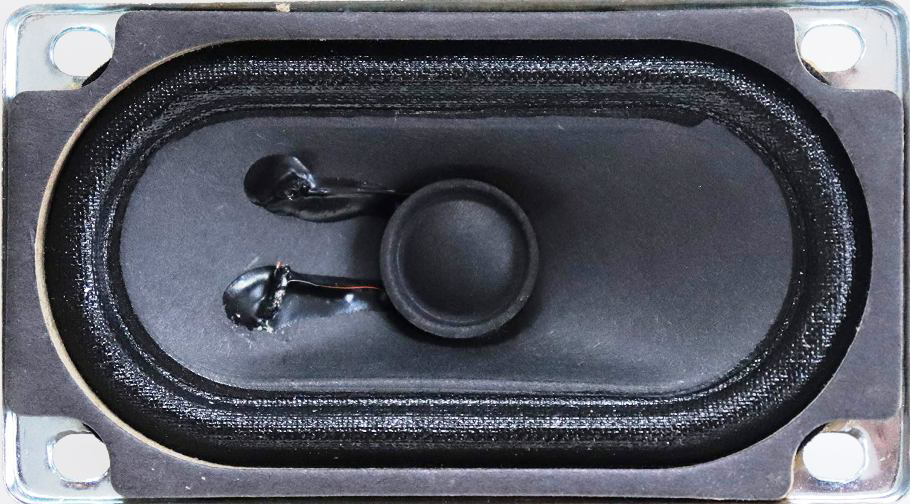
The Rectangular Speaker (Manufacturer: A, Part ID: Speaker) is an audio output device designed to convert electrical signals into sound waves. Its rectangular shape provides a larger surface area compared to traditional round speakers, enhancing sound projection and bass response. This makes it an excellent choice for applications requiring high-quality audio output in a compact form factor.
Explore Projects Built with Rectangular Speaker

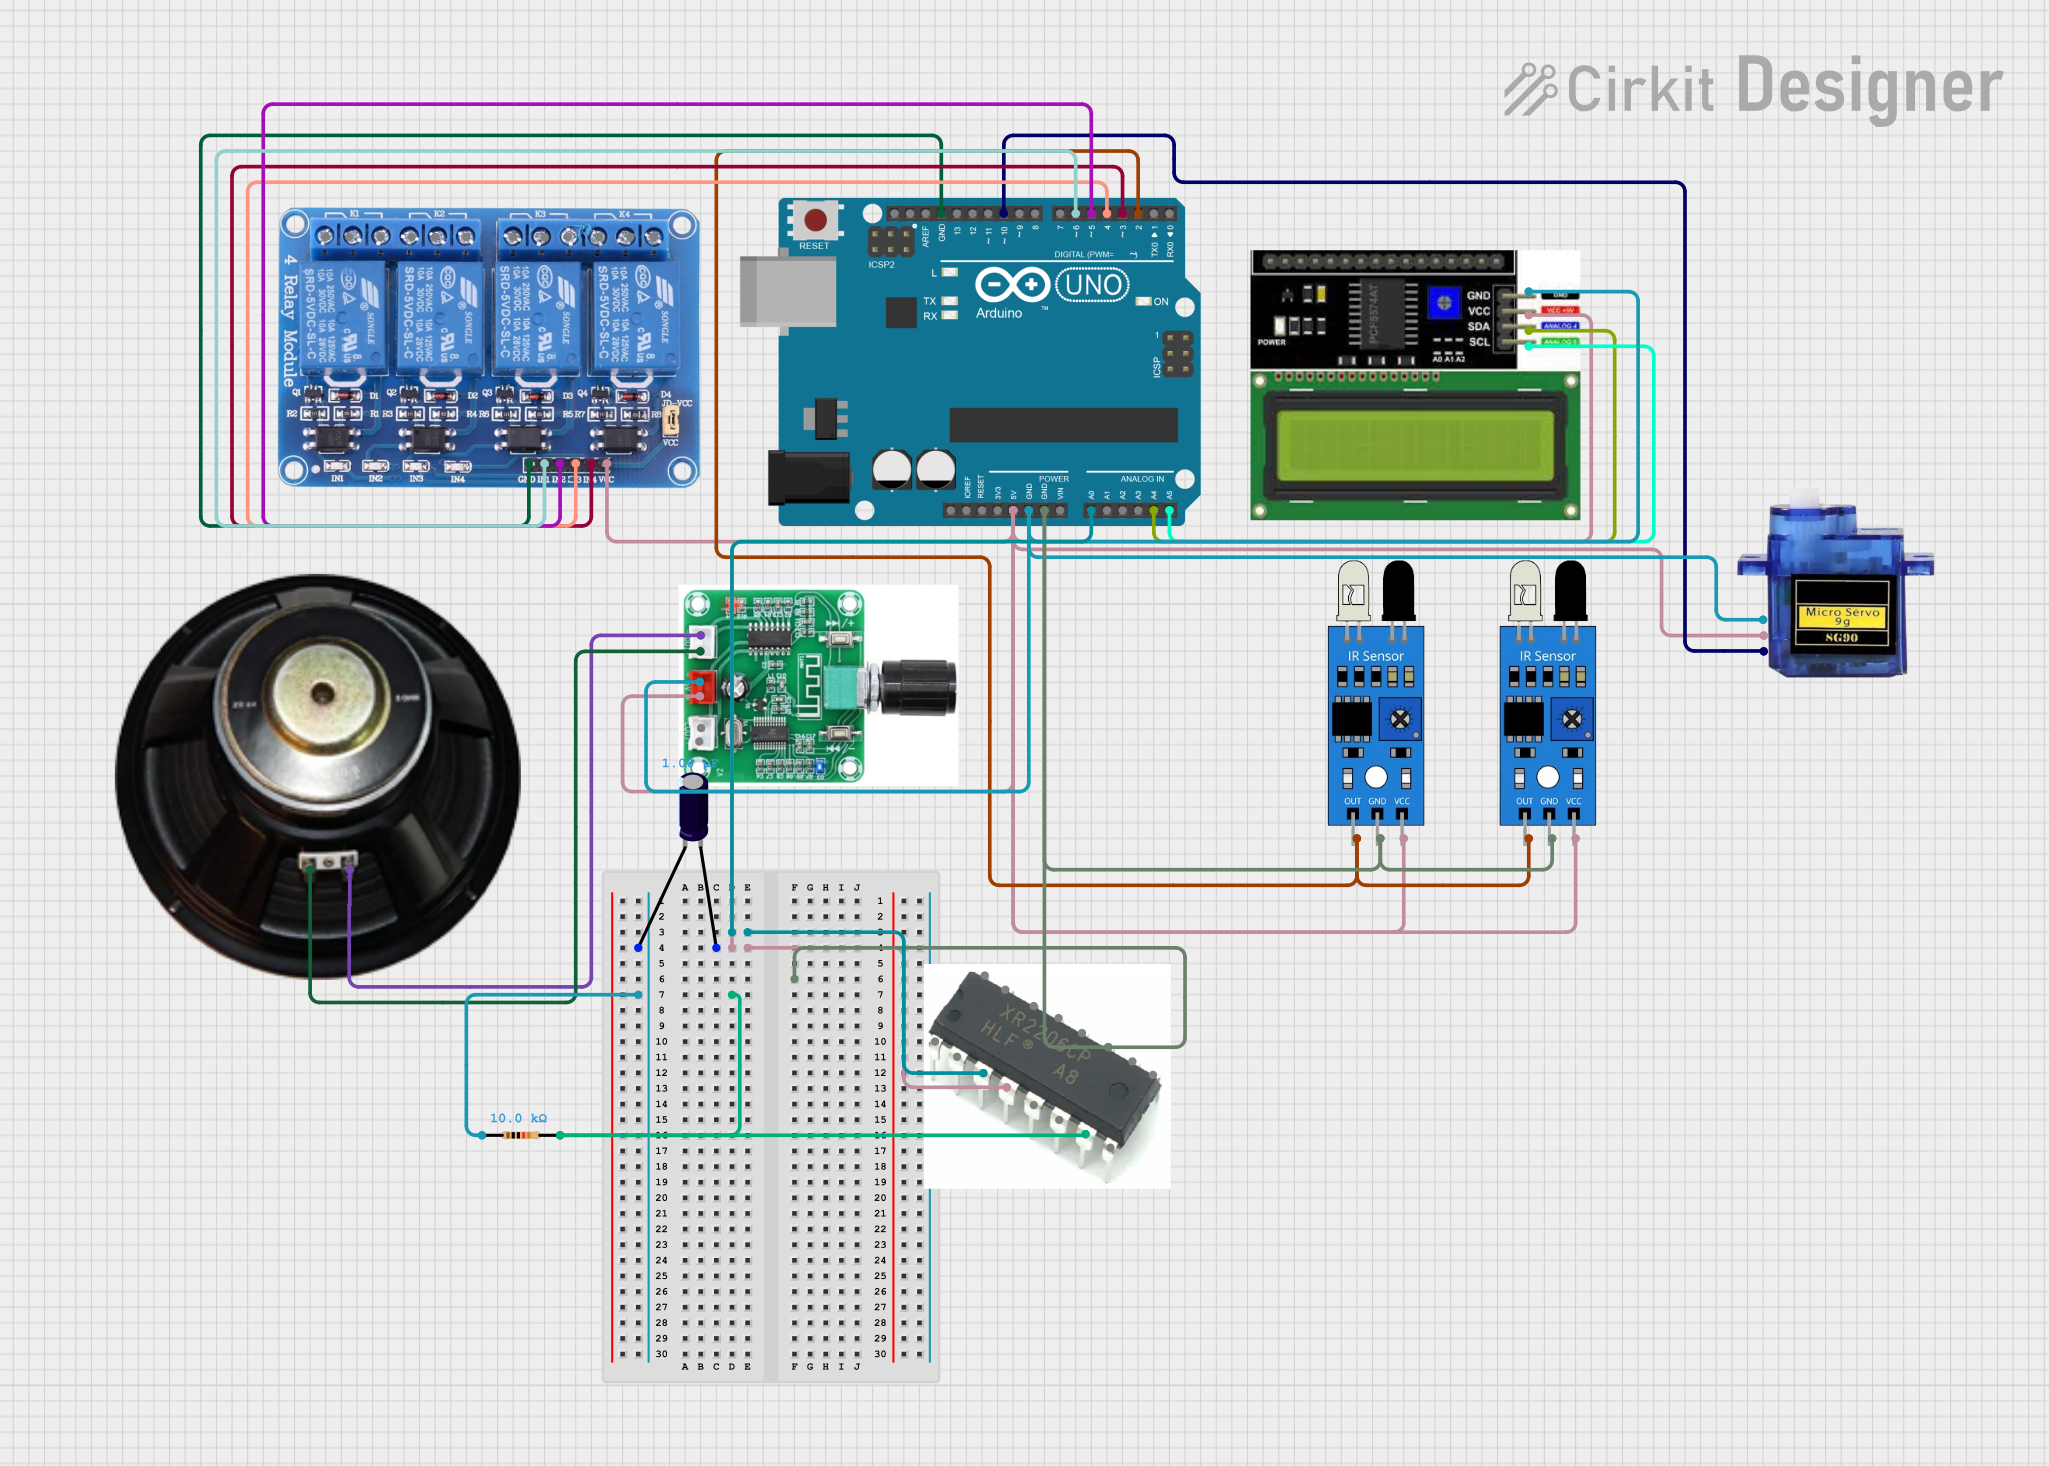

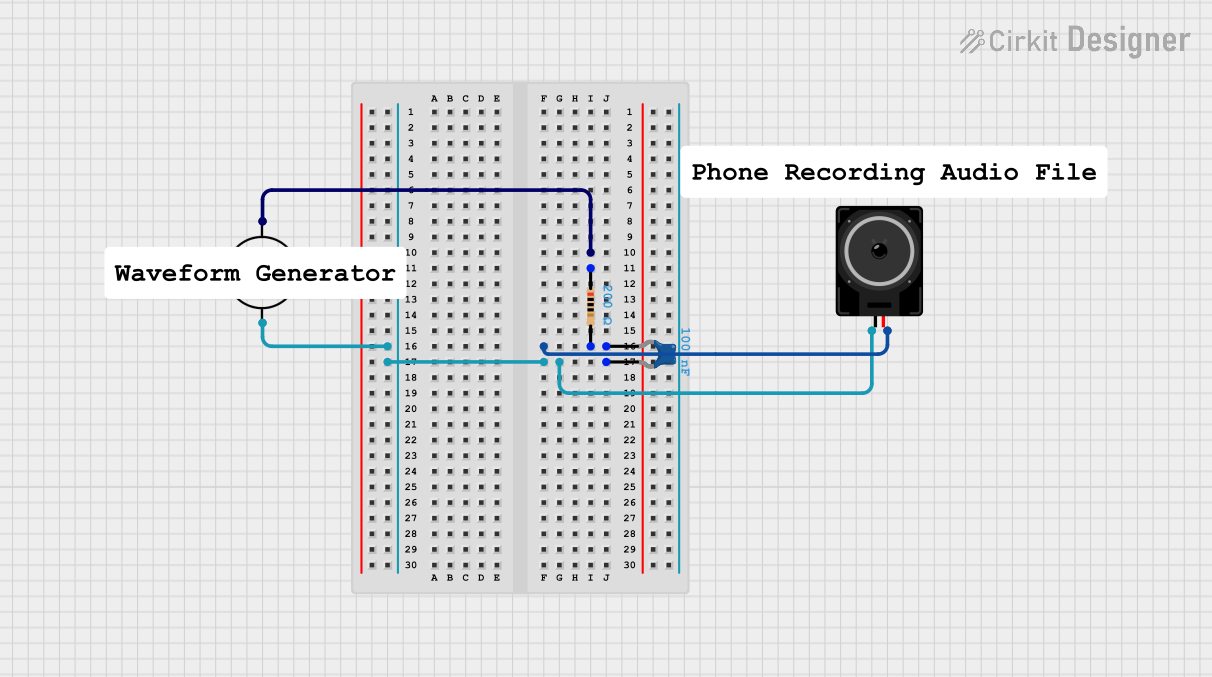
Explore Projects Built with Rectangular Speaker
Common Applications and Use Cases
- Portable audio systems
- Home theater systems
- Public address systems
- Embedded systems with audio output
- DIY audio projects
Technical Specifications
Below are the key technical details for the Rectangular Speaker:
| Parameter | Value |
|---|---|
| Manufacturer | A |
| Part ID | Speaker |
| Shape | Rectangular |
| Impedance | 8 Ω |
| Power Rating | 5 W |
| Frequency Response | 100 Hz – 20 kHz |
| Sensitivity | 85 dB @ 1W/1m |
| Dimensions (L x W x H) | 100 mm x 50 mm x 25 mm |
| Weight | 150 g |
| Connector Type | Solder terminals |
Pin Configuration and Descriptions
The Rectangular Speaker has two solder terminals for electrical connections:
| Pin | Description |
|---|---|
| + | Positive terminal for input signal |
| - | Negative terminal for input signal |
Usage Instructions
How to Use the Component in a Circuit
Connect the Speaker to an Audio Amplifier:
- The speaker requires an amplified audio signal to operate effectively. Connect the positive terminal (
+) of the speaker to the positive output of the amplifier and the negative terminal (-) to the negative output.
- The speaker requires an amplified audio signal to operate effectively. Connect the positive terminal (
Ensure Proper Impedance Matching:
- Verify that the amplifier's output impedance matches the speaker's impedance (8 Ω) to avoid distortion or damage to the speaker.
Power Considerations:
- Do not exceed the speaker's power rating of 5 W. Use an amplifier that provides a maximum of 5 W output power to prevent damage.
Mounting the Speaker:
- Secure the speaker in an enclosure or mounting bracket to optimize sound quality and protect it from physical damage.
Important Considerations and Best Practices
- Avoid Overdriving the Speaker: Exceeding the power rating can cause permanent damage to the speaker's diaphragm or voice coil.
- Use a Proper Enclosure: A well-designed enclosure can significantly improve sound quality by enhancing bass response and reducing distortion.
- Protect Against Moisture: If used in outdoor or humid environments, ensure the speaker is protected against moisture to prevent corrosion or damage.
Example: Connecting the Speaker to an Arduino UNO
To use the Rectangular Speaker with an Arduino UNO, you can generate simple tones using the tone() function. Below is an example:
/*
  Example: Generating a tone with the Rectangular Speaker
  - Connect the positive terminal of the speaker to a 100-ohm resistor.
  - Connect the other end of the resistor to Arduino pin 8.
  - Connect the negative terminal of the speaker to Arduino GND.
*/

#define SPEAKER_PIN 8  // Define the pin connected to the speaker

void setup() {
  // No setup required for tone generation
}

void loop() {
  tone(SPEAKER_PIN, 440);  // Generate a 440 Hz tone (A4 note)
  delay(1000);             // Play the tone for 1 second
  noTone(SPEAKER_PIN);     // Stop the tone
  delay(1000);             // Wait for 1 second
}
Note: Use a resistor (e.g., 100 Ω) in series with the speaker to limit current and protect the Arduino pin.
Troubleshooting and FAQs
Common Issues and Solutions
| Issue | Possible Cause | Solution |
|---|---|---|
| No sound from the speaker | Loose or incorrect connections | Verify all connections and ensure proper polarity. |
| Distorted sound | Overdriving the speaker or impedance mismatch | Reduce the amplifier volume or check impedance matching. |
| Low volume | Insufficient amplifier power | Use an amplifier with a higher power output (up to 5 W). |
| Speaker not working with Arduino | Missing resistor or incorrect wiring | Add a 100 Ω resistor in series and double-check the wiring. |
FAQs
Can I use the speaker without an amplifier?
- No, the speaker requires an amplified signal to produce audible sound.
What type of enclosure is recommended?
- A sealed or ported enclosure designed for the speaker's dimensions and frequency response is ideal.
Can I use the speaker with a different impedance amplifier?
- It is recommended to use an amplifier with an 8 Ω output impedance for optimal performance.
Is the speaker waterproof?
- No, the speaker is not waterproof. Use protective measures if operating in humid or outdoor environments.
By following this documentation, you can effectively integrate the Rectangular Speaker into your audio projects and achieve high-quality sound output.