How to Use refletancia: Examples, Pinouts, and Specs

Introduction
Refletancia is a term used in optics and electronics to describe the reflection of light or electromagnetic waves from a surface. It is a critical parameter in understanding how materials interact with light, influencing the efficiency and performance of various systems. This component is commonly used in applications such as optical sensors, photovoltaic cells, and reflective coatings. By measuring or controlling refletancia, engineers can optimize designs for energy efficiency, signal clarity, and material performance.
Explore Projects Built with refletancia
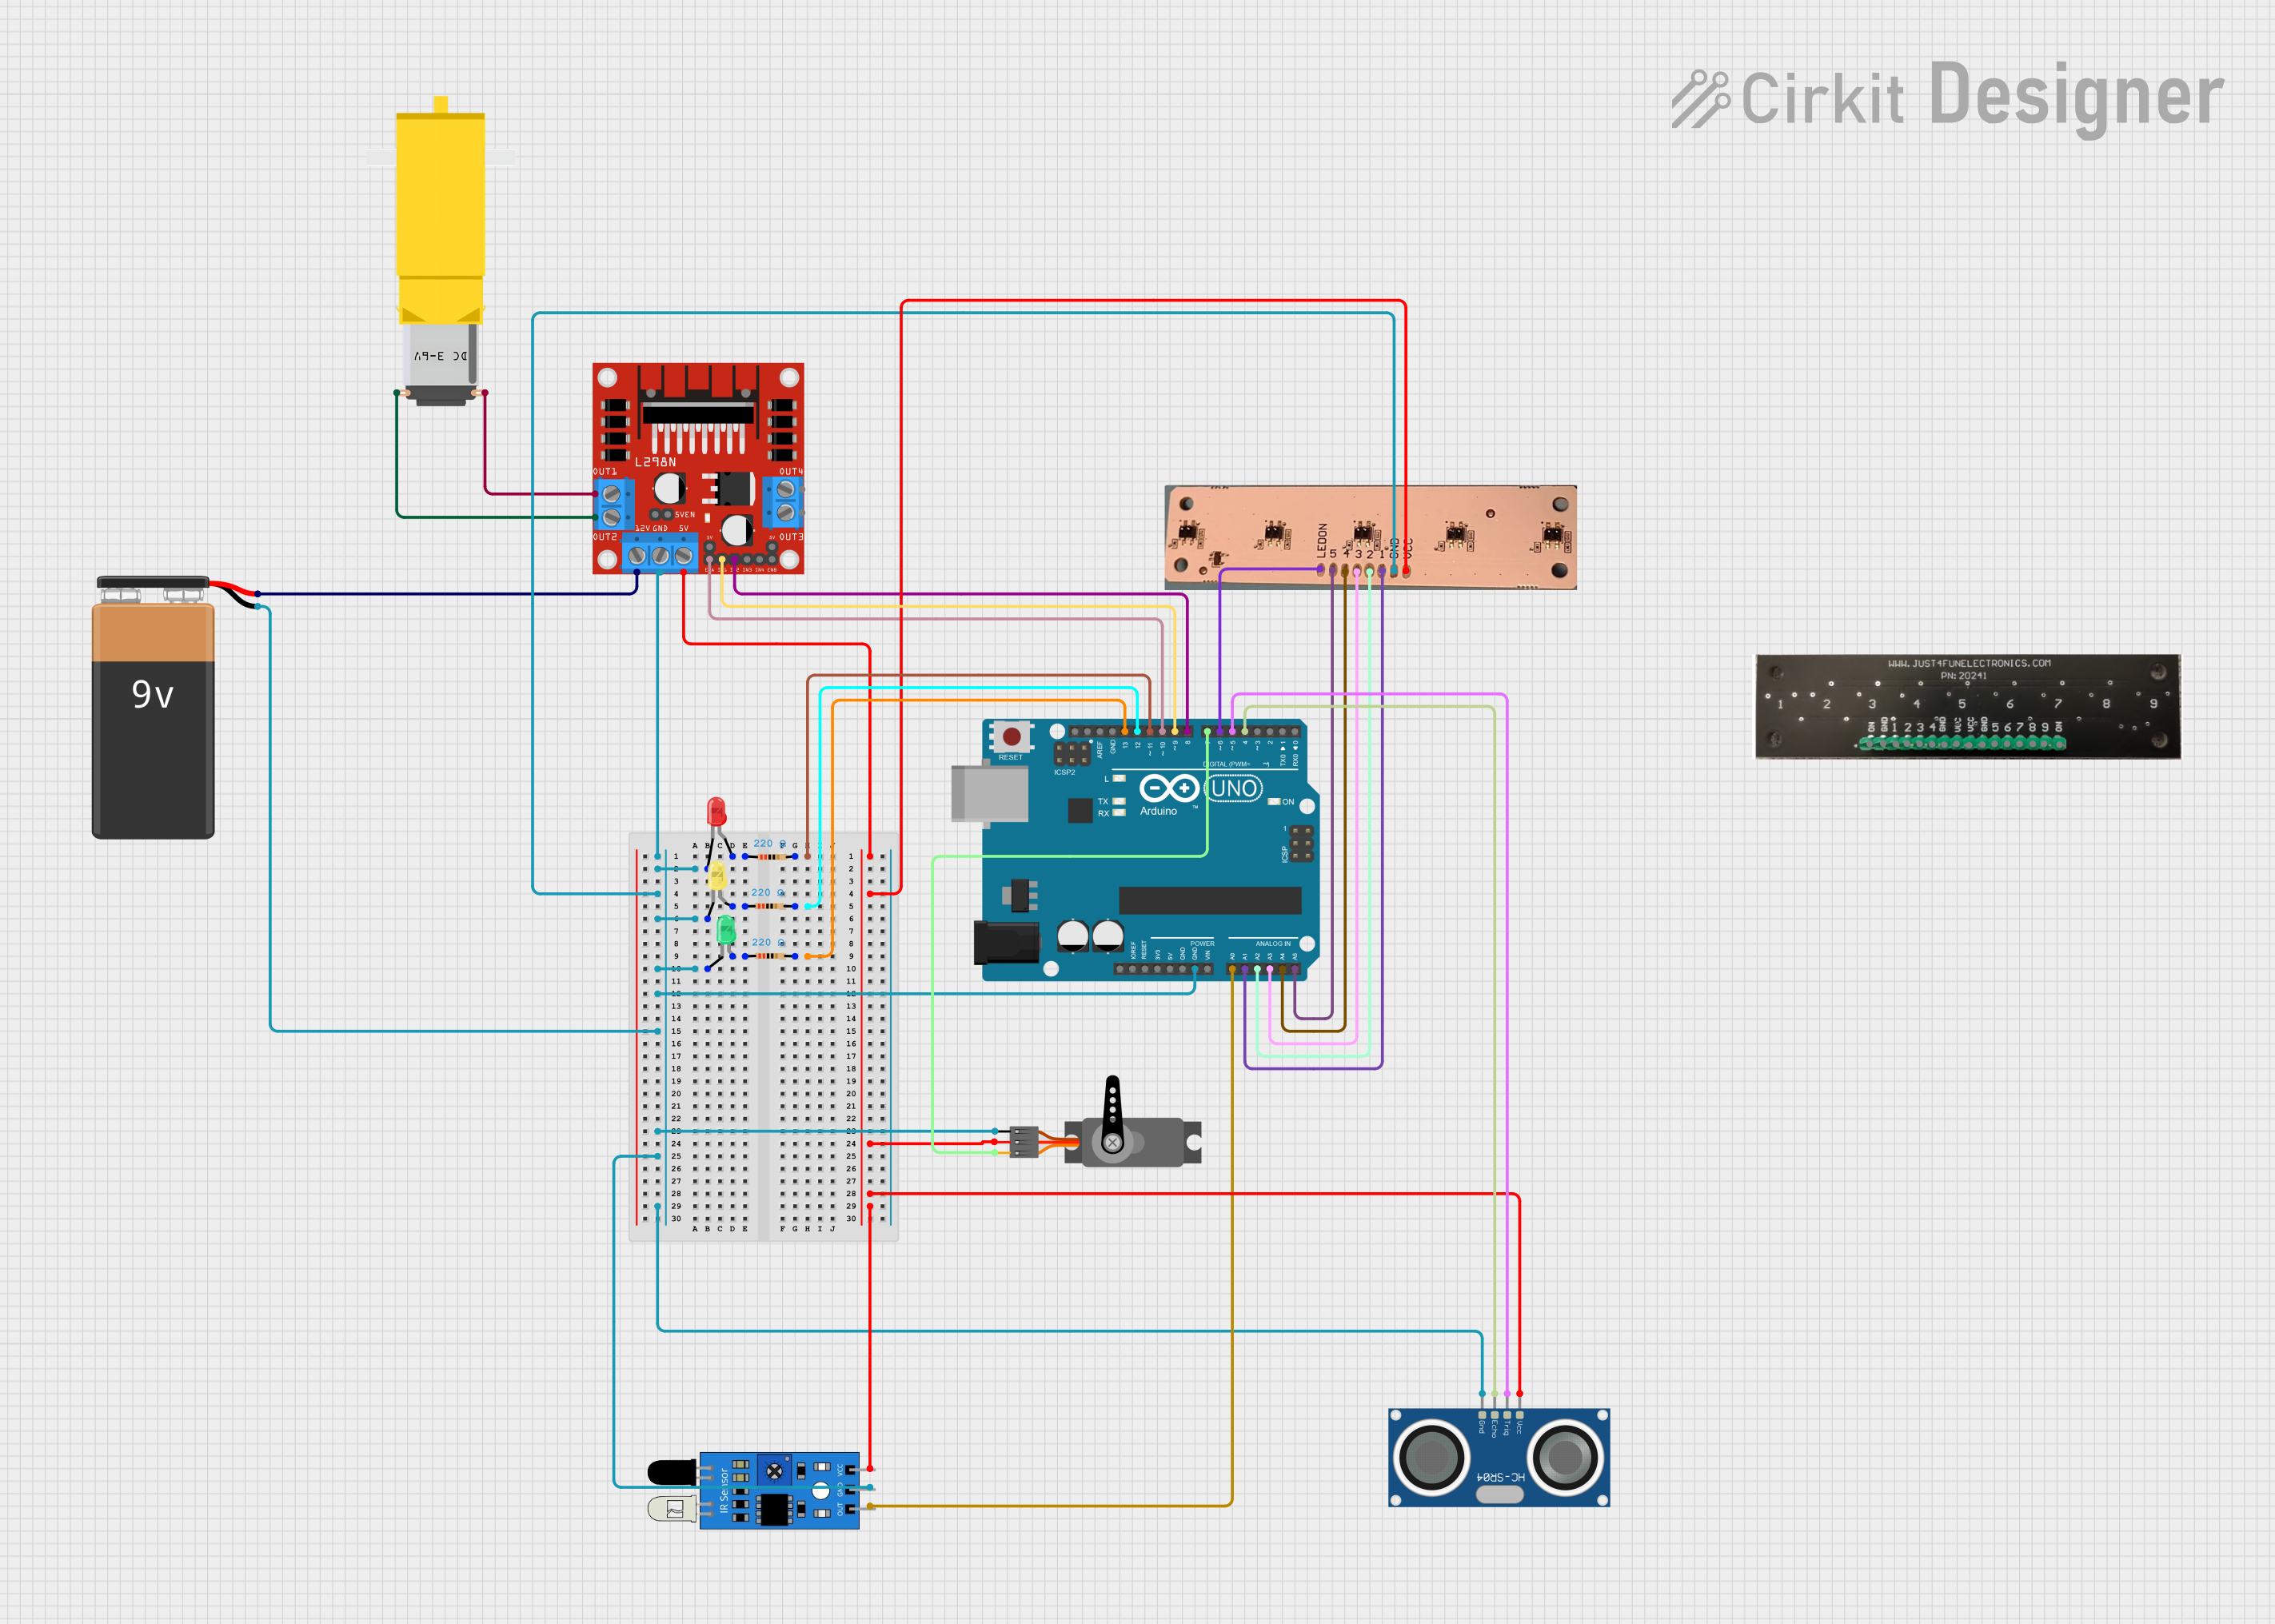
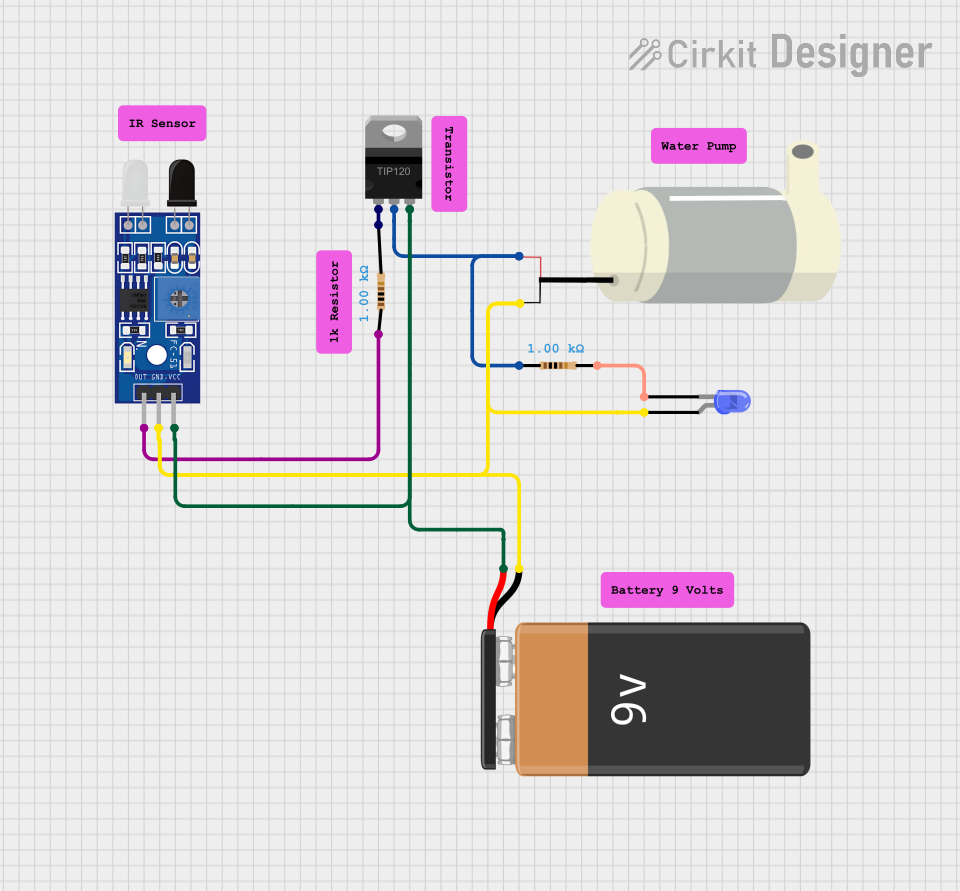
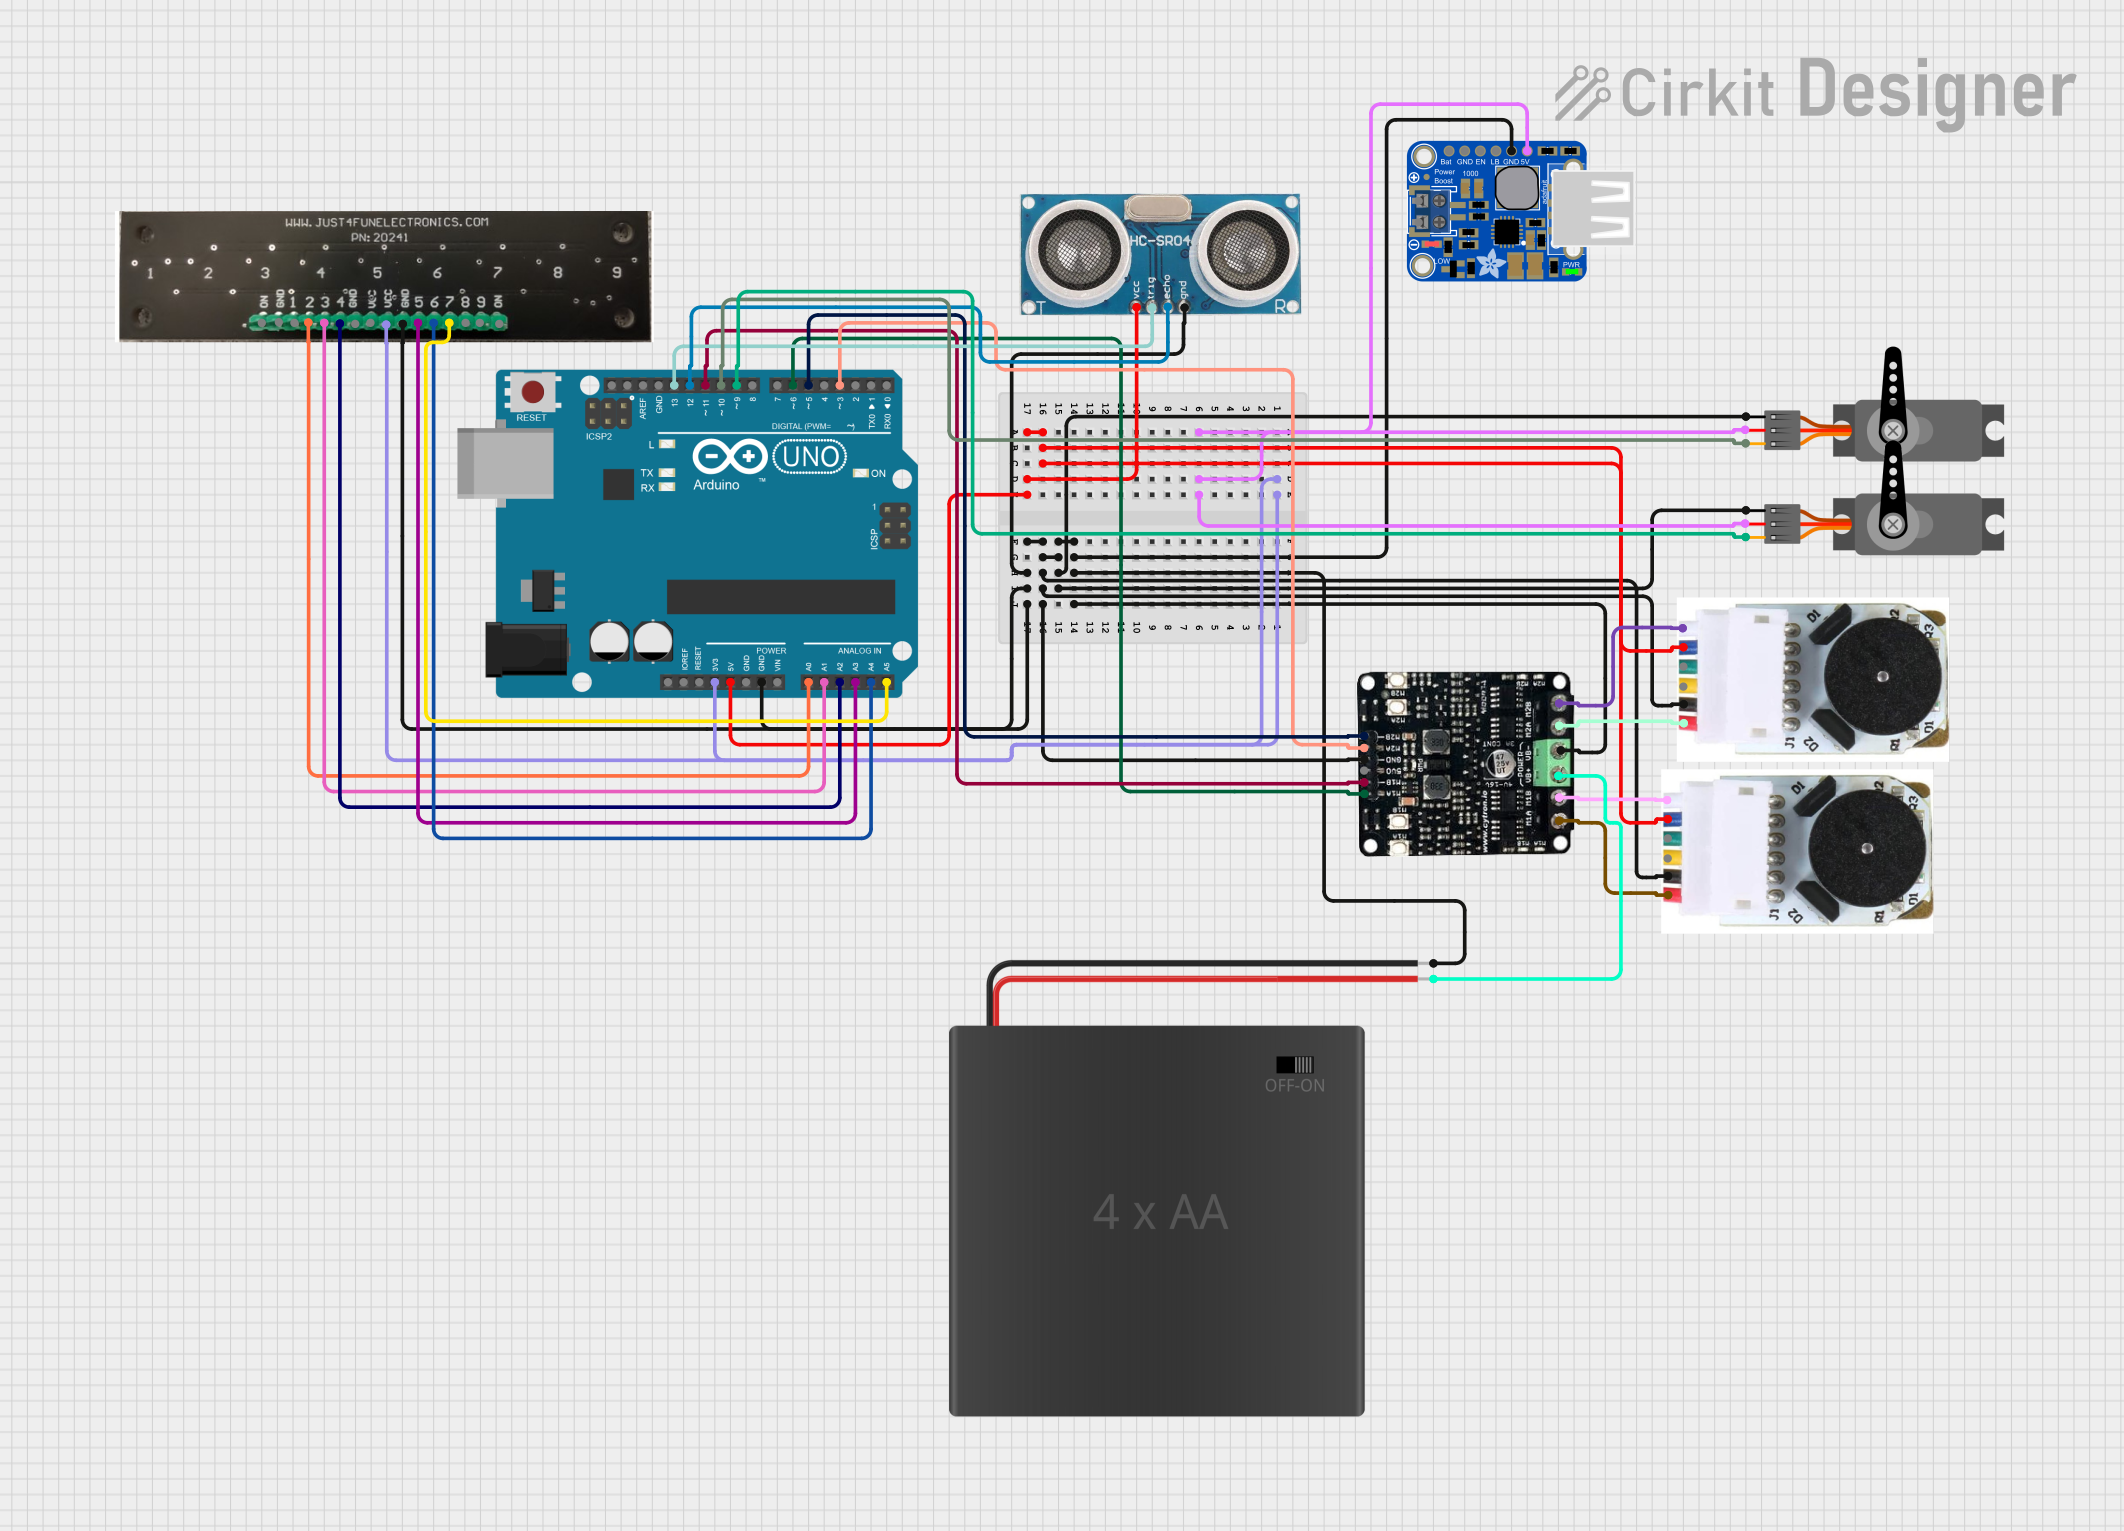

Explore Projects Built with refletancia
Common Applications:
- Optical Sensors: Used to detect light intensity or changes in reflected light.
- Photovoltaic Cells: Helps in analyzing and improving light absorption efficiency.
- Reflective Coatings: Used in mirrors, lenses, and other optical devices.
- Laser Systems: To control and measure beam reflection for precision applications.
Technical Specifications
The technical specifications of a refletancia-based system or sensor depend on the material and design. Below are general parameters for a typical refletancia sensor:
Key Technical Details:
- Operating Wavelength Range: 400 nm to 1100 nm (visible to near-infrared spectrum)
- Reflection Sensitivity: ±1% accuracy
- Input Voltage: 3.3V to 5V DC
- Output Signal: Analog voltage proportional to reflected light intensity
- Operating Temperature: -20°C to 85°C
- Power Consumption: < 50 mW
Pin Configuration and Descriptions:
| Pin | Name | Description |
|---|---|---|
| 1 | VCC | Power supply input (3.3V to 5V DC) |
| 2 | GND | Ground connection |
| 3 | OUT | Analog output signal proportional to the reflected light intensity |
| 4 | EN (Optional) | Enable pin to activate or deactivate the sensor (active HIGH) |
Usage Instructions
To use a refletancia sensor in a circuit, follow these steps:
- Power the Sensor: Connect the VCC pin to a 3.3V or 5V DC power source and the GND pin to the ground.
- Connect the Output: Attach the OUT pin to an analog input pin of your microcontroller or measurement device.
- Enable the Sensor: If the sensor has an enable pin (EN), ensure it is set HIGH to activate the sensor.
- Calibrate the Sensor: Place the sensor at the desired distance from the reflective surface and record the output voltage for calibration.
- Read the Output: Measure the analog voltage from the OUT pin to determine the reflected light intensity.
Important Considerations:
- Surface Properties: The refletancia depends on the material and texture of the surface. Smooth, shiny surfaces reflect more light, while rough or matte surfaces reflect less.
- Distance: Maintain a consistent distance between the sensor and the reflective surface for accurate readings.
- Ambient Light: Minimize ambient light interference by shielding the sensor or using it in controlled lighting conditions.
- Temperature: Ensure the operating temperature is within the specified range to avoid performance degradation.
Example: Using Refletancia Sensor with Arduino UNO
Below is an example of how to connect and read data from a refletancia sensor using an Arduino UNO:
// Define the analog pin connected to the sensor's OUT pin
const int sensorPin = A0;

void setup() {
  Serial.begin(9600); // Initialize serial communication at 9600 baud
}

void loop() {
  int sensorValue = analogRead(sensorPin); // Read the analog value from the sensor
  float voltage = sensorValue * (5.0 / 1023.0); // Convert the reading to voltage

  // Print the voltage to the Serial Monitor
  Serial.print("Reflected Light Voltage: ");
  Serial.print(voltage);
  Serial.println(" V");

  delay(500); // Wait for 500ms before the next reading
}
Notes:
- Ensure the sensor's VCC and GND are properly connected to the Arduino's 5V and GND pins.
- The analog output from the sensor is read on pin A0 in this example. Adjust the code if using a different pin.
Troubleshooting and FAQs
Common Issues:
No Output Signal:
- Check the power connections (VCC and GND).
- Ensure the EN pin is HIGH (if applicable).
- Verify that the reflective surface is within the sensor's detection range.
Inconsistent Readings:
- Ensure the sensor is at a fixed distance from the reflective surface.
- Minimize ambient light interference by shielding the sensor.
- Check for loose or faulty connections.
Low Sensitivity:
- Verify that the reflective surface is not too far or too close to the sensor.
- Clean the sensor lens to remove dust or smudges.
FAQs:
Q1: Can the refletancia sensor detect colors?
A1: No, the sensor measures the intensity of reflected light, not its color. For color detection, use a color sensor.
Q2: What is the maximum distance for accurate readings?
A2: The effective range depends on the sensor design, but typically it is 2-10 cm for most refletancia sensors.
Q3: Can I use the sensor outdoors?
A3: Yes, but ensure it is protected from direct sunlight and extreme weather conditions to maintain accuracy.
Q4: How do I calibrate the sensor?
A4: Place the sensor at a fixed distance from a known reflective surface, record the output voltage, and use it as a reference for future measurements.
By following this documentation, you can effectively integrate and troubleshoot a refletancia sensor in your projects.