How to Use laser: Examples, Pinouts, and Specs
Introduction
A laser is a device that emits light through a process of optical amplification based on the stimulated emission of electromagnetic radiation. Lasers are known for their ability to produce highly focused, coherent, and monochromatic beams of light. These properties make lasers indispensable in a wide range of applications, including telecommunications, medical devices, industrial cutting and welding, scientific research, and consumer electronics.
Common applications and use cases:
- Barcode scanners and optical storage devices (e.g., CD/DVD players)
- Fiber-optic communication systems
- Laser cutting, engraving, and welding in manufacturing
- Medical procedures such as laser surgery and skin treatments
- Scientific experiments, including spectroscopy and interferometry
- Laser pointers and rangefinders
Explore Projects Built with laser
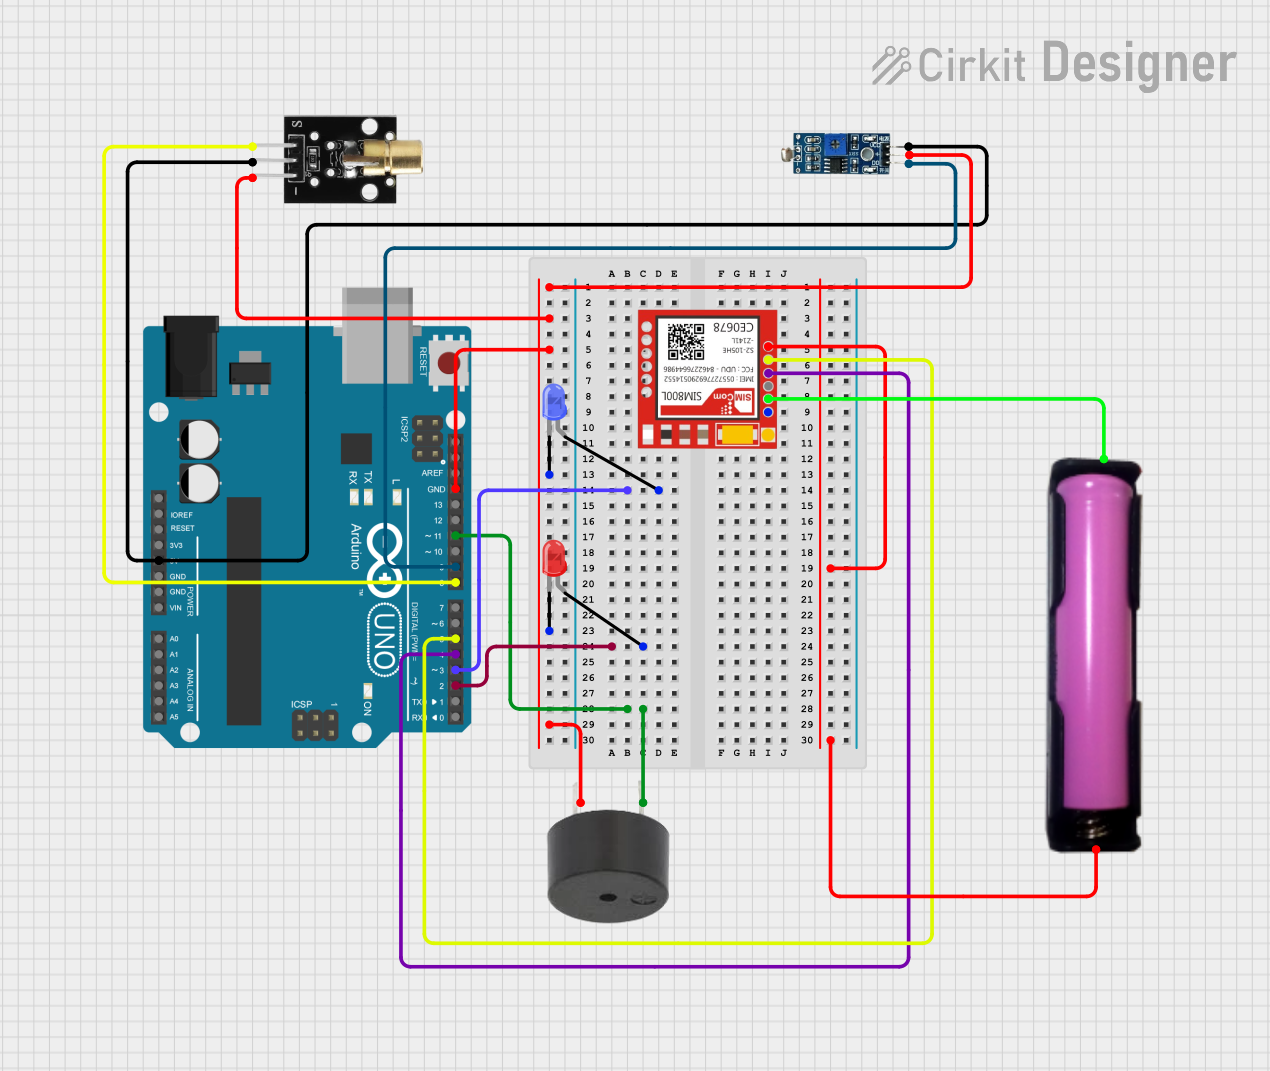
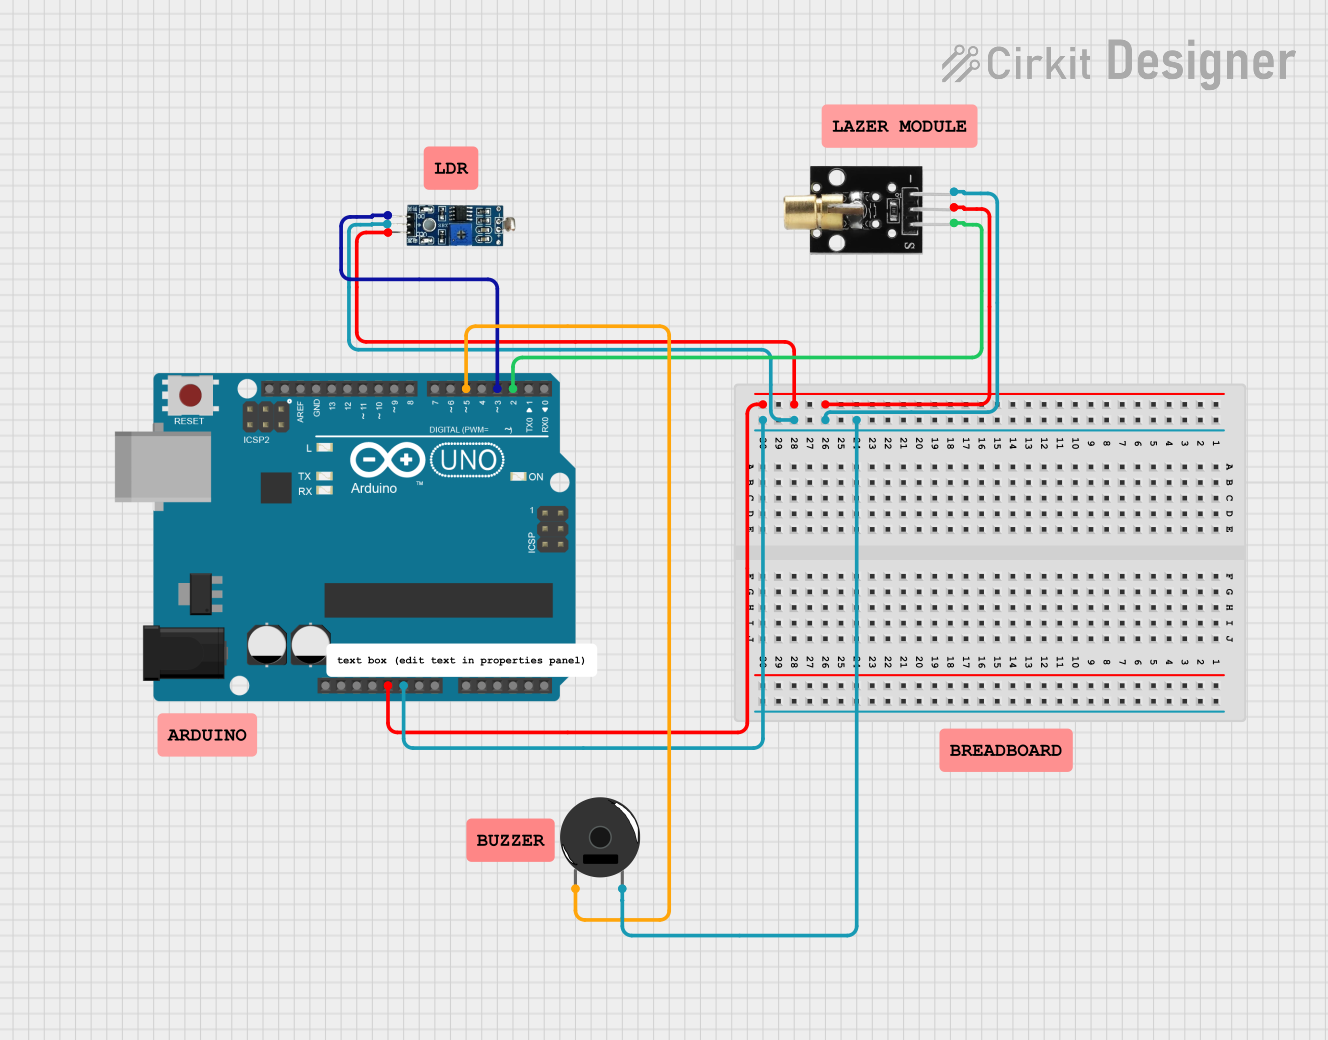

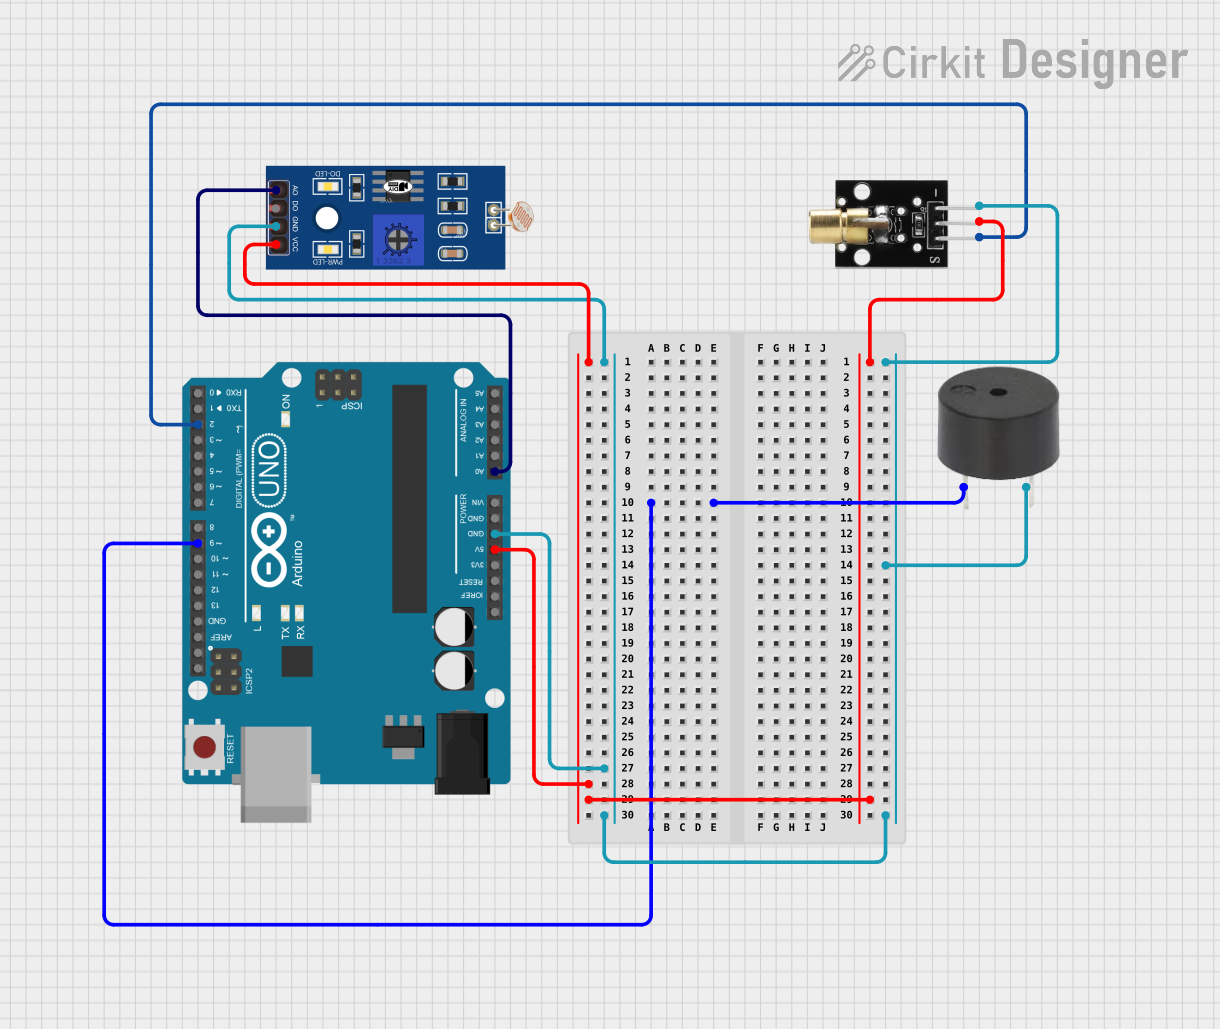
Explore Projects Built with laser
Technical Specifications
Below are the general technical specifications for a typical laser module used in electronics projects:
| Parameter | Value |
|---|---|
| Wavelength | 650 nm (red) or 532 nm (green) |
| Output Power | 1 mW to 5 mW (Class IIIa/IIIb) |
| Operating Voltage | 3V to 5V |
| Operating Current | 20 mA to 40 mA |
| Beam Divergence | < 1.5 mrad |
| Focus | Fixed or adjustable |
| Operating Temperature | -10°C to 50°C |
| Dimensions | Typically 6 mm x 18 mm (module) |
Pin Configuration and Descriptions
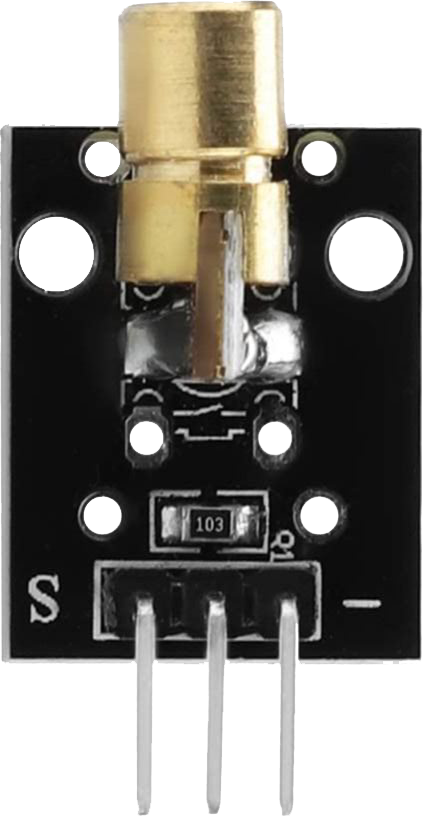
The laser module typically has three pins or wires for connection:
| Pin/Wire | Description |
|---|---|
| VCC | Positive power supply (3V to 5V) |
| GND | Ground connection |
| TTL/Control | Optional input for modulation (PWM) |
Note: Some basic laser modules may only have two wires (VCC and GND) without a TTL/Control pin.
Usage Instructions
How to Use the Laser in a Circuit
- Power Supply: Connect the VCC pin to a 3V-5V DC power source and the GND pin to the ground. Ensure the power supply matches the laser module's voltage and current requirements.
- Control Signal (if available): If the laser module has a TTL/Control pin, you can use it to modulate the laser beam using a PWM signal. This is useful for applications like Morse code transmission or brightness control.
- Mounting: Secure the laser module in a stable position to prevent misalignment or damage. Use a heatsink if the module generates significant heat during operation.
- Safety Precautions: Always avoid direct eye exposure to the laser beam. Use appropriate safety goggles if necessary.
Example: Connecting a Laser Module to an Arduino UNO
Below is an example of how to connect and control a laser module using an Arduino UNO:
Circuit Connections
- Connect the laser module's VCC pin to the Arduino's 5V pin.
- Connect the GND pin to the Arduino's GND pin.
- If the laser module has a TTL/Control pin, connect it to a PWM-capable pin on the Arduino (e.g., pin 9).
Arduino Code
// Laser control using Arduino UNO
// This code turns the laser on and off at 1-second intervals.

const int laserPin = 9; // Connect the TTL/Control pin of the laser to pin 9

void setup() {
  pinMode(laserPin, OUTPUT); // Set the laser pin as an output
}

void loop() {
  digitalWrite(laserPin, HIGH); // Turn the laser on
  delay(1000); // Wait for 1 second
  digitalWrite(laserPin, LOW); // Turn the laser off
  delay(1000); // Wait for 1 second
}
Important Considerations and Best Practices
- Power Supply: Ensure the power supply voltage and current match the laser module's specifications to avoid damage.
- Heat Management: For high-power lasers, use a heatsink or cooling mechanism to prevent overheating.
- Safety: Never point the laser at people, animals, or reflective surfaces. Use the laser in a controlled environment.
- Modulation: Use the TTL/Control pin for precise control of the laser beam in applications requiring modulation.
Troubleshooting and FAQs
Common Issues and Solutions
Laser Does Not Turn On:
- Check the power supply voltage and current. Ensure proper connections to VCC and GND.
- Verify that the TTL/Control pin is receiving a HIGH signal (if applicable).
Laser Beam Is Weak or Flickering:
- Ensure the power supply is stable and not fluctuating.
- Check for loose connections or damaged wires.
- If the laser has an adjustable focus, ensure it is properly set.
Laser Overheats:
- Reduce the operating time or use a heatsink to dissipate heat.
- Ensure the ambient temperature is within the specified operating range.
Laser Does Not Respond to PWM Signal:
- Verify that the TTL/Control pin is connected to a PWM-capable pin on the microcontroller.
- Check the PWM frequency and duty cycle. Some lasers may require specific modulation parameters.
FAQs
Q: Can I use a laser module with a 12V power supply?
A: No, most laser modules are designed for 3V-5V operation. Using a higher voltage can damage the module.
Q: Is it safe to use a laser module without safety goggles?
A: For low-power lasers (<5 mW), direct eye exposure should still be avoided. For higher-power lasers, always use appropriate safety goggles.
Q: Can I adjust the focus of the laser beam?
A: Some laser modules have an adjustable lens for focusing. Check the module's specifications to confirm.
Q: How do I know if my laser module supports PWM control?
A: Look for a TTL/Control pin in the module's pin configuration. Consult the datasheet for details on supported modulation.
By following this documentation, you can safely and effectively use a laser module in your electronic projects.