Cirkit Designer
Your all-in-one circuit design IDE
Home /
Component Documentation
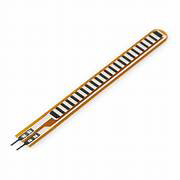
How to Use Flex sensor: Examples, Pinouts, and Specs
Introduction
A flex sensor is a type of sensor that measures the amount of deflection or bending. The resistance of the sensor increases as it is bent, making it a versatile component in various applications. Common use cases include:
- Robotics: Detecting joint angles and movements.
- Gaming: Creating interactive and responsive gaming controls.
- Wearable Technology: Monitoring body movements and gestures.
Explore Projects Built with Flex sensor
Arduino Micro-Based Force Sensing Resistor Array
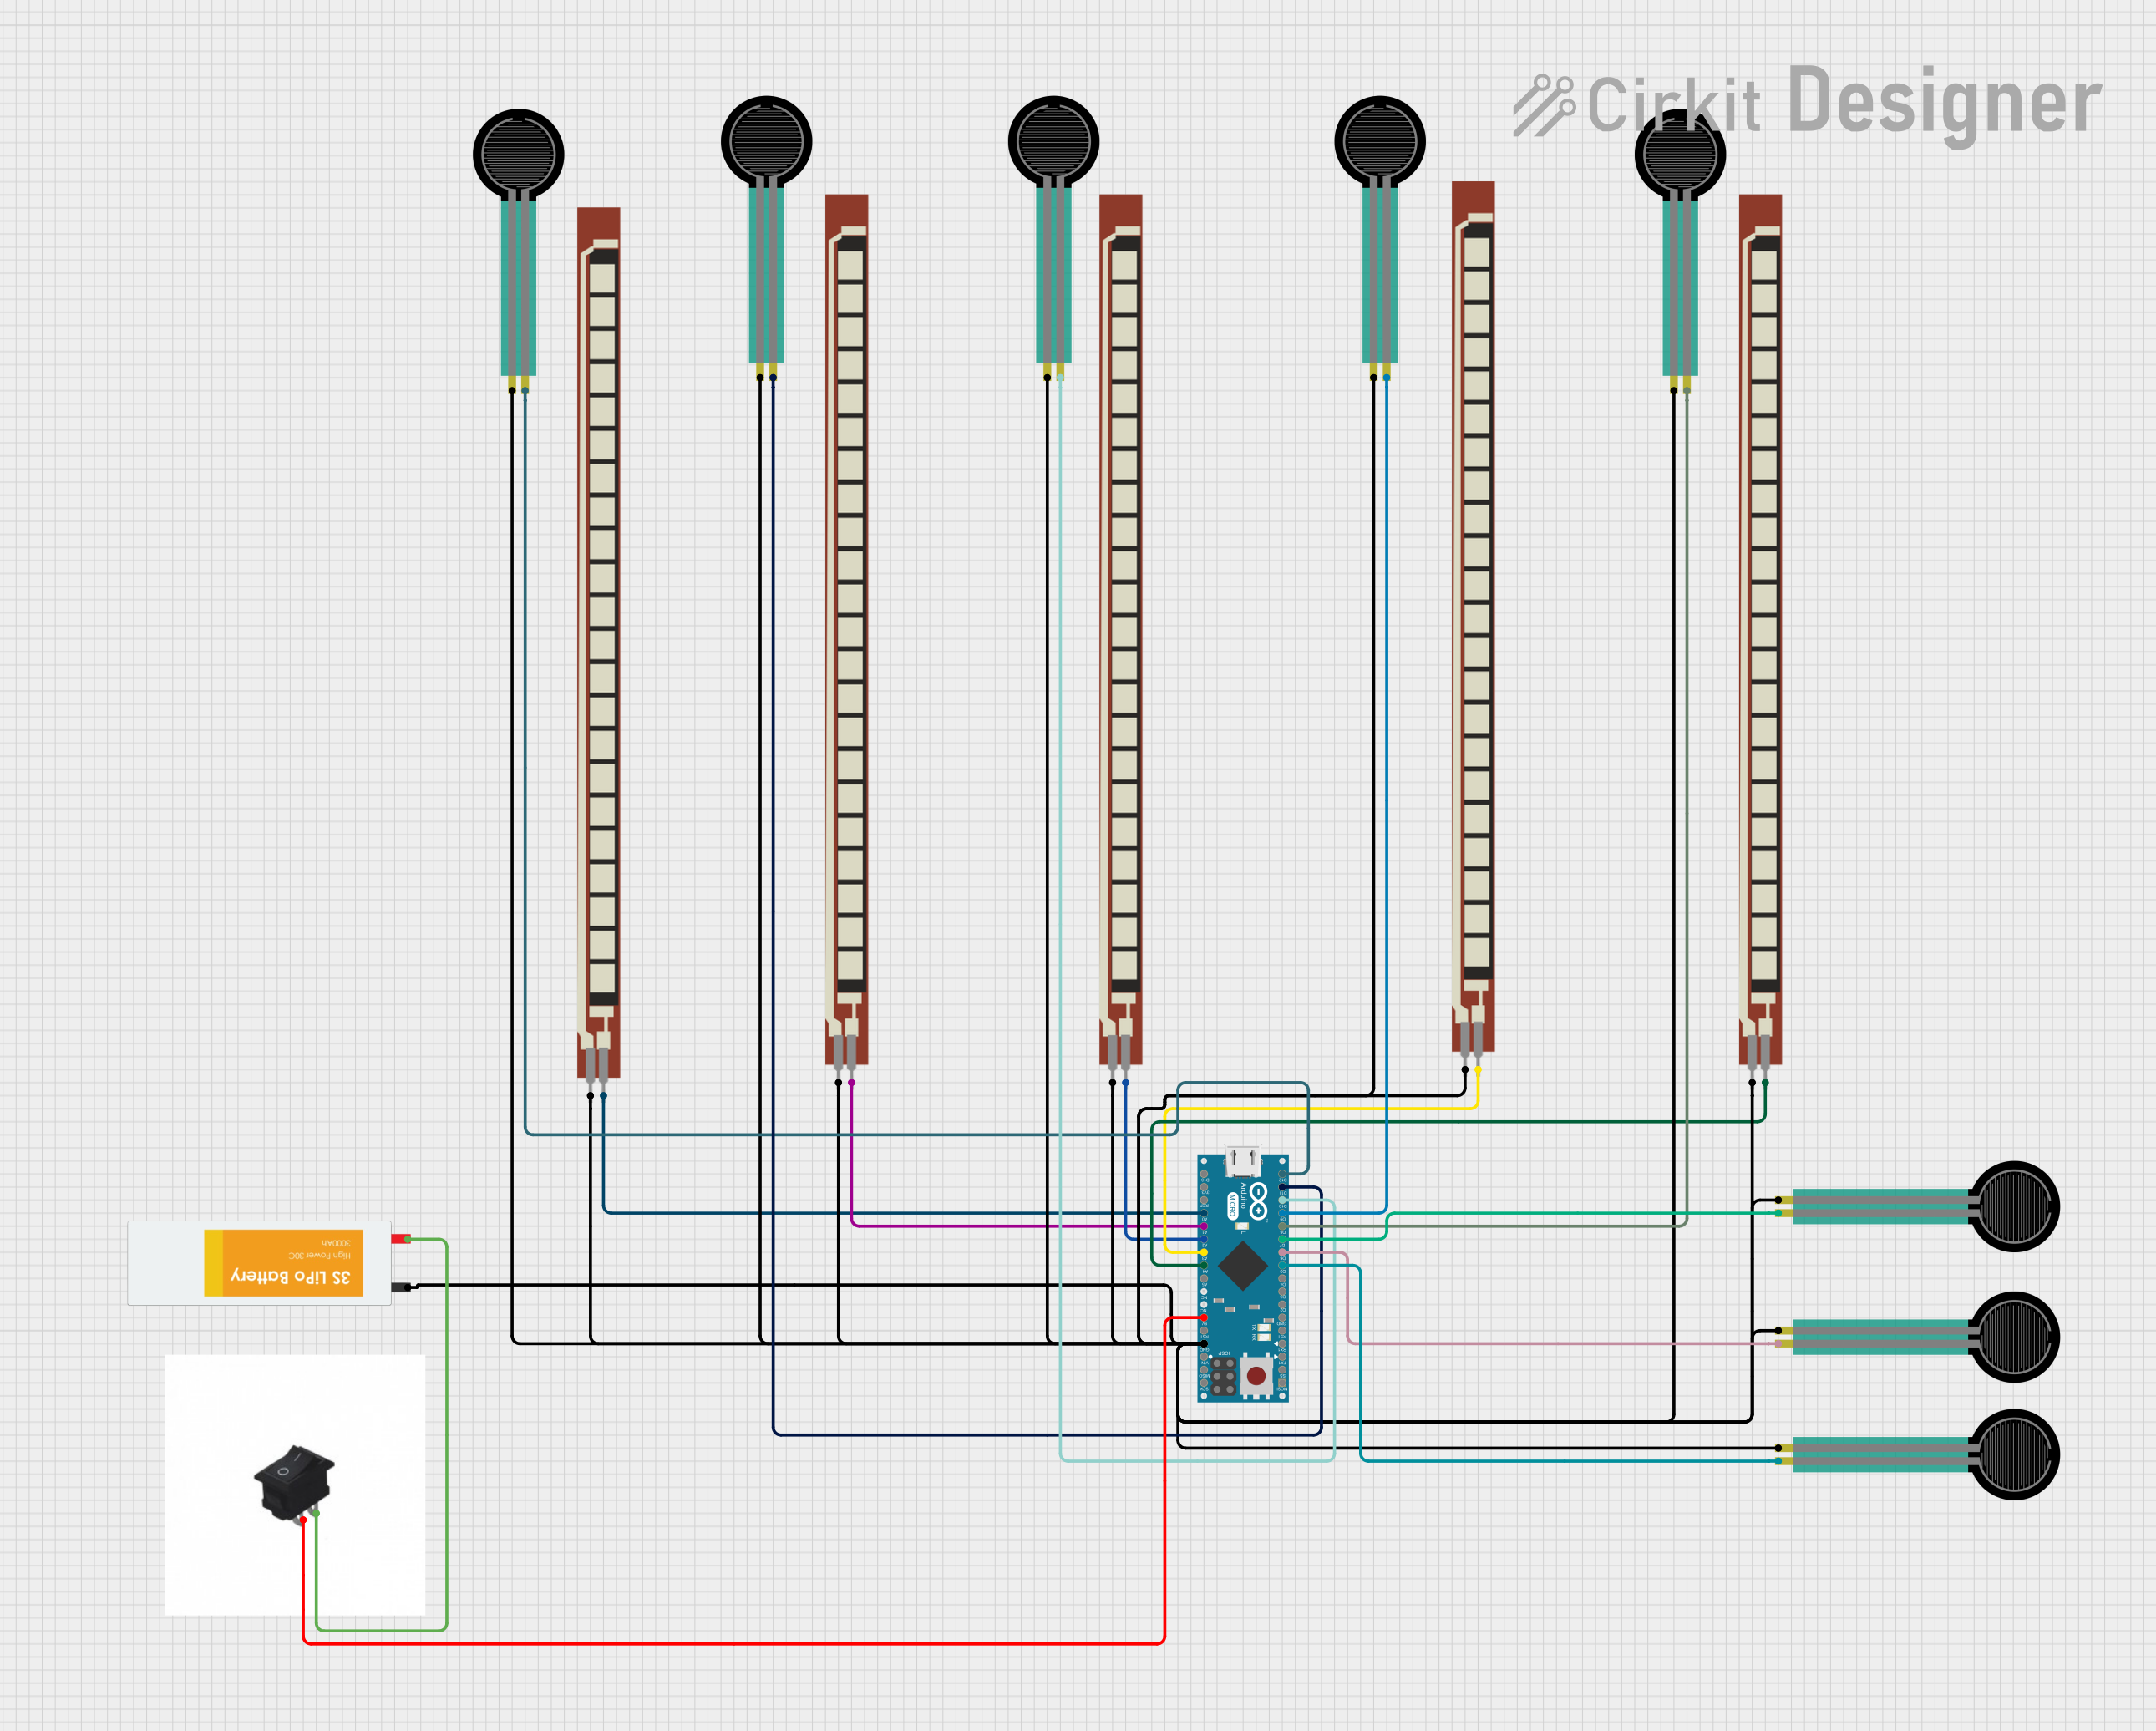
This is a sensor interface circuit using an Arduino Micro to read from multiple force sensing resistors and basic flex resistors, indicating it's designed for detecting pressure and flexing. The circuit is powered by a Lipo battery with a rocker switch for power control, and the microcontroller's code is currently a placeholder for future development.
ESP32-Based Force Measurement System with LSM303AGR Sensor
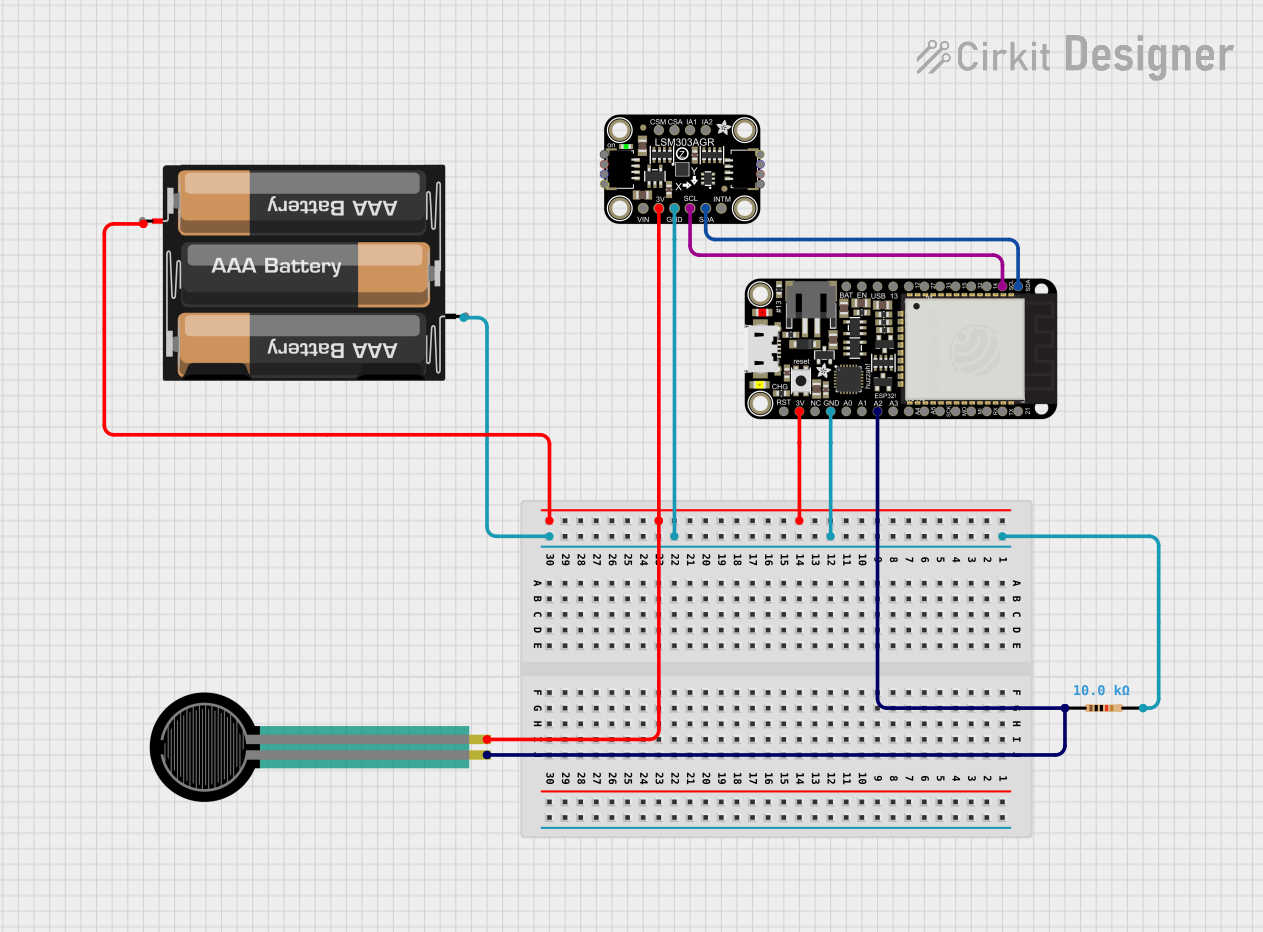
This circuit features an Adafruit HUZZAH32 ESP32 Feather microcontroller connected to an Adafruit LSM303AGR sensor via I2C communication lines (SCL and SDA), a force sensing resistor (FSR) interfaced through an analog input with a pull-up resistor, and powered by a 3xAA battery pack. The LSM303AGR sensor provides acceleration and magnetic field measurements, while the FSR detects applied force. The ESP32 processes these inputs and can be programmed to respond to sensor data for applications such as motion tracking and force measurement.
ESP32-Based Flex Sensor Array and Heart Pulse Monitor with LCD Display
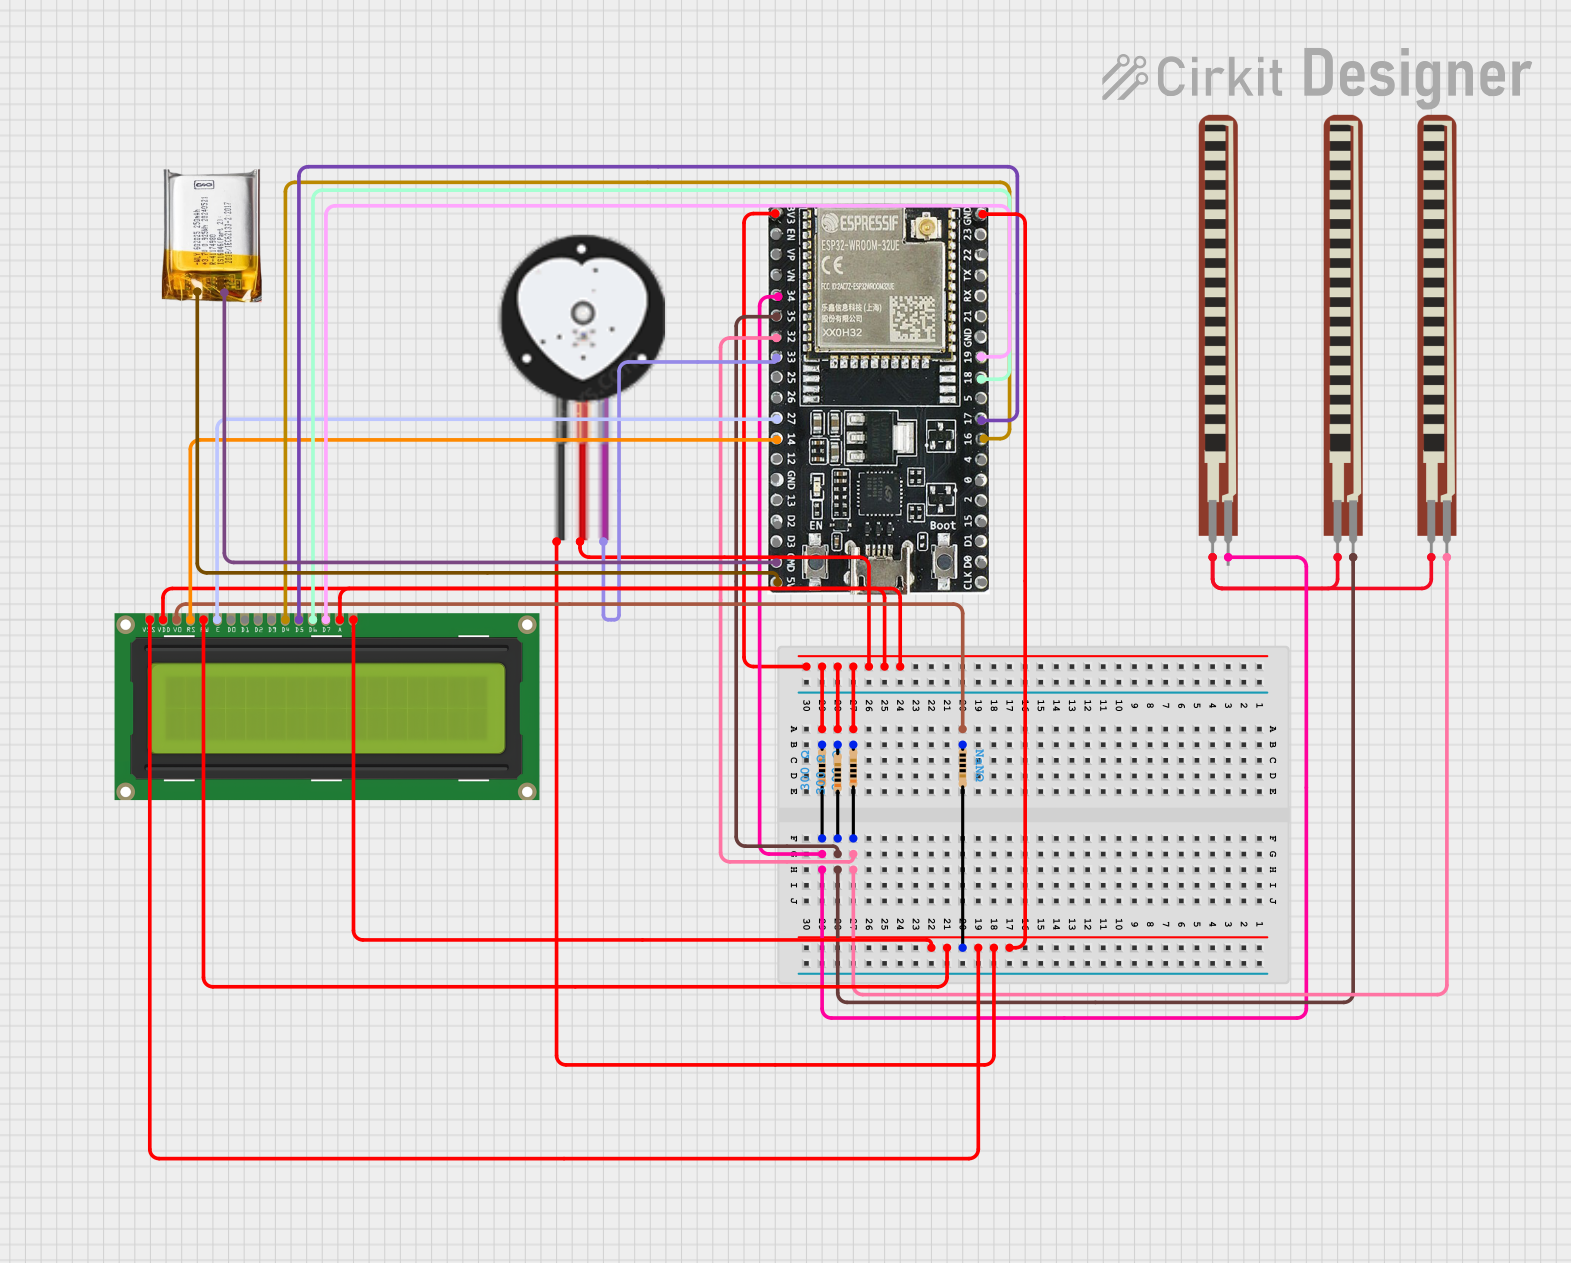
This circuit features an ESP32 microcontroller interfaced with multiple flex sensors, a heart pulse sensor, and a 16x2 LCD display. The ESP32 reads analog values from the flex sensors and the heart pulse sensor, then displays the readings of the first flex sensor and the heart pulse on the LCD. The circuit is designed for monitoring physical flex movements and heart rate, with the data visualized in real-time on the display and available via the serial output for further processing or monitoring.
Arduino Mega 2560-Based Sensor Data Logger with ESP32-CAM and LCD Interface

This is a multifunctional sensor system with visual feedback and control interfaces. It utilizes an Arduino Mega 2560 to process data from an accelerometer, ultrasonic sensor, and camera module, and displays information on an LCD screen. User inputs can be provided through toggle and DIP switches, while LEDs indicate system status.
Explore Projects Built with Flex sensor
Arduino Micro-Based Force Sensing Resistor Array
This is a sensor interface circuit using an Arduino Micro to read from multiple force sensing resistors and basic flex resistors, indicating it's designed for detecting pressure and flexing. The circuit is powered by a Lipo battery with a rocker switch for power control, and the microcontroller's code is currently a placeholder for future development.
ESP32-Based Force Measurement System with LSM303AGR Sensor
This circuit features an Adafruit HUZZAH32 ESP32 Feather microcontroller connected to an Adafruit LSM303AGR sensor via I2C communication lines (SCL and SDA), a force sensing resistor (FSR) interfaced through an analog input with a pull-up resistor, and powered by a 3xAA battery pack. The LSM303AGR sensor provides acceleration and magnetic field measurements, while the FSR detects applied force. The ESP32 processes these inputs and can be programmed to respond to sensor data for applications such as motion tracking and force measurement.
ESP32-Based Flex Sensor Array and Heart Pulse Monitor with LCD Display
This circuit features an ESP32 microcontroller interfaced with multiple flex sensors, a heart pulse sensor, and a 16x2 LCD display. The ESP32 reads analog values from the flex sensors and the heart pulse sensor, then displays the readings of the first flex sensor and the heart pulse on the LCD. The circuit is designed for monitoring physical flex movements and heart rate, with the data visualized in real-time on the display and available via the serial output for further processing or monitoring.
Arduino Mega 2560-Based Sensor Data Logger with ESP32-CAM and LCD Interface
This is a multifunctional sensor system with visual feedback and control interfaces. It utilizes an Arduino Mega 2560 to process data from an accelerometer, ultrasonic sensor, and camera module, and displays information on an LCD screen. User inputs can be provided through toggle and DIP switches, while LEDs indicate system status.
Technical Specifications
Key Technical Details
| Parameter | Value |
|---|---|
| Resistance (Unbent) | 10kΩ |
| Resistance (Bent) | Up to 40kΩ |
| Operating Voltage | 0-5V |
| Length | 2.2 inches (55.88 mm) |
| Width | 0.28 inches (7.11 mm) |
| Thickness | 0.5 mm |
| Temperature Range | -35°C to +80°C |
Pin Configuration and Descriptions
| Pin Number | Pin Name | Description |
|---|---|---|
| 1 | GND | Ground |
| 2 | VCC | Supply Voltage (0-5V) |
| 3 | Signal | Output signal (variable resistance) |
Usage Instructions
How to Use the Component in a Circuit
Connect the Flex Sensor:
- Connect one end of the flex sensor to the ground (GND).
- Connect the other end to a voltage divider circuit to measure the resistance change.
Voltage Divider Circuit:
- Use a fixed resistor (e.g., 10kΩ) in series with the flex sensor.
- Connect the junction of the fixed resistor and the flex sensor to an analog input pin on your microcontroller (e.g., Arduino).
Arduino Connection Example:
- Connect the GND pin of the flex sensor to the GND pin on the Arduino.
- Connect the VCC pin of the flex sensor to the 5V pin on the Arduino.
- Connect the Signal pin of the flex sensor to an analog input pin (e.g., A0) on the Arduino.
Important Considerations and Best Practices
- Calibration: Calibrate the sensor for accurate readings by mapping the resistance values to the desired range.
- Handling: Handle the sensor carefully to avoid damaging the flexible substrate.
- Environment: Ensure the sensor operates within the specified temperature range to maintain accuracy.
Arduino Code Example
// Flex Sensor Arduino Code Example
const int flexPin = A0; // Pin connected to the flex sensor
int flexValue = 0;      // Variable to store the sensor value

void setup() {
  Serial.begin(9600);   // Initialize serial communication
  pinMode(flexPin, INPUT); // Set the flex sensor pin as input
}

void loop() {
  flexValue = analogRead(flexPin); // Read the value from the sensor
  Serial.print("Flex Sensor Value: ");
  Serial.println(flexValue); // Print the sensor value to the serial monitor
  delay(500); // Wait for 500 milliseconds before the next reading
}
Troubleshooting and FAQs
Common Issues Users Might Face
Inconsistent Readings:
- Solution: Ensure stable connections and check for any loose wires. Calibrate the sensor to account for any variations.
No Readings:
- Solution: Verify the connections and ensure the sensor is properly connected to the circuit. Check the power supply.
Sensor Damage:
- Solution: Handle the sensor carefully and avoid excessive bending beyond the specified limits.
FAQs
Q1: How do I calibrate the flex sensor?
- A1: To calibrate, map the raw sensor values to a known range of angles or positions. Use the
map()function in Arduino to convert the sensor readings to the desired range.
Q2: Can I use the flex sensor with other microcontrollers?
- A2: Yes, the flex sensor can be used with any microcontroller that has analog input pins. Ensure proper voltage levels and connections.
Q3: What is the lifespan of a flex sensor?
- A3: The lifespan depends on the usage and handling. Proper care and avoiding excessive bending can extend the sensor's life.
This documentation provides a comprehensive guide to understanding, using, and troubleshooting the flex sensor. Whether you are a beginner or an experienced user, this guide aims to help you make the most of this versatile component.