How to Use Dual Charging Buck: Examples, Pinouts, and Specs
Introduction
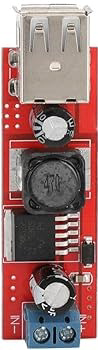
A Dual Charging Buck is a highly efficient DC-DC converter designed to step down voltage while simultaneously charging two separate batteries or power sources. This component is widely used in applications where energy management and compact design are critical, such as portable electronics, power banks, electric vehicles, and renewable energy systems. Its ability to handle dual charging streams makes it an ideal choice for devices requiring efficient power distribution and battery management.
Explore Projects Built with Dual Charging Buck


Explore Projects Built with Dual Charging Buck
Common Applications
- Portable electronic devices (e.g., smartphones, tablets)
- Power banks and battery packs
- Electric vehicles and e-bikes
- Renewable energy systems (e.g., solar-powered devices)
- Industrial equipment with dual battery configurations
Technical Specifications
Below are the key technical details of a typical Dual Charging Buck converter:
| Parameter | Value |
|---|---|
| Input Voltage Range | 6V to 36V |
| Output Voltage Range | 3.3V to 12V (adjustable) |
| Maximum Output Current | 3A per channel (dual outputs) |
| Efficiency | Up to 95% |
| Switching Frequency | 150 kHz to 1 MHz |
| Operating Temperature | -40°C to +85°C |
| Protection Features | Overcurrent, Overvoltage, Thermal Shutdown |
Pin Configuration and Descriptions
The Dual Charging Buck typically comes in a multi-pin package. Below is a table describing the pin configuration:
| Pin Number | Pin Name | Description |
|---|---|---|
| 1 | VIN | Input voltage pin. Connect to the DC power source. |
| 2 | GND | Ground pin. Connect to the system ground. |
| 3 | VOUT1 | Output voltage for the first charging channel. |
| 4 | VOUT2 | Output voltage for the second charging channel. |
| 5 | EN | Enable pin. High to enable the converter, low to disable. |
| 6 | FB1 | Feedback pin for the first channel. Used to set the output voltage. |
| 7 | FB2 | Feedback pin for the second channel. Used to set the output voltage. |
| 8 | COMP | Compensation pin for stabilizing the control loop. |
| 9 | SYNC | Synchronization pin for external clock input. Optional for frequency control. |
| 10 | PG | Power Good pin. Indicates the status of the output voltage. |
Usage Instructions
How to Use the Dual Charging Buck in a Circuit
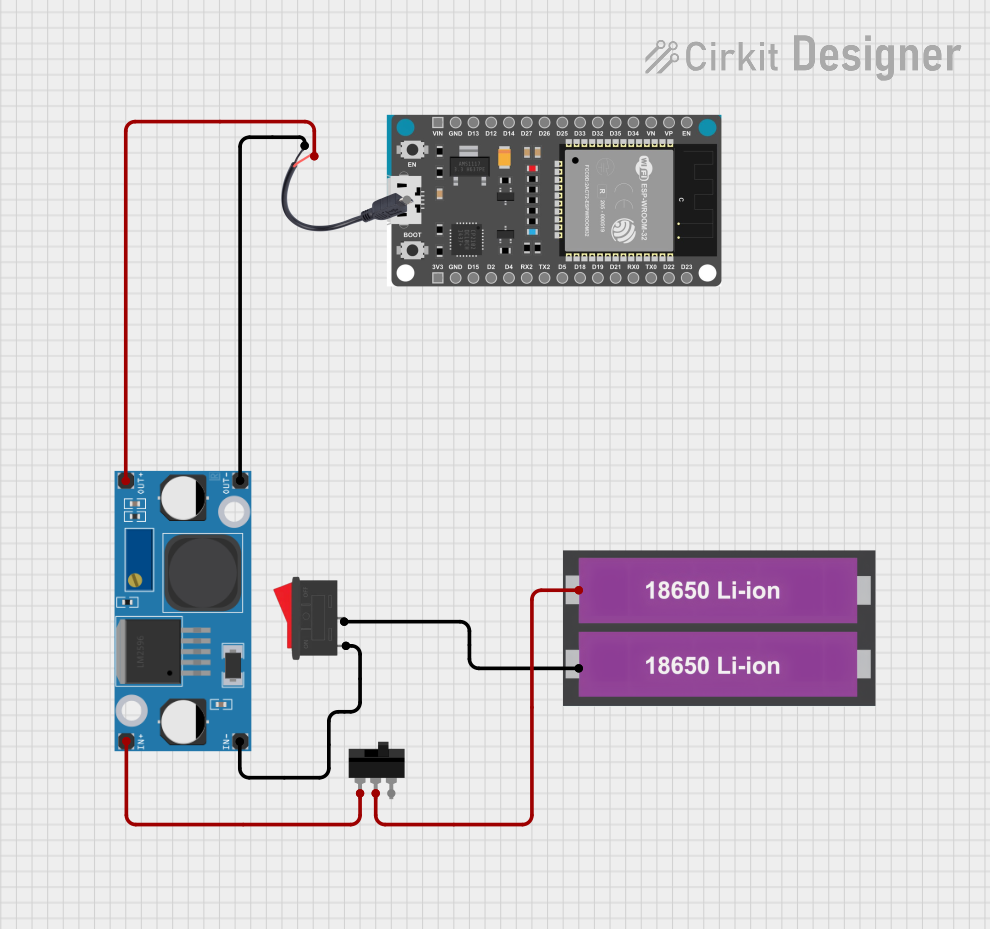
- Input Voltage Connection: Connect the VIN pin to a DC power source within the specified input voltage range (e.g., 12V or 24V).
- Output Voltage Adjustment: Use the FB1 and FB2 pins to set the desired output voltages for each channel. This is typically done by connecting a resistor divider network to these pins.
- Enable the Converter: Pull the EN pin high to activate the converter. If left floating, the converter may not operate.
- Load Connection: Connect the batteries or devices to be charged to the VOUT1 and VOUT2 pins. Ensure the load does not exceed the maximum output current for each channel.
- Stabilization: Use appropriate capacitors on the input and output pins to ensure stable operation and minimize voltage ripple.
- Optional Synchronization: If needed, connect an external clock signal to the SYNC pin to synchronize the switching frequency with other components in the system.
Important Considerations and Best Practices
- Thermal Management: Ensure adequate heat dissipation by using a heatsink or placing the component on a PCB with good thermal design.
- Protection Features: Verify that the overcurrent and overvoltage protection features are functioning correctly to prevent damage to the component or connected devices.
- Component Selection: Use high-quality capacitors and inductors to ensure stable operation and high efficiency.
- Testing: Before connecting sensitive devices, test the output voltages and currents to confirm proper operation.
Example: Using with an Arduino UNO
The Dual Charging Buck can be used to power an Arduino UNO and charge a secondary battery simultaneously. Below is an example code snippet to monitor the status of the Power Good (PG) pin using the Arduino:
// Define the pin connected to the Power Good (PG) signal
const int pgPin = 2; // PG pin connected to Arduino digital pin 2

void setup() {
  pinMode(pgPin, INPUT); // Set PG pin as input
  Serial.begin(9600);    // Initialize serial communication
}

void loop() {
  int pgStatus = digitalRead(pgPin); // Read the status of the PG pin

  if (pgStatus == HIGH) {
    // PG pin is HIGH, output voltage is stable
    Serial.println("Output voltage is stable.");
  } else {
    // PG pin is LOW, output voltage is not stable
    Serial.println("Output voltage is unstable. Check connections.");
  }

  delay(1000); // Wait for 1 second before checking again
}
Troubleshooting and FAQs
Common Issues and Solutions
No Output Voltage
- Cause: The EN pin is not pulled high.
- Solution: Ensure the EN pin is connected to a high logic level or tied to VIN through a resistor.
Output Voltage is Unstable
- Cause: Insufficient input or output capacitors.
- Solution: Add low-ESR capacitors to the input and output pins as recommended in the datasheet.
Overheating
- Cause: Excessive load current or poor thermal management.
- Solution: Reduce the load current or improve heat dissipation using a heatsink or thermal vias.
Synchronization Issues
- Cause: Incorrect external clock signal on the SYNC pin.
- Solution: Verify the external clock frequency and ensure it matches the component's specifications.
FAQs
Q1: Can I use the Dual Charging Buck to charge two batteries with different chemistries?
A1: Yes, but ensure that the output voltages and charging currents are configured appropriately for each battery type.
Q2: What happens if one channel is not used?
A2: If one channel is not used, leave the corresponding FB pin floating and ensure the VOUT pin is not connected to any load.
Q3: Can I use this component with a solar panel?
A3: Yes, the Dual Charging Buck can be used with a solar panel, provided the input voltage is within the specified range and the panel's output is stable.
Q4: How do I calculate the resistor values for the feedback pins?
A4: Use the formula provided in the datasheet, typically:
[
V_{OUT} = V_{REF} \times \left(1 + \frac{R1}{R2}\right)
]
where ( V_{REF} ) is the reference voltage, and ( R1 ) and ( R2 ) are the resistors in the divider network.