How to Use MATEK H743 SLIM: Examples, Pinouts, and Specs
Introduction
The MATEK H743 SLIM is a compact and high-performance flight controller designed for drones and UAVs. It features advanced processing capabilities, multiple input/output (I/O) ports, and support for a wide range of sensors and communication protocols. This flight controller is ideal for applications requiring precise control, efficient power management, and compatibility with modern flight systems.
Explore Projects Built with MATEK H743 SLIM
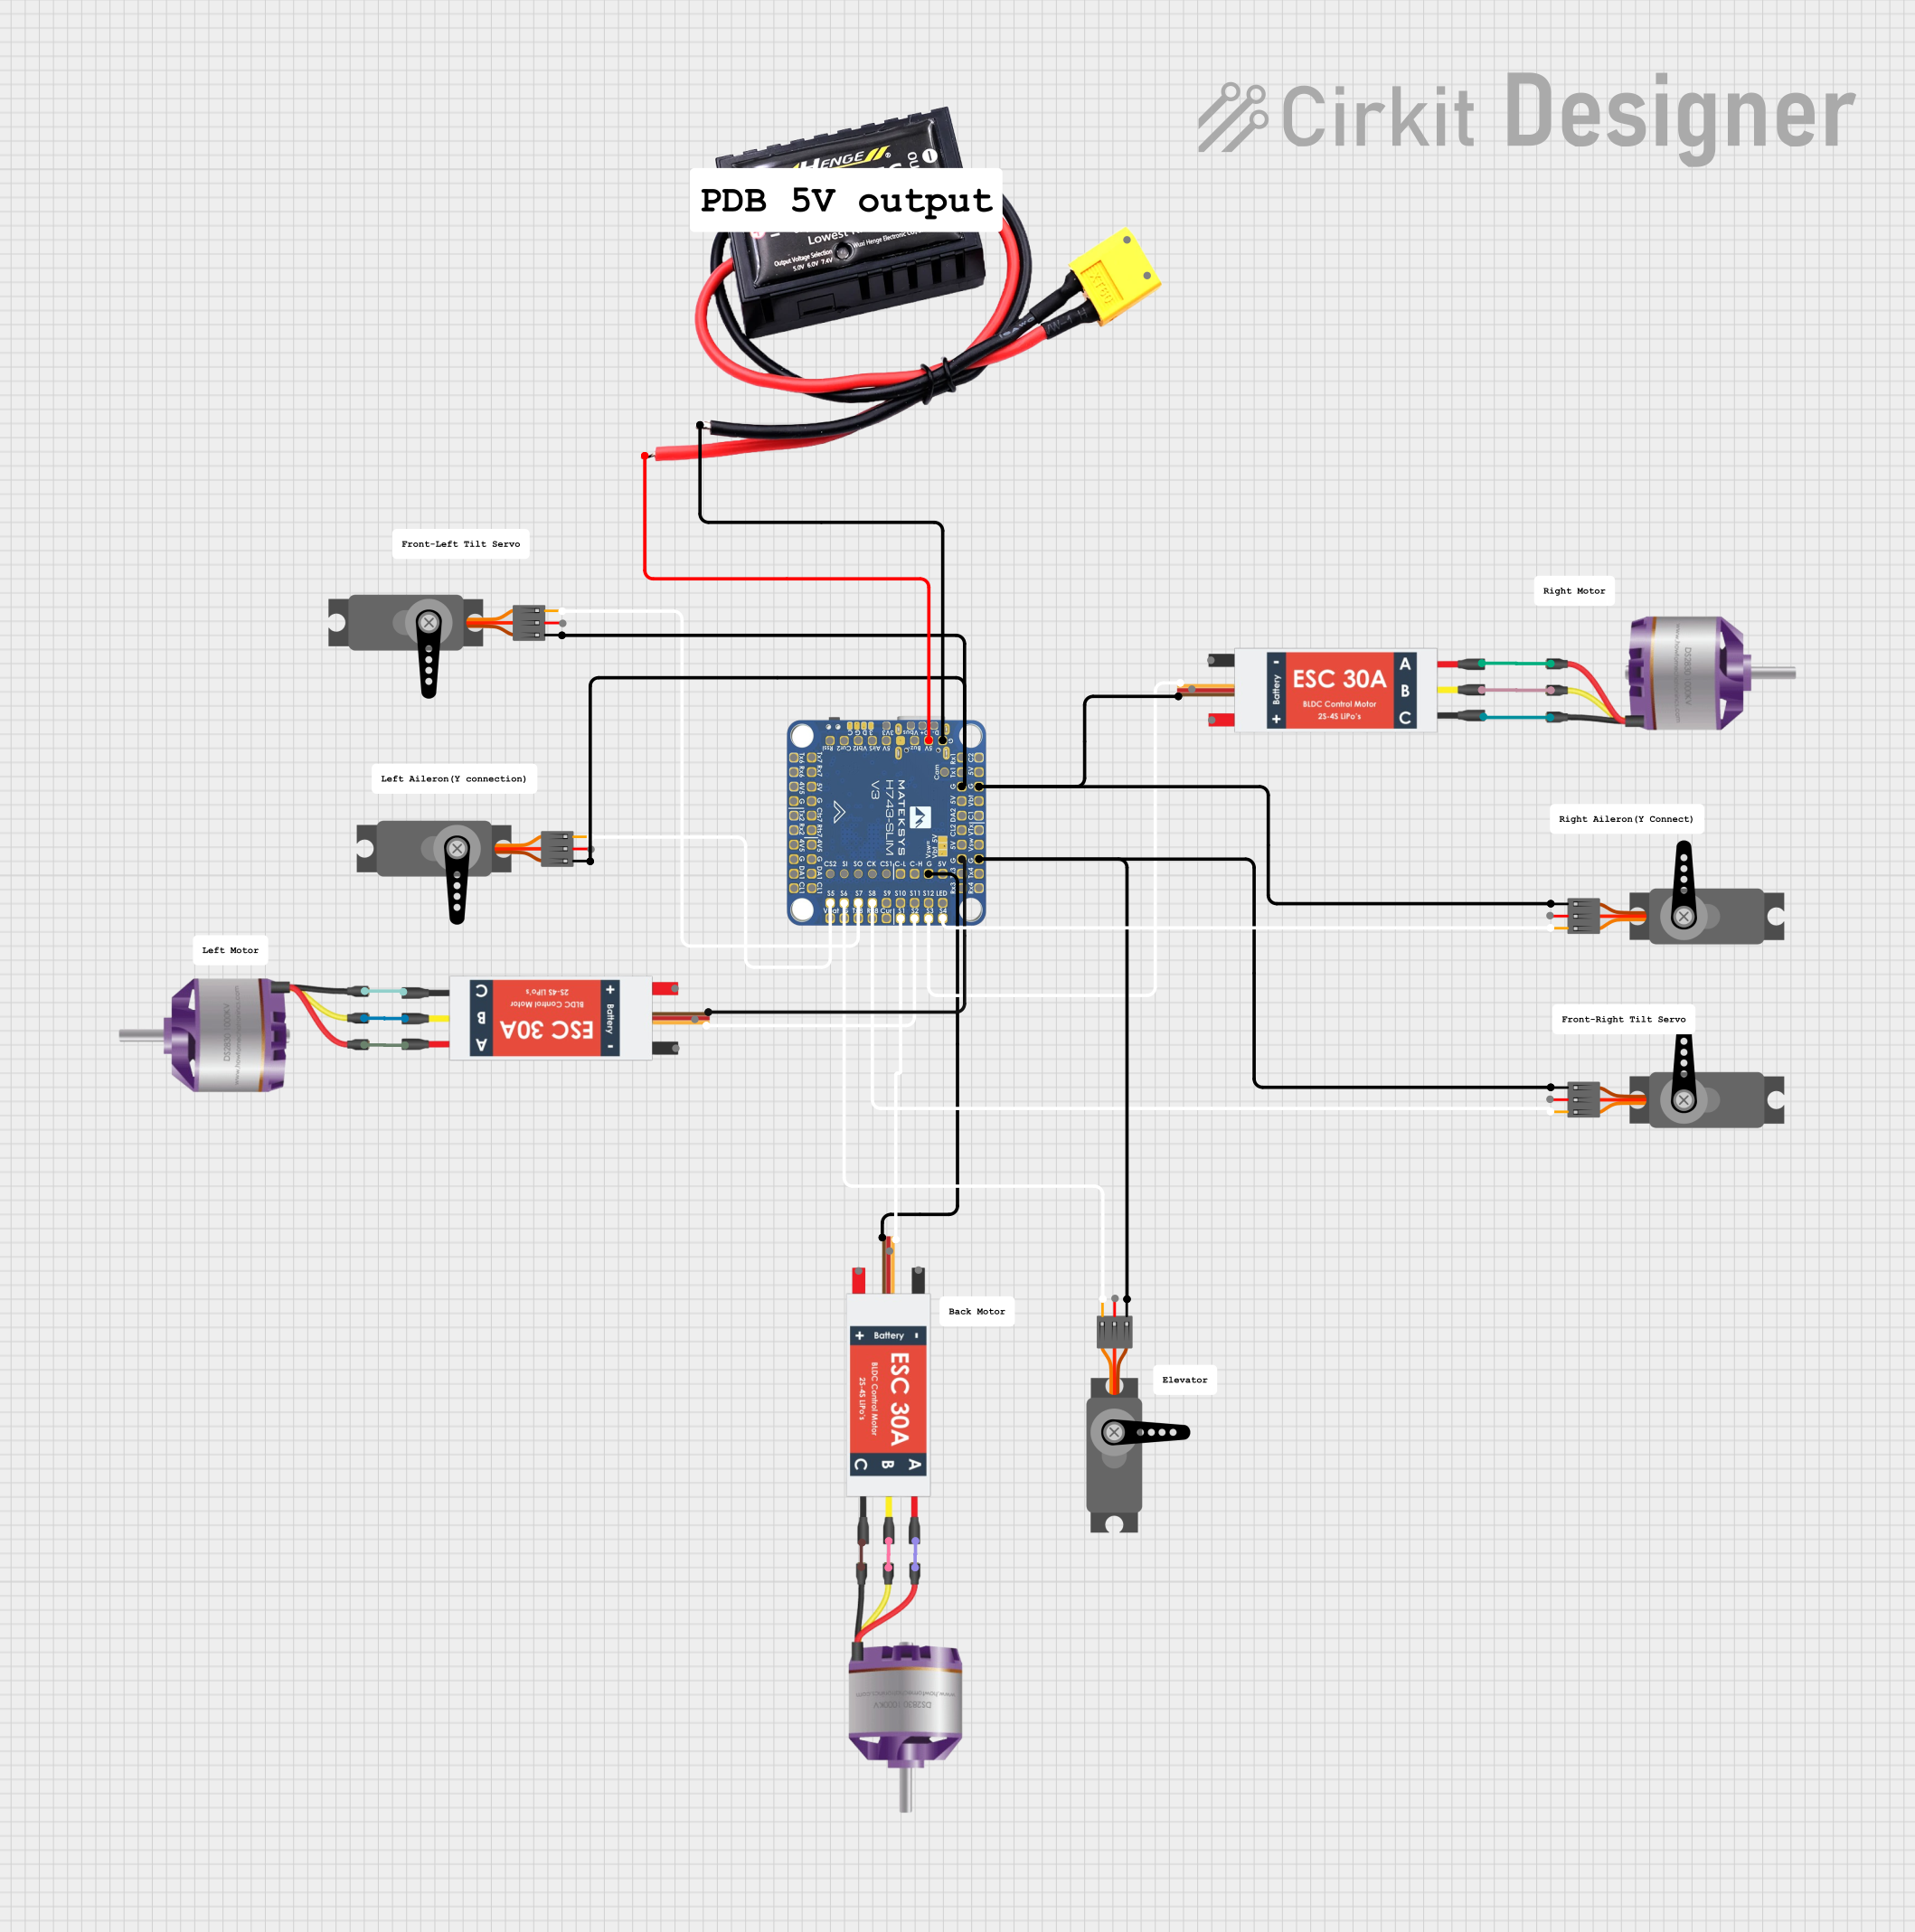


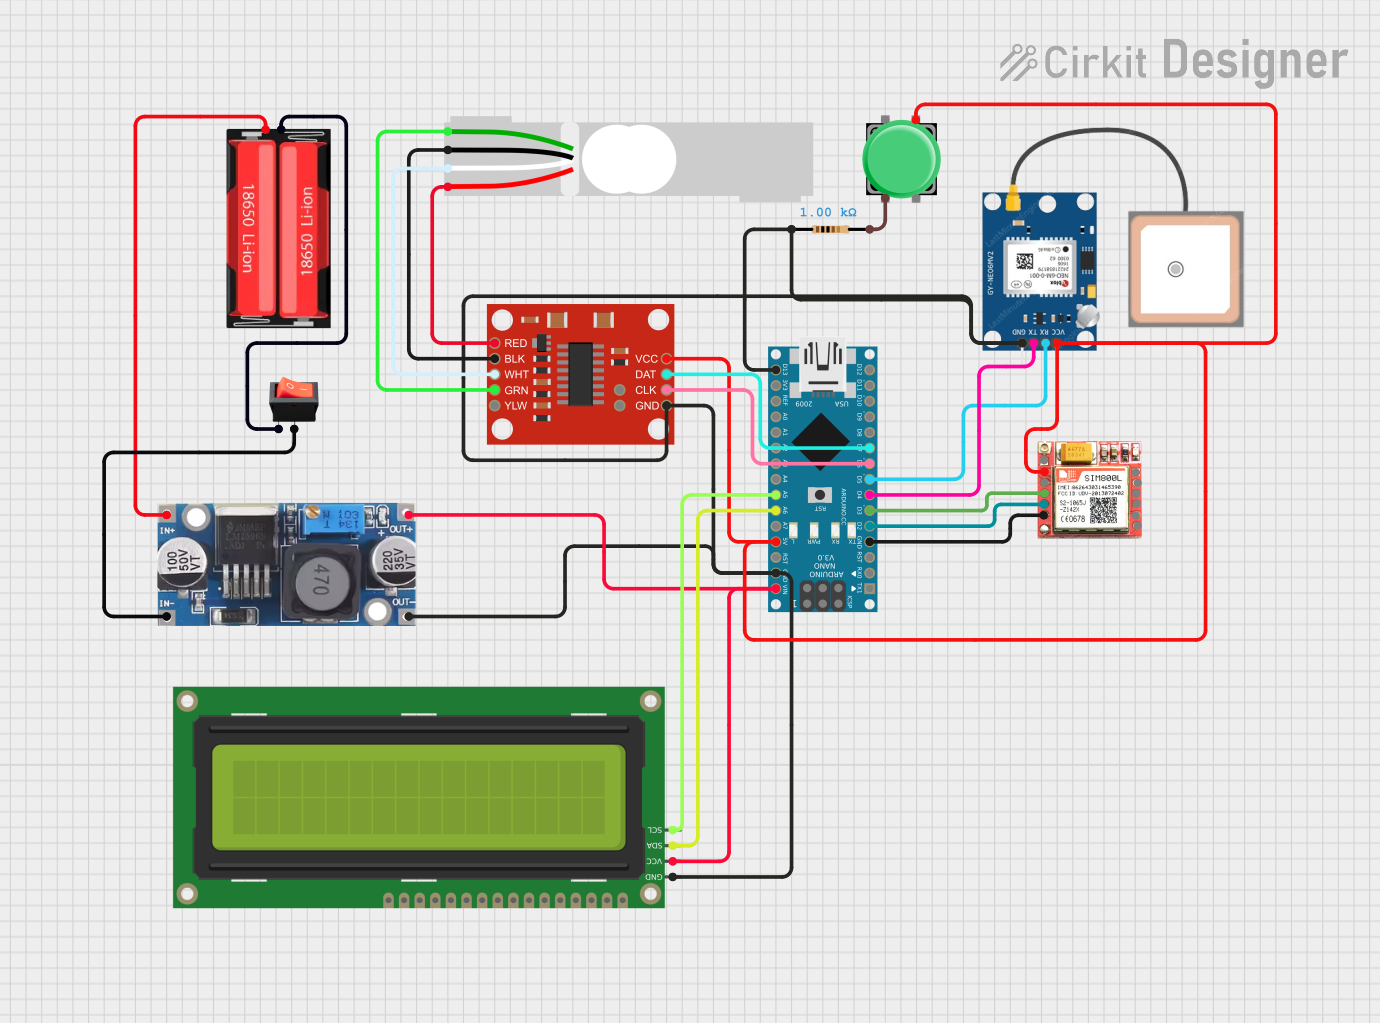
Explore Projects Built with MATEK H743 SLIM
Common Applications and Use Cases
- Multirotor drones for aerial photography and videography
- Fixed-wing UAVs for mapping and surveying
- FPV (First-Person View) racing drones
- Autonomous robotics and experimental UAV projects
- Educational and research platforms for flight control systems
Technical Specifications
Key Technical Details
- Processor: STM32H743 32-bit ARM Cortex-M7, 480 MHz
- IMU (Inertial Measurement Unit): Dual IMUs (MPU6000 and ICM20602)
- Barometer: BMP280
- Input Voltage Range: 7V–30V (2S–6S LiPo)
- BEC Output: 5V/2A and 9V/2A
- Flash Memory: 16 MB for data logging
- UART Ports: 7 UARTs for peripherals
- I2C Ports: 2 I2C buses
- CAN Bus: 2 CAN ports for advanced communication
- PWM Outputs: 8 motor outputs
- OSD (On-Screen Display): Integrated OSD for FPV systems
- Dimensions: 68mm x 25mm
- Weight: 8 grams
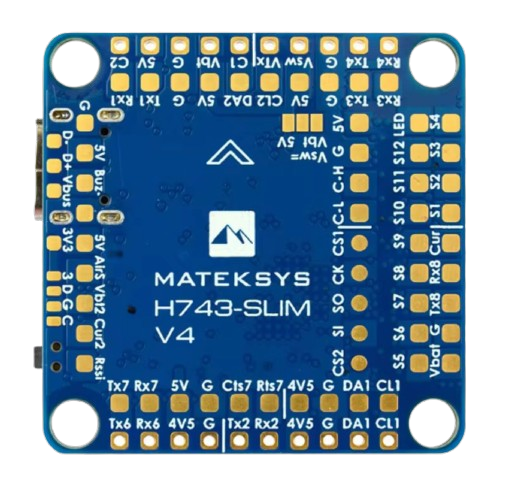
Pin Configuration and Descriptions
The MATEK H743 SLIM features a variety of pins for connecting peripherals. Below is a table summarizing the key pin functions:
| Pin Name | Description |
|---|---|
| GND | Ground connection for power and signal reference |
| VIN | Voltage input (7V–30V) |
| 5V | 5V output for powering peripherals (2A max) |
| 9V | 9V output for powering FPV systems (2A max) |
| UART1–UART7 | Serial communication ports for GPS, telemetry, and other peripherals |
| I2C1, I2C2 | I2C communication ports for sensors and external devices |
| CAN1, CAN2 | CAN bus ports for advanced communication protocols |
| PWM1–PWM8 | PWM outputs for motor control or servo connections |
| RSSI | Analog input for receiver signal strength indication |
| LED_STRIP | Output for programmable LED strips |
| Buzzer | Output for connecting a buzzer for alerts |
| ADC | Analog-to-digital converter input for voltage or current sensing |
| Boot | Bootloader pin for firmware updates |
Usage Instructions
How to Use the MATEK H743 SLIM in a Circuit
Powering the Flight Controller:
- Connect a 2S–6S LiPo battery to the VIN and GND pins.
- Ensure the input voltage is within the 7V–30V range to avoid damage.
Connecting Peripherals:
- Use the UART ports for GPS modules, telemetry radios, or other serial devices.
- Connect I2C-compatible sensors (e.g., magnetometers) to the I2C1 or I2C2 ports.
- Attach ESCs (Electronic Speed Controllers) or servos to the PWM outputs.
Configuring the Flight Controller:
- Install Betaflight or INAV configurator software on your computer.
- Connect the flight controller to your computer via USB.
- Use the configurator to set up the flight modes, calibrate sensors, and assign ports.
Using the OSD:
- Connect the video input from your FPV camera to the OSD input pin.
- Connect the OSD output pin to your video transmitter.
- Configure the OSD settings in the configurator to display telemetry data on your FPV feed.
Important Considerations and Best Practices
- Firmware Updates: Always ensure the flight controller is running the latest firmware version for optimal performance and compatibility.
- Power Management: Avoid overloading the 5V and 9V BEC outputs by calculating the total current draw of connected peripherals.
- Sensor Calibration: Perform IMU and compass calibration before the first flight to ensure accurate readings.
- Vibration Isolation: Mount the flight controller on vibration-dampening pads to reduce noise affecting the IMU.
Example Code for Arduino UNO Integration
While the MATEK H743 SLIM is primarily used in drones, it can interface with an Arduino UNO for testing or additional functionality. Below is an example of reading data from a UART port:
#include <SoftwareSerial.h>

// Define RX and TX pins for UART communication
SoftwareSerial mySerial(10, 11); // RX = pin 10, TX = pin 11

void setup() {
  Serial.begin(9600); // Start the serial monitor
  mySerial.begin(9600); // Start UART communication with the flight controller

  Serial.println("MATEK H743 SLIM UART Test");
}

void loop() {
  // Check if data is available from the flight controller
  if (mySerial.available()) {
    String data = mySerial.readString(); // Read the incoming data
    Serial.println("Received: " + data); // Print the data to the serial monitor
  }

  // Send a test message to the flight controller
  mySerial.println("Hello from Arduino!");
  delay(1000); // Wait for 1 second
}
Troubleshooting and FAQs
Common Issues and Solutions
Flight Controller Not Powering On:
- Cause: Insufficient or incorrect input voltage.
- Solution: Verify the battery voltage is within the 7V–30V range and check the connections.
No Communication with Configurator:
- Cause: USB driver not installed or incorrect COM port selected.
- Solution: Install the correct USB driver for the flight controller and select the appropriate COM port in the configurator.
Unstable Flight or Drifting:
- Cause: Improper sensor calibration or vibration interference.
- Solution: Recalibrate the IMU and compass, and ensure the flight controller is mounted on vibration-dampening pads.
OSD Not Displaying Data:
- Cause: Incorrect wiring or OSD settings.
- Solution: Verify the FPV camera and video transmitter connections, and configure the OSD settings in the configurator.
FAQs
Q: Can the MATEK H743 SLIM be used with ArduPilot?
A: Yes, the flight controller is compatible with ArduPilot firmware.Q: What is the maximum number of motors supported?
A: The flight controller supports up to 8 motors via the PWM outputs.Q: Does it support GPS modules?
A: Yes, GPS modules can be connected via the UART ports.Q: How do I update the firmware?
A: Use the bootloader pin and a USB connection to flash the firmware using Betaflight or INAV configurator.
This concludes the documentation for the MATEK H743 SLIM. For further assistance, refer to the official user manual or community forums.