How to Use ADXL345: Examples, Pinouts, and Specs
Introduction
The ADXL345 is a small, thin, low-power, 3-axis accelerometer manufactured by Arduino (Part ID: UNO). It offers high-resolution (13-bit) measurements of acceleration up to ±16g. This versatile sensor is designed for applications requiring motion sensing, tilt detection, and gesture recognition. Its ability to communicate via I2C or SPI makes it suitable for integration into a wide range of electronic projects, including robotics, wearable devices, and gaming systems.
Explore Projects Built with ADXL345
Explore Projects Built with ADXL345
Common Applications:
- Motion sensing in robotics and drones
- Tilt detection in portable devices
- Gesture recognition in gaming controllers
- Vibration monitoring in industrial systems
- Step counting and activity tracking in fitness devices
Technical Specifications
The ADXL345 is packed with features that make it a popular choice for motion sensing applications. Below are its key technical specifications:
| Parameter | Value |
|---|---|
| Operating Voltage | 2.0V to 3.6V |
| Communication Interface | I2C or SPI |
| Measurement Range | ±2g, ±4g, ±8g, ±16g |
| Resolution | 13-bit |
| Output Data Rate (ODR) | 0.1 Hz to 3200 Hz |
| Power Consumption | 40 µA in measurement mode |
| Operating Temperature | -40°C to +85°C |
| Dimensions | 3 mm × 5 mm × 1 mm |
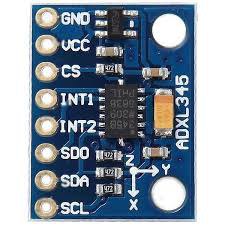
Pin Configuration and Descriptions
The ADXL345 has the following pin configuration:
| Pin Name | Pin Number | Description |
|---|---|---|
| VCC | 1 | Power supply input (2.0V to 3.6V). Connect to the 3.3V pin of the Arduino UNO. |
| GND | 2 | Ground. Connect to the GND pin of the Arduino UNO. |
| CS | 3 | Chip Select. Used for SPI communication. Connect to GND for I2C mode. |
| SDO/ALT ADDRESS | 4 | I2C address selection or SPI data output. Connect to GND for default I2C address. |
| SDA | 5 | I2C data line. Connect to the SDA pin of the Arduino UNO. |
| SCL | 6 | I2C clock line. Connect to the SCL pin of the Arduino UNO. |
| INT1 | 7 | Interrupt 1 output. Configurable for motion detection or other events. |
| INT2 | 8 | Interrupt 2 output. Configurable for motion detection or other events. |
Usage Instructions
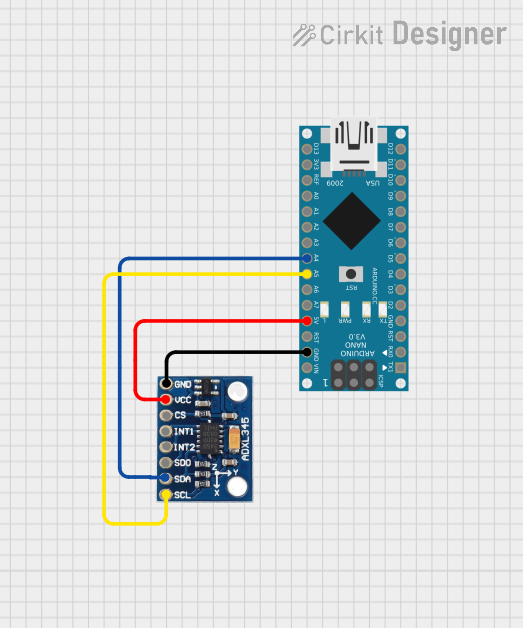
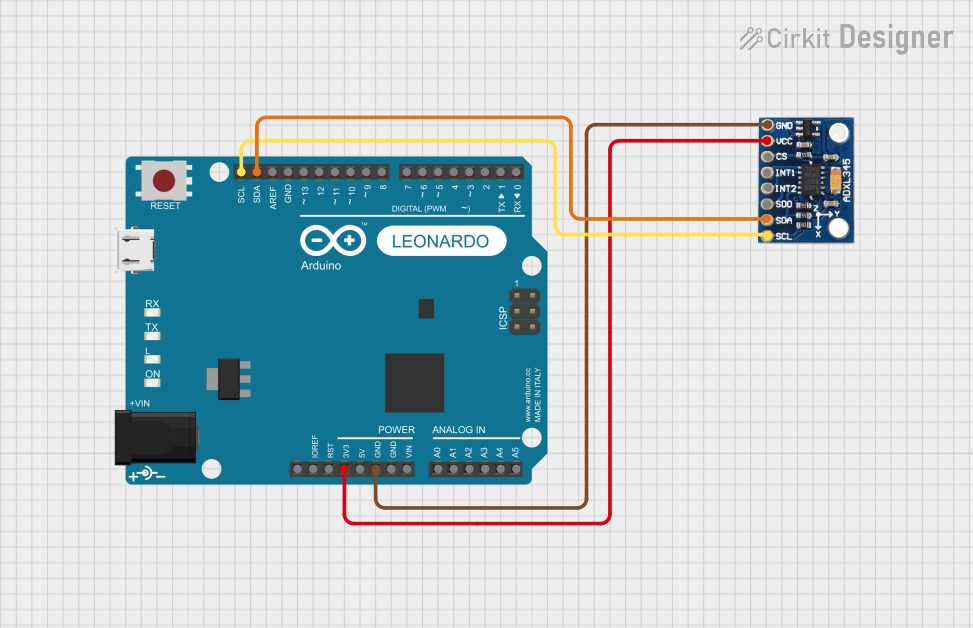
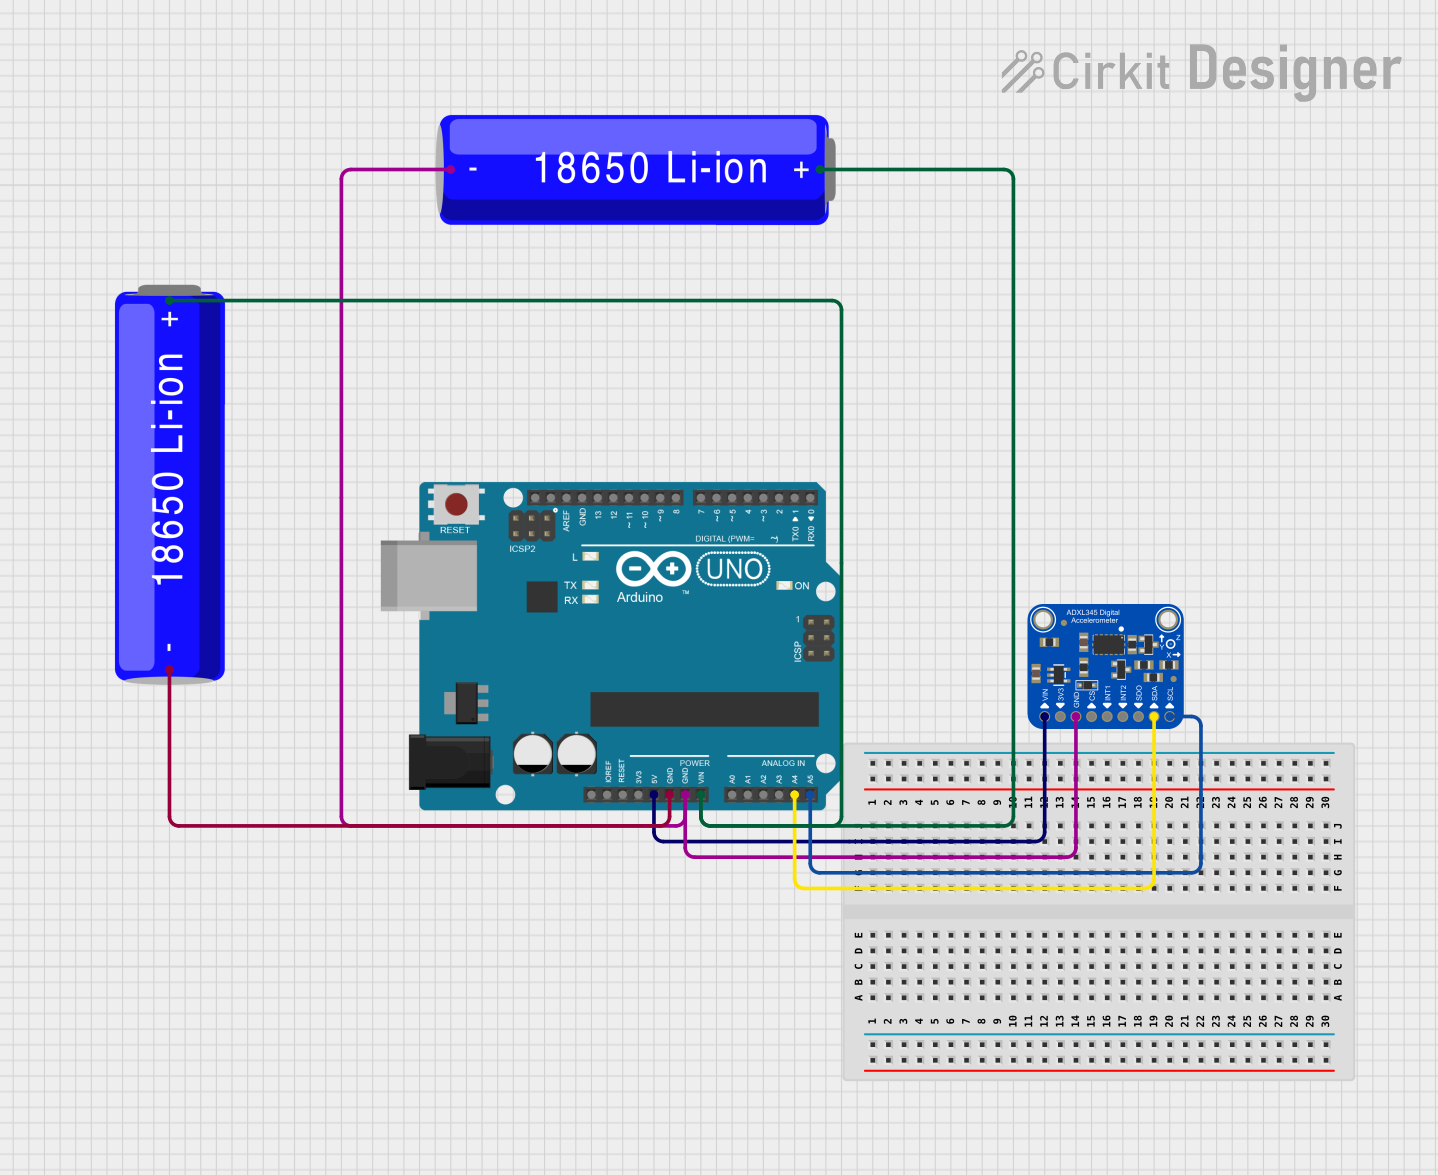
Connecting the ADXL345 to an Arduino UNO
To use the ADXL345 with an Arduino UNO, follow these steps:
Wiring: Connect the ADXL345 to the Arduino UNO as shown below:
- VCC → 3.3V
- GND → GND
- SDA → A4 (on older Arduino boards) or SDA pin
- SCL → A5 (on older Arduino boards) or SCL pin
- CS → GND (for I2C mode)
- SDO → GND (for default I2C address)
Install Libraries: Install the
Adafruit_ADXL345library from the Arduino Library Manager for easy interfacing.Upload Code: Use the following example code to read acceleration data from the ADXL345:
#include <Wire.h>
#include <Adafruit_Sensor.h>
#include <Adafruit_ADXL345_U.h>

// Create an ADXL345 object
Adafruit_ADXL345_Unified accel = Adafruit_ADXL345_Unified(12345);

void setup() {
  Serial.begin(9600);
  // Initialize the ADXL345
  if (!accel.begin()) {
    Serial.println("Failed to find ADXL345 chip. Check connections.");
    while (1);
  }
  Serial.println("ADXL345 initialized successfully!");

  // Set range to ±16g for maximum sensitivity
  accel.setRange(ADXL345_RANGE_16_G);
}

void loop() {
  sensors_event_t event;
  accel.getEvent(&event);

  // Print acceleration data
  Serial.print("X: "); Serial.print(event.acceleration.x); Serial.print(" m/s^2 ");
  Serial.print("Y: "); Serial.print(event.acceleration.y); Serial.print(" m/s^2 ");
  Serial.print("Z: "); Serial.print(event.acceleration.z); Serial.println(" m/s^2");

  delay(500); // Delay for readability
}
Important Considerations:
- Power Supply: Ensure the ADXL345 is powered with 3.3V. Using 5V may damage the sensor.
- Pull-Up Resistors: If your Arduino board does not have built-in pull-up resistors on the I2C lines, add external 4.7kΩ resistors between SDA/SCL and VCC.
- Range Configuration: Adjust the measurement range (±2g, ±4g, ±8g, or ±16g) based on your application using the
setRange()function.
Troubleshooting and FAQs
Common Issues:
No Data Output:
- Cause: Incorrect wiring or loose connections.
- Solution: Double-check all connections and ensure SDA/SCL are connected to the correct pins.
Initialization Fails:
- Cause: Incorrect I2C address or damaged sensor.
- Solution: Verify the I2C address (default is 0x53). Replace the sensor if damaged.
Inconsistent Readings:
- Cause: Electrical noise or improper grounding.
- Solution: Ensure proper grounding and use decoupling capacitors if necessary.
FAQs:
Q1: Can the ADXL345 be used with 5V logic?
A1: No, the ADXL345 operates at 3.3V. Use a logic level shifter if interfacing with a 5V system.
Q2: How do I switch to SPI communication?
A2: Connect the CS pin to a digital pin on the Arduino and configure the library for SPI mode.
Q3: What is the maximum sampling rate of the ADXL345?
A3: The ADXL345 supports output data rates up to 3200 Hz.
By following this documentation, you can successfully integrate the ADXL345 into your projects for reliable motion sensing and acceleration measurements.