Introduction
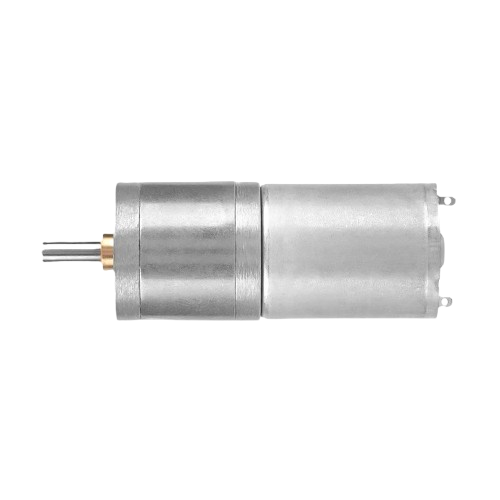
The Moteur 25GA370 12V is a compact and efficient DC motor designed for a wide range of applications. Operating at 12 volts, it is known for its reliability and durability in driving small mechanical systems. This motor is commonly used in robotics, automation, and other projects requiring precise and consistent rotational motion. Its small size and high torque make it ideal for applications where space is limited but performance is critical.
Common Applications:
- Robotics (e.g., driving wheels or robotic arms)
- Automated systems (e.g., conveyor belts, small actuators)
- DIY projects and hobbyist applications
- Small-scale industrial machinery
Technical Specifications
Below are the key technical details of the Moteur 25GA370 12V:
Pin Configuration and Descriptions
The Moteur 25GA370 12V has two terminals for electrical connections:
Note: The motor's direction of rotation can be reversed by swapping the polarity of the connections.
Usage Instructions
How to Use the Moteur 25GA370 12V in a Circuit
- Power Supply: Connect the motor to a 12V DC power source. Ensure the power supply can provide sufficient current (at least 1.5 A) to handle the motor's stall current.
- Motor Driver: Use a motor driver (e.g., L298N or L293D) to control the motor. This allows for speed and direction control via a microcontroller like an Arduino.
- Polarity: To change the direction of rotation, reverse the polarity of the connections to the motor terminals.
- Mounting: Secure the motor using appropriate brackets or mounts to prevent vibration during operation.
Important Considerations and Best Practices
- Current Limiting: Use a motor driver or current-limiting circuit to prevent damage from excessive current during stall conditions.
- Heat Dissipation: Avoid prolonged operation at high loads to prevent overheating.
- Power Supply: Ensure the power supply is stable and capable of delivering the required current.
- Noise Suppression: Add capacitors (e.g., 0.1 µF) across the motor terminals to reduce electrical noise.
Example: Controlling the Motor with an Arduino UNO
Below is an example of how to control the Moteur 25GA370 12V using an Arduino UNO and an L298N motor driver:
// Example: Controlling Moteur 25GA370 12V with Arduino and L298N

// Define motor control pins
const int motorPin1 = 5; // IN1 on L298N
const int motorPin2 = 6; // IN2 on L298N
const int enablePin = 9; // ENA on L298N (PWM control)

void setup() {
  // Set motor control pins as outputs
  pinMode(motorPin1, OUTPUT);
  pinMode(motorPin2, OUTPUT);
  pinMode(enablePin, OUTPUT);

  // Start motor at low speed
  analogWrite(enablePin, 128); // Set speed (0-255)
  digitalWrite(motorPin1, HIGH); // Set direction
  digitalWrite(motorPin2, LOW);
}

void loop() {
  // Example: Change motor direction every 5 seconds
  delay(5000);
  digitalWrite(motorPin1, LOW);
  digitalWrite(motorPin2, HIGH);
}
Explanation of Code:
motorPin1 and motorPin2 control the motor's direction via the L298N driver.enablePin controls the motor's speed using PWM (Pulse Width Modulation).- The motor changes direction every 5 seconds in the
loop() function.
Troubleshooting and FAQs
Common Issues and Solutions
Motor Does Not Spin:
- Cause: Insufficient power supply or loose connections.
- Solution: Check the power supply voltage and current rating. Ensure all connections are secure.
Motor Spins in the Wrong Direction:
- Cause: Incorrect polarity of the motor terminals.
- Solution: Swap the connections to the motor terminals or adjust the control signals.
Motor Overheats:
- Cause: Prolonged operation at high loads or insufficient ventilation.
- Solution: Reduce the load on the motor or improve heat dissipation.
Electrical Noise Interference:
- Cause: Motor generates electrical noise during operation.
- Solution: Add capacitors (e.g., 0.1 µF) across the motor terminals to suppress noise.
FAQs
Can I use a lower voltage to power the motor?
- Yes, but the motor's speed and torque will decrease proportionally. Operating below 6V is not recommended.
What is the maximum load the motor can handle?
- The motor can handle up to ~3.5 kg.cm of torque. Exceeding this may cause stalling or damage.
Can I control the motor without a motor driver?
- While possible, it is not recommended. A motor driver provides better control and protects the motor and power supply.
How do I reduce motor noise in my circuit?
- Use capacitors across the motor terminals and ensure proper grounding in your circuit.
This documentation provides a comprehensive guide to using the Moteur 25GA370 12V effectively in your projects.

 Open Project in Cirkit Designer