How to Use ANALOG EMG SENSOR: Examples, Pinouts, and Specs
Introduction
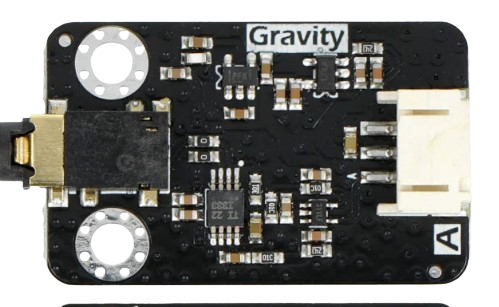
The Analog EMG Sensor is a device designed to detect the electrical activity generated by skeletal muscles. It converts these signals into an analog voltage output, which can be processed for various applications. This sensor is widely used in fields such as biomedical engineering, robotics, and human-computer interaction. Its ability to measure muscle activity makes it ideal for applications like prosthetics control, biofeedback systems, and gesture recognition.
Explore Projects Built with ANALOG EMG SENSOR

Explore Projects Built with ANALOG EMG SENSOR
Common Applications and Use Cases
- Prosthetics Control: Enables muscle signals to control robotic limbs.
- Biofeedback Systems: Monitors muscle activity for rehabilitation or fitness tracking.
- Gesture Recognition: Detects muscle movements for controlling devices or gaming.
- Medical Research: Studies muscle behavior and neuromuscular disorders.
- Wearable Technology: Integrates into devices for real-time muscle monitoring.
Technical Specifications
The following table outlines the key technical details of the Analog EMG Sensor:
| Parameter | Value |
|---|---|
| Operating Voltage | 3.3V to 5V |
| Output Signal | Analog voltage (0V to Vcc) |
| Gain | Adjustable (typically 1000x) |
| Bandwidth | 20 Hz to 500 Hz |
| Input Impedance | >10 MΩ |
| Output Impedance | <1 kΩ |
| Electrode Type | Disposable or reusable |
| Dimensions | Varies by manufacturer |
Pin Configuration and Descriptions
The Analog EMG Sensor typically has the following pin configuration:
| Pin | Name | Description |
|---|---|---|
| 1 | VCC | Power supply input (3.3V to 5V). |
| 2 | GND | Ground connection. |
| 3 | SIG | Analog signal output representing muscle activity. |
| 4 | REF (optional) | Reference voltage input for signal calibration (if available on the sensor). |
Usage Instructions
How to Use the Component in a Circuit
- Power the Sensor: Connect the VCC pin to a 3.3V or 5V power source and the GND pin to the ground.
- Attach Electrodes: Place the electrodes on the target muscle group. Ensure proper skin preparation (clean and dry) for accurate readings.
- Use one electrode as the reference (placed on a bony area or inactive muscle).
- Place the other two electrodes on the active muscle, aligned with the muscle fibers.
- Connect the Signal Output: Connect the SIG pin to an analog input pin of a microcontroller (e.g., Arduino UNO) or an oscilloscope for signal monitoring.
- Calibrate the Sensor: Adjust the gain (if adjustable) to amplify the signal appropriately for your application.
Important Considerations and Best Practices
- Electrode Placement: Proper placement is critical for accurate signal detection. Avoid placing electrodes near joints or tendons.
- Signal Noise: Minimize noise by ensuring good skin contact and using shielded cables for connections.
- Power Supply: Use a stable power source to avoid fluctuations in the output signal.
- Signal Processing: The raw EMG signal may require filtering (e.g., low-pass or high-pass filters) to remove noise and extract meaningful data.
- Safety: Ensure the sensor is used in a safe environment and avoid direct contact with high-voltage equipment.
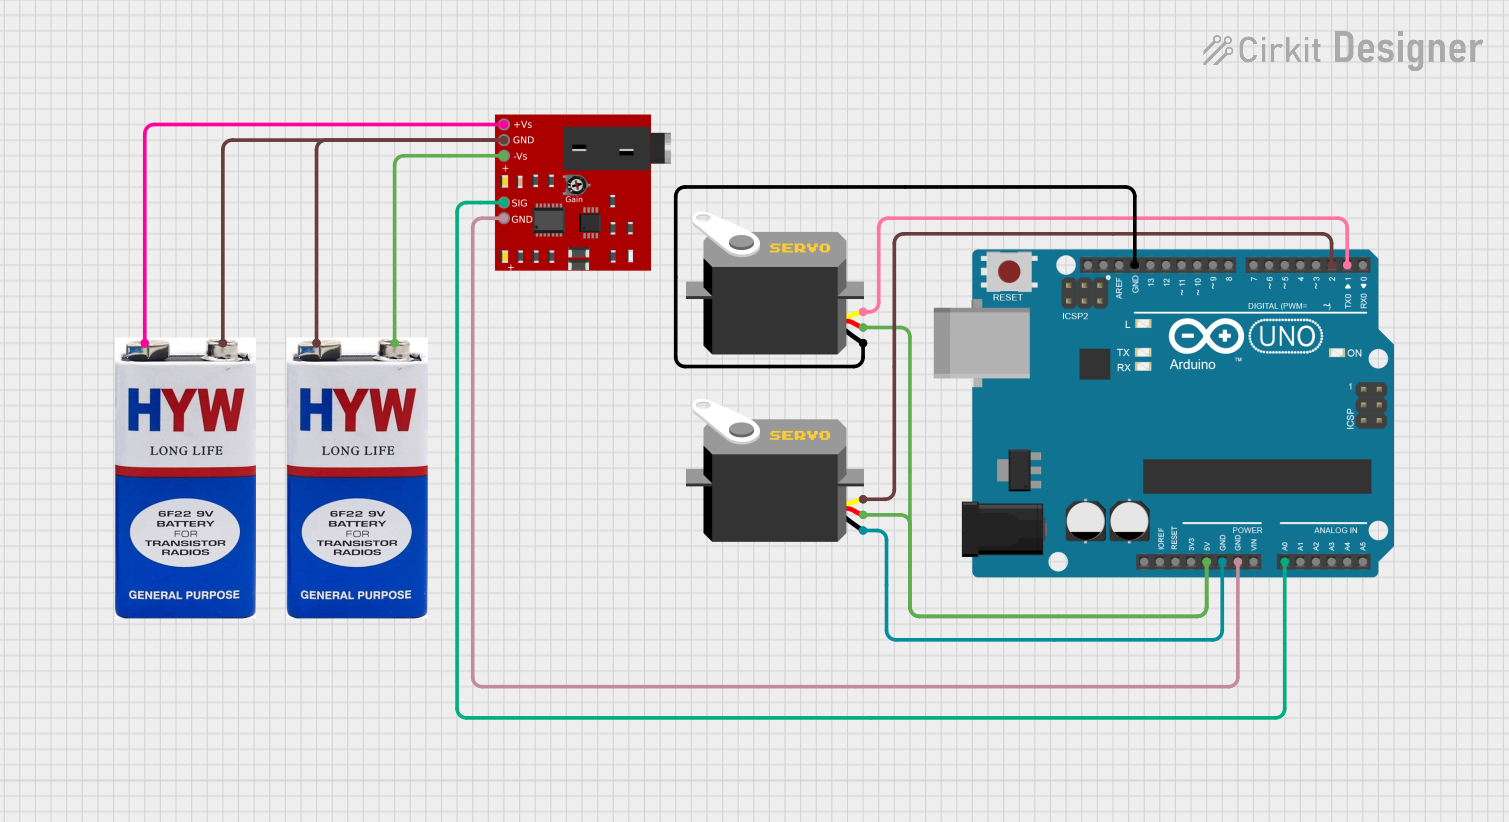
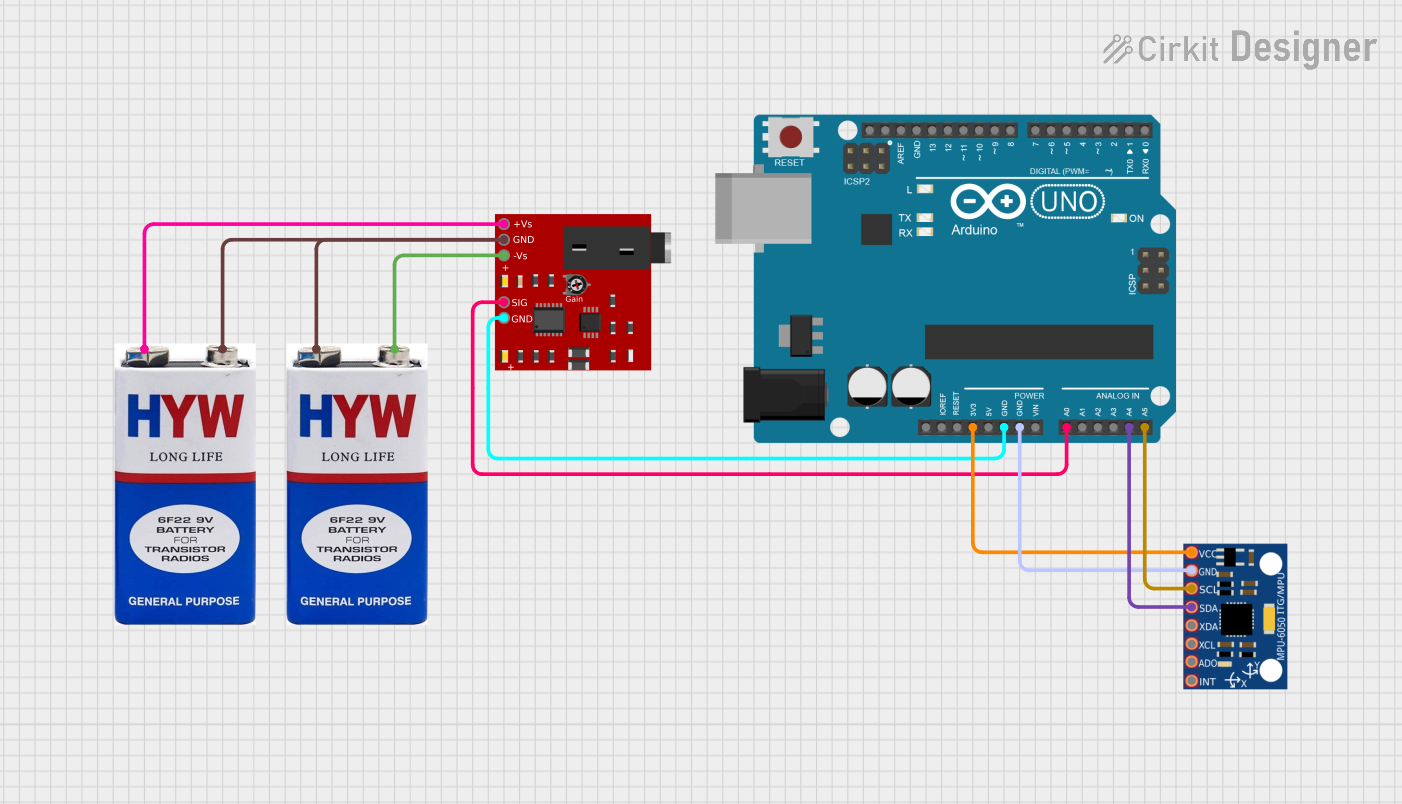
Example: Connecting to an Arduino UNO
Below is an example of how to connect and read data from the Analog EMG Sensor using an Arduino UNO:
Circuit Connections
- VCC: Connect to the 5V pin on the Arduino.
- GND: Connect to the GND pin on the Arduino.
- SIG: Connect to an analog input pin (e.g., A0) on the Arduino.
Arduino Code
// Analog EMG Sensor Example Code
// Reads the analog signal from the EMG sensor and prints it to the Serial Monitor.

const int emgPin = A0; // Define the analog pin connected to the EMG sensor's SIG pin

void setup() {
  Serial.begin(9600); // Initialize serial communication at 9600 baud
  pinMode(emgPin, INPUT); // Set the EMG pin as an input
}

void loop() {
  int emgValue = analogRead(emgPin); // Read the analog value from the EMG sensor
  Serial.println(emgValue); // Print the value to the Serial Monitor
  delay(10); // Small delay for stability
}
Notes:
- The raw EMG signal may need further processing (e.g., rectification, smoothing) depending on the application.
- Use the Serial Plotter in the Arduino IDE to visualize the signal in real time.
Troubleshooting and FAQs
Common Issues and Solutions
No Signal Detected
- Cause: Poor electrode contact or incorrect placement.
- Solution: Ensure the skin is clean and dry. Reposition the electrodes on the muscle.
High Noise in Signal
- Cause: Electrical interference or loose connections.
- Solution: Use shielded cables, ensure proper grounding, and avoid placing the sensor near high-power devices.
Weak Signal Output
- Cause: Low muscle activity or incorrect gain settings.
- Solution: Adjust the gain (if adjustable) or ensure the muscle is actively contracting.
Fluctuating Signal
- Cause: Unstable power supply or movement artifacts.
- Solution: Use a regulated power source and minimize movement during measurements.
FAQs
Q1: Can I use the Analog EMG Sensor with a 3.3V microcontroller?
A1: Yes, the sensor is compatible with 3.3V systems. Ensure the output signal is within the input range of the microcontroller's ADC.
Q2: How do I process the raw EMG signal?
A2: The raw signal can be processed using techniques like rectification (absolute value), filtering (low-pass or high-pass), and envelope detection to extract meaningful data.
Q3: Are the electrodes reusable?
A3: Some electrodes are reusable, while others are disposable. Check the manufacturer's specifications for details.
Q4: Can I use this sensor for medical diagnosis?
A4: No, the Analog EMG Sensor is not intended for medical diagnosis. It is designed for research, prototyping, and educational purposes only.
Q5: What is the typical lifespan of the sensor?
A5: The lifespan depends on usage and environmental conditions. Proper handling and storage can extend its durability.