How to Use Set battery (7v): Examples, Pinouts, and Specs
Introduction
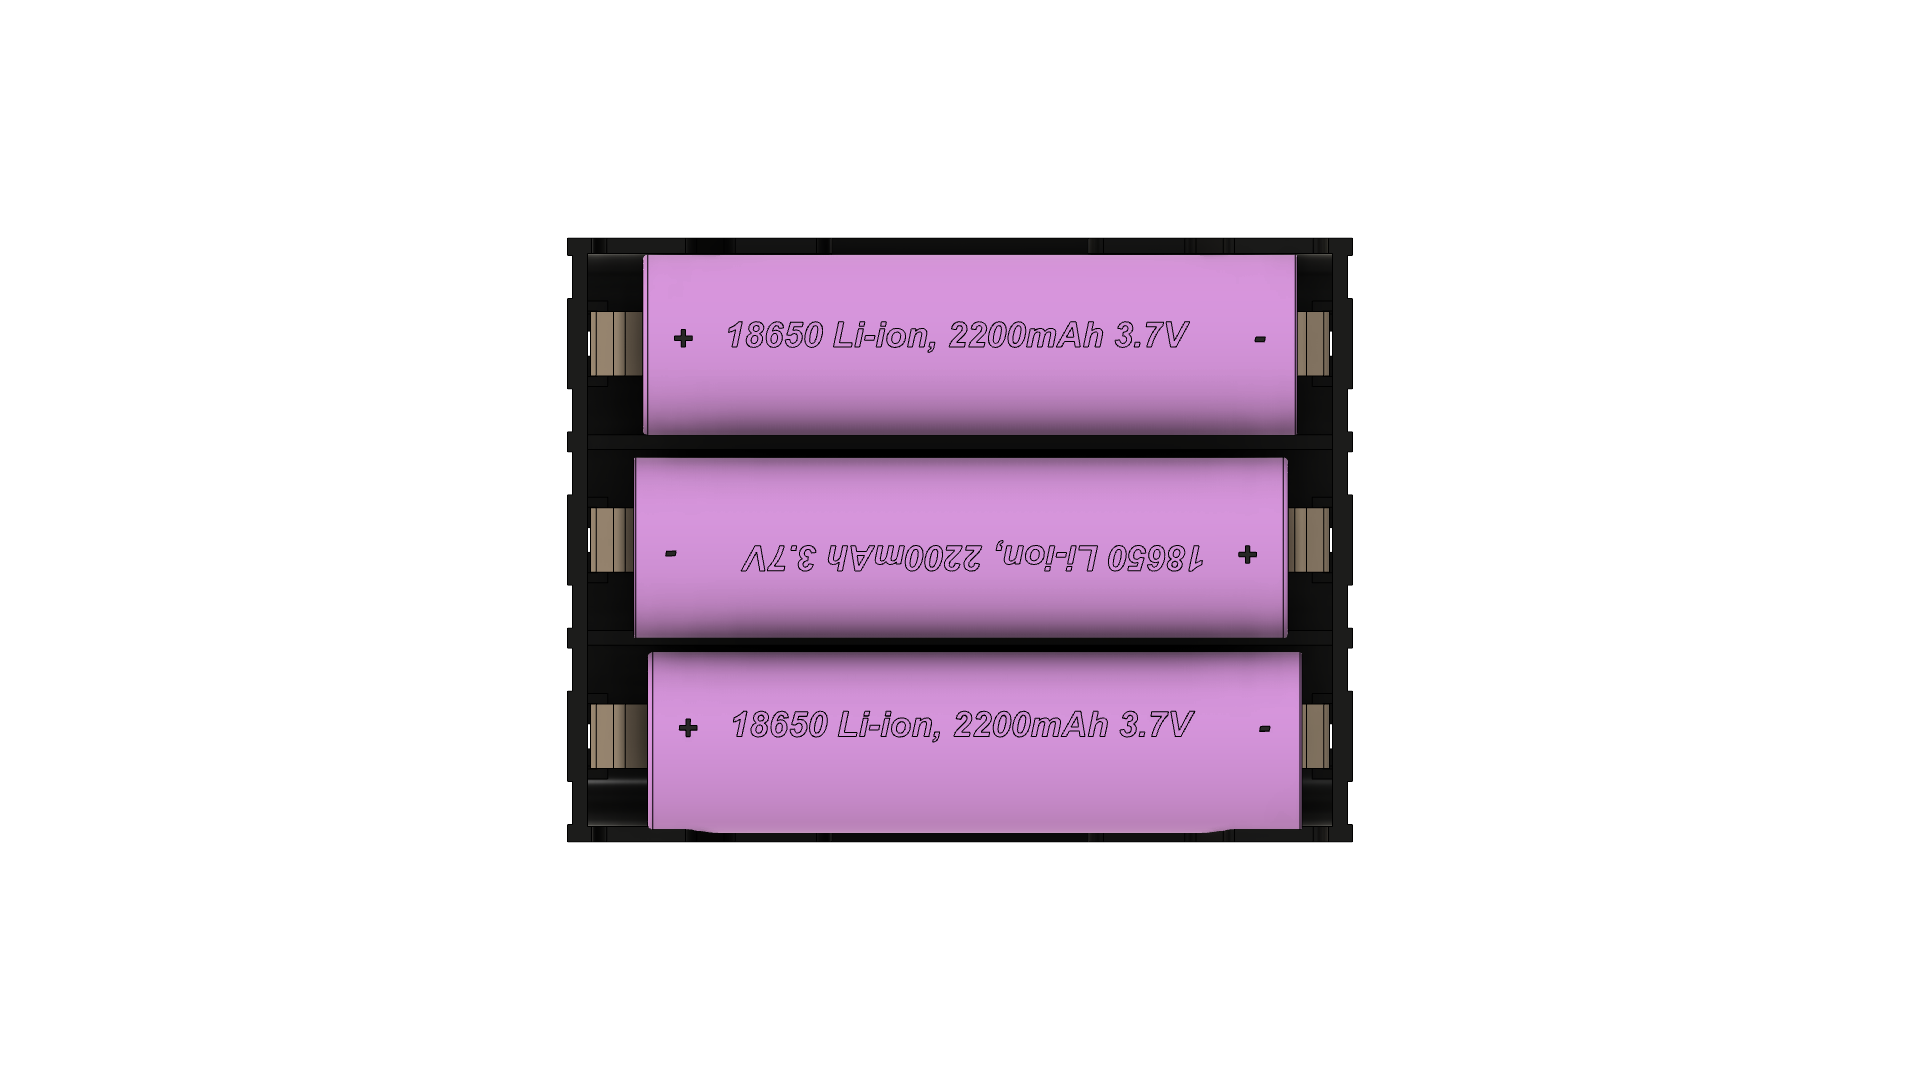
A set battery is an electronic component designed to provide a stable power source with a constant voltage output of 7 volts. This type of battery is commonly used in portable electronics, hobbyist projects, and as a power source for microcontrollers like the Arduino UNO. Its consistent voltage output ensures reliable operation of electronic circuits that require a specific operating voltage.
Explore Projects Built with Set battery (7v)


Explore Projects Built with Set battery (7v)
Common Applications and Use Cases
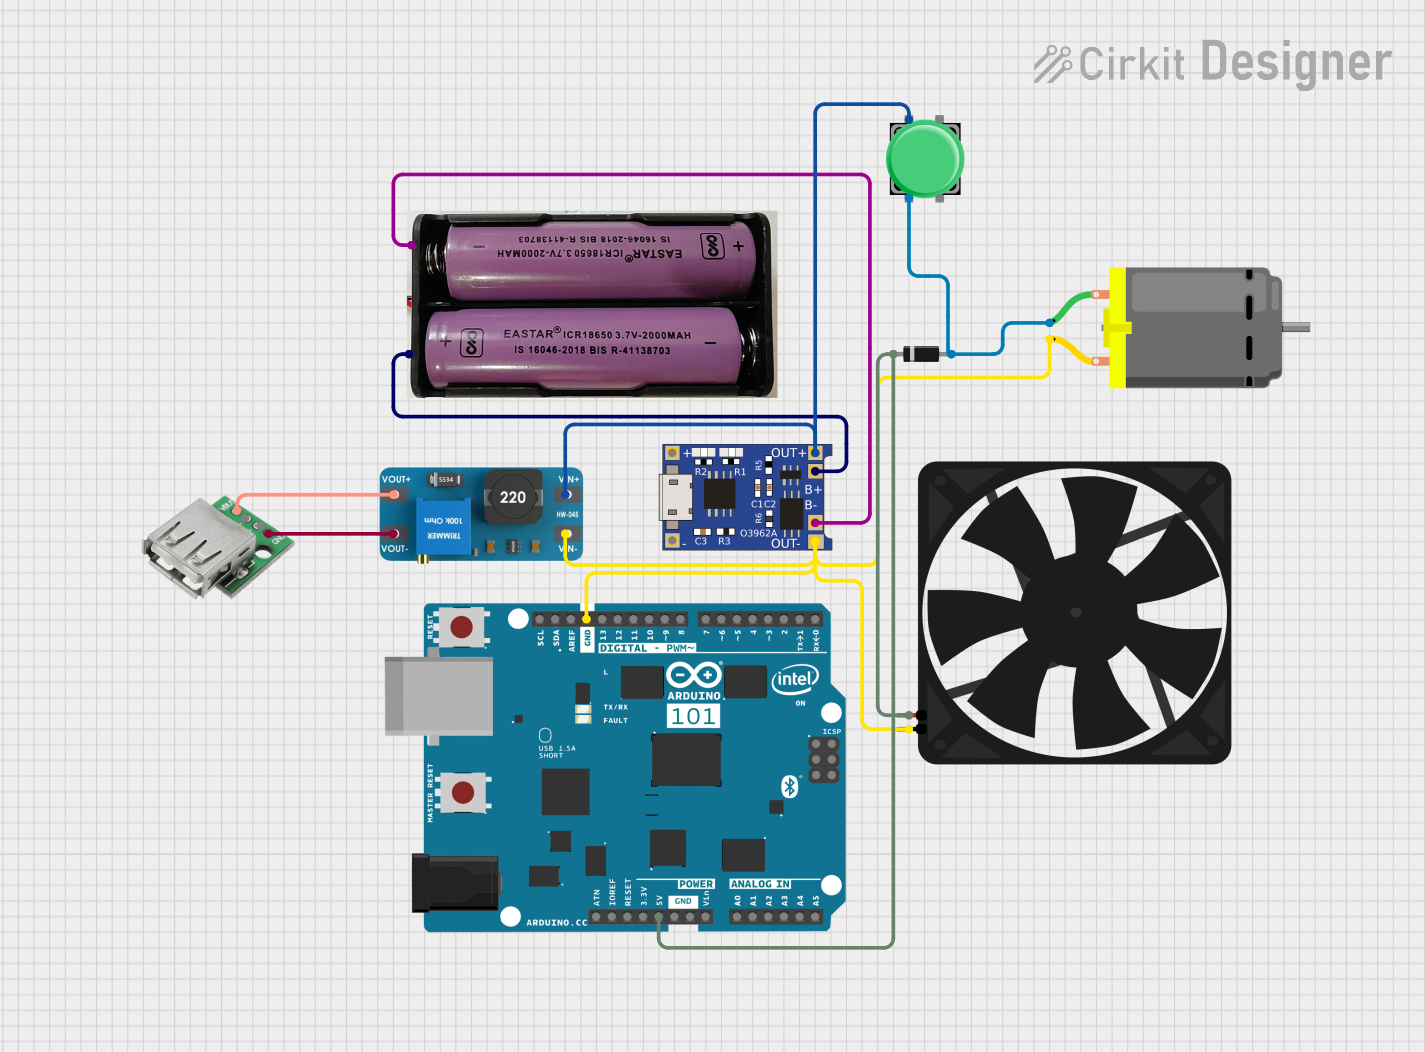
- Powering Arduino and other microcontroller-based projects
- Portable electronic devices
- Robotics
- DIY electronics projects
- Remote sensors and communication devices
Technical Specifications
Key Technical Details
- Nominal Voltage: 7V
- Chemistry: (Specify the type, e.g., Li-ion, NiMH, Alkaline)
- Capacity: (Specify in mAh or Ah)
- Maximum Continuous Discharge Current: (Specify in A or mA)
- Charge/Discharge Cycles: (Specify the number of cycles)
- Operating Temperature Range: (Specify in °C)
Pin Configuration and Descriptions
| Pin Number | Description | Notes |
|---|---|---|
| 1 | Positive (+) Terminal | Connect to Vcc of the circuit |
| 2 | Negative (-) Terminal | Connect to GND of the circuit |
Usage Instructions
How to Use the Component in a Circuit
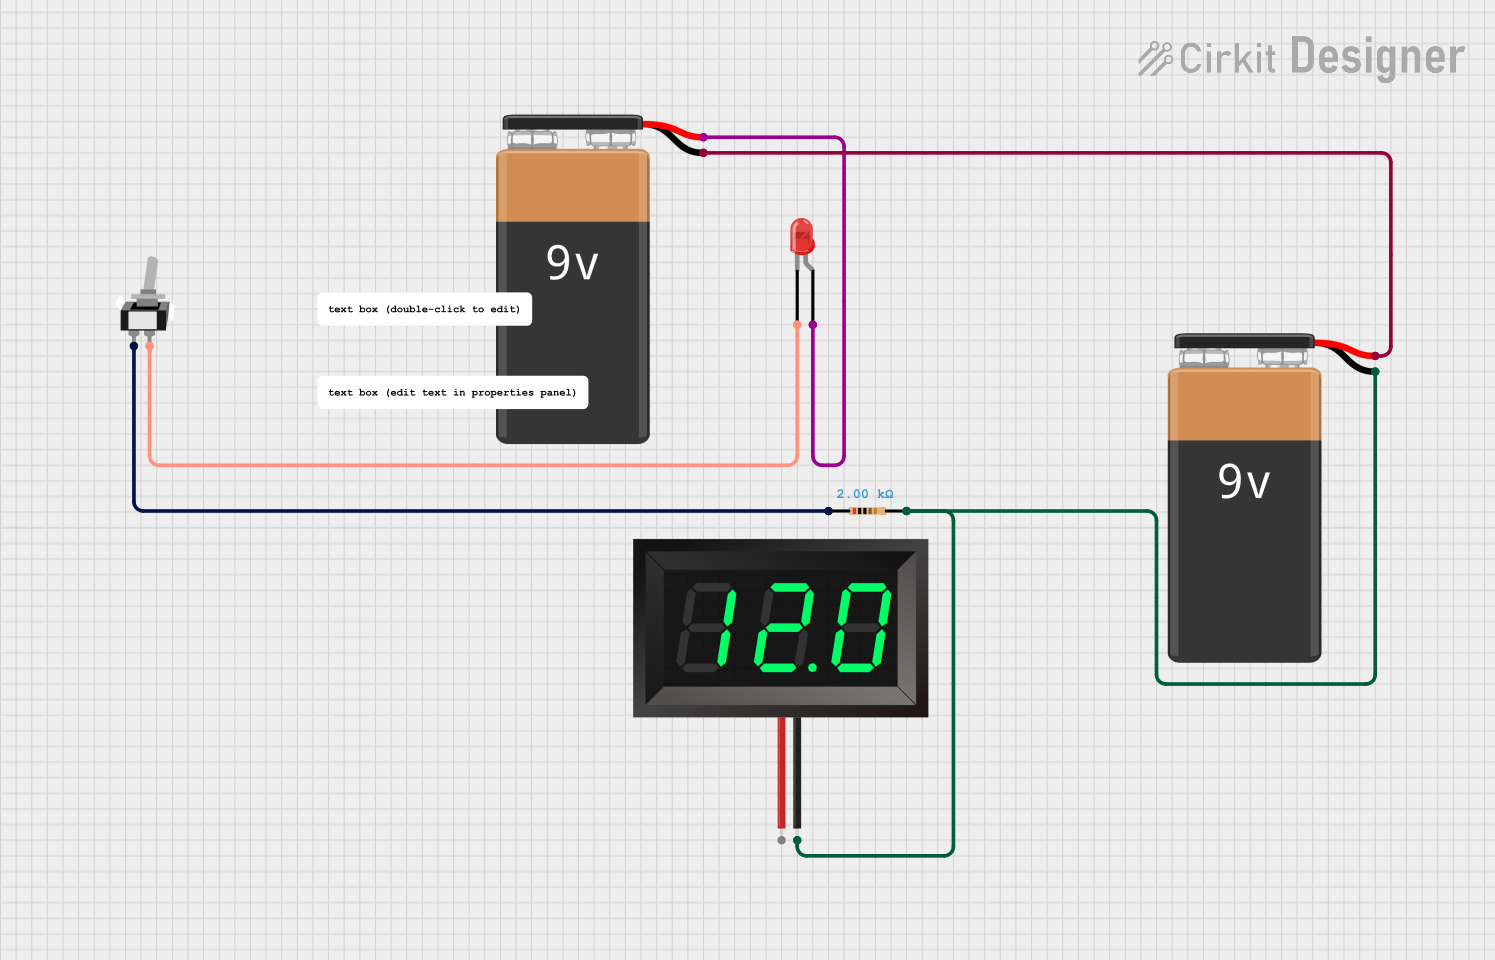
Connecting to a Circuit:
- Ensure the circuit's voltage requirements match the 7V output of the set battery.
- Connect the positive terminal of the battery to the Vcc or power input of the circuit.
- Connect the negative terminal to the ground (GND) of the circuit.
Voltage Regulation (if necessary):
- If the circuit requires a voltage lower than 7V, use a voltage regulator to step down the voltage to the desired level.
Charging (for rechargeable types):
- Use a compatible charger designed for the battery's chemistry and voltage.
- Follow the manufacturer's guidelines for charging times and rates.
Important Considerations and Best Practices
- Do not exceed the battery's maximum discharge current to prevent overheating and potential damage.
- Avoid short-circuiting the battery terminals.
- Store the battery in a cool, dry place when not in use.
- Dispose of the battery according to local regulations, especially if it's a non-rechargeable type.
Troubleshooting and FAQs
Common Issues Users Might Face
Battery not powering the circuit:
- Check the battery charge level and recharge if necessary.
- Ensure proper connections to the circuit (correct polarity).
- Inspect for any loose connections or broken wires.
Circuit operates intermittently:
- Verify that the battery is securely connected.
- Check for any signs of battery damage or depletion.
Solutions and Tips for Troubleshooting
- Always measure the battery voltage before connecting it to the circuit to ensure it is within the expected range.
- If the battery is rechargeable and not holding a charge, it may have reached the end of its useful life and should be replaced.
- For circuits that draw high current, consider using a battery with a higher capacity or connecting multiple batteries in parallel for increased current capability.
FAQs
Q: Can I use a 7V set battery to power a 5V circuit? A: Yes, but you will need to use a voltage regulator to step down the voltage to 5V to avoid damaging the circuit.
Q: How do I know when to recharge the battery? A: For rechargeable batteries, it's best to monitor the voltage level. When it drops below the nominal voltage, it's time to recharge.
Q: Is it safe to leave the battery connected to a circuit when not in use? A: It is generally safe, but to prolong battery life, it's recommended to disconnect it when the circuit is not in use.
Example Code for Arduino UNO
// Example code to read battery voltage and display it on the Serial Monitor

const int batteryPin = A0; // Analog pin connected to battery voltage divider

void setup() {
  Serial.begin(9600); // Start serial communication at 9600 baud rate
}

void loop() {
  int sensorValue = analogRead(batteryPin); // Read the analog value
  float voltage = sensorValue * (7.0 / 1023.0); // Convert to battery voltage
  Serial.print("Battery Voltage: ");
  Serial.println(voltage, 2); // Print the voltage with 2 decimal places
  delay(1000); // Wait for 1 second before reading again
}
Note: The above code assumes a direct connection to the battery. If a voltage divider is used to step down the voltage to a safe level for the Arduino's analog pin, the conversion factor in the code must be adjusted accordingly. Always ensure that the input voltage does not exceed the maximum voltage rating of the Arduino's analog pins.