How to Use DF Robot: Examples, Pinouts, and Specs

Introduction
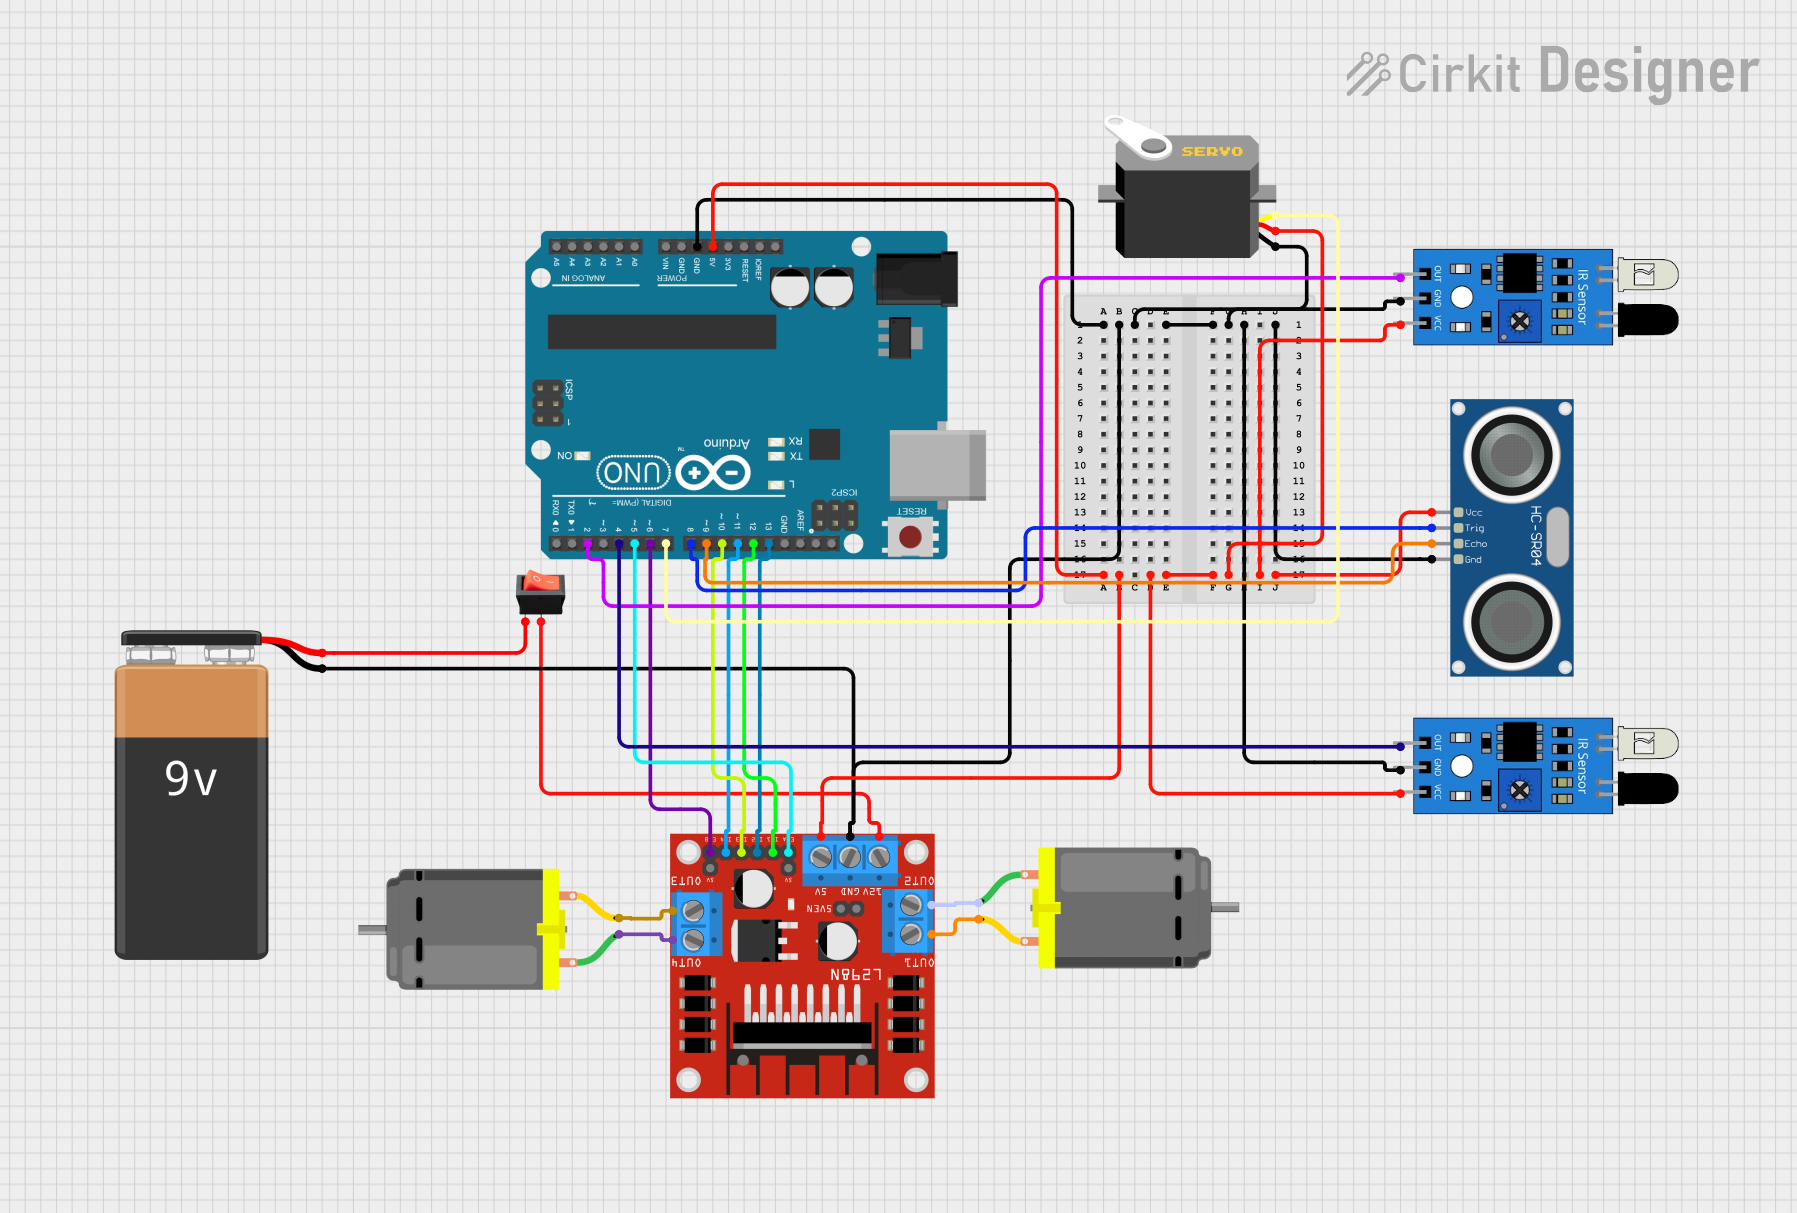
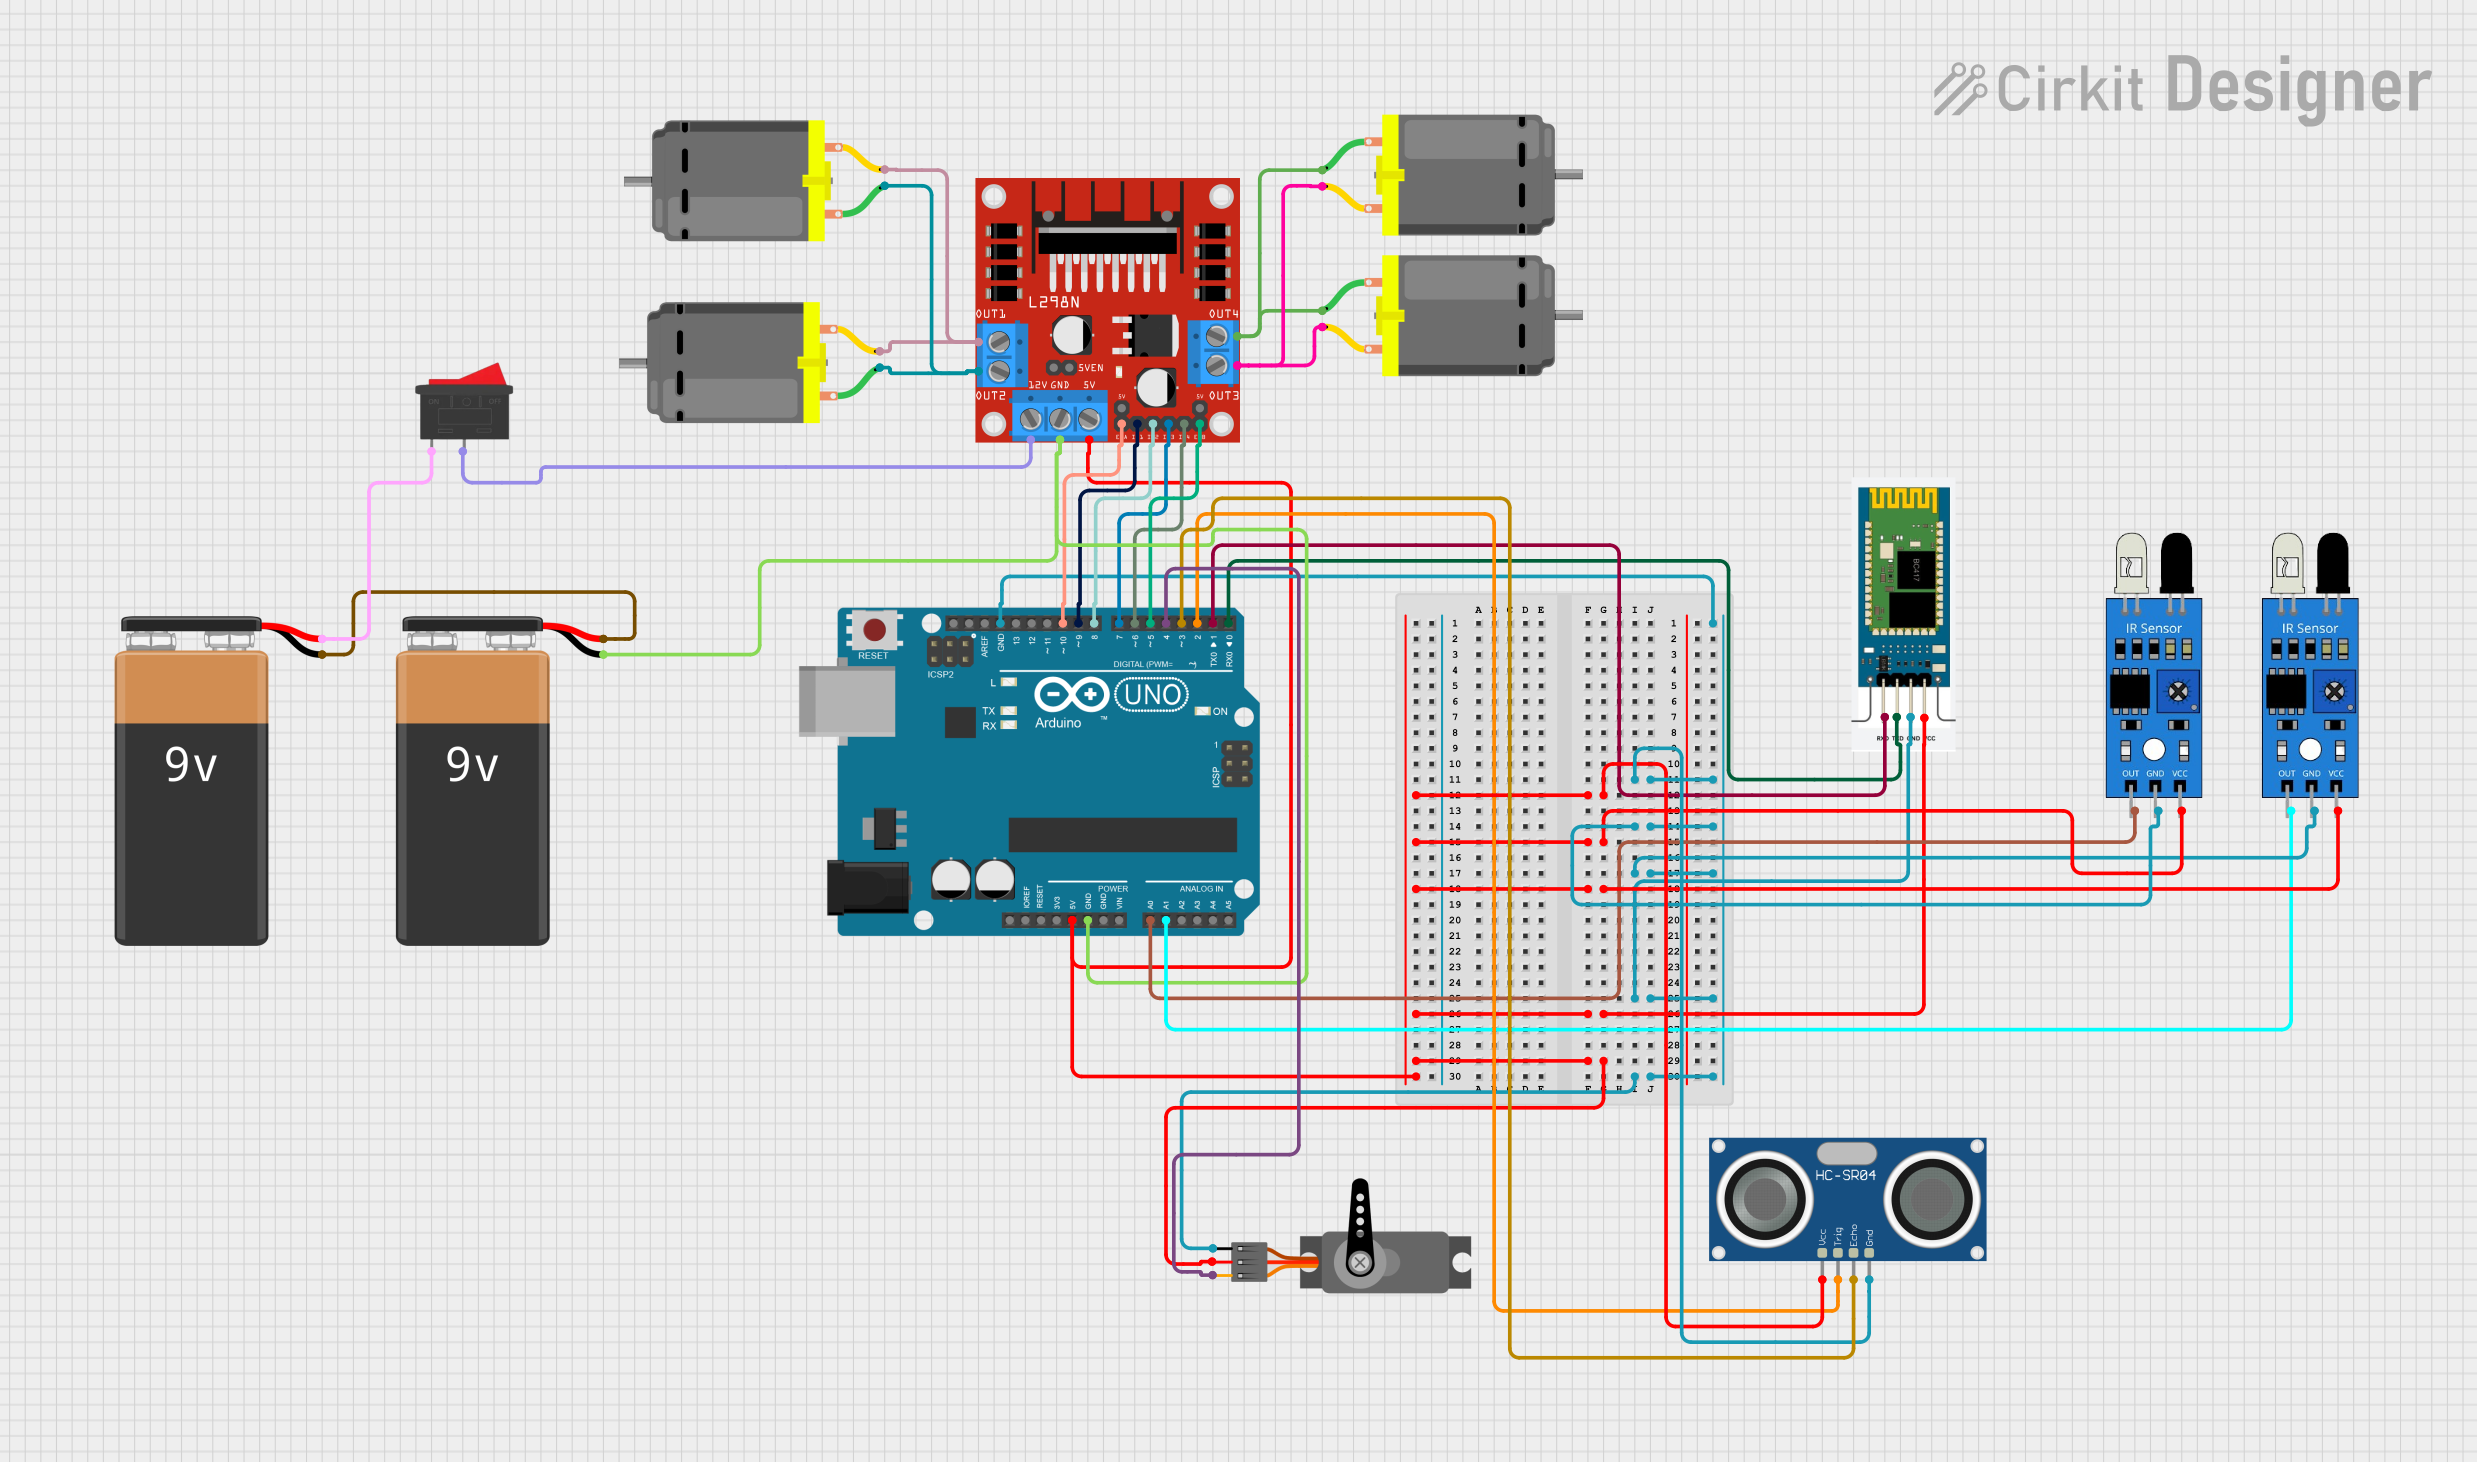
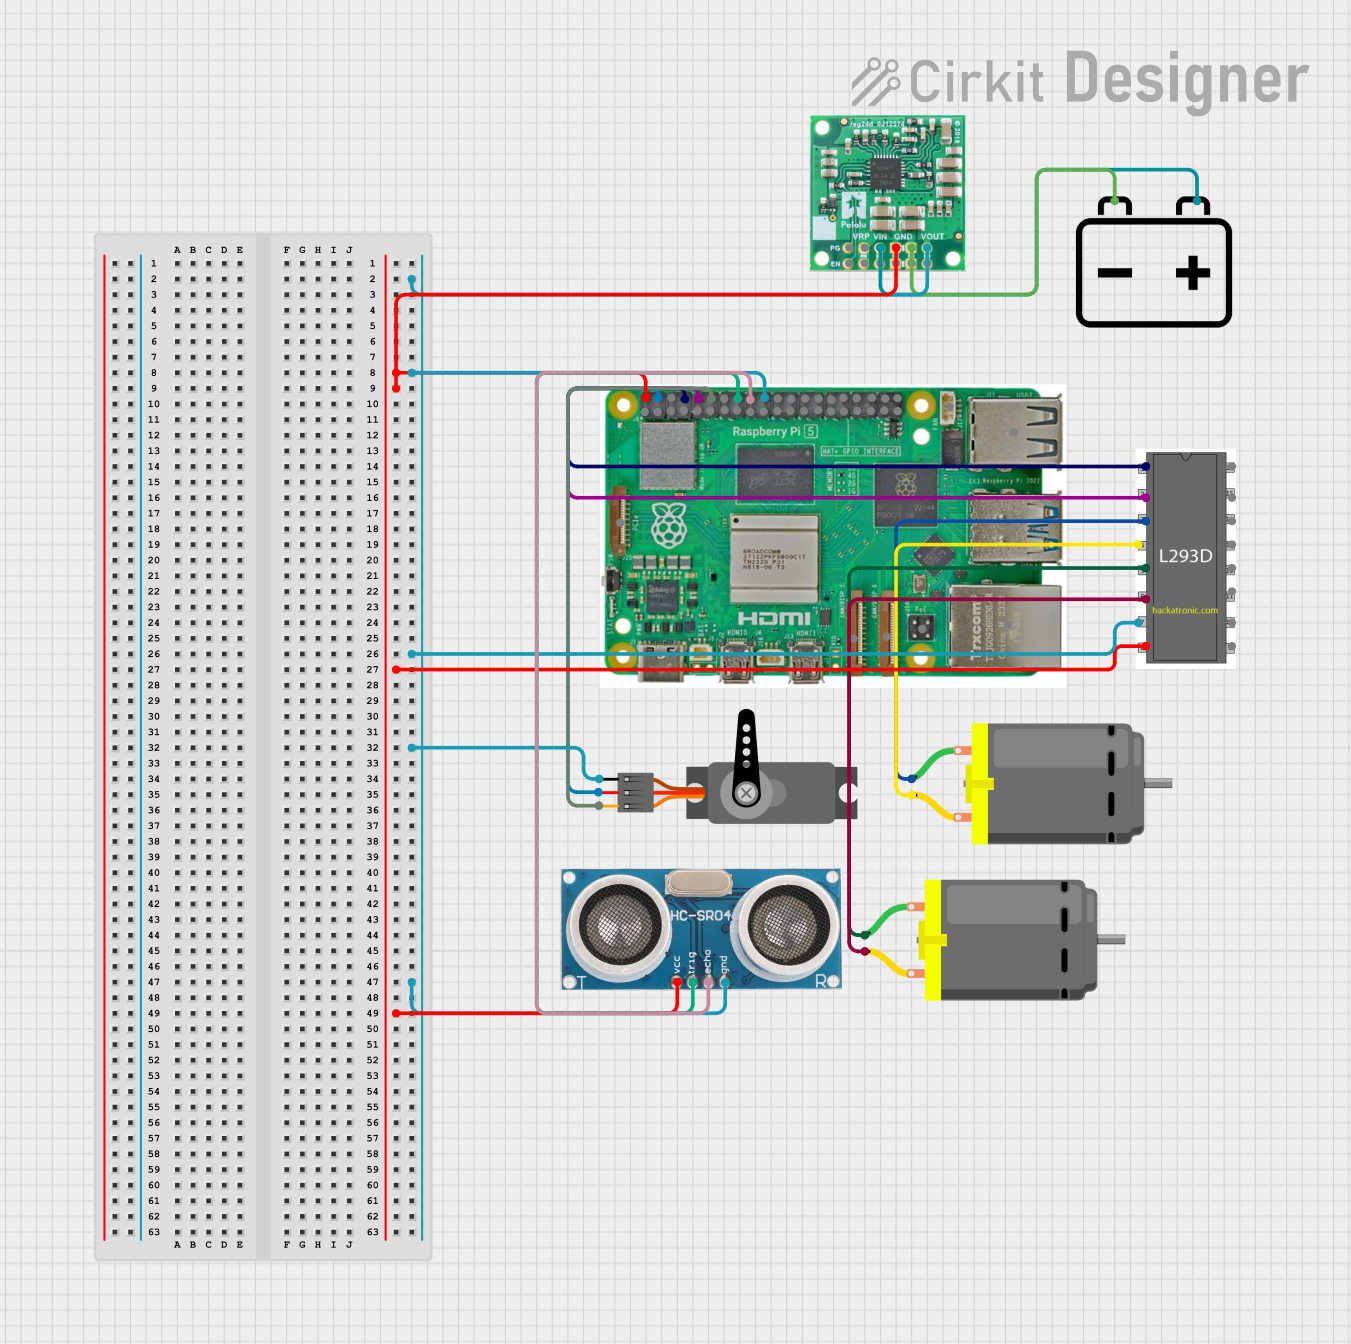
The DF Robot is a versatile robotic platform designed for educational and hobbyist use. It is equipped with various sensors and actuators, making it ideal for interactive projects. This platform is widely used in robotics education, prototyping, and DIY projects due to its modular design and compatibility with popular microcontrollers like Arduino. Whether you're a beginner or an experienced maker, the DF Robot provides a robust foundation for building and experimenting with robotics.
Explore Projects Built with DF Robot

Explore Projects Built with DF Robot
Common Applications and Use Cases
- Robotics education and STEM learning
- DIY robotic projects
- Obstacle avoidance and line-following robots
- Interactive and autonomous systems
- Prototyping for advanced robotics research
Technical Specifications
Key Technical Details
| Parameter | Specification |
|---|---|
| Power Supply | 6V to 12V DC |
| Motor Driver | Dual-channel H-bridge motor driver |
| Sensors Included | IR sensors, ultrasonic sensor, etc. |
| Actuators Included | DC motors, servo motors |
| Microcontroller Support | Arduino, Raspberry Pi, etc. |
| Communication Protocols | I2C, UART, SPI |
| Dimensions | 200mm x 150mm x 80mm |
| Weight | ~500g |
Pin Configuration and Descriptions
Motor Driver Pinout
| Pin Name | Description |
|---|---|
| VCC | Power input (6V to 12V DC) |
| GND | Ground |
| IN1 | Motor A control input 1 |
| IN2 | Motor A control input 2 |
| IN3 | Motor B control input 1 |
| IN4 | Motor B control input 2 |
| ENA | Enable pin for Motor A |
| ENB | Enable pin for Motor B |
Sensor Pinout (Example: Ultrasonic Sensor)
| Pin Name | Description |
|---|---|
| VCC | Power input (5V DC) |
| GND | Ground |
| TRIG | Trigger signal input |
| ECHO | Echo signal output |
Usage Instructions
How to Use the DF Robot in a Circuit
- Power the Robot: Connect a 6V to 12V DC power supply to the VCC and GND pins of the motor driver.
- Connect Motors: Attach the DC motors to the motor driver outputs (e.g., Motor A and Motor B terminals).
- Connect Sensors: Attach sensors like ultrasonic or IR sensors to the appropriate pins on the microcontroller.
- Microcontroller Integration: Use an Arduino or other compatible microcontroller to control the robot. Connect the motor driver and sensors to the microcontroller's GPIO pins.
- Write Code: Program the microcontroller to control the motors and read sensor data.
Important Considerations and Best Practices
- Ensure the power supply matches the voltage and current requirements of the motors and sensors.
- Use proper pull-up or pull-down resistors for sensor connections if required.
- Avoid overloading the motor driver by exceeding its current rating.
- Secure all connections to prevent loose wires during operation.
- Test individual components (e.g., motors, sensors) before integrating them into the full system.
Example Code for Arduino UNO
Below is an example code snippet to control the DF Robot's motors and read data from an ultrasonic sensor:
// Define motor driver pins
#define IN1 7
#define IN2 6
#define IN3 5
#define IN4 4
#define ENA 9
#define ENB 10

// Define ultrasonic sensor pins
#define TRIG 11
#define ECHO 12

void setup() {
  // Initialize motor driver pins as outputs
  pinMode(IN1, OUTPUT);
  pinMode(IN2, OUTPUT);
  pinMode(IN3, OUTPUT);
  pinMode(IN4, OUTPUT);
  pinMode(ENA, OUTPUT);
  pinMode(ENB, OUTPUT);

  // Initialize ultrasonic sensor pins
  pinMode(TRIG, OUTPUT);
  pinMode(ECHO, INPUT);

  // Start serial communication for debugging
  Serial.begin(9600);
}

void loop() {
  // Example: Move the robot forward
  digitalWrite(IN1, HIGH); // Motor A forward
  digitalWrite(IN2, LOW);
  digitalWrite(IN3, HIGH); // Motor B forward
  digitalWrite(IN4, LOW);
  analogWrite(ENA, 150);   // Set speed for Motor A
  analogWrite(ENB, 150);   // Set speed for Motor B

  delay(2000); // Move forward for 2 seconds

  // Stop the robot
  digitalWrite(IN1, LOW);
  digitalWrite(IN2, LOW);
  digitalWrite(IN3, LOW);
  digitalWrite(IN4, LOW);

  delay(1000); // Pause for 1 second

  // Measure distance using ultrasonic sensor
  long duration, distance;
  digitalWrite(TRIG, LOW);
  delayMicroseconds(2);
  digitalWrite(TRIG, HIGH);
  delayMicroseconds(10);
  digitalWrite(TRIG, LOW);

  duration = pulseIn(ECHO, HIGH);
  distance = duration * 0.034 / 2; // Convert to cm

  // Print distance to Serial Monitor
  Serial.print("Distance: ");
  Serial.print(distance);
  Serial.println(" cm");

  delay(1000); // Wait before next loop iteration
}
Troubleshooting and FAQs
Common Issues and Solutions
Motors Not Running
- Cause: Incorrect wiring or insufficient power supply.
- Solution: Double-check motor connections and ensure the power supply meets the voltage and current requirements.
Sensors Not Responding
- Cause: Loose connections or incorrect pin assignments in the code.
- Solution: Verify sensor connections and ensure the correct pins are defined in the code.
Robot Moves Erratically
- Cause: Incorrect motor driver control signals.
- Solution: Check the logic levels on the motor driver pins and ensure the code is sending the correct signals.
Ultrasonic Sensor Gives Incorrect Readings
- Cause: Interference or incorrect timing in the code.
- Solution: Ensure the sensor is not obstructed and adjust the timing in the code if necessary.
FAQs
Can I use a different microcontroller with the DF Robot? Yes, the DF Robot is compatible with various microcontrollers, including Raspberry Pi and ESP32, as long as the appropriate connections and libraries are used.
What is the maximum load the motors can handle? The maximum load depends on the motor specifications. Refer to the motor datasheet for detailed information.
Can I add additional sensors or actuators? Yes, the DF Robot is modular and can be expanded with additional components, provided the microcontroller has enough GPIO pins and power capacity.
Is the DF Robot suitable for outdoor use? The DF Robot is primarily designed for indoor use. If used outdoors, ensure it is protected from water and extreme environmental conditions.