The SparkFun Atmospheric Sensor Breakout - BME280 is a high-precision sensor module that can measure temperature, humidity, and barometric pressure. This breakout board is based on the Bosch BME280 sensor and is ideal for environmental sensing in weather stations, home automation systems, and IoT applications. Its small form factor and low power consumption make it suitable for portable and battery-powered devices.
Explore Projects Built with SparkFun Atmospheric Sensor Breakout - BME280
Use Cirkit Designer to design, explore, and prototype these projects online. Some projects support real-time simulation. Click "Open Project" to start designing instantly!
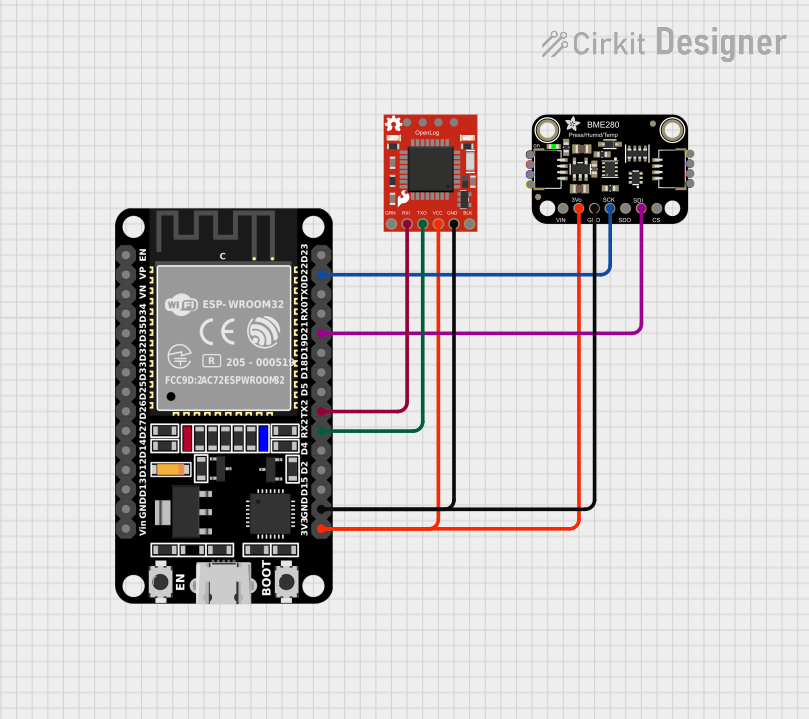
This circuit features an ESP32 microcontroller interfaced with an Adafruit BME280 sensor for environmental data acquisition and a SparkFun OpenLog for data logging. The ESP32 communicates with the BME280 via I2C and with the OpenLog via UART, while all components share common power and ground connections.
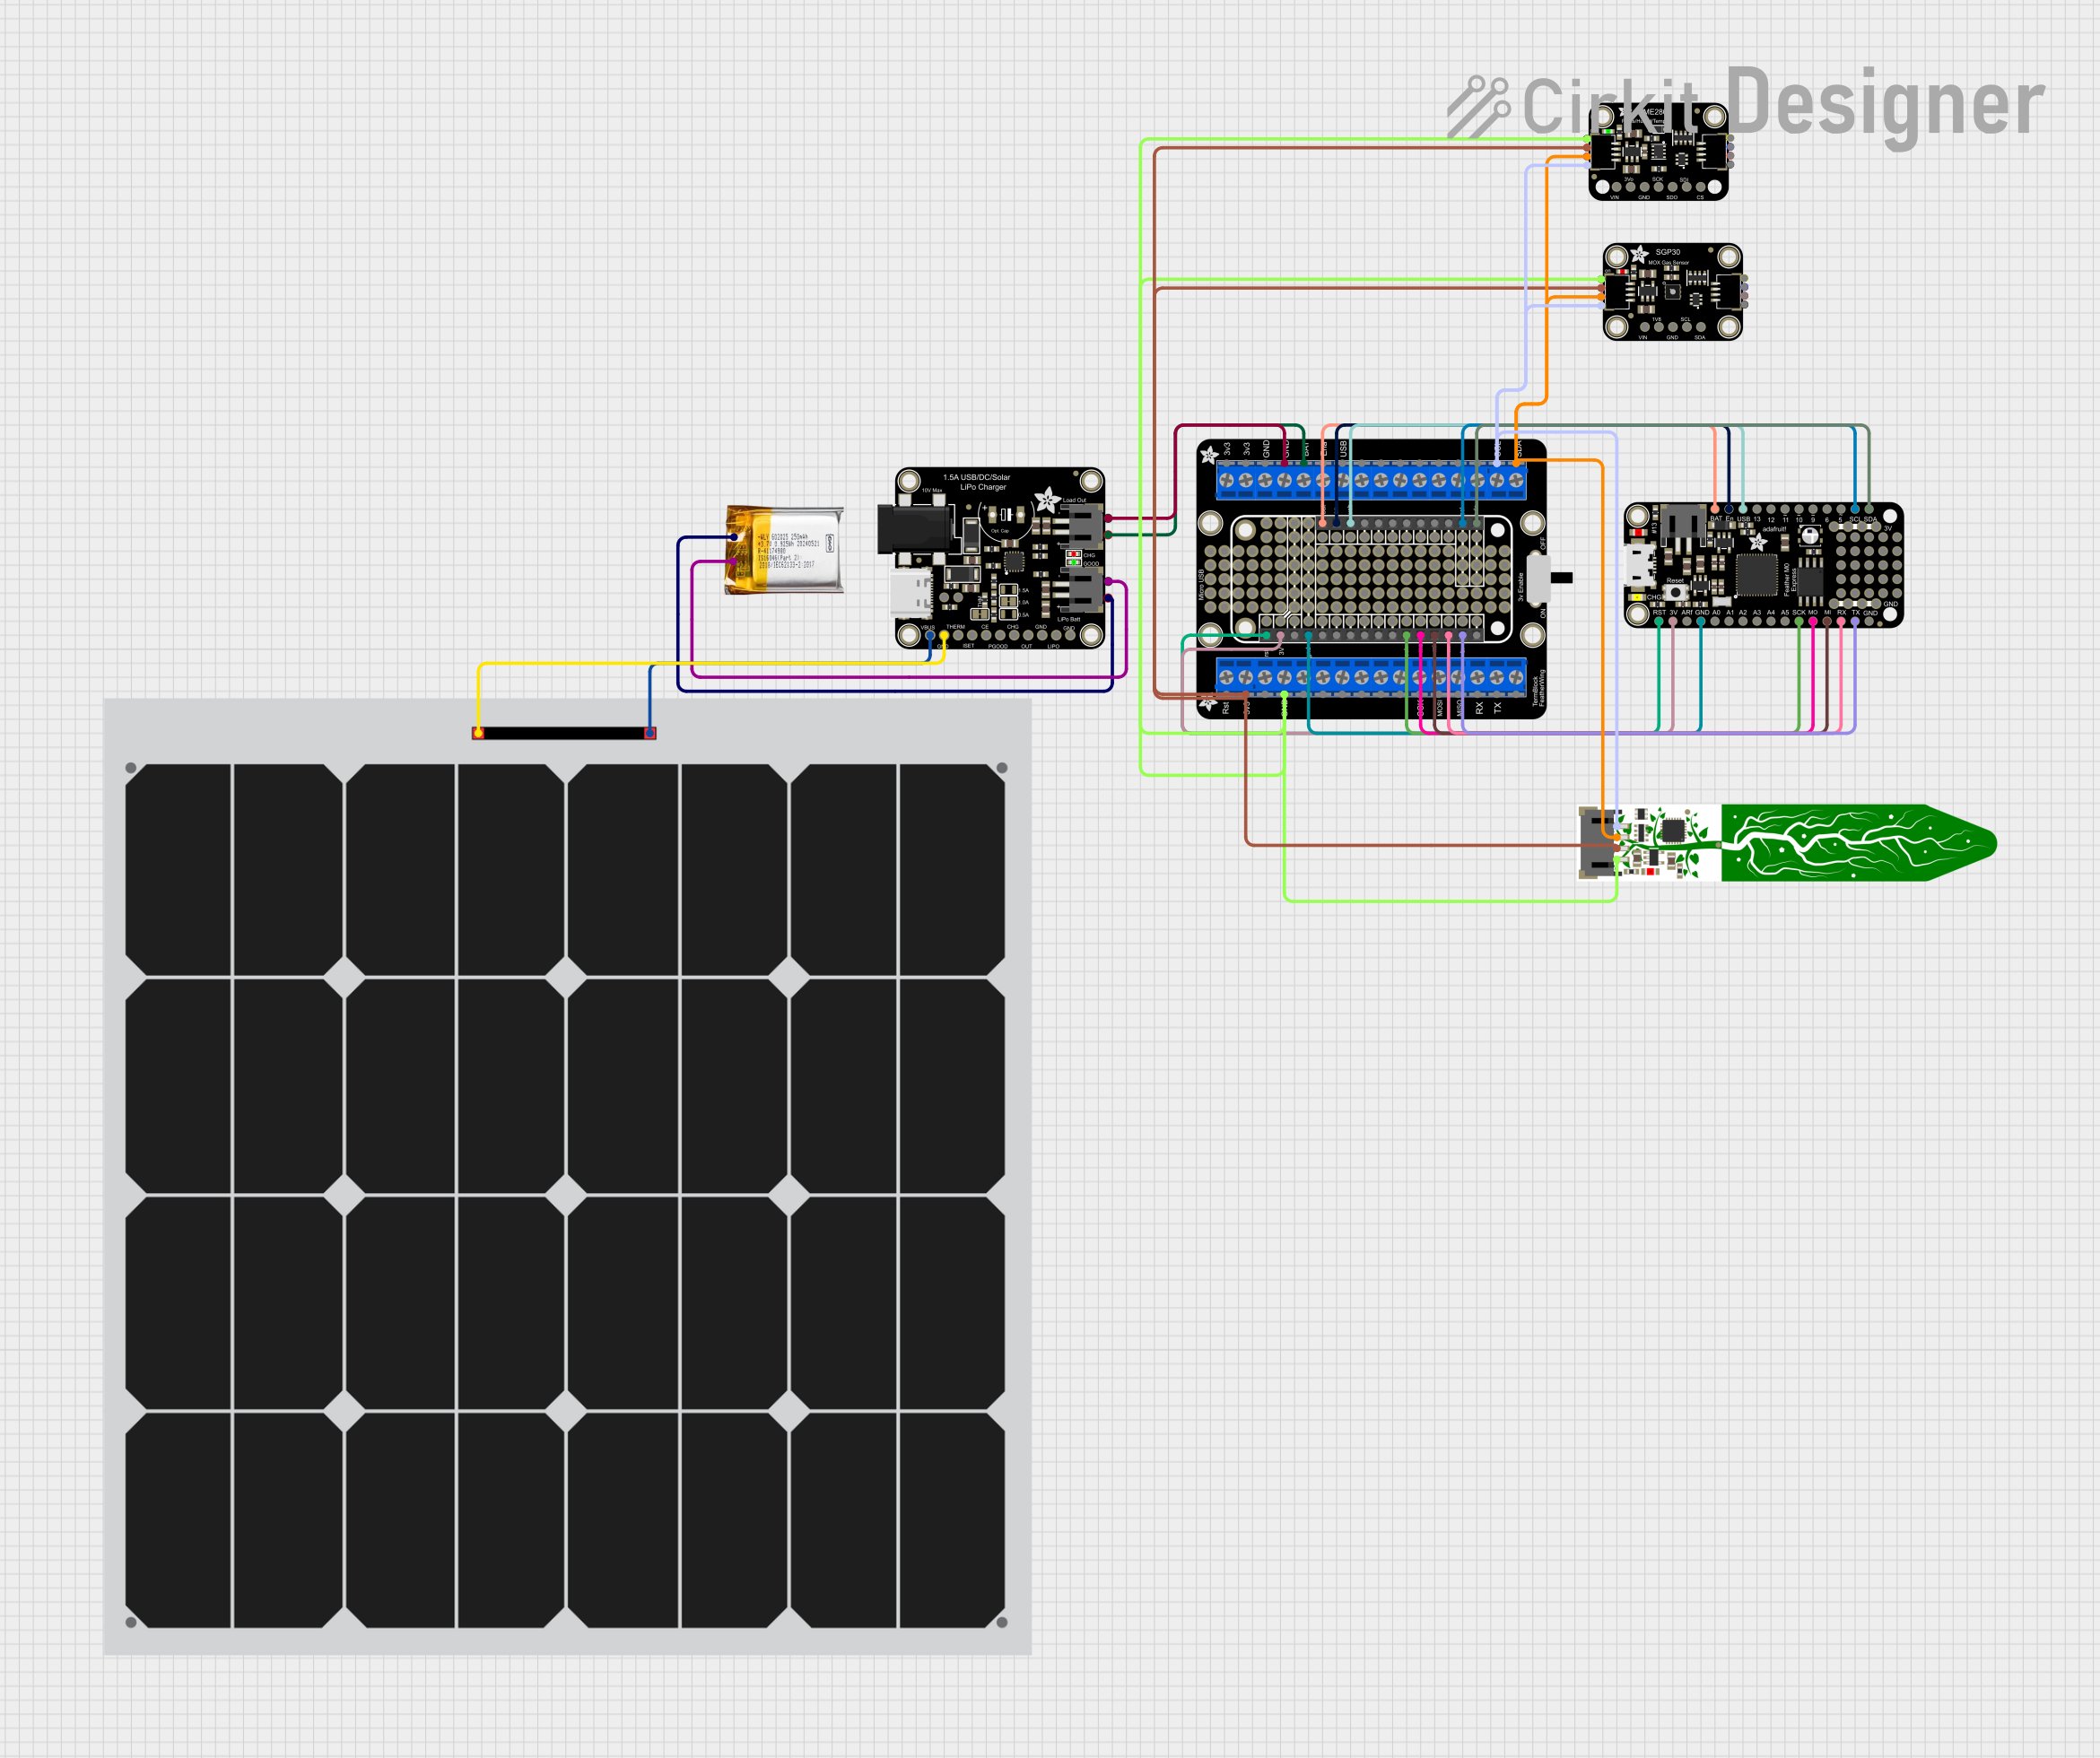
This circuit is designed for environmental data collection and logging, utilizing an Adafruit Feather M0 Express microcontroller as the central processing unit. It interfaces with a BME280 sensor for atmospheric temperature, humidity, and pressure measurements, an SGP30 sensor for monitoring air quality (eCO2 and TVOC), and a STEMMA soil sensor for detecting soil moisture and temperature. The system is powered by a solar panel and a 3.7v LiPo battery, managed by an Adafruit BQ24074 Solar-DC-USB Lipo Charger, and provides easy access to the microcontroller's connections through an Adafruit Terminal Breakout FeatherWing.
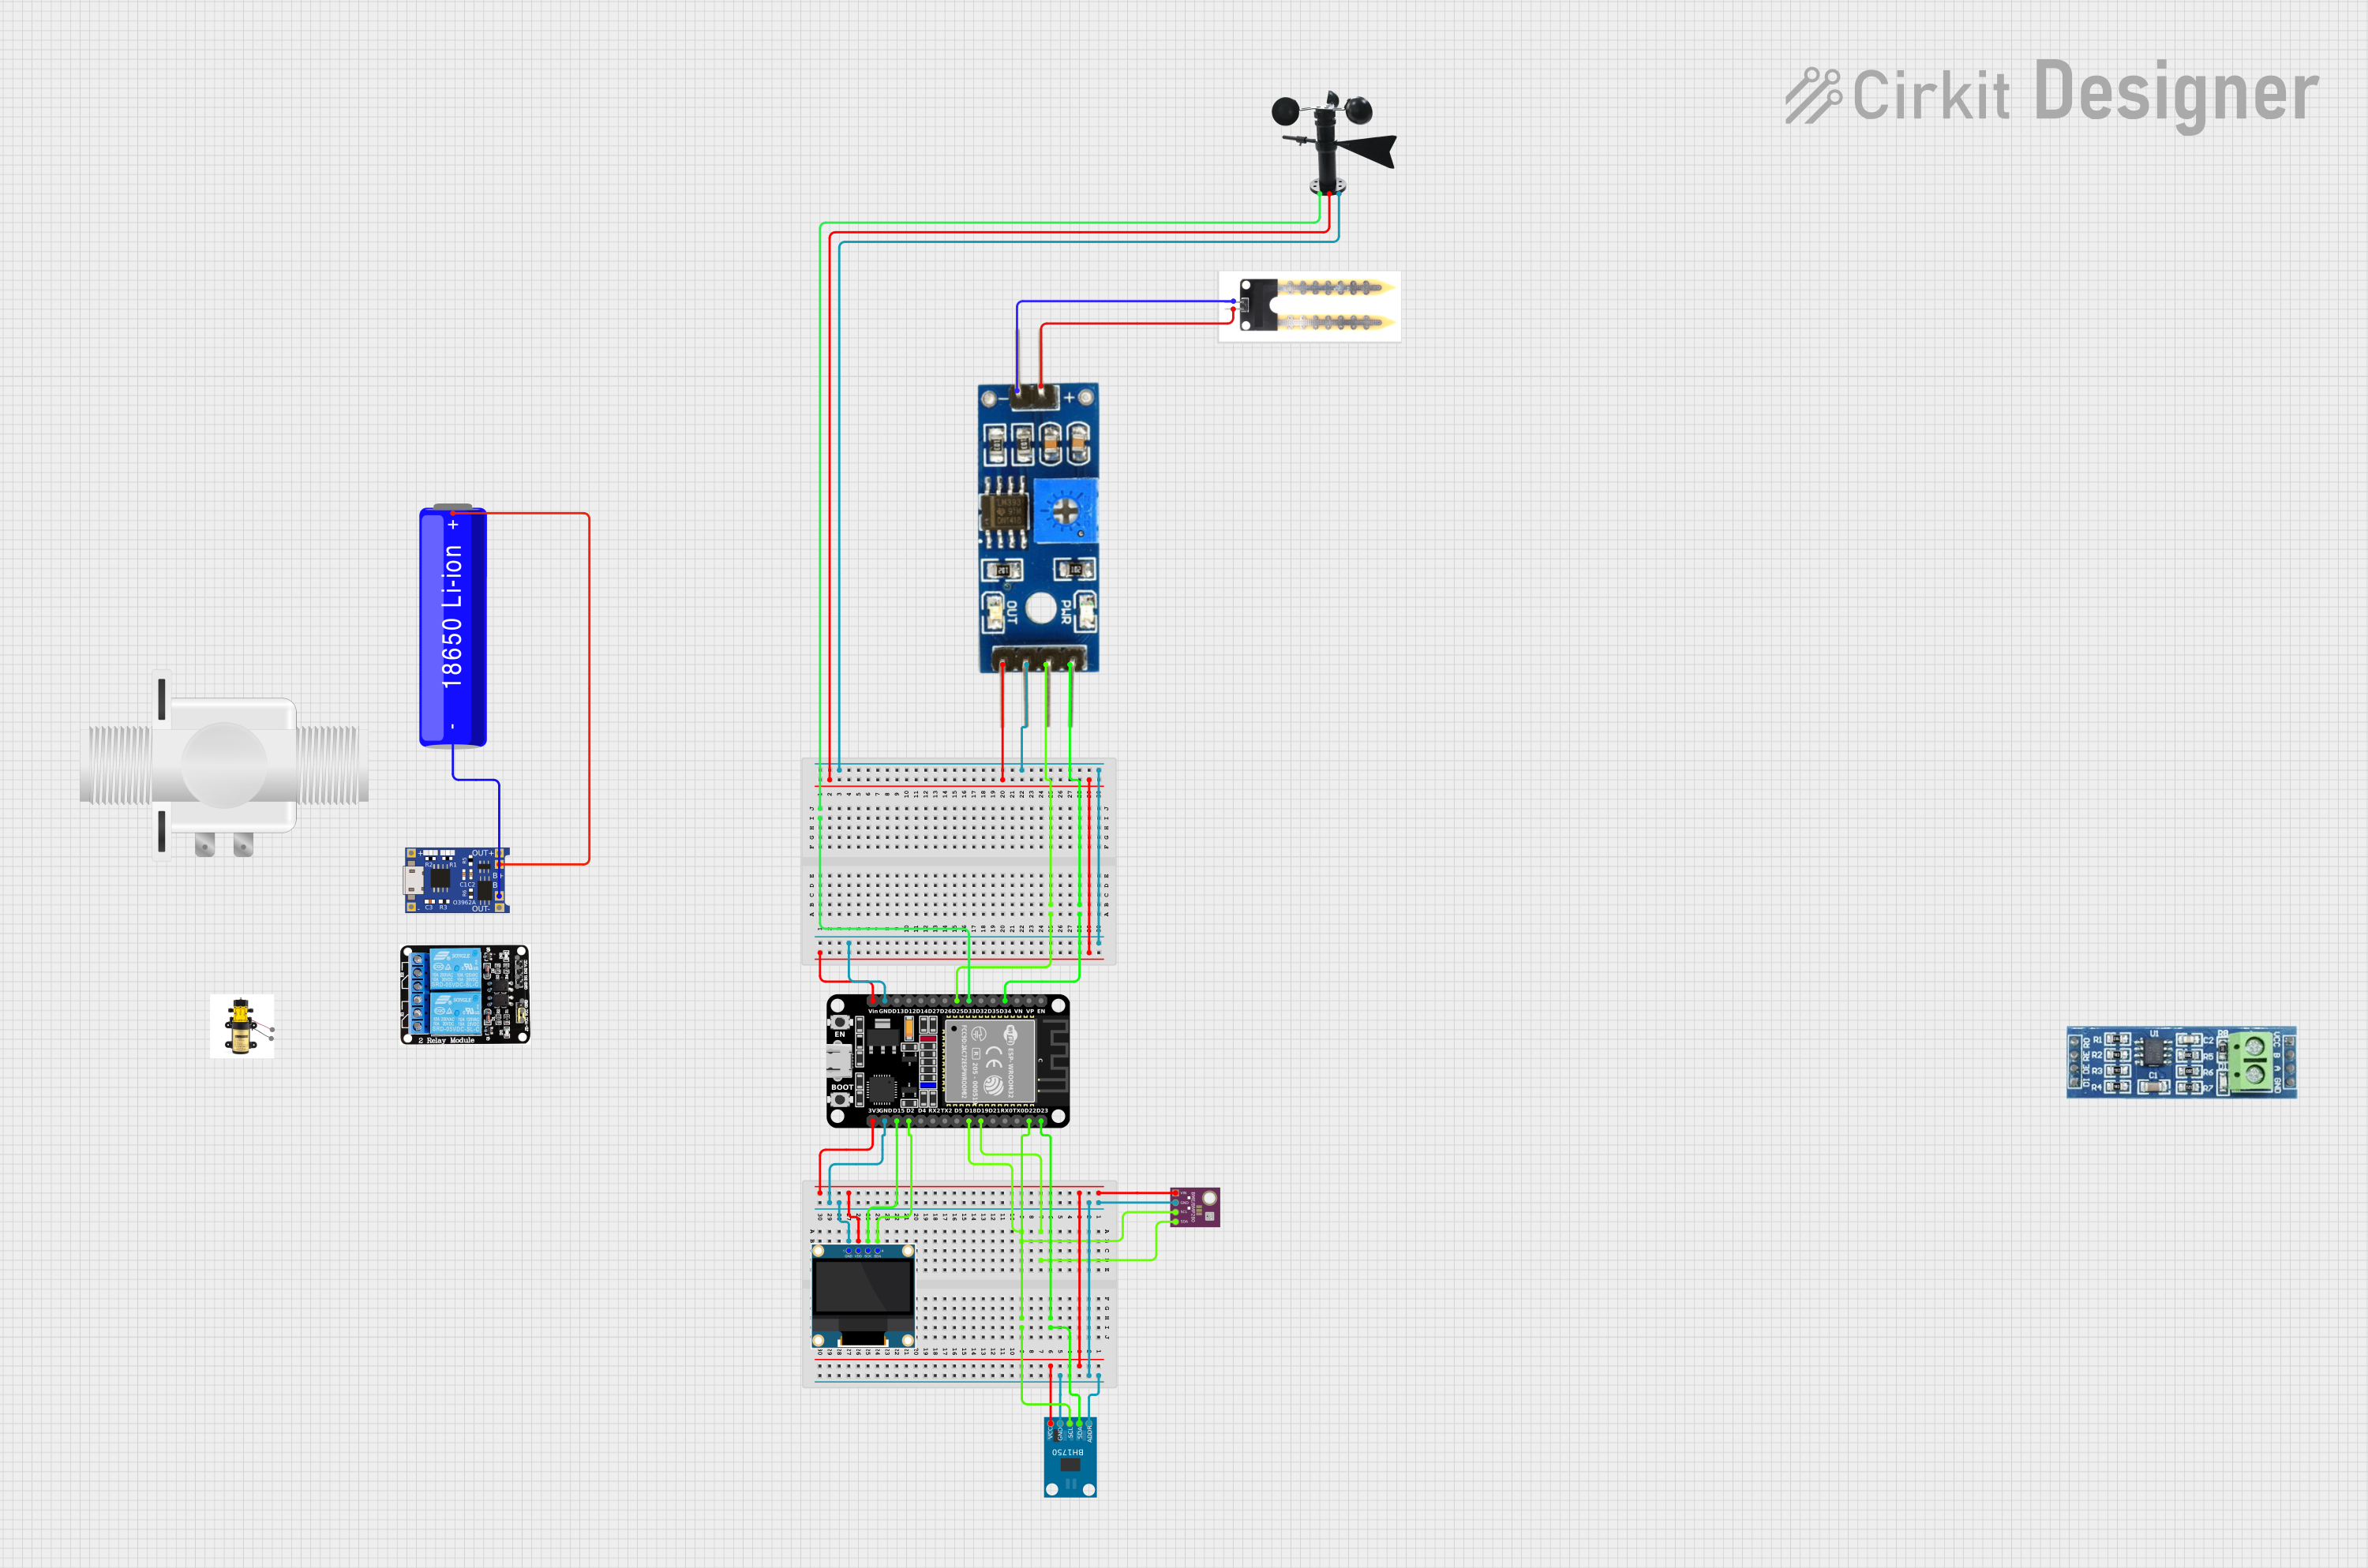
This circuit is a smart weather station that uses an ESP32 microcontroller to interface with a BME280 sensor for measuring temperature, humidity, and pressure, a BH1750 sensor for measuring light intensity, and a 0.96" OLED display to show the sensor readings. Additional components include a wind vane and a soil moisture module for environmental monitoring, all powered by a 18650 Li-ion battery managed by a TP4056 charging module.
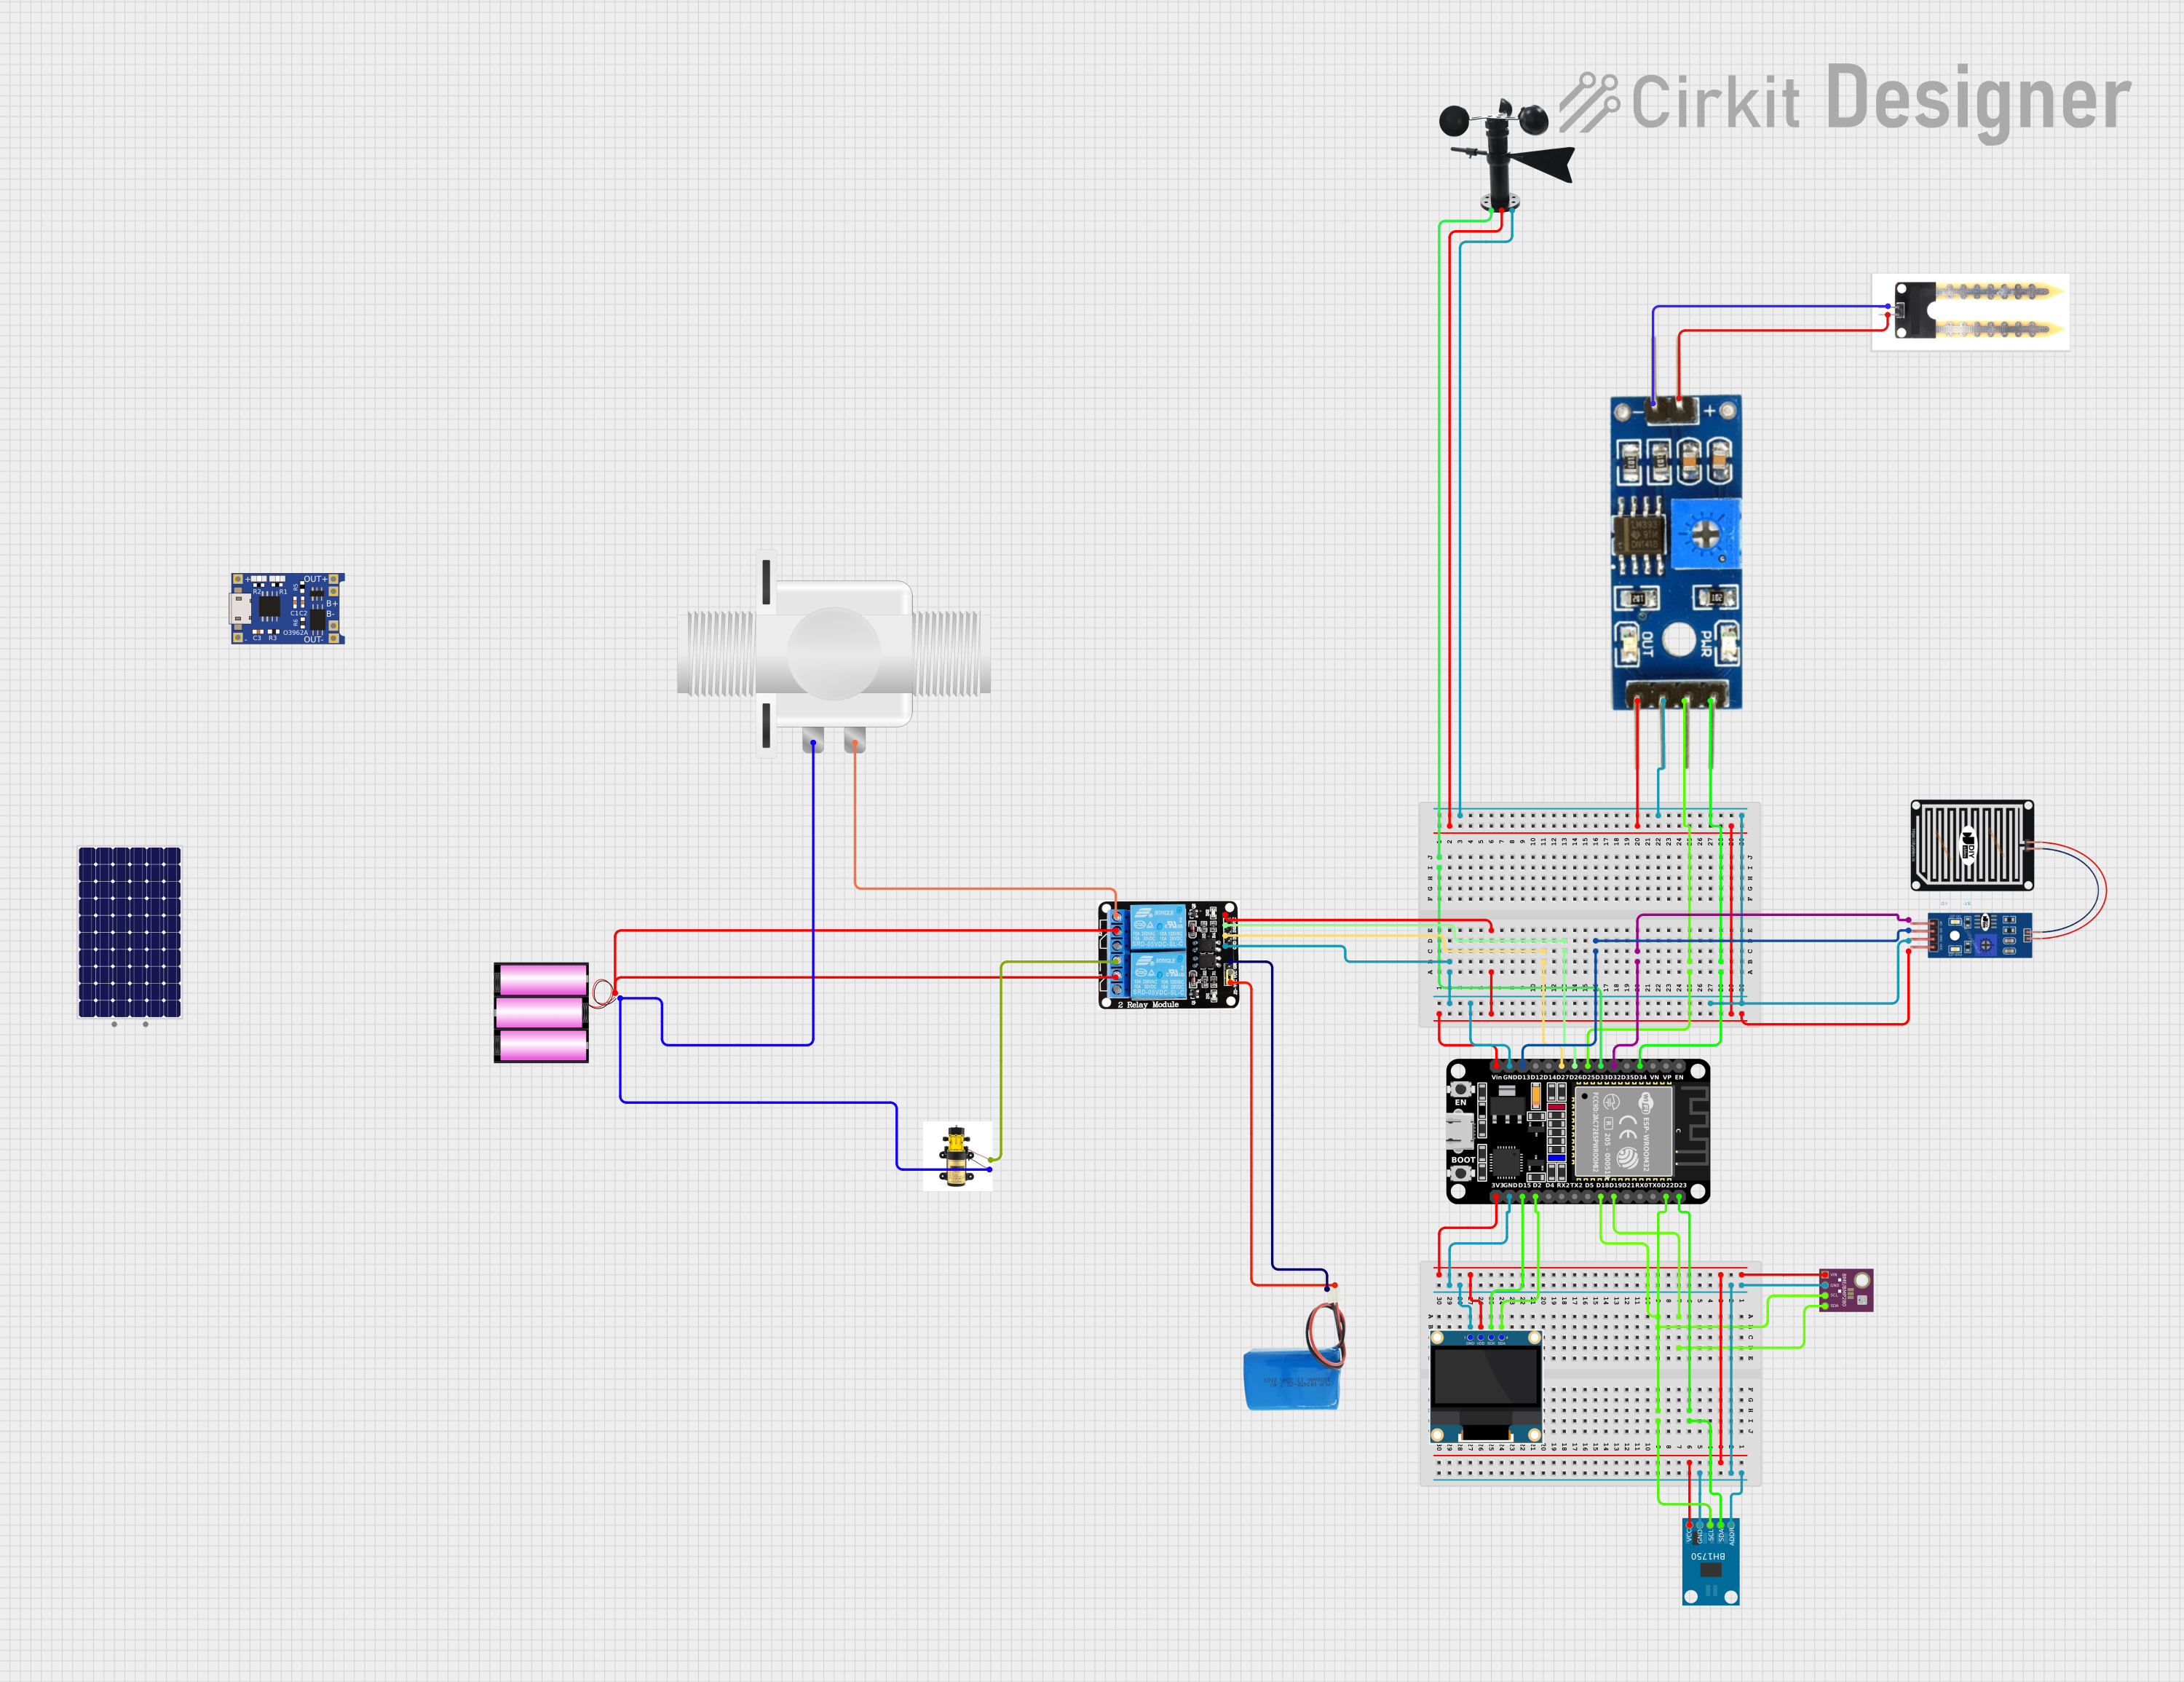
This circuit is a smart weather station that uses an ESP32 microcontroller to interface with a BME280 sensor for measuring temperature, humidity, and pressure, a BH1750 sensor for measuring light intensity, and a 0.96" OLED display for showing the sensor readings. Additional sensors include a wind vane, rain sensor, and soil moisture sensor, with a relay module controlling a pump and solenoid valve for potential irrigation control.
Interface: I2C (up to 3.4 MHz), SPI (up to 10 MHz)
Operating Range:
Temperature: -40°C to +85°C
Humidity: 0% to 100% RH
Pressure: 300 hPa to 1100 hPa
Accuracy:
Temperature: ±1.0°C
Humidity: ±3% RH
Pressure: ±1 hPa
Average Current Consumption: 1.8 µA at 1 Hz sampling rate (typical)
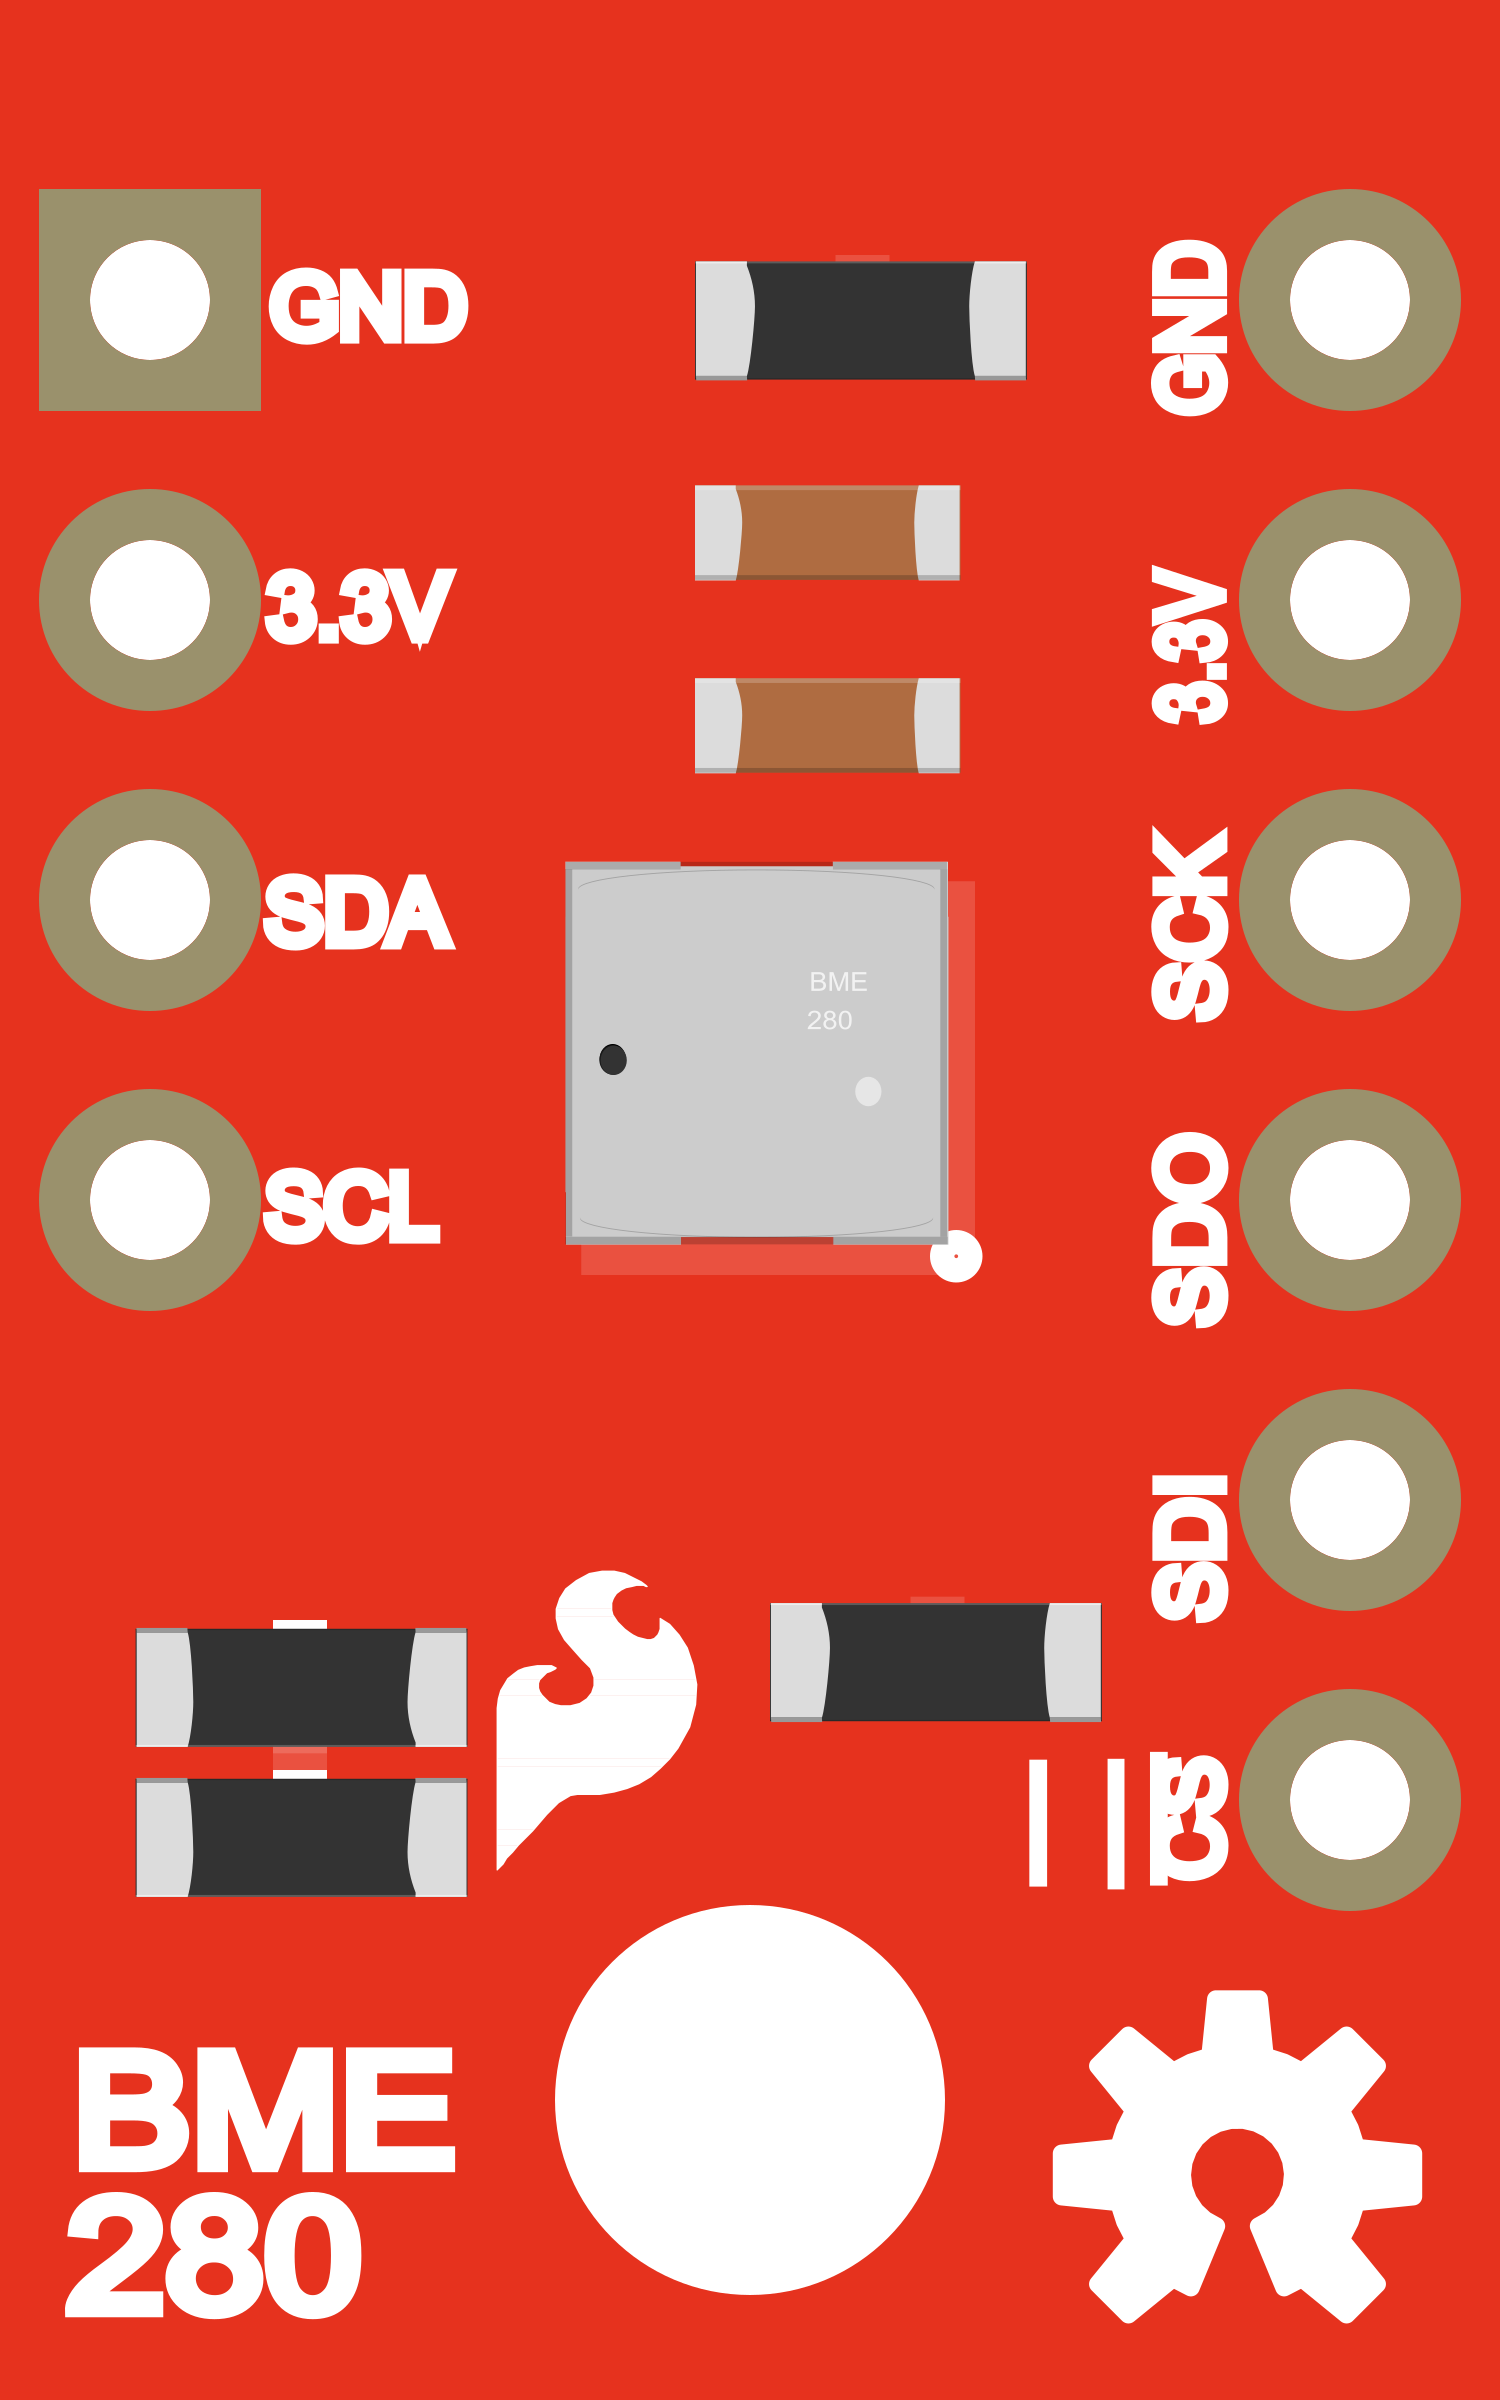
Pin Configuration and Descriptions
Pin Number
Name
Description
1
GND
Ground connection
2
VCC
Supply voltage (1.71 V to 3.6 V)
3
SDA
I2C Data / SPI Data Input (MOSI)
4
SCL
I2C Clock / SPI Clock Input
5
CSB
SPI Chip Select (active low)
6
SDO
SPI Data Output (MISO) / I2C Address Select
Usage Instructions
Integration with a Circuit
To use the BME280 sensor with an Arduino UNO, follow these steps:
Connect the sensor's VCC pin to the Arduino's 3.3V output.
Connect the sensor's GND pin to the Arduino's ground.
For I2C communication:
Connect the sensor's SDA pin to the Arduino's A4 (SDA) pin.
Connect the sensor's SCL pin to the Arduino's A5 (SCL) pin.
For SPI communication:
Connect the sensor's SDA pin to the Arduino's D11 (MOSI) pin.
Connect the sensor's SCL pin to the Arduino's D13 (SCK) pin.
Connect the sensor's CSB pin to a digital pin (e.g., D10) for chip select.
Connect the sensor's SDO pin to the Arduino's D12 (MISO) pin.
Best Practices
Use pull-up resistors on the I2C lines if they are not included on the breakout board.
Keep the sensor away from heat sources to ensure accurate measurements.
Avoid touching the sensor or breathing on it, as this can affect humidity readings.
Example Code for Arduino UNO
Below is an example of how to read data from the BME280 sensor using the I2C interface with an Arduino UNO. This code assumes the use of the Adafruit BME280 library.
#include <Wire.h>
#include <Adafruit_Sensor.h>
#include <Adafruit_BME280.h>

Adafruit_BME280 bme; // I2C

void setup() {
  Serial.begin(9600);
  if (!bme.begin(0x76)) {   // Address 0x76 can be changed by connecting SDO to GND
    Serial.println("Could not find a valid BME280 sensor, check wiring!");
    while (1);
  }
}

void loop() {
    Serial.print("Temperature = ");
    Serial.print(bme.readTemperature());
    Serial.println(" *C");

    Serial.print("Pressure = ");
    Serial.print(bme.readPressure() / 100.0F);
    Serial.println(" hPa");

    Serial.print("Humidity = ");
    Serial.print(bme.readHumidity());
    Serial.println(" %");

    delay(2000); // Delay between measurements
}
Troubleshooting and FAQs
Common Issues
Sensor not detected: Ensure that the wiring is correct and that the sensor is properly powered.
Inaccurate readings: Verify that the sensor is not exposed to direct heat sources or drafts.
I2C communication failure: Check for proper pull-up resistors and that there are no shorts on the I2C lines.
FAQs
Q: Can the BME280 sensor measure altitude?
A: Yes, the sensor can estimate altitude based on the barometric pressure reading.
Q: How do I change the I2C address of the sensor?
A: The I2C address can be changed by connecting the SDO pin to GND or VCC. The default is 0x77, and connecting SDO to GND changes it to 0x76.
Q: Is the sensor waterproof?
A: No, the BME280 sensor is not waterproof and should be protected from moisture and condensation.
For further assistance, consult the manufacturer's datasheet and the community forums dedicated to the SparkFun Atmospheric Sensor Breakout - BME280.

 Open Project in Cirkit Designer