How to Use sound card: Examples, Pinouts, and Specs
Introduction
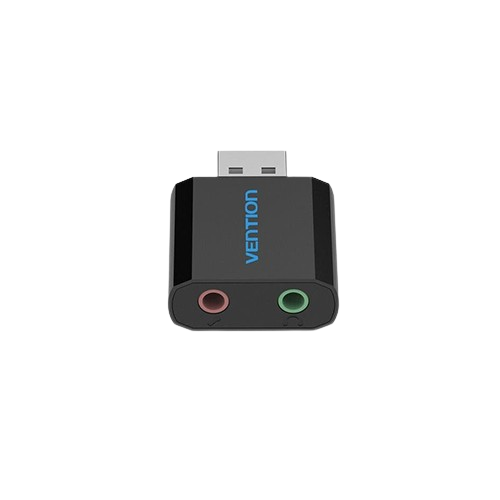
A sound card is an internal hardware component that enables a computer to process audio data. It serves as the interface between the computer and audio devices, such as speakers, headphones, and microphones. The sound card converts digital audio signals into analog signals for playback and can also capture analog audio signals from microphones, converting them into digital data for processing.
Explore Projects Built with sound card


Explore Projects Built with sound card
Common Applications and Use Cases
- Audio Playback: Enhances the quality of sound output for music, movies, and games.
- Audio Recording: Captures high-quality audio from microphones for podcasts, voiceovers, or music production.
- Gaming: Provides immersive audio experiences with surround sound and 3D audio effects.
- Professional Audio Production: Used in studios for mixing, mastering, and editing audio tracks.
- Voice Communication: Facilitates clear audio for video calls, online meetings, and gaming chats.
Technical Specifications
Below are the general technical specifications of a typical sound card. Note that specific models may vary in their features and capabilities.
Key Technical Details
- Audio Channels: 2.0 (stereo), 5.1, 7.1 surround sound support
- Sample Rate: 44.1 kHz, 48 kHz, 96 kHz, up to 192 kHz
- Bit Depth: 16-bit, 24-bit, or 32-bit
- Signal-to-Noise Ratio (SNR): 90 dB to 120 dB
- Input/Output Ports:
- 3.5mm jacks for headphones, microphones, and line-in/line-out
- Optical S/PDIF for digital audio
- RCA connectors for professional audio equipment
- Interface: PCI, PCIe, or USB (for external sound cards)
- Power Requirements: Typically powered through the PCI/PCIe slot or USB connection
Pin Configuration and Descriptions
For internal sound cards, the pin configuration is typically based on the PCI or PCIe interface. Below is a table describing the common ports and their functions:
| Port/Pin | Description |
|---|---|
| Line-Out (Green) | Outputs audio to speakers or headphones. |
| Line-In (Blue) | Accepts audio input from external devices like MP3 players or mixers. |
| Microphone (Pink) | Connects to a microphone for audio recording. |
| S/PDIF (Optical) | Digital audio output for high-quality sound transmission. |
| MIDI/Game Port | Legacy port for connecting MIDI devices or game controllers (on older models). |
| PCI/PCIe Pins | Connects the sound card to the motherboard for data and power transmission. |
Usage Instructions
How to Use the Sound Card in a System
Installation:
- For internal sound cards:
- Power off the computer and unplug it from the power source.
- Open the computer case and locate an available PCI or PCIe slot.
- Insert the sound card into the slot and secure it with a screw.
- Close the case, reconnect the power, and boot the computer.
- For external sound cards:
- Connect the sound card to a USB port on the computer.
- Install any required drivers or software provided by the manufacturer.
- For internal sound cards:
Driver Installation:
- Download and install the latest drivers from the manufacturer's website.
- Follow the on-screen instructions to complete the installation.
Connecting Audio Devices:
- Plug speakers or headphones into the Line-Out port.
- Connect a microphone to the Microphone port.
- Use the Line-In port for external audio sources.
Configuration:
- Open the operating system's sound settings to select the sound card as the default audio device.
- Adjust volume levels and configure advanced settings, such as sample rate and bit depth.
Important Considerations and Best Practices
- Ensure the sound card is compatible with your computer's operating system and hardware.
- Use high-quality cables and connectors to minimize signal loss and interference.
- Regularly update the sound card drivers to ensure optimal performance and compatibility.
- Avoid placing the sound card near components that generate electromagnetic interference, such as power supplies or graphics cards.
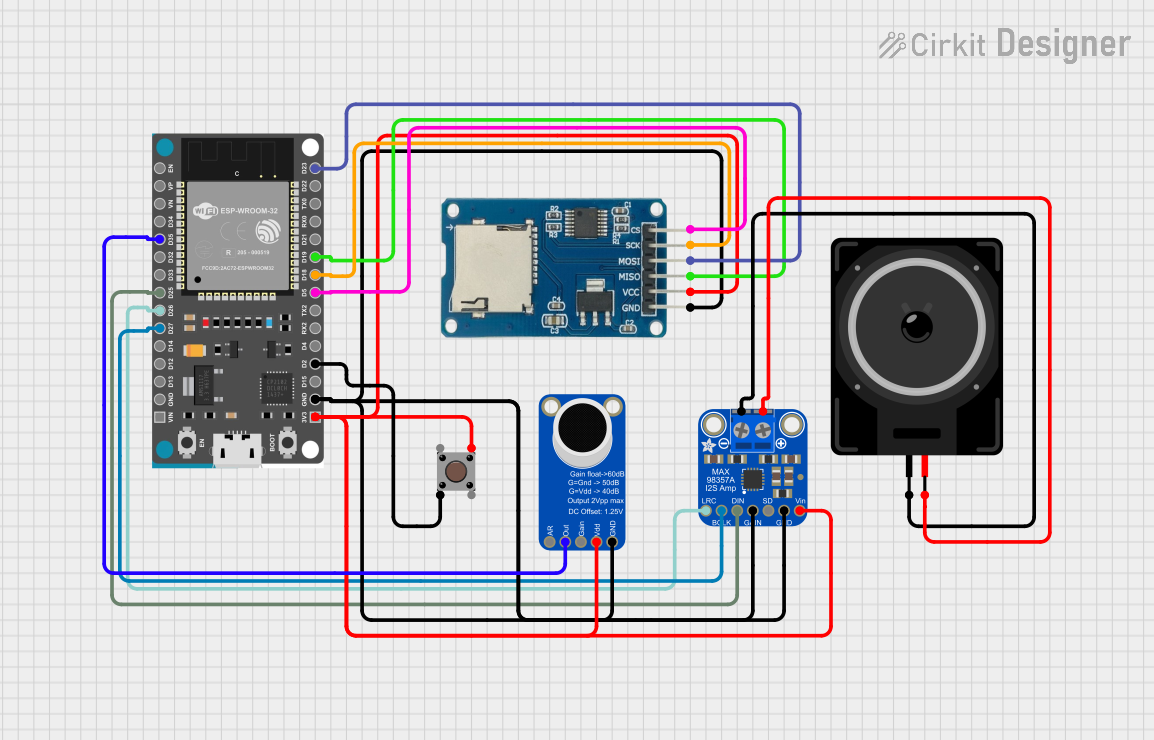
Example: Using a Sound Card with Arduino UNO
While sound cards are not typically used directly with microcontrollers like the Arduino UNO, you can interface an external USB sound card with an Arduino using a USB host shield. Below is an example of how to send audio data to a sound card:
#include <USBHost.h>

// Create a USBHost object to manage USB devices
USBHost usb;

// Initialize the USB sound card object
USBDevice soundCard(&usb);

void setup() {
  Serial.begin(9600);
  while (!Serial) {
    // Wait for the serial connection to initialize
  }

  Serial.println("Initializing USB sound card...");
  usb.begin();

  if (soundCard) {
    Serial.println("Sound card connected successfully!");
  } else {
    Serial.println("Failed to detect sound card.");
  }
}

void loop() {
  usb.Task(); // Continuously poll the USB host for device activity

  // Add code here to send audio data to the sound card
  // Note: Sending audio data requires additional libraries and setup
}
Note: This example demonstrates basic USB host functionality. Sending audio data requires advanced libraries and is beyond the scope of this documentation.
Troubleshooting and FAQs
Common Issues and Solutions
No Sound Output:
- Cause: The sound card is not set as the default audio device.
- Solution: Go to the operating system's sound settings and select the sound card as the default playback device.
Distorted or Low-Quality Audio:
- Cause: Incorrect sample rate or bit depth settings.
- Solution: Adjust the sample rate and bit depth in the sound card's control panel or audio settings.
Microphone Not Working:
- Cause: The microphone is muted or not selected as the input device.
- Solution: Check the sound settings and ensure the microphone is enabled and selected.
Sound Card Not Detected:
- Cause: Missing or outdated drivers.
- Solution: Install or update the sound card drivers from the manufacturer's website.
Interference or Noise:
- Cause: Electromagnetic interference from nearby components.
- Solution: Reposition the sound card or use shielded cables.
FAQs
Q: Can I use a sound card with a laptop?
- A: Yes, external USB sound cards are ideal for laptops as they do not require internal installation.
Q: What is the difference between onboard audio and a dedicated sound card?
- A: Onboard audio is built into the motherboard and offers basic functionality, while a dedicated sound card provides higher-quality audio and advanced features.
Q: Do I need a sound card for gaming?
- A: While onboard audio is sufficient for most games, a dedicated sound card can enhance the gaming experience with better sound quality and surround sound support.
Q: How do I know if my sound card supports 7.1 surround sound?
- A: Check the specifications on the manufacturer's website or the product manual.
Q: Can I use a sound card for professional audio production?
- A: Yes, many high-end sound cards are designed for studio-quality audio production. Look for features like low latency, high SNR, and support for ASIO drivers.