How to Use DC Breaker 20A: Examples, Pinouts, and Specs
Introduction
A DC breaker rated for 20 amps is a protective device designed to safeguard electrical circuits by interrupting the flow of current in the event of an overload or short circuit. This component is essential in DC power systems to prevent damage to equipment, wiring, and other components caused by excessive current.
Explore Projects Built with DC Breaker 20A


Explore Projects Built with DC Breaker 20A
Common Applications and Use Cases
- Solar power systems to protect DC circuits.
- Battery banks and energy storage systems.
- Electric vehicles and charging stations.
- Industrial DC power distribution systems.
- Protection for DC motors and other high-current devices.
Technical Specifications
The following table outlines the key technical details of the DC Breaker 20A:
| Parameter | Value |
|---|---|
| Rated Current | 20A |
| Rated Voltage | 12V DC, 24V DC, or 48V DC |
| Breaking Capacity | 6kA (typical) |
| Operating Temperature | -20°C to +70°C |
| Mounting Type | DIN rail or panel mount |
| Trip Mechanism | Thermal-magnetic |
| Poles | 1P (single pole) or 2P (double pole) |
| Dimensions | Varies by model (e.g., 90x18x70 mm) |
| Compliance Standards | IEC 60947-2, UL 1077 |
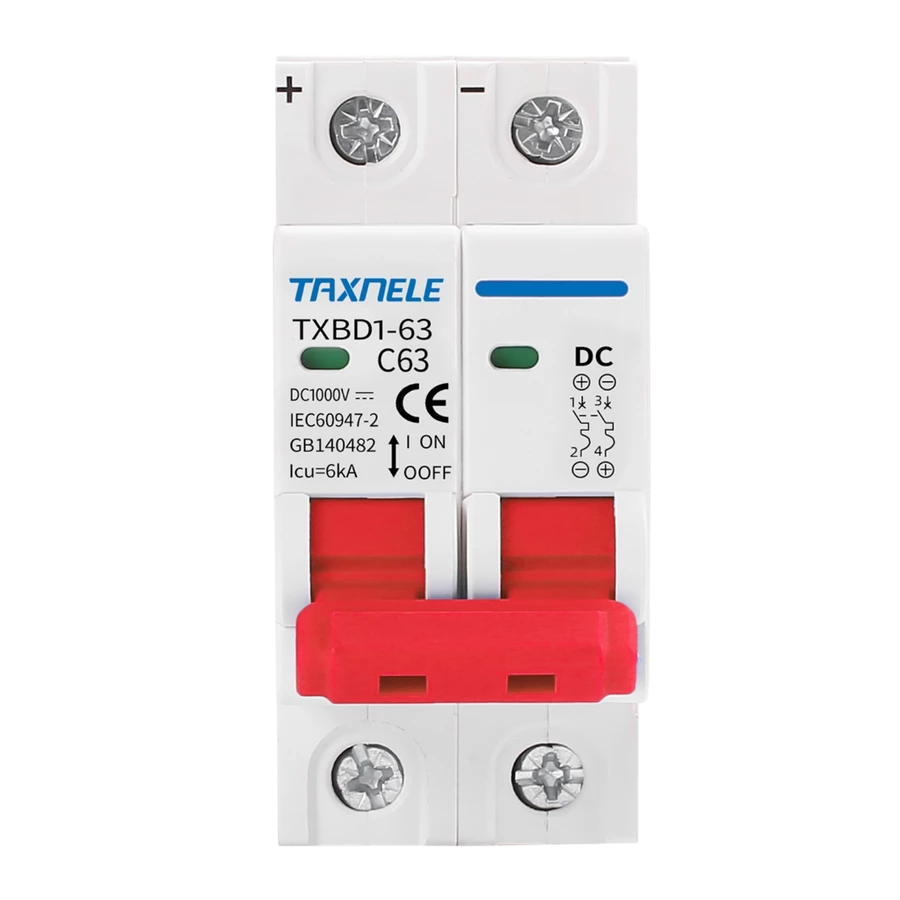
Pin Configuration and Descriptions
The DC breaker does not have traditional pins but instead features terminals for connecting input and output wires. Below is a description of the terminals:
| Terminal | Description |
|---|---|
| Line (Input) | Connects to the positive terminal of the DC power source. |
| Load (Output) | Connects to the positive terminal of the load (e.g., motor, battery). |
| Ground | Optional grounding terminal for safety (if available). |
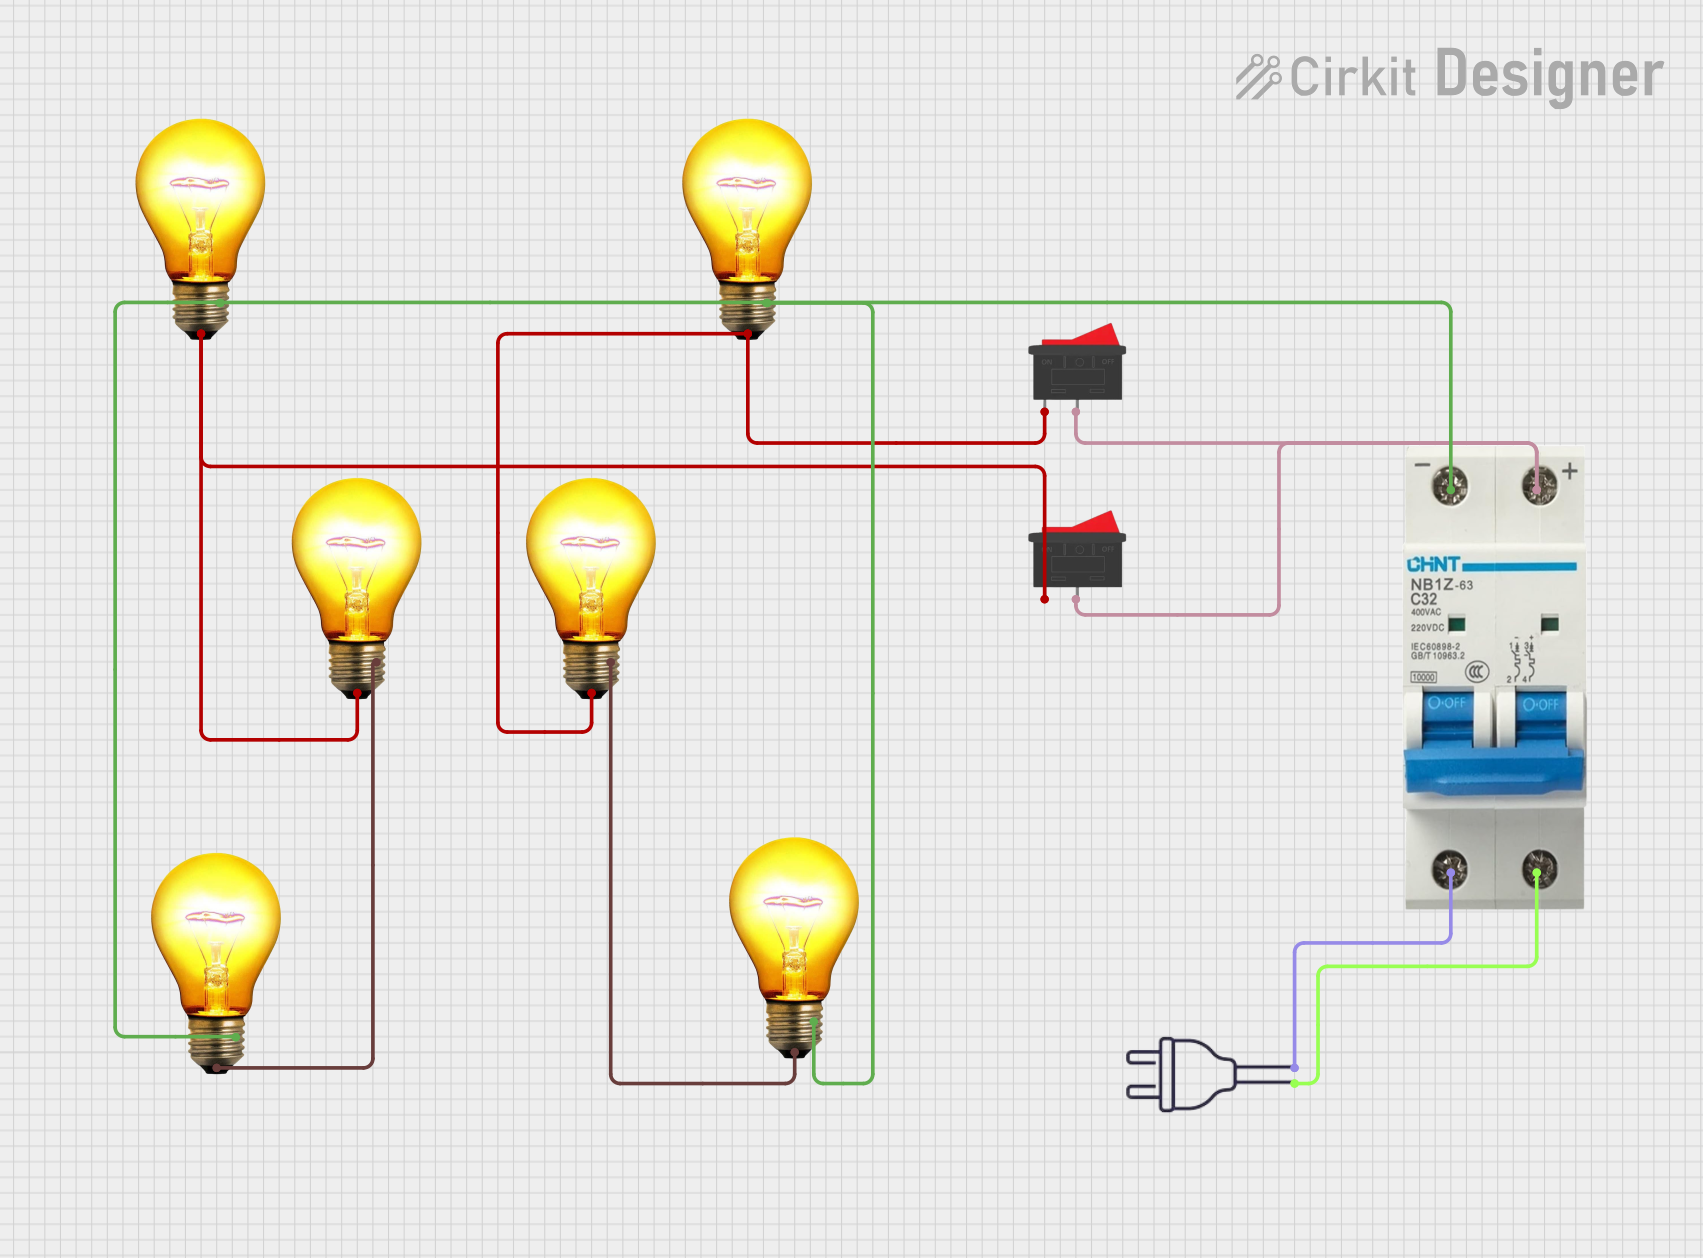
Usage Instructions
How to Use the DC Breaker in a Circuit
- Determine the Voltage and Current Requirements: Ensure the DC breaker is rated for the voltage and current of your circuit (e.g., 20A, 48V DC).
- Mount the Breaker: Install the breaker on a DIN rail or panel, depending on the mounting type.
- Connect the Wires:
- Connect the positive wire from the DC power source to the Line (Input) terminal.
- Connect the positive wire from the load to the Load (Output) terminal.
- If the breaker has a grounding terminal, connect it to the system ground for added safety.
- Test the Circuit: Power on the system and verify that the breaker operates correctly. If an overload or short circuit occurs, the breaker should trip and interrupt the current flow.
Important Considerations and Best Practices
- Select the Correct Breaker: Always choose a breaker with a current rating that matches or slightly exceeds the maximum current of your circuit.
- Avoid Overloading: Do not exceed the breaker's rated current or voltage, as this may cause damage or failure.
- Regular Maintenance: Periodically inspect the breaker for signs of wear, corrosion, or damage.
- Proper Wiring: Use appropriately sized wires to handle the current and minimize voltage drop.
- Resetting the Breaker: After a trip, identify and resolve the cause of the fault before resetting the breaker.
Example: Using a DC Breaker with an Arduino UNO
If you are using the DC breaker to protect a circuit powered by an Arduino UNO, follow these steps:
- Connect the DC power source to the Line (Input) terminal of the breaker.
- Connect the Load (Output) terminal to the input of a DC-DC converter or other load that powers the Arduino.
- Ensure the breaker trips if the current exceeds 20A, protecting the Arduino and connected components.
Here is an example Arduino code to monitor the voltage of the DC circuit:
// This code reads the voltage of a DC circuit using an analog pin on the Arduino.
// Ensure the voltage divider is used to step down the voltage to a safe level.

const int voltagePin = A0; // Analog pin connected to the voltage divider
const float voltageDividerRatio = 10.0; // Adjust based on your resistor values
const float referenceVoltage = 5.0; // Arduino's reference voltage (5V for most boards)

void setup() {
  Serial.begin(9600); // Initialize serial communication
  pinMode(voltagePin, INPUT); // Set the voltage pin as input
}

void loop() {
  int rawValue = analogRead(voltagePin); // Read the analog value
  float voltage = (rawValue / 1023.0) * referenceVoltage * voltageDividerRatio;

  // Print the voltage to the Serial Monitor
  Serial.print("Voltage: ");
  Serial.print(voltage);
  Serial.println(" V");

  delay(1000); // Wait for 1 second before the next reading
}
Note: Use a voltage divider to step down the DC voltage to a level safe for the Arduino's analog input (0-5V).
Troubleshooting and FAQs
Common Issues and Solutions
| Issue | Possible Cause | Solution |
|---|---|---|
| Breaker trips frequently | Circuit overload or short circuit | Check the load and wiring for faults. |
| Breaker does not trip during a fault | Breaker is faulty or incorrectly rated | Replace the breaker with a suitable one. |
| Breaker is difficult to reset | Fault condition still exists in the circuit | Resolve the fault before resetting. |
| Excessive heat around the breaker | Loose connections or overcurrent condition | Tighten connections and verify the load. |
FAQs
Can I use a DC breaker in an AC circuit?
- No, DC breakers are specifically designed for direct current and may not function correctly in AC circuits.
What happens if I exceed the breaker's rated current?
- The breaker will trip to protect the circuit. Repeated overloading may damage the breaker.
How do I know if the breaker is faulty?
- If the breaker does not trip during a fault or trips under normal conditions, it may be faulty and should be replaced.
Can I use a 20A DC breaker for a 10A circuit?
- Yes, but it is recommended to use a breaker with a rating closer to the circuit's maximum current for optimal protection.
By following this documentation, you can effectively use the DC Breaker 20A to protect your DC circuits and ensure safe operation.