How to Use Solar Panel 380W: Examples, Pinouts, and Specs
Introduction
The Solar Panel 380W is a high-efficiency photovoltaic module designed to convert sunlight into electrical energy. With a power output of 380 watts, it is suitable for a wide range of applications, from residential solar power systems to larger scale solar farms. Common uses include off-grid power for remote locations, supplemental power for reducing electricity bills, and as a component in renewable energy projects.
Explore Projects Built with Solar Panel 380W
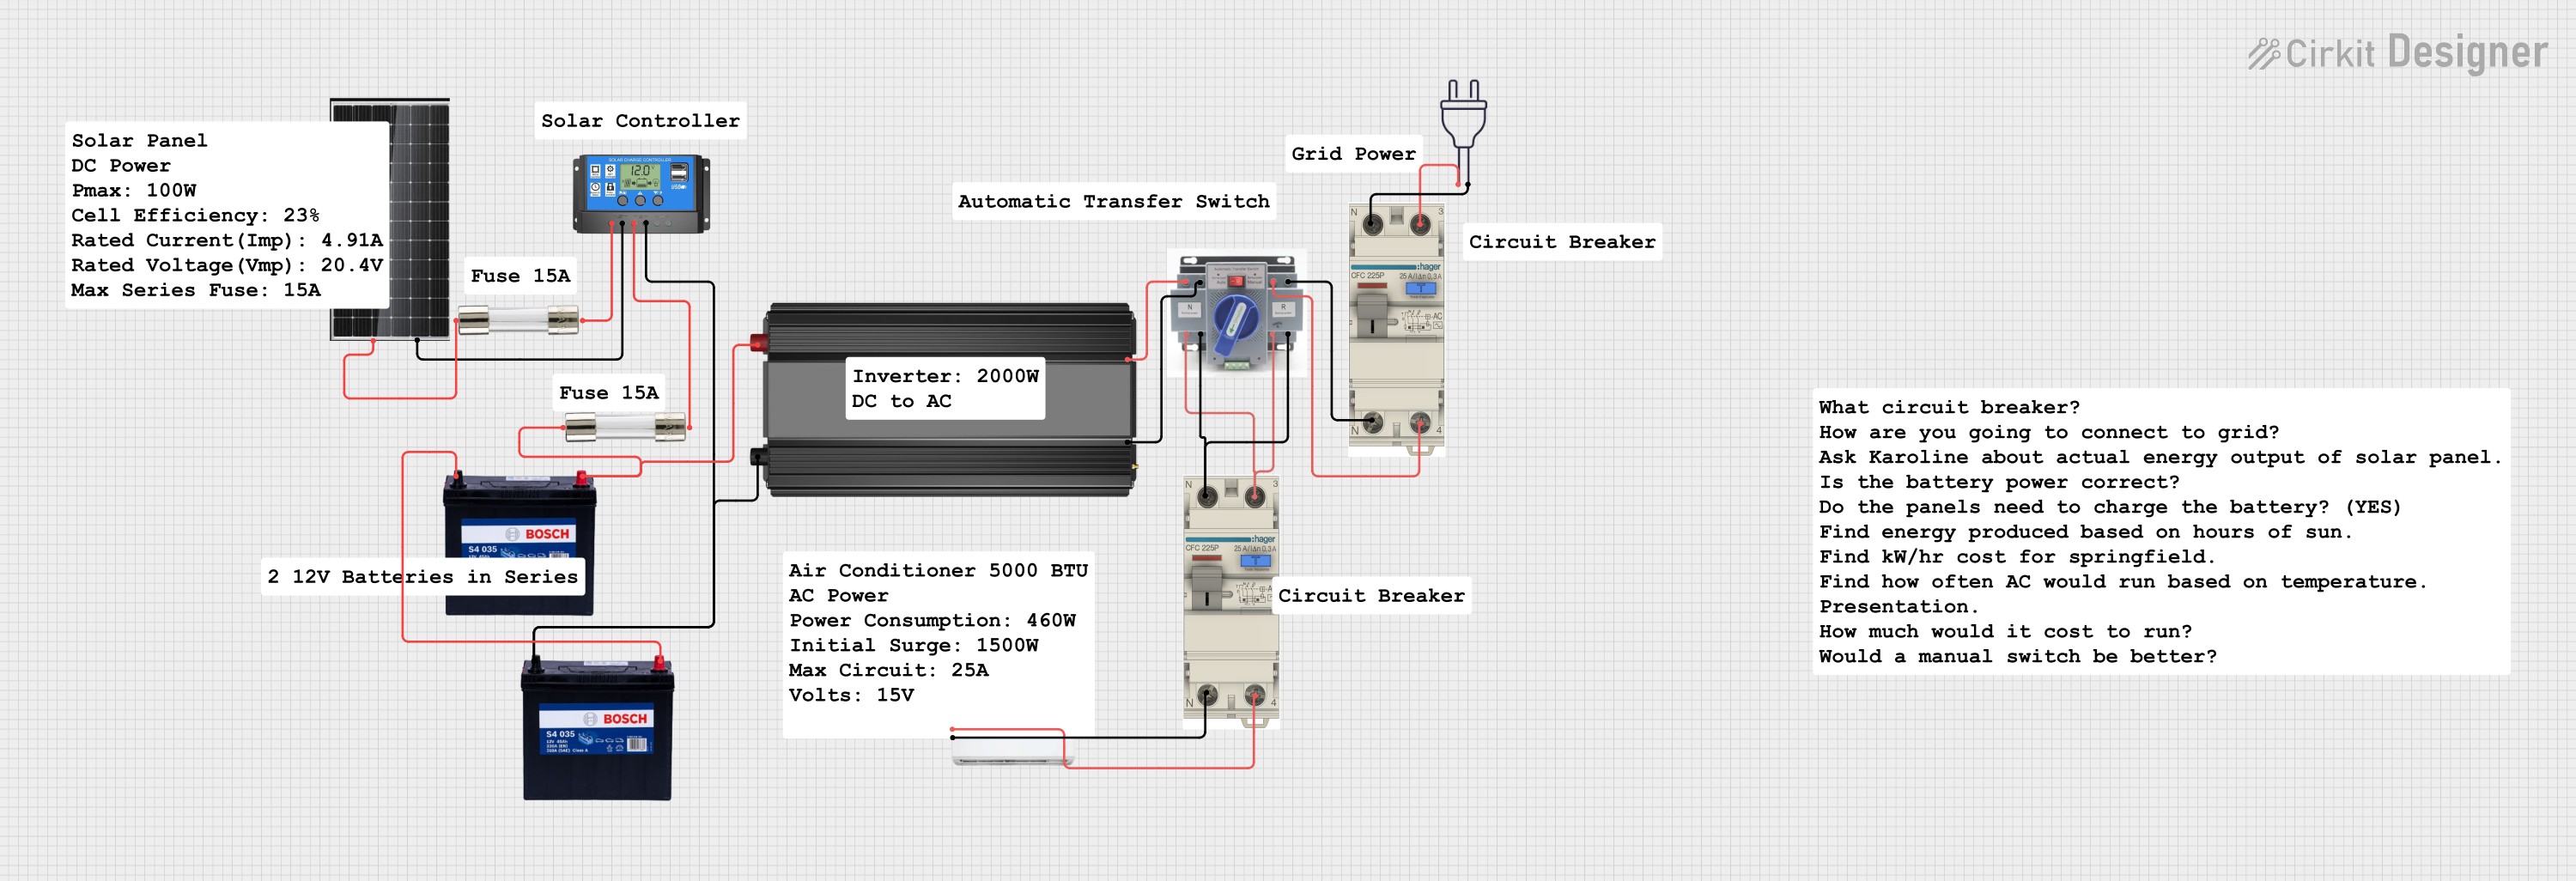
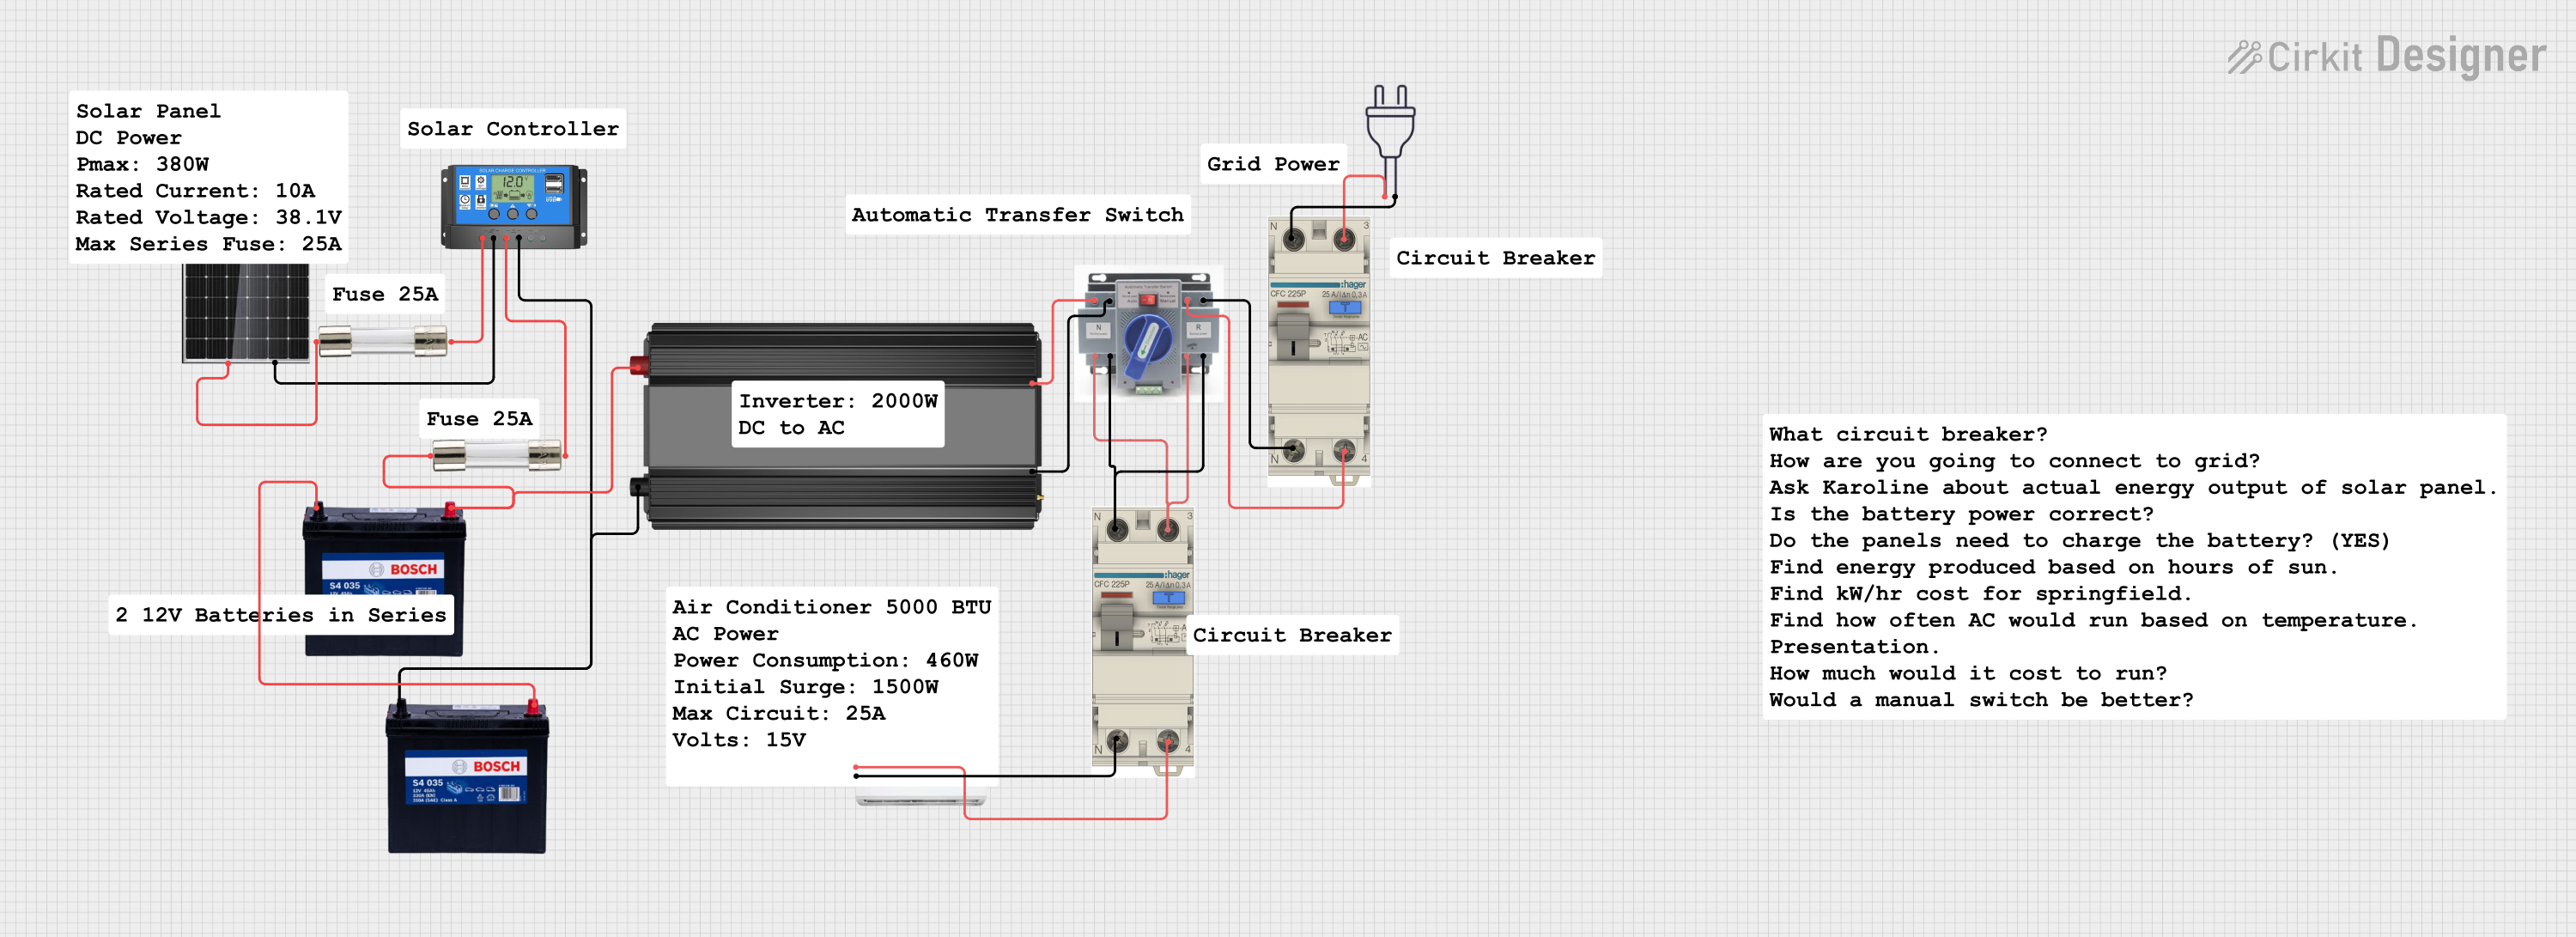
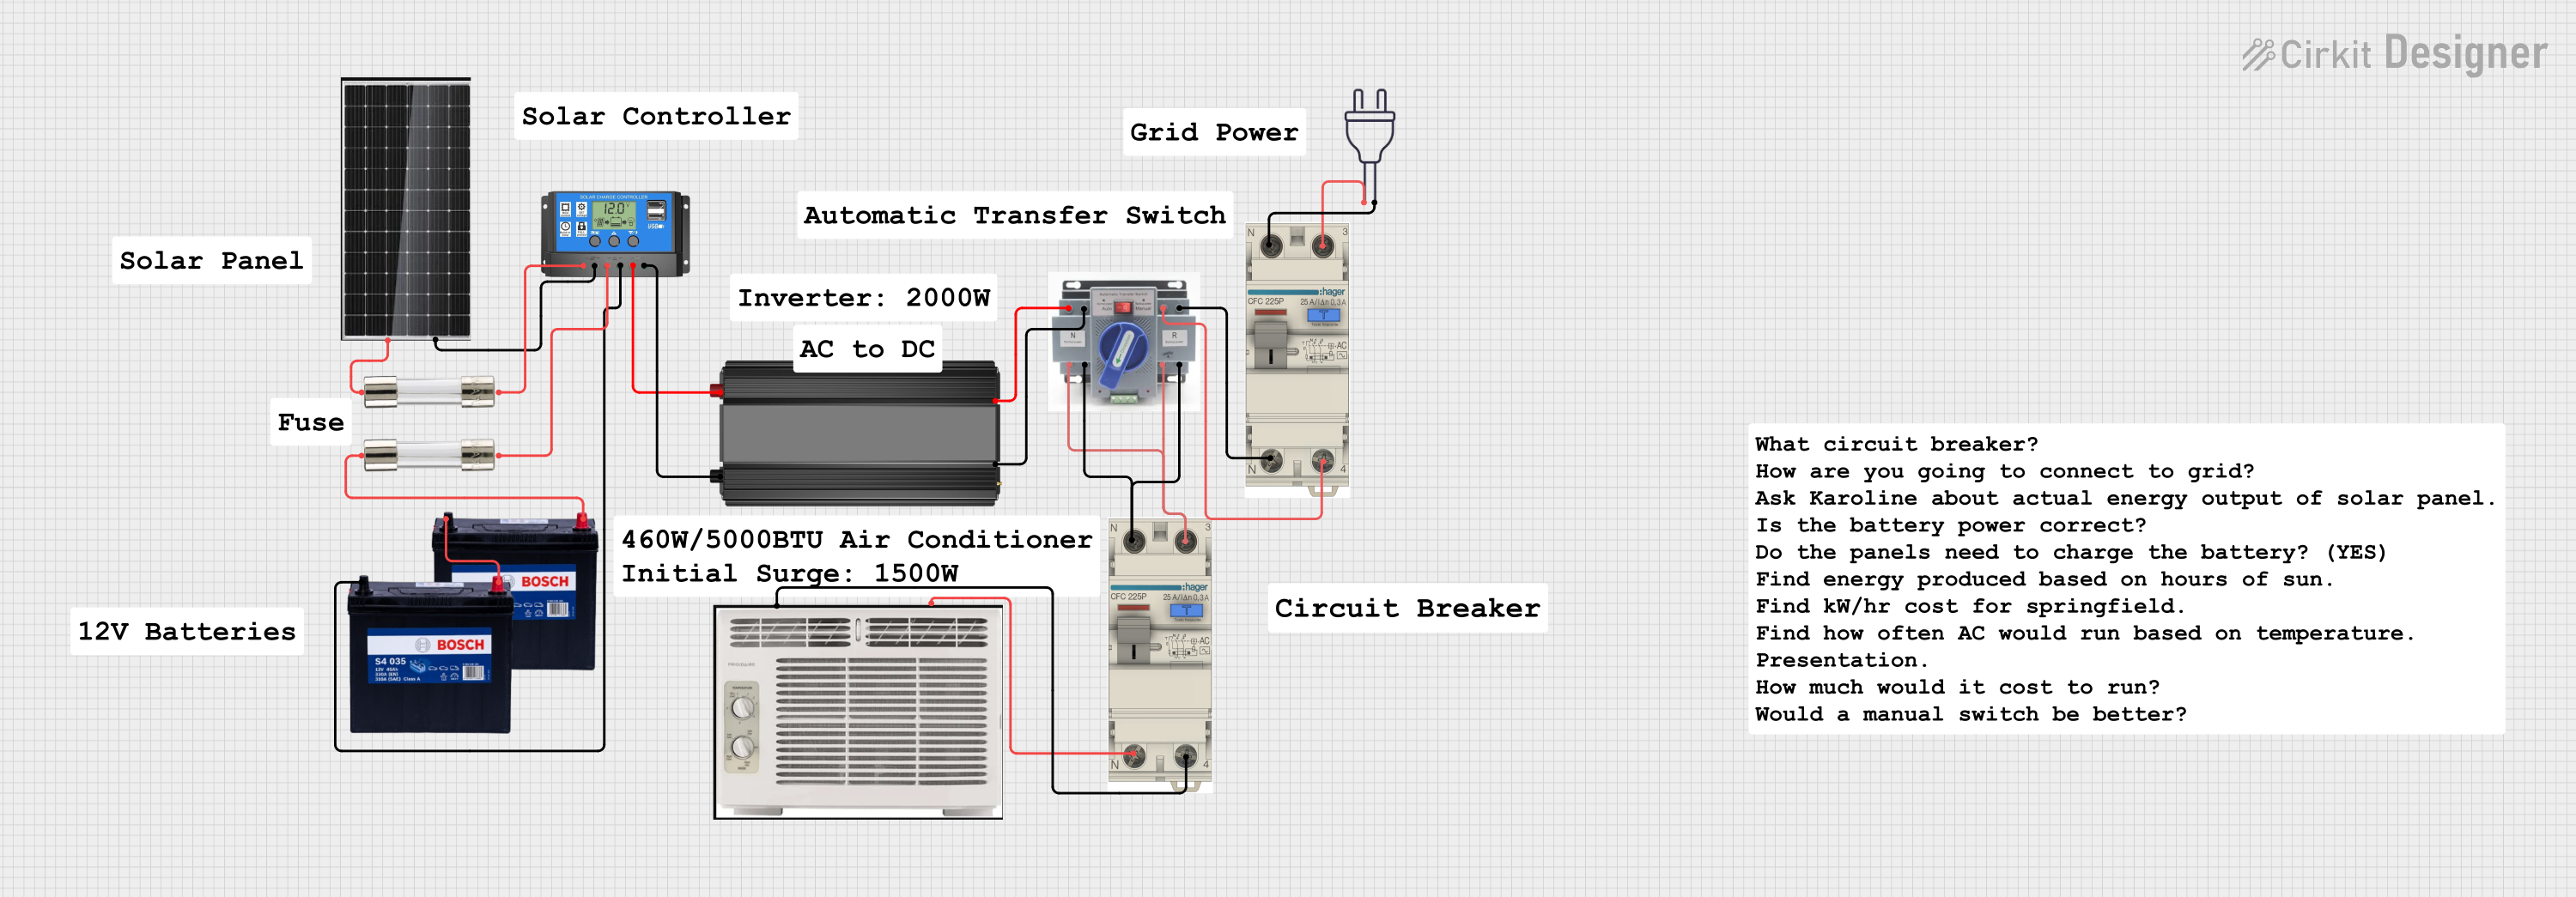

Explore Projects Built with Solar Panel 380W
Technical Specifications
General Characteristics
- Nominal Power (Pmax): 380W
- Voltage at Pmax (Vmp): 31.0V
- Current at Pmax (Imp): 12.26A
- Open-Circuit Voltage (Voc): 37.5V
- Short-Circuit Current (Isc): 13.05A
- Module Efficiency: Approximately 19%
- Operating Temperature Range: -40°C to +85°C
- Maximum System Voltage: 1000V DC
Mechanical Specifications
- Dimensions: 1956 x 992 x 40 mm
- Weight: 22.5 kg
- Frame Material: Anodized Aluminum Alloy
- Front Cover: High Transmission Tempered Glass
Pin Configuration and Descriptions
| Pin Number | Description | Notes |
|---|---|---|
| 1 | Positive Output | Connect to positive terminal of load or charge controller |
| 2 | Negative Output | Connect to negative terminal of load or charge controller |
Usage Instructions
Installation
- Mounting: Secure the solar panel on a stable, well-angled surface to maximize sun exposure.
- Wiring: Use appropriate gauge wires to connect the solar panel to a charge controller, ensuring polarity is correct.
- Grounding: Properly ground the solar panel frame to protect against electrical surges.
Connection to a Circuit
- Charge Controller: Always use a compatible charge controller to regulate the charging of batteries and protect against overcharging.
- Inverter: For AC power applications, connect the solar panel to an inverter to convert DC to AC.
Best Practices
- Orientation: Install the panel facing true south (in the northern hemisphere) or true north (in the southern hemisphere) for optimal sunlight exposure.
- Tilt Angle: Adjust the tilt angle according to your latitude and the season for maximum efficiency.
- Maintenance: Regularly clean the surface of the panel to remove dust, dirt, and snow that can reduce performance.
Troubleshooting and FAQs
Common Issues
- Reduced Power Output: Often caused by shading, dirt, or improper tilt angle. Ensure the panel is clean and correctly positioned.
- No Power Output: Check all connections for proper contact and ensure the charge controller and inverter are functioning correctly.
FAQs
Q: Can I connect multiple 380W solar panels together? A: Yes, you can connect multiple panels in series or parallel to increase voltage or current, respectively. Ensure your charge controller can handle the combined output.
Q: Do I need a charge controller? A: Yes, a charge controller is necessary to regulate the voltage and current going to the battery to prevent overcharging and damage.
Q: How do I determine the correct wire gauge for my setup? A: The wire gauge depends on the current (Imp) and the distance between the solar panel and the charge controller. Use an electrical wire gauge calculator or refer to the National Electrical Code (NEC) for guidance.
Example Code for Arduino UNO
The following example demonstrates how to read the voltage output from the Solar Panel 380W using an Arduino UNO and a voltage sensor module. This setup is useful for monitoring the panel's performance.
// Define the analog input pin for the voltage sensor
const int voltageSensorPin = A0;

void setup() {
  // Begin serial communication at a baud rate of 9600
  Serial.begin(9600);
}

void loop() {
  // Read the value from the voltage sensor
  int sensorValue = analogRead(voltageSensorPin);
  // Convert the analog reading to voltage (for 5V Arduino boards)
  float voltage = sensorValue * (5.0 / 1023.0);
  // Print the voltage to the Serial Monitor
  Serial.print("Voltage: ");
  Serial.print(voltage);
  Serial.println(" V");
  // Wait for a second before taking another reading
  delay(1000);
}
Note: This code assumes the use of a voltage sensor module that is compatible with the voltage levels produced by the Solar Panel 380W. Always ensure that the voltage sensor can handle the maximum voltage output of the solar panel.