Cirkit Designer Logo
Cirkit Designer
Your all-in-one circuit design IDE
Home / 
Component Documentation

How to Use Rainfall Sensor DFRobot: Examples, Pinouts, and Specs

Image of Rainfall Sensor DFRobot
Cirkit Designer LogoDesign with Rainfall Sensor DFRobot in Cirkit Designer

Introduction

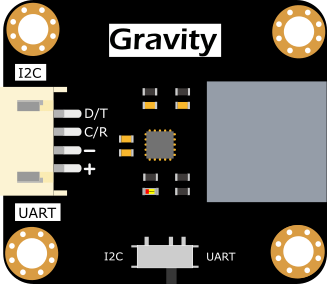
The Rainfall Sensor DFRobot (Gravity_12C_UART) is a versatile sensor designed to detect and measure rainfall. It provides both analog and digital outputs, making it suitable for a wide range of applications. The sensor can detect the presence of rain and measure its intensity, making it an essential component in weather monitoring systems, smart irrigation systems, and other environmental monitoring projects.

This sensor is part of DFRobot's Gravity series, which is known for its ease of use and compatibility with microcontrollers like Arduino. Its robust design ensures reliable performance in outdoor environments.

Explore Projects Built with Rainfall Sensor DFRobot

Use Cirkit Designer to design, explore, and prototype these projects online. Some projects support real-time simulation. Click "Open Project" to start designing instantly!
Arduino Uno-Based Rain-Sensing Robot with OLED Display and Battery Power
Image of Automated Roof Roller with Rain Detection System: A project utilizing Rainfall Sensor DFRobot in a practical application
This circuit is a rain-sensing robotic vehicle controlled by an Arduino Uno. It uses a rain sensor to detect precipitation and an L298N motor driver to control two DC motors for movement. An OLED display provides visual feedback, and the system can be controlled via serial commands to move forward, backward, turn, or stop.
Cirkit Designer LogoOpen Project in Cirkit Designer
Arduino Nano-Based Rain Detection and Light Sensing System
Image of smart window: A project utilizing Rainfall Sensor DFRobot in a practical application
This circuit features an Arduino Nano microcontroller connected to a rain sensor and a photocell (LDR) for environmental sensing, and a Tower Pro SG90 servo for actuation. The rain sensor's analog output (AO) is connected to the Arduino's analog input (A0) to measure rain intensity, while the photocell is connected to another analog input (A1) through a 220-ohm resistor to measure light levels. The servo is controlled by a digital output (D2) from the Arduino, and all components share a common power supply from the Arduino's 5V and ground (GND) pins.
Cirkit Designer LogoOpen Project in Cirkit Designer
Arduino UNO Based Weather Monitoring System with Rain Sensor and DHT11
Image of projekmikro: A project utilizing Rainfall Sensor DFRobot in a practical application
This circuit features an Arduino UNO microcontroller interfaced with a rain sensor, a DHT11 temperature and humidity sensor, and a servo motor (MG996R). Two LEDs with series resistors are connected to digital pins for indication purposes. The rain sensor's digital output is connected to the Arduino, as is the DHT11 data line, and the servo motor is controlled via a signal line from the Arduino. The code provided for the Arduino is a template with empty setup and loop functions, indicating that the specific functionality is yet to be implemented.
Cirkit Designer LogoOpen Project in Cirkit Designer
Arduino UNO Based Weather Monitoring System with LCD Display
Image of agriculture: A project utilizing Rainfall Sensor DFRobot in a practical application
This is a weather monitoring and control system built around an Arduino UNO. It collects data from rain, water level, and temperature/humidity sensors, displays readings on an LCD, and can control a water pump using a relay, possibly for automated plant watering based on the sensor inputs.
Cirkit Designer LogoOpen Project in Cirkit Designer

Explore Projects Built with Rainfall Sensor DFRobot

Use Cirkit Designer to design, explore, and prototype these projects online. Some projects support real-time simulation. Click "Open Project" to start designing instantly!
Image of Automated Roof Roller with Rain Detection System: A project utilizing Rainfall Sensor DFRobot in a practical application
Arduino Uno-Based Rain-Sensing Robot with OLED Display and Battery Power
This circuit is a rain-sensing robotic vehicle controlled by an Arduino Uno. It uses a rain sensor to detect precipitation and an L298N motor driver to control two DC motors for movement. An OLED display provides visual feedback, and the system can be controlled via serial commands to move forward, backward, turn, or stop.
Cirkit Designer LogoOpen Project in Cirkit Designer
Image of smart window: A project utilizing Rainfall Sensor DFRobot in a practical application
Arduino Nano-Based Rain Detection and Light Sensing System
This circuit features an Arduino Nano microcontroller connected to a rain sensor and a photocell (LDR) for environmental sensing, and a Tower Pro SG90 servo for actuation. The rain sensor's analog output (AO) is connected to the Arduino's analog input (A0) to measure rain intensity, while the photocell is connected to another analog input (A1) through a 220-ohm resistor to measure light levels. The servo is controlled by a digital output (D2) from the Arduino, and all components share a common power supply from the Arduino's 5V and ground (GND) pins.
Cirkit Designer LogoOpen Project in Cirkit Designer
Image of projekmikro: A project utilizing Rainfall Sensor DFRobot in a practical application
Arduino UNO Based Weather Monitoring System with Rain Sensor and DHT11
This circuit features an Arduino UNO microcontroller interfaced with a rain sensor, a DHT11 temperature and humidity sensor, and a servo motor (MG996R). Two LEDs with series resistors are connected to digital pins for indication purposes. The rain sensor's digital output is connected to the Arduino, as is the DHT11 data line, and the servo motor is controlled via a signal line from the Arduino. The code provided for the Arduino is a template with empty setup and loop functions, indicating that the specific functionality is yet to be implemented.
Cirkit Designer LogoOpen Project in Cirkit Designer
Image of agriculture: A project utilizing Rainfall Sensor DFRobot in a practical application
Arduino UNO Based Weather Monitoring System with LCD Display
This is a weather monitoring and control system built around an Arduino UNO. It collects data from rain, water level, and temperature/humidity sensors, displays readings on an LCD, and can control a water pump using a relay, possibly for automated plant watering based on the sensor inputs.
Cirkit Designer LogoOpen Project in Cirkit Designer

Common Applications

  • Weather monitoring stations
  • Smart irrigation systems
  • Rain detection for automated systems
  • Environmental monitoring projects

Technical Specifications

Below are the key technical details of the Rainfall Sensor DFRobot:

Parameter Specification
Operating Voltage 3.3V - 5V
Output Type Analog and Digital
Interface Gravity 3-pin interface
Detection Area 5cm x 4cm
Output Signal Analog voltage (rain intensity)
Digital Output Threshold Adjustable via onboard potentiometer
Operating Temperature -40°C to 85°C
Dimensions 54mm x 40mm

Pin Configuration

The sensor has a 3-pin interface for easy connection. Below is the pin description:

Pin Name Description
1 VCC Power supply (3.3V - 5V)
2 GND Ground
3 SIG Signal output (analog or digital, depending on mode)

Usage Instructions

Connecting the Sensor

  1. Power Supply: Connect the VCC pin to a 3.3V or 5V power source and the GND pin to ground.
  2. Signal Output: Connect the SIG pin to an analog or digital input pin on your microcontroller.
    • For analog output, read the voltage to determine rain intensity.
    • For digital output, adjust the sensitivity using the onboard potentiometer.

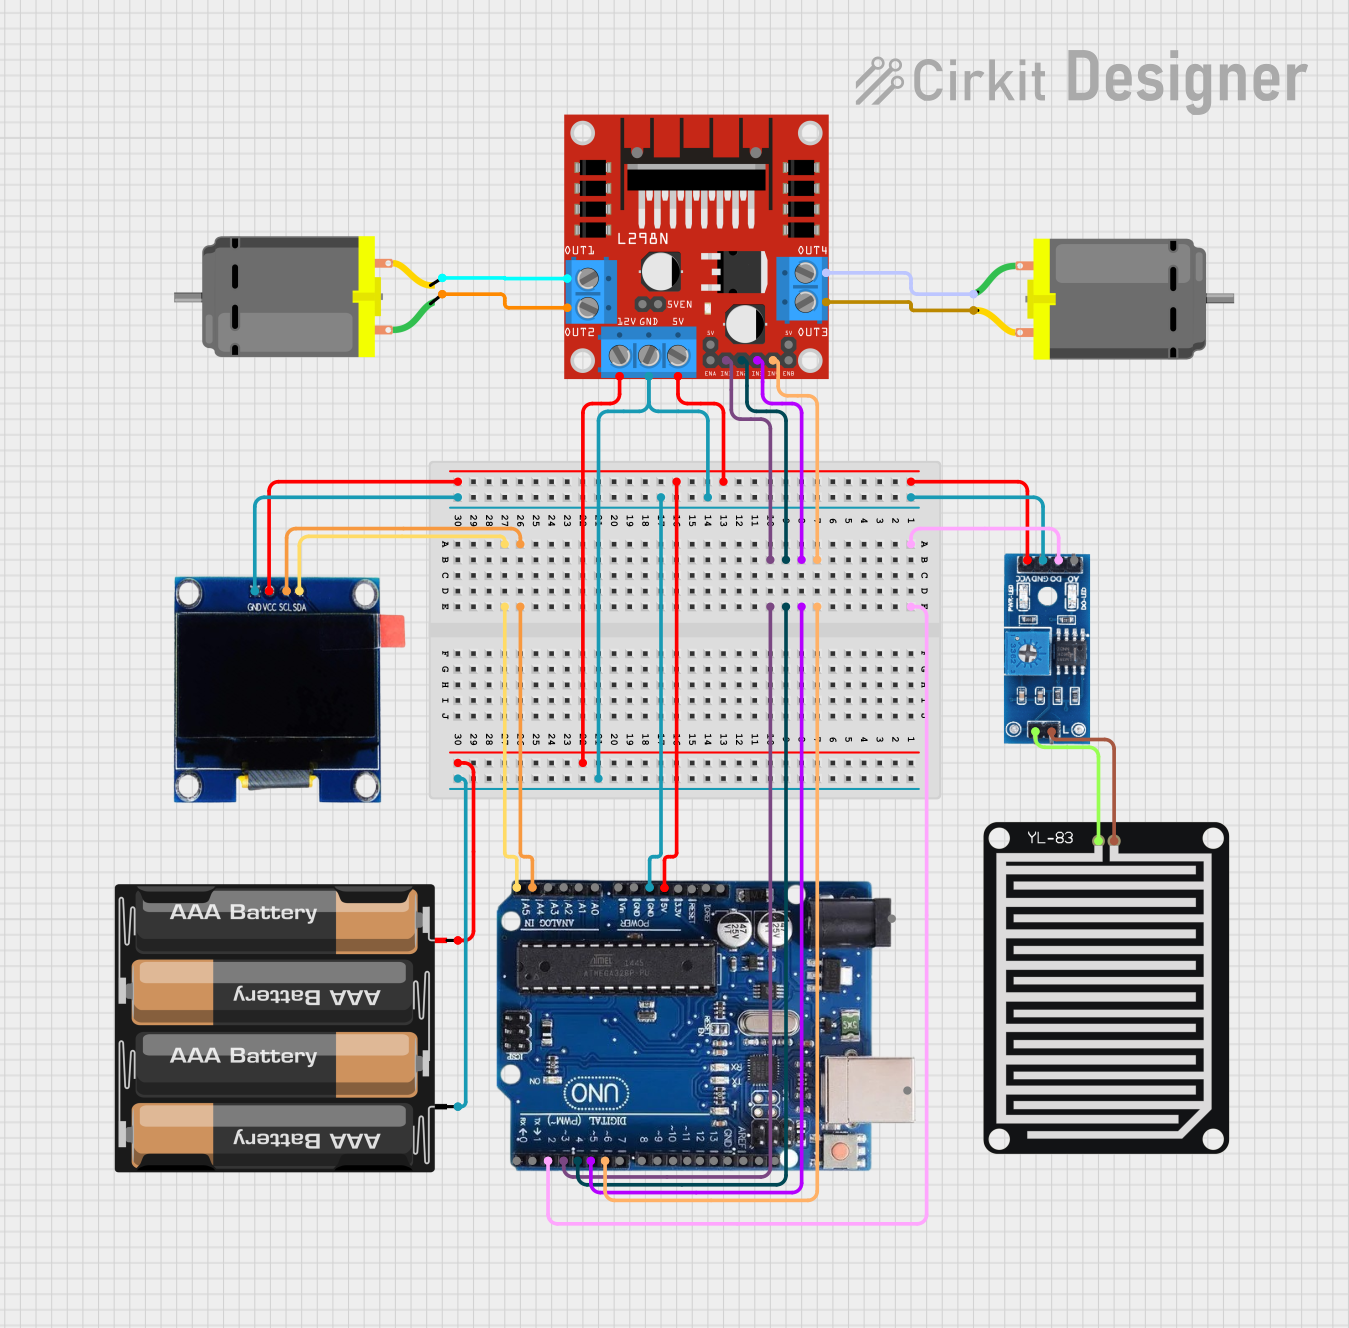
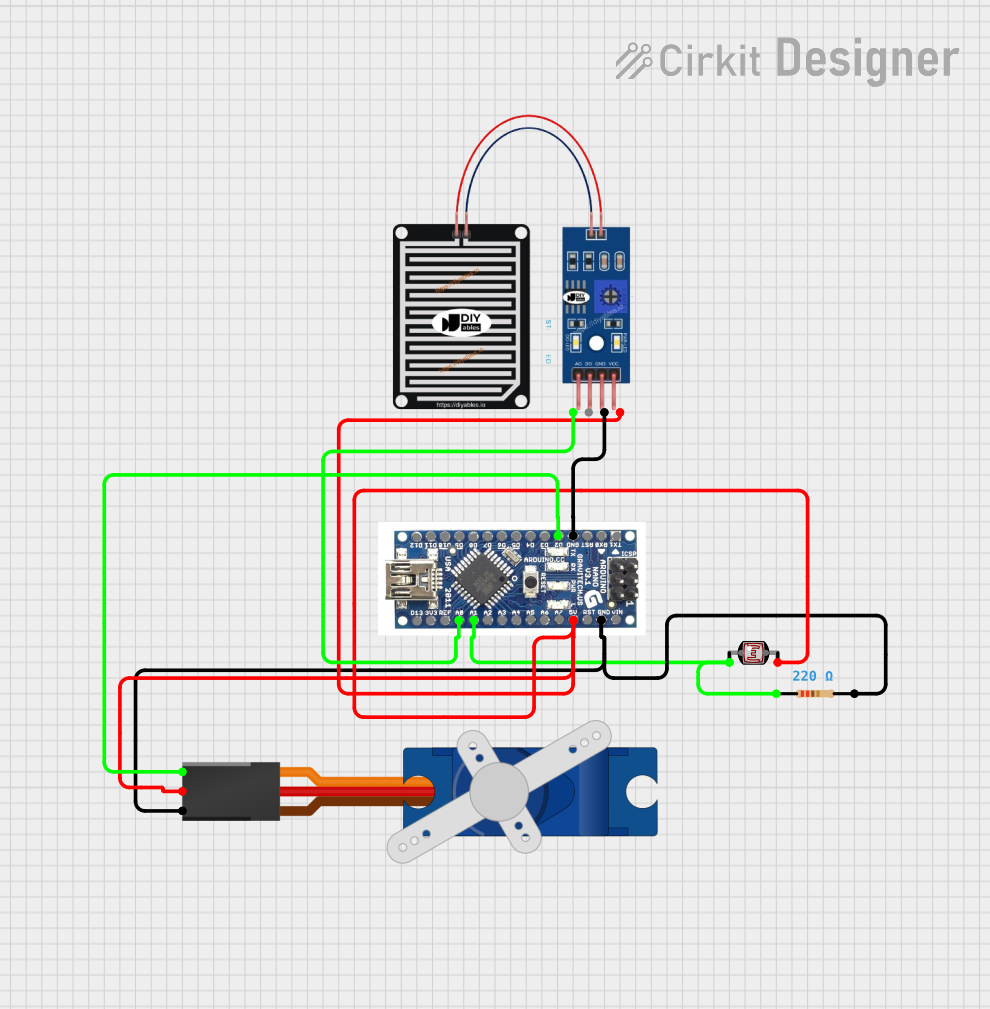
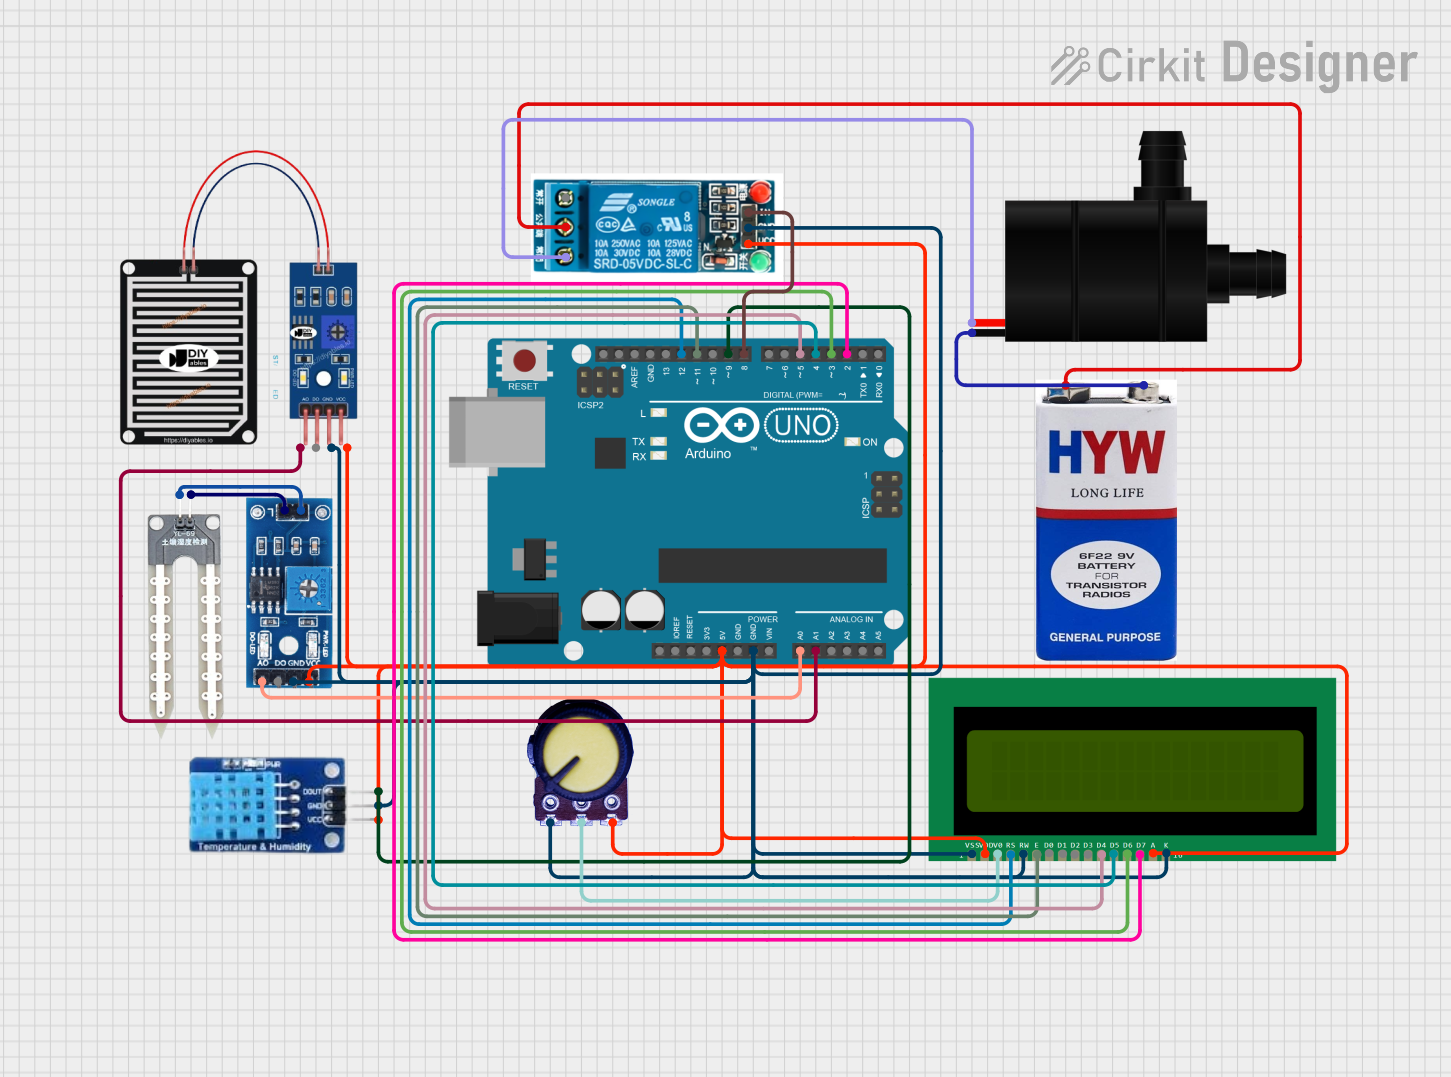
Example Circuit with Arduino UNO

Below is an example of how to connect the Rainfall Sensor to an Arduino UNO:

  • VCC → 5V on Arduino
  • GND → GND on Arduino
  • SIG → A0 (analog input) or D2 (digital input) on Arduino

Sample Code

The following Arduino code demonstrates how to read both analog and digital outputs from the sensor:

// Define pin connections
const int analogPin = A0; // Analog pin connected to SIG
const int digitalPin = 2; // Digital pin connected to SIG

void setup() {
  Serial.begin(9600); // Initialize serial communication
  pinMode(digitalPin, INPUT); // Set digital pin as input
}

void loop() {
  // Read analog value (rain intensity)
  int analogValue = analogRead(analogPin);
  Serial.print("Analog Value (Rain Intensity): ");
  Serial.println(analogValue);

  // Read digital value (rain detected or not)
  int digitalValue = digitalRead(digitalPin);
  Serial.print("Digital Value (Rain Detected): ");
  if (digitalValue == LOW) {
    Serial.println("Yes"); // Rain detected
  } else {
    Serial.println("No"); // No rain detected
  }

  delay(1000); // Wait for 1 second before next reading
}

Important Considerations

  • Sensitivity Adjustment: Use the onboard potentiometer to adjust the digital output threshold for rain detection.
  • Placement: Ensure the sensor is placed in an open area where it can directly detect rainfall.
  • Waterproofing: While the sensor is designed for outdoor use, ensure proper sealing of connections to prevent water damage.

Troubleshooting and FAQs

Common Issues

  1. No Output Signal

    • Cause: Incorrect wiring or insufficient power supply.
    • Solution: Double-check the connections and ensure the power supply is within the specified range (3.3V - 5V).
  2. Inconsistent Readings

    • Cause: Dirt or debris on the sensor surface.
    • Solution: Clean the sensor surface gently with a soft cloth.
  3. Digital Output Always HIGH or LOW

    • Cause: Incorrect sensitivity adjustment.
    • Solution: Adjust the potentiometer to set the desired threshold.
  4. Analog Output Not Changing

    • Cause: Faulty sensor or improper placement.
    • Solution: Verify the sensor's placement and test with a known water source.

FAQs

Q: Can this sensor detect the amount of rainfall over time?
A: The sensor provides real-time rain intensity data. To measure cumulative rainfall, you would need to integrate the data over time using a microcontroller.

Q: Is the sensor waterproof?
A: The sensor is designed for outdoor use, but the connections should be properly sealed to prevent water damage.

Q: Can I use this sensor with a Raspberry Pi?
A: Yes, the sensor can be connected to a Raspberry Pi using its GPIO pins. Use an ADC (Analog-to-Digital Converter) module for reading analog signals.

Q: How do I clean the sensor?
A: Use a soft, damp cloth to gently clean the sensor surface. Avoid using abrasive materials.

By following this documentation, you can effectively integrate the Rainfall Sensor DFRobot into your projects and ensure reliable performance.