The MQ-9 Breakout is an essential tool for integrating the MQ-9 sensor into electronic projects. The MQ-9 sensor is capable of detecting carbon monoxide (CO) and combustible gases, making it ideal for safety applications in domestic and industrial settings. Common applications include gas leak detection systems, air quality monitoring, and early fire detection.
Explore Projects Built with MQ-9 Breakout
Use Cirkit Designer to design, explore, and prototype these projects online. Some projects support real-time simulation. Click "Open Project" to start designing instantly!
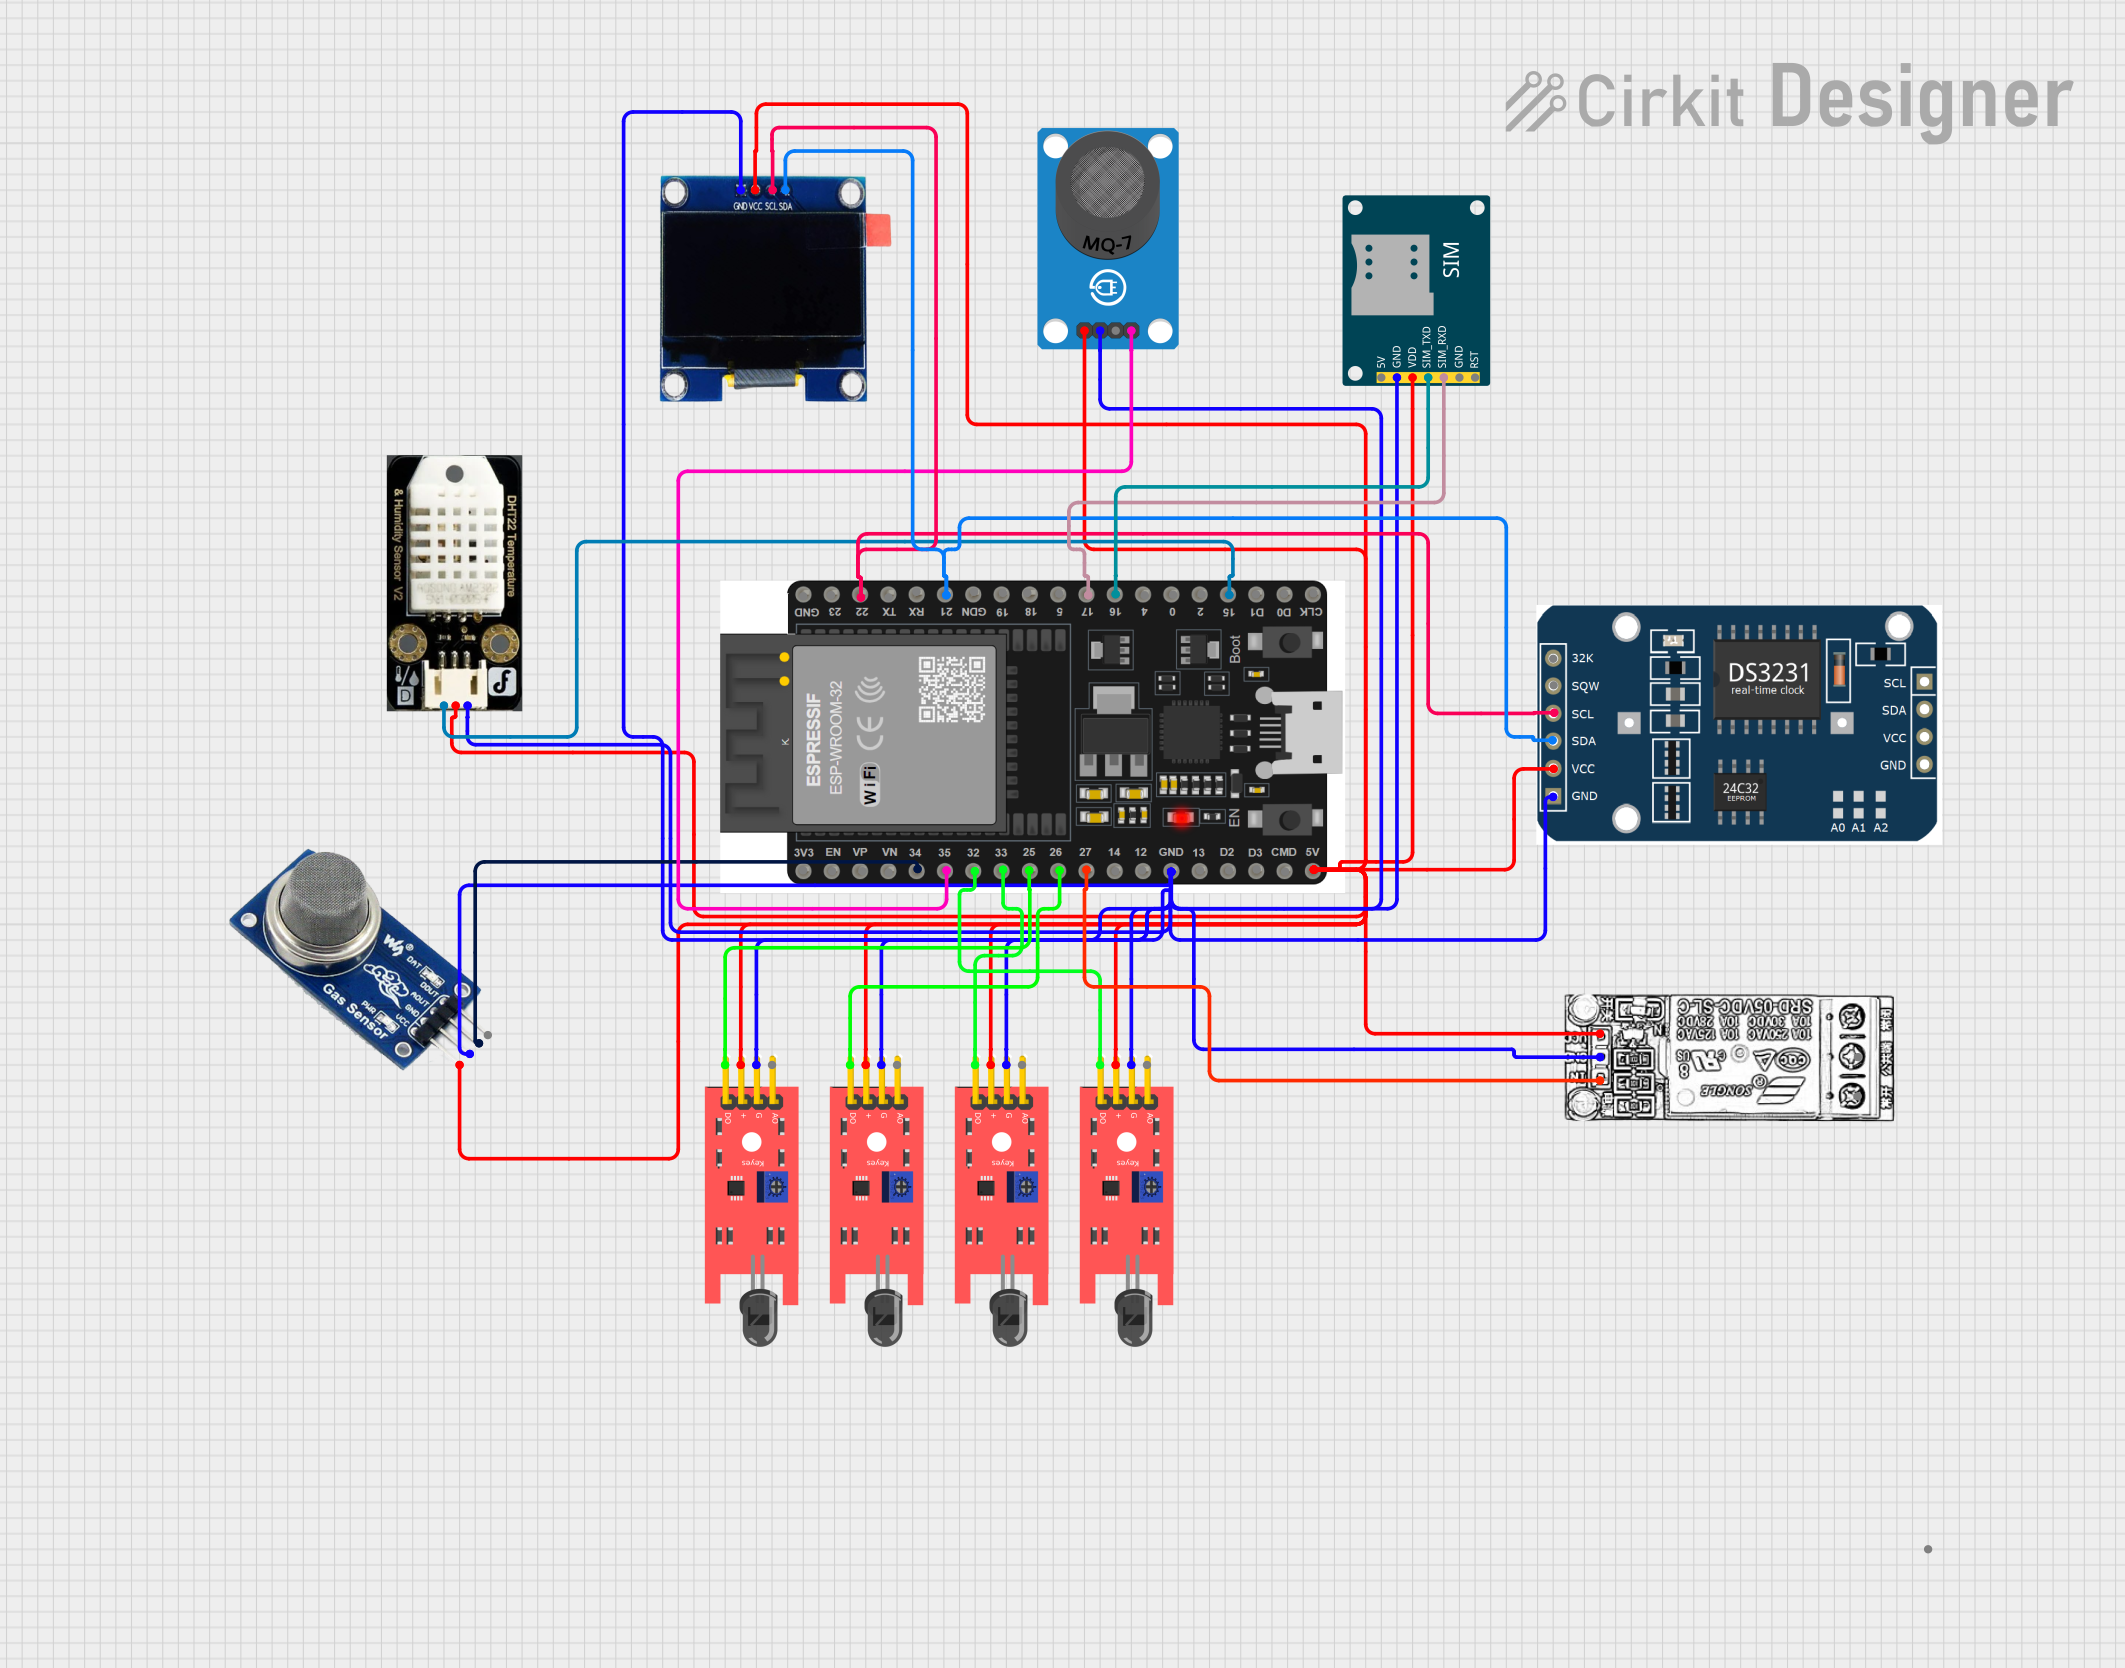
This circuit is a multi-sensor monitoring system using an ESP32 microcontroller. It integrates various sensors including flame sensors, gas sensors (MQ-2 and MQ-7), a temperature and humidity sensor, and an OLED display for real-time data visualization. Additionally, it includes a relay module for controlling external devices and a GSM module for remote communication.
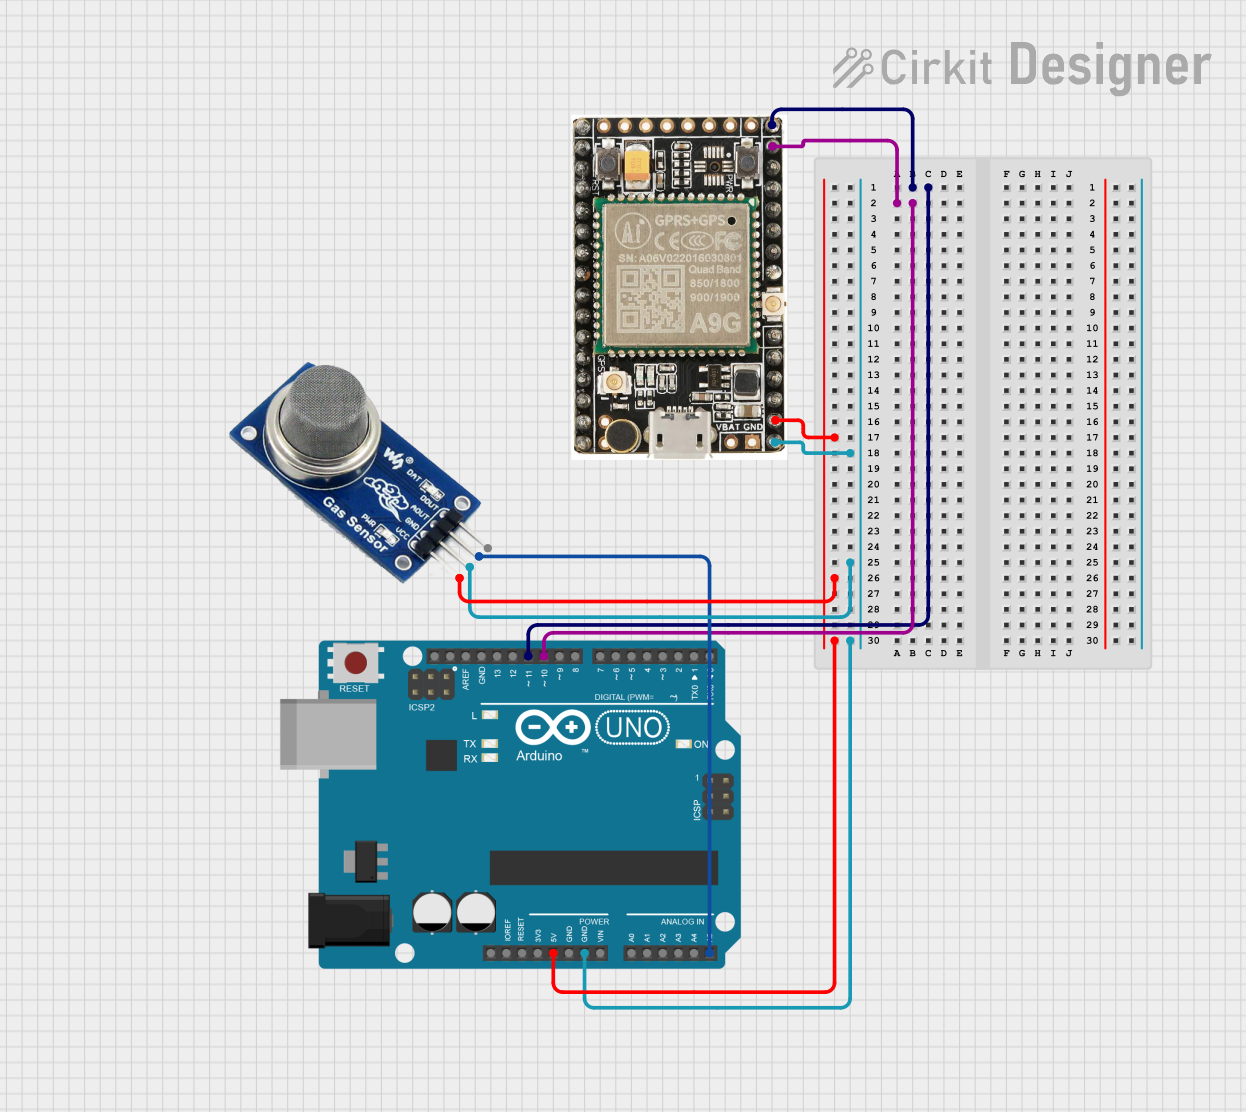
This circuit features an Arduino UNO microcontroller interfaced with an A9G GSM/GPRS+GPS module and an MQ2 gas sensor. The Arduino communicates with the A9G module via digital pins D11 and D10 for data transmission, and it reads analog gas concentration levels from the MQ2 sensor through analog pin A5. Both the A9G module and the MQ2 sensor are powered by the Arduino's 5V output, and all components share a common ground.
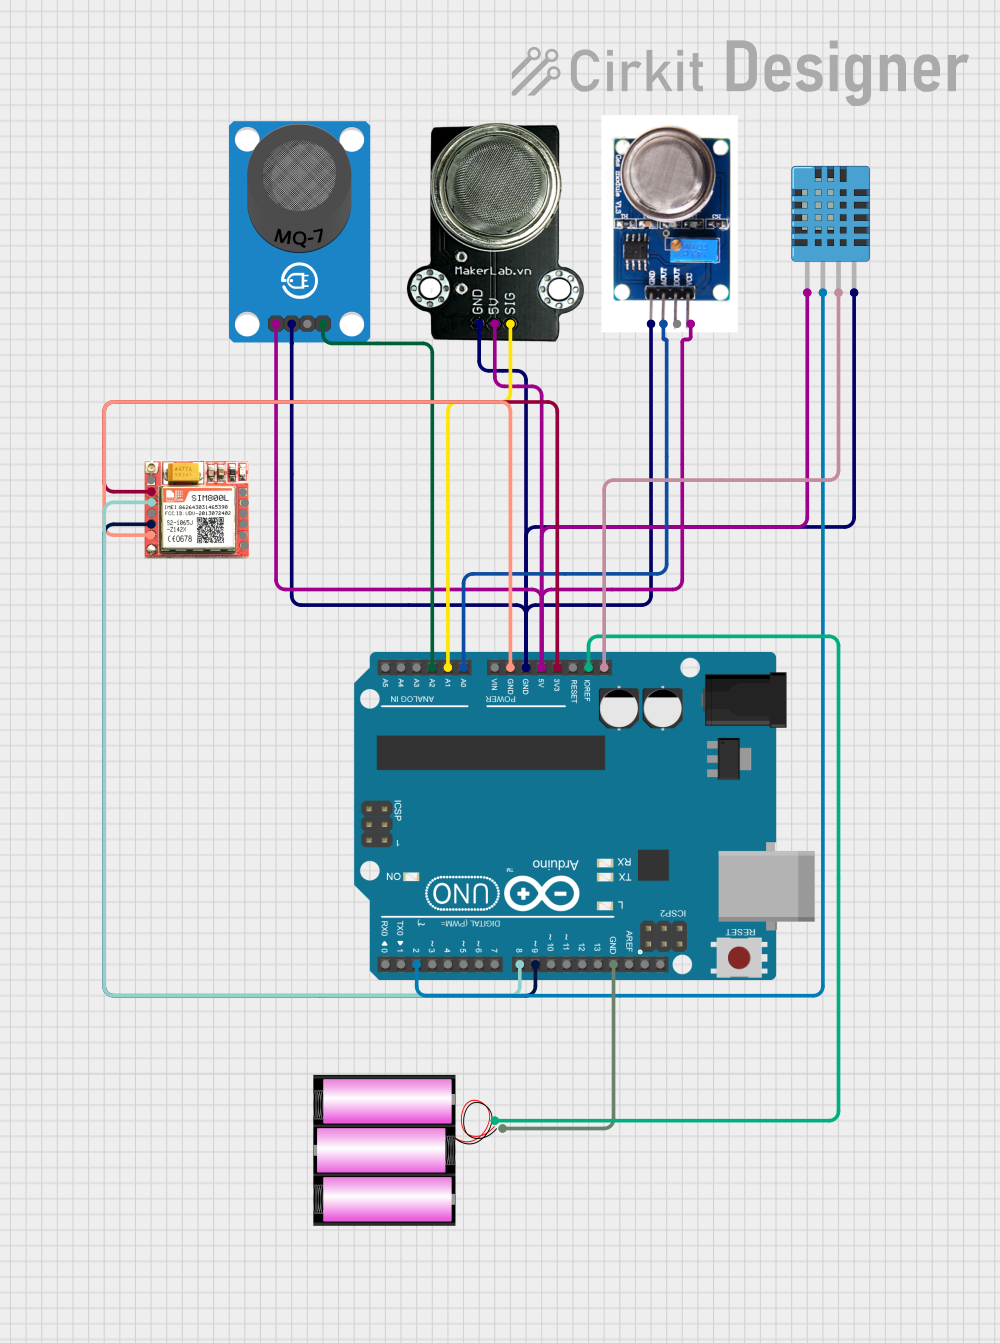
This circuit is an air quality monitoring system that uses an Arduino UNO to read data from various sensors, including the MQ-7 for CO detection, MQ131 for ozone detection, MQ-135 for general air quality, and a DHT11 for temperature and humidity. The Arduino processes the sensor data and can communicate the results via a SIM800L module for remote monitoring.
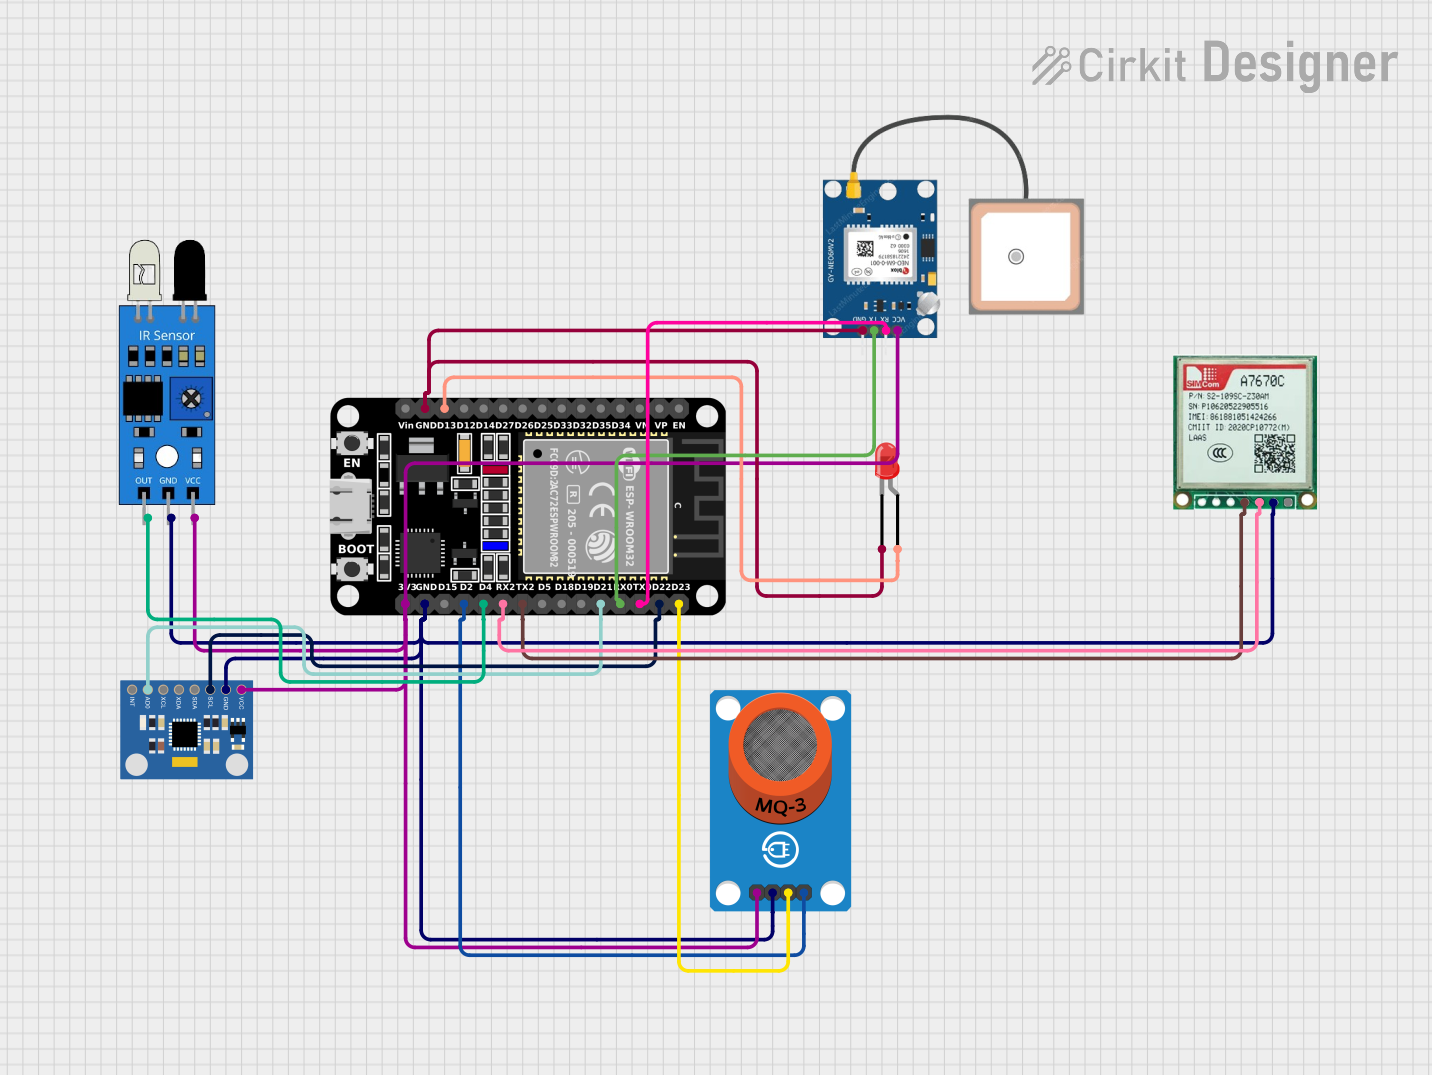
This circuit is an IoT-based sensor system using an ESP32 microcontroller to monitor alcohol levels, motion, and IR signals. It integrates an MQ-3 alcohol sensor, MPU6050 accelerometer/gyroscope, IR sensor, GPS module, and GSM module to collect data, send alerts via SMS, and upload information to a cloud server.
Load Resistance: Adjustable via onboard potentiometer
Analog Output Voltage (VA): 0-5V (proportional to gas concentration)
Pin Configuration and Descriptions
Pin Number
Pin Name
Description
1
VCC
Power supply (5V DC)
2
GND
Ground
3
DOUT
Digital output (TTL logic level)
4
AOUT
Analog output (0-5V, gas concentration)
5
H
Heater control (connect to 5V for heating)
Usage Instructions
Integration into a Circuit
Power Supply: Connect the VCC pin to a 5V power supply and the GND pin to the ground of your system.
Heater Activation: Connect the H pin to 5V to activate the sensor's heater. The heater must be on for the sensor to operate correctly.
Analog Output: Connect the AOUT pin to an analog input on your microcontroller to read the gas concentration levels.
Digital Output (Optional): The DOUT pin can be connected to a digital input on your microcontroller if you wish to use the sensor's built-in comparator for simple threshold-based detection.
Best Practices
Preheat the sensor for at least 24 hours before initial use for optimal performance.
Calibrate the sensor in the environment where it will be used to ensure accurate readings.
Avoid exposure to high concentrations of alcohol, smoke, and other volatile organic compounds to prevent sensor poisoning.
Use the onboard potentiometer to adjust the load resistance and calibrate the sensor's sensitivity.
Example Arduino Code
// MQ-9 Breakout Example Code for Arduino UNO
int analogPin = A0; // Analog input pin connected to AOUT on MQ-9
int sensorValue = 0; // Variable to store the sensor value

void setup() {
  Serial.begin(9600); // Initialize serial communication at 9600 baud
}

void loop() {
  sensorValue = analogRead(analogPin); // Read the sensor value
  Serial.print("Gas concentration: ");
  Serial.println(sensorValue); // Print the sensor value to the serial monitor
  delay(1000); // Wait for 1 second before reading the value again
}
Troubleshooting and FAQs
Common Issues
Sensor Not Responding: Ensure the heater is powered and has been preheated for the recommended time.
Inaccurate Readings: Verify that the sensor has been calibrated correctly and is not exposed to contaminants.
No Output Signal: Check all connections, especially the power supply and ground, for proper contact.
FAQs
Q: How long does the MQ-9 sensor last?
A: The lifespan of the MQ-9 sensor is typically around 5 years, depending on usage and environmental conditions.
Q: Can the MQ-9 detect natural gas?
A: Yes, the MQ-9 is sensitive to flammable gases, including natural gas.
Q: What is the purpose of the onboard potentiometer?
A: The potentiometer adjusts the load resistance, which changes the sensor's sensitivity to gas concentrations.
Q: How do I calibrate the sensor?
A: Calibration involves adjusting the potentiometer while exposing the sensor to a known concentration of the target gas until the desired output is achieved.
For further assistance, please refer to the manufacturer's datasheet or contact technical support.


 Open Project in Cirkit Designer