The Plastic Solenoid Valve is an electromechanical device designed to control the flow of fluids or gases within a system. It operates by using an electric current to generate a magnetic field within a solenoid coil, which in turn moves a plunger to open or close the valve. These valves are widely used in various applications, including water control systems, irrigation, home appliances, and pneumatic systems, due to their reliability and quick response times.
Explore Projects Built with Plastic Solenoid Valve
Use Cirkit Designer to design, explore, and prototype these projects online. Some projects support real-time simulation. Click "Open Project" to start designing instantly!
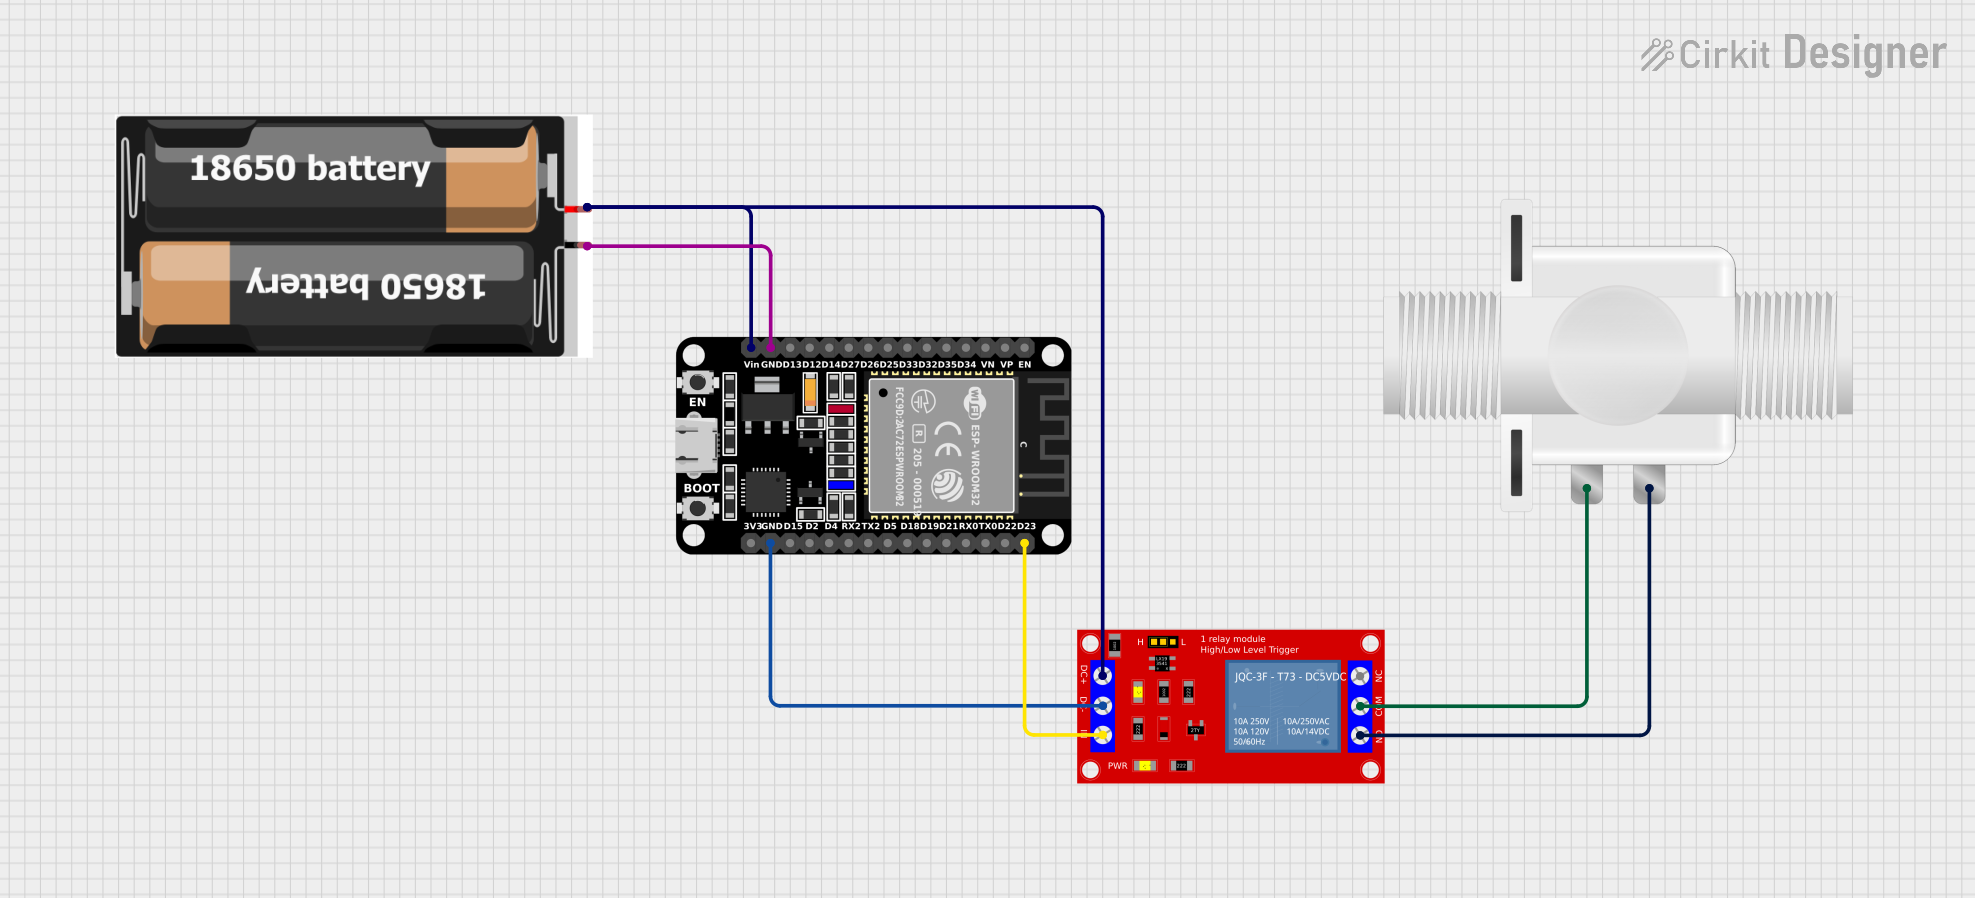
This circuit is designed to control a plastic solenoid valve using an ESP32 microcontroller. The ESP32 uses a digital output to switch a relay module, which provides or cuts off power to the valve. The entire system is powered by a pair of 18650 batteries.
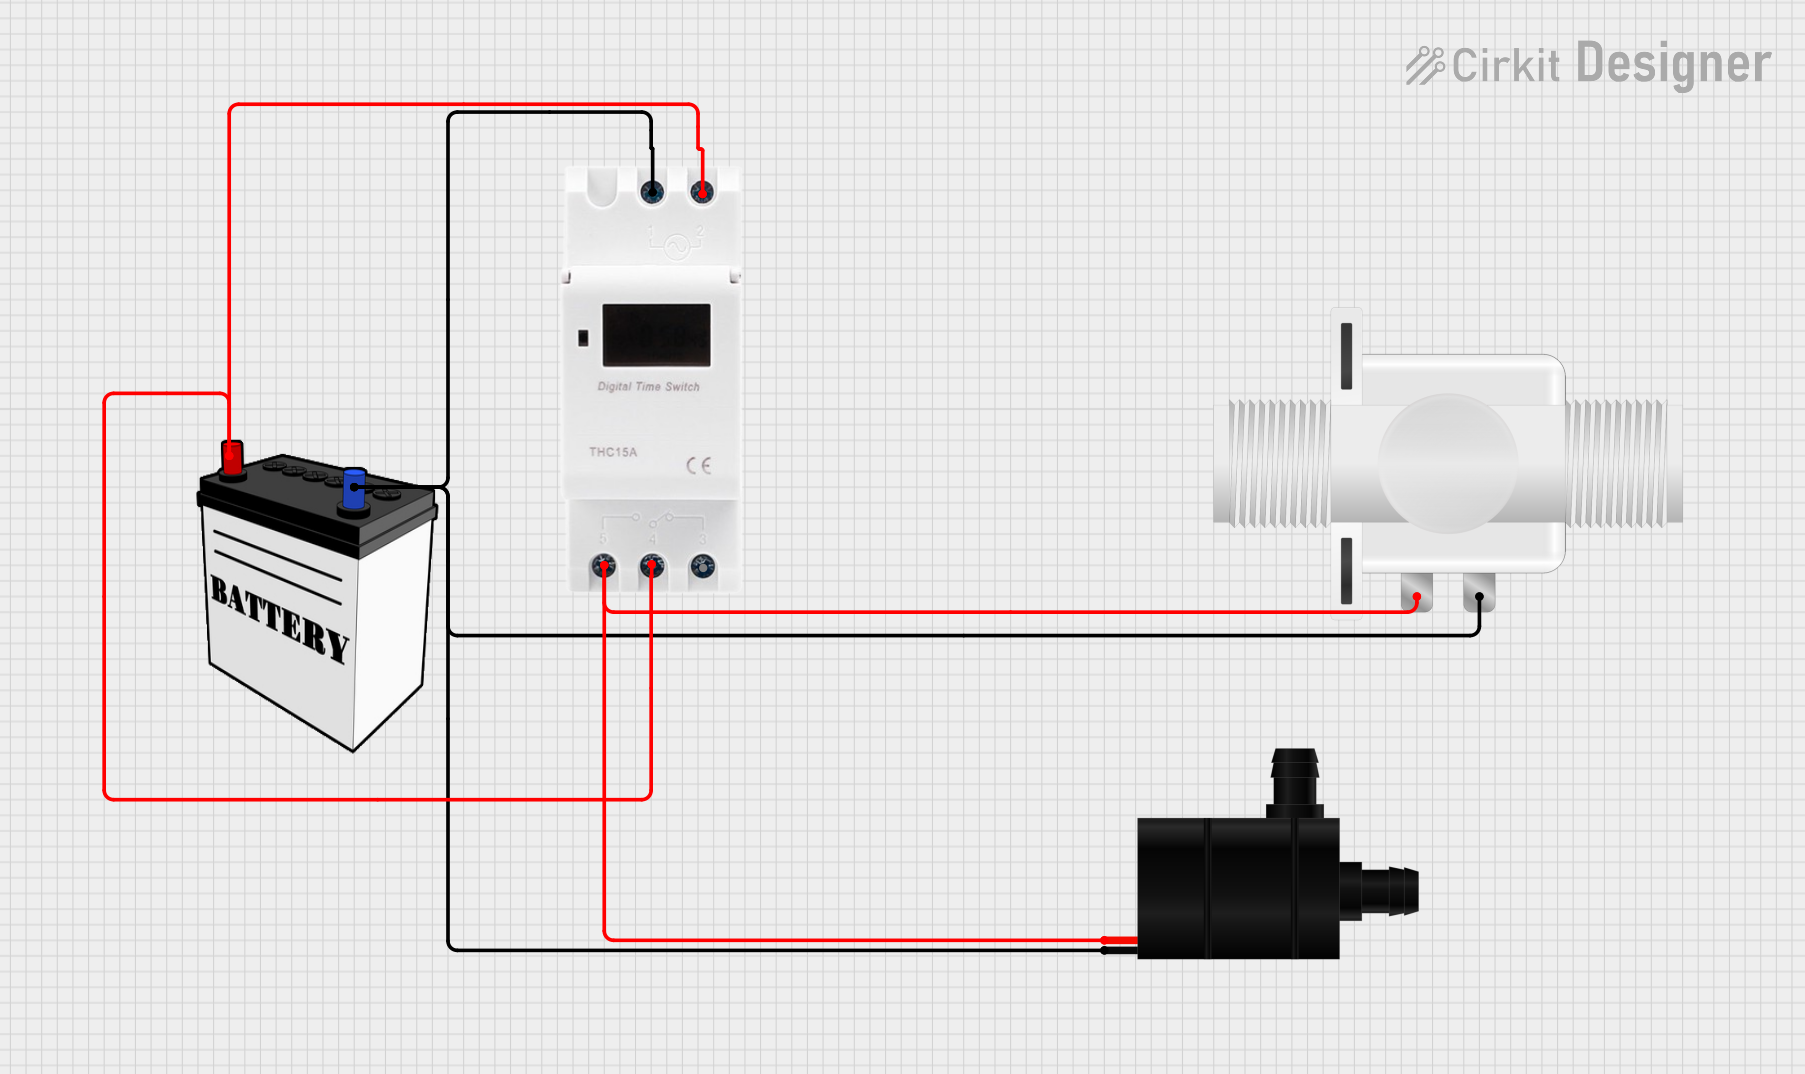
This circuit consists of a water pump and a plastic solenoid valve, both of which are controlled by a timer switch. The timer switch is powered by a 12V battery and is responsible for providing power to the pump and valve at timed intervals. There is no microcontroller code involved, indicating that the timing functions are likely handled by the timer switch hardware.
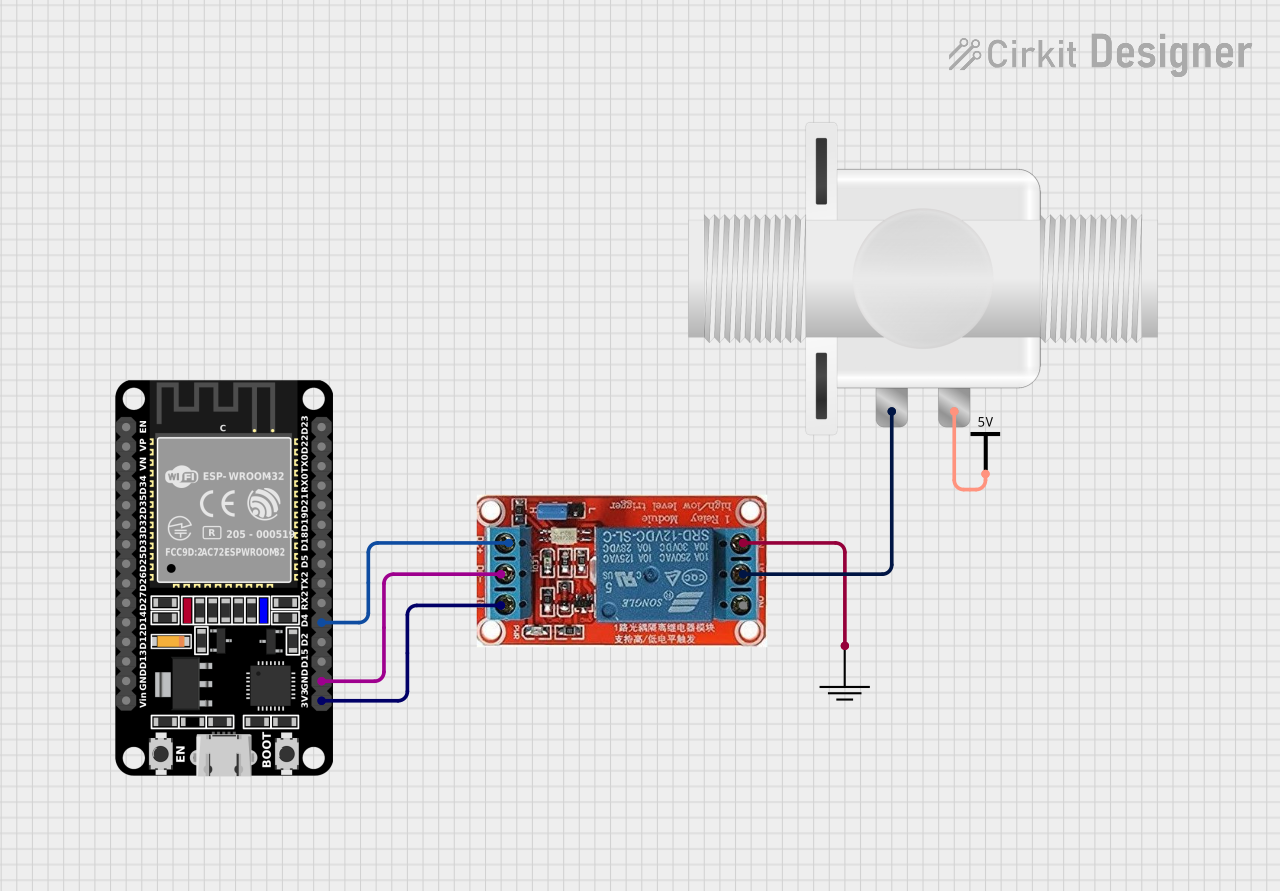
This circuit uses an ESP32 microcontroller to control a 12V relay, which in turn operates a plastic solenoid valve. The ESP32 toggles the relay on and off every second, allowing the solenoid valve to open and close accordingly.
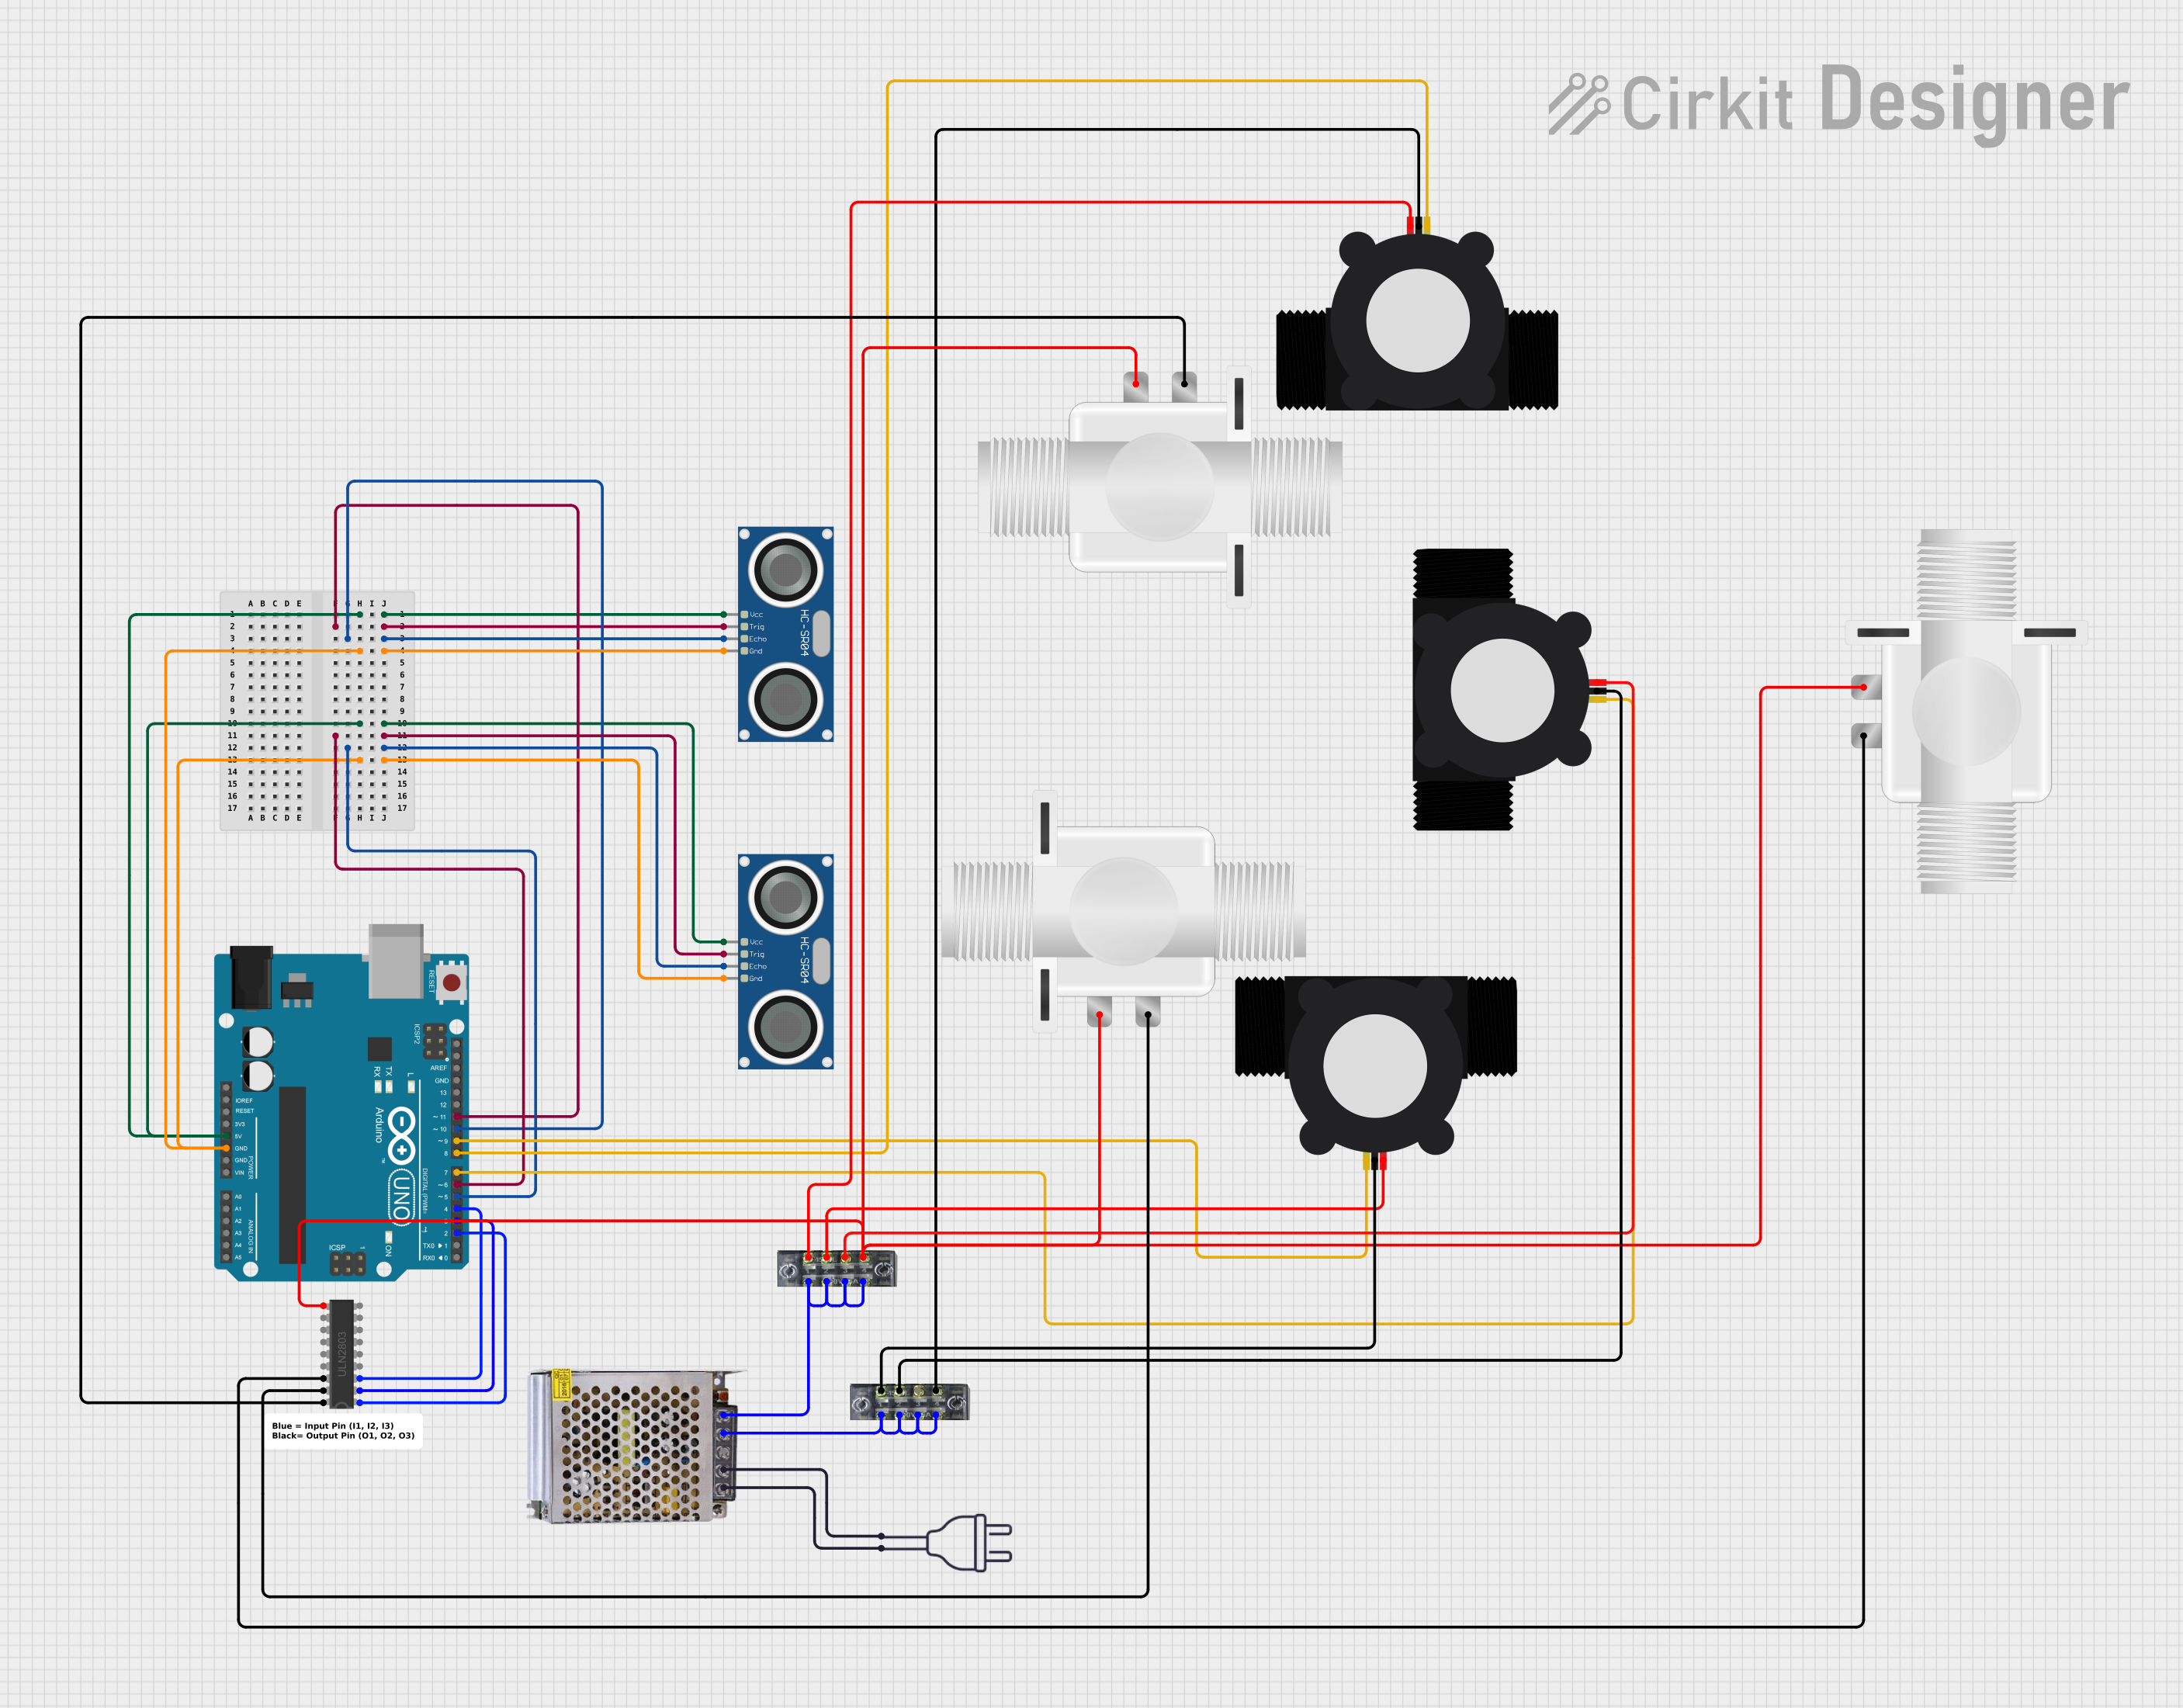
This circuit is designed to monitor and control water flow using ultrasonic sensors, water flow meters, and solenoid valves, all managed by an Arduino UNO microcontroller. The ultrasonic sensors detect the presence of objects, and the water flow meters measure the flow of water, triggering the solenoid valves to open or close accordingly. The system's logic is programmed to ensure water flow is enabled only when no objects are detected within a certain range, and flow is present, which could be used in applications like automated irrigation or fluid dispensing systems.
Operation Mode: Normally closed (valve opens when energized)
Fluid Temperature Range: 0°C to 50°C (32°F to 122°F)
Ambient Temperature Range: 5°C to 40°C (41°F to 104°F)
Life Expectancy: Typically 1 million cycles
Electrical Specifications
Operating Voltage: 12V DC (commonly available)
Current Draw: 200-500mA (depending on model)
Power Consumption: Approx. 6W
Flow Specifications
Pressure Range: 0 to 0.8MPa
Flow Rate: Varies with valve size and pressure
Pin Configuration and Descriptions
Pin
Description
1
Power (+12V DC)
2
Ground (0V)
Usage Instructions
Integration into a Circuit
Power Supply: Ensure that the power supply matches the operating voltage of the solenoid valve. A 12V DC power supply is typically used.
Polarity: Connect the positive lead of the power supply to Pin 1 and the negative lead to Pin 2.
Control Signal: Use a relay or a transistor to switch the solenoid valve on and off. The control signal can be provided by a microcontroller like an Arduino UNO.
Best Practices
Waterproofing: Ensure that the solenoid valve is protected from water and moisture to prevent electrical shorts.
Pressure Rating: Do not exceed the recommended pressure range to avoid damaging the valve.
Heat Dissipation: Provide adequate ventilation around the solenoid coil to prevent overheating.
Example Arduino UNO Code
// Define the solenoid valve control pin
const int solenoidPin = 7;

void setup() {
  // Set the solenoid pin as an output
  pinMode(solenoidPin, OUTPUT);
}

void loop() {
  // Open the solenoid valve
  digitalWrite(solenoidPin, HIGH);
  delay(1000); // Keep the valve open for 1 second

  // Close the solenoid valve
  digitalWrite(solenoidPin, LOW);
  delay(1000); // Keep the valve closed for 1 second
}
Troubleshooting and FAQs
Common Issues
Valve Does Not Open: Check the power supply and ensure that the voltage and current ratings are adequate. Inspect the wiring for any loose connections.
Valve Stays Open: This could be due to a stuck plunger or a malfunctioning coil. Disconnect the power and inspect the valve for any debris or damage.
Overheating: If the solenoid becomes too hot, it may be due to continuous operation or inadequate ventilation. Ensure the duty cycle allows for cooling periods.
FAQs
Q: Can the solenoid valve be used with liquids other than water?
A: Yes, but ensure that the liquid is compatible with the valve's material and within the specified temperature range.
Q: How long can the solenoid valve remain energized?
A: It depends on the model and design. Refer to the manufacturer's specifications for the maximum duty cycle.
Q: Is it possible to control the flow rate with the solenoid valve?
A: Solenoid valves are typically on/off devices. To control flow rate, additional equipment like a flow control valve is required.
Remember to always refer to the manufacturer's datasheet for the most accurate and specific information regarding the operation and specifications of the Plastic Solenoid Valve.

 Open Project in Cirkit Designer