How to Use TP-Link Archer MR600 4G: Examples, Pinouts, and Specs
Introduction
The TP-Link Archer MR600 4G is a dual-band 4G LTE router designed to deliver high-speed internet access to multiple devices simultaneously. With its built-in SIM card slot, it eliminates the need for a separate modem, making it a convenient solution for homes, offices, and remote locations. The router supports advanced security features, ensuring a safe and reliable internet connection.
Explore Projects Built with TP-Link Archer MR600 4G


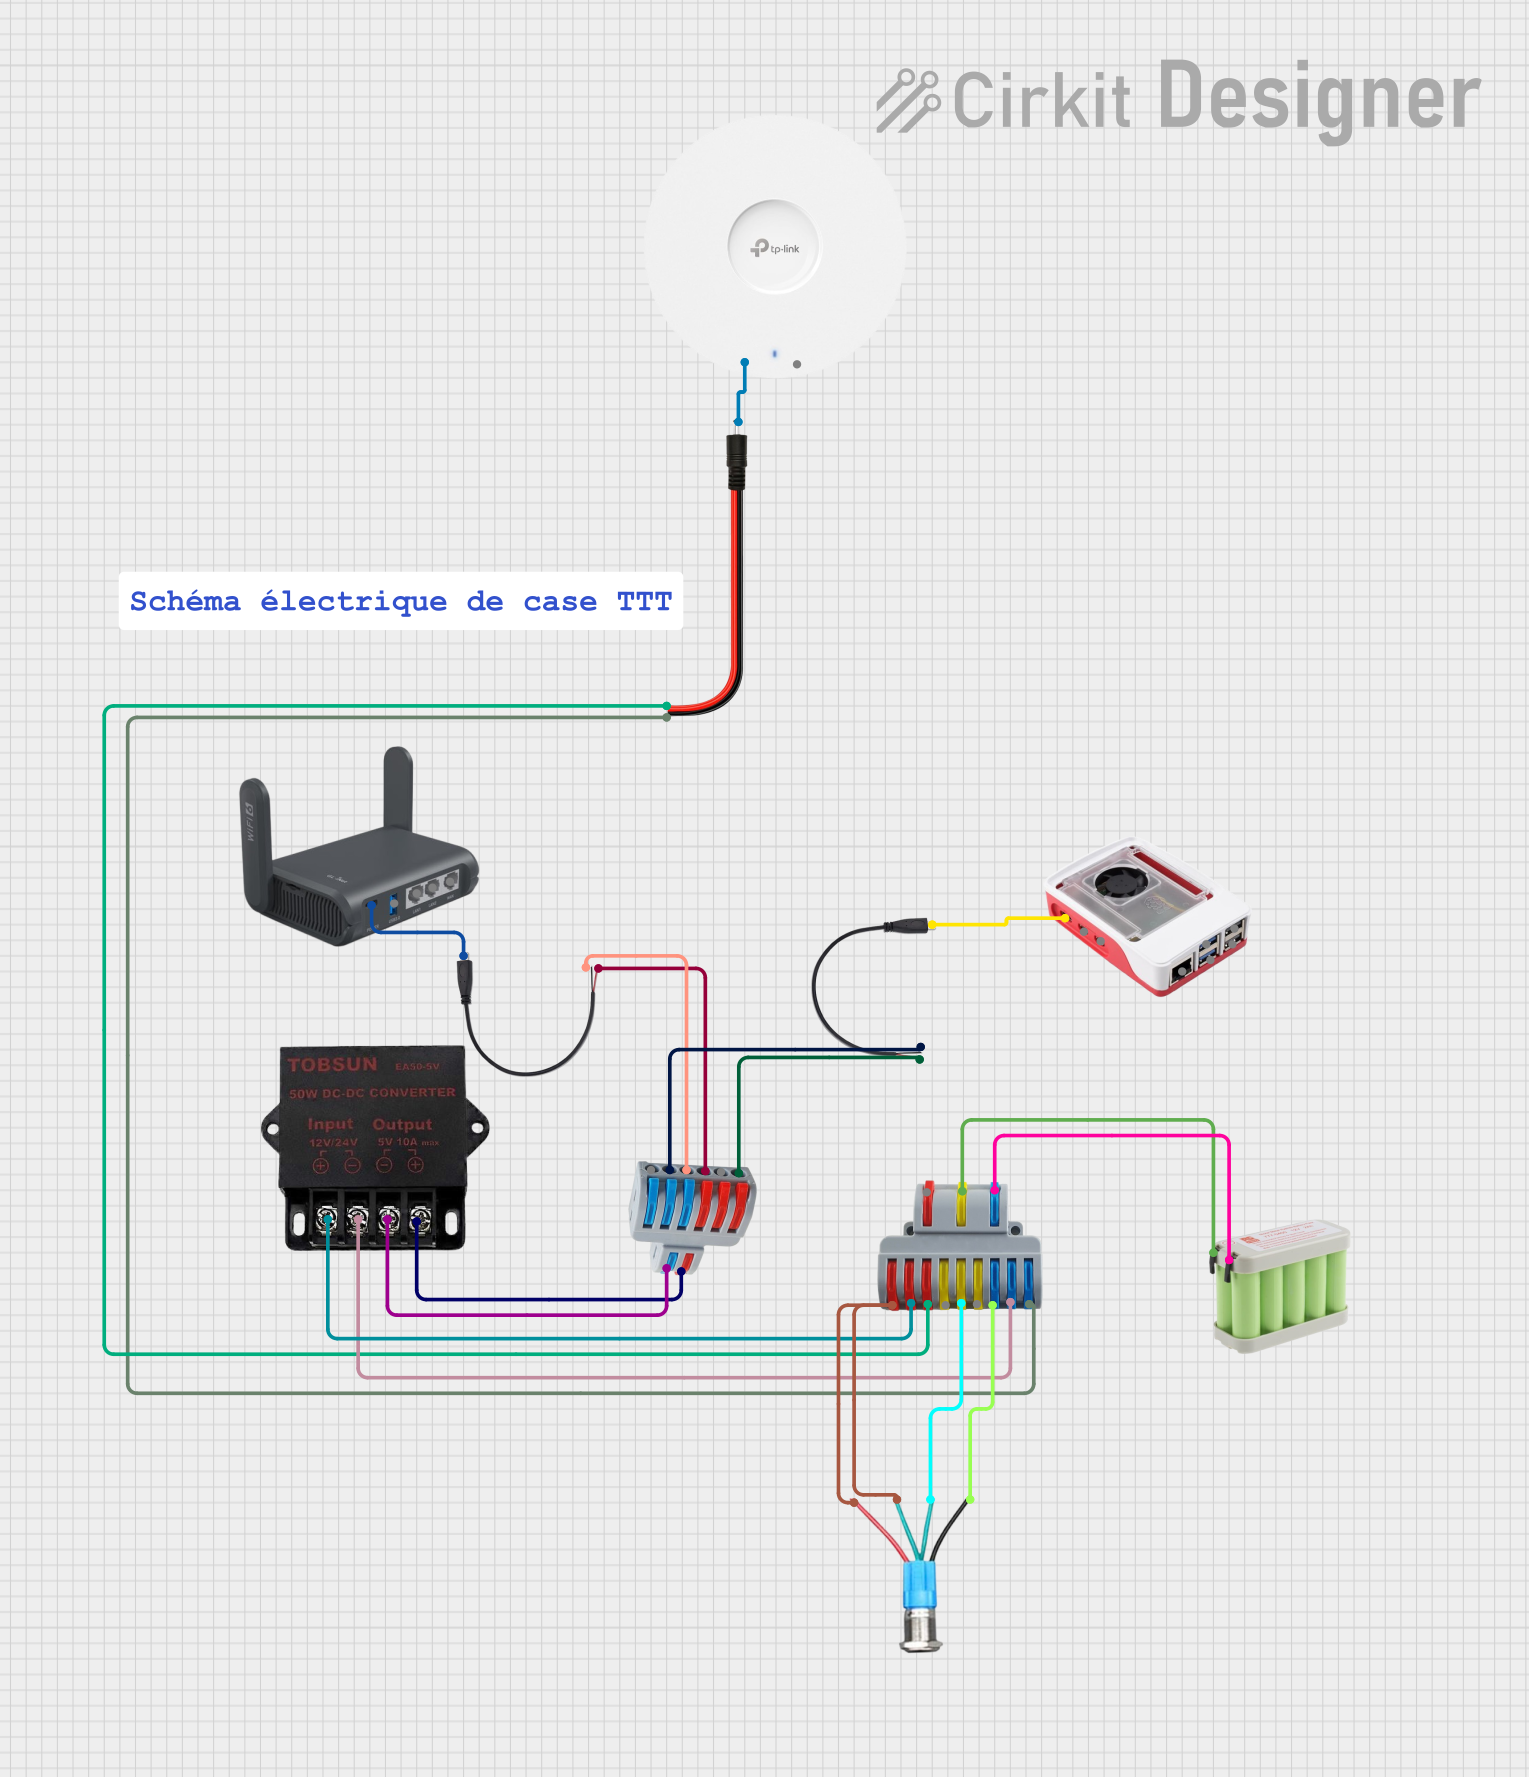
Explore Projects Built with TP-Link Archer MR600 4G
Common Applications and Use Cases
- Providing internet access in areas with limited or no wired broadband availability.
- Enabling connectivity for smart home devices and IoT systems.
- Supporting remote work and online learning in rural or mobile environments.
- Acting as a backup internet solution in case of primary network failure.
Technical Specifications
Key Technical Details
| Specification | Value |
|---|---|
| Manufacturer | TP-Link |
| Model | Archer MR600 4G |
| Part ID | MR600 4G |
| Network Type | 4G LTE, 3G |
| Wireless Standards | IEEE 802.11ac/n/a 5 GHz, IEEE 802.11b/g/n 2.4 GHz |
| Frequency Bands | Dual-band (2.4 GHz and 5 GHz) |
| Maximum Wireless Speed | Up to 300 Mbps (2.4 GHz), 867 Mbps (5 GHz) |
| SIM Card Slot | Nano SIM |
| Ethernet Ports | 4x Gigabit LAN, 1x Gigabit WAN/LAN |
| Antennas | 2x External LTE Antennas, 2x Internal Wi-Fi Antennas |
| Security Features | WPA/WPA2, SPI Firewall, Access Control |
| Power Supply | 12V/1.5A DC |
| Dimensions | 229 mm x 160 mm x 37 mm |
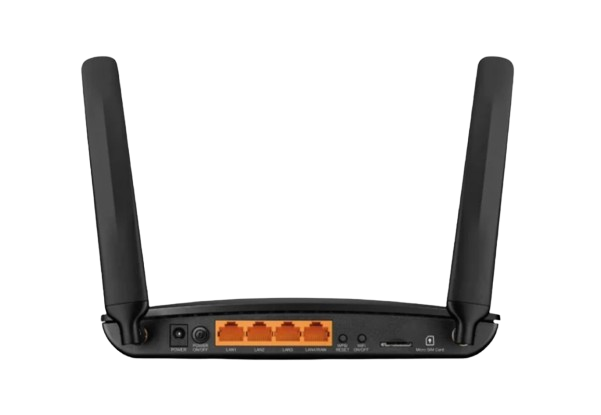
Pin Configuration and Descriptions
The TP-Link Archer MR600 4G does not have traditional pins like electronic ICs. However, the following table describes its key ports and interfaces:
| Port/Interface | Description |
|---|---|
| Nano SIM Slot | Insert a 4G LTE-enabled SIM card for internet access. |
| Gigabit LAN Ports | Connect wired devices such as PCs, smart TVs, or gaming consoles. |
| Gigabit WAN/LAN Port | Can function as a WAN port for wired internet or as an additional LAN port. |
| Power Port | Connect the included 12V/1.5A DC power adapter. |
| Reset Button | Press and hold for 10 seconds to reset the router to factory settings. |
| WPS Button | Quickly connect devices via Wi-Fi Protected Setup. |
| Wi-Fi On/Off Button | Toggle the Wi-Fi functionality on or off. |
Usage Instructions
How to Use the TP-Link Archer MR600 4G in a Network
Insert the SIM Card:
- Ensure the router is powered off.
- Insert a nano SIM card into the SIM card slot until it clicks into place.
- Power on the router.
Connect to the Router:
- Use a LAN cable to connect a device to one of the LAN ports, or connect wirelessly using the default Wi-Fi credentials printed on the router's label.
Access the Web Interface:
- Open a web browser and navigate to
http://tplinkmodem.netor192.168.1.1. - Log in using the default username and password (admin/admin) or the credentials provided.
- Open a web browser and navigate to
Configure the Internet Settings:
- Follow the Quick Setup wizard to configure the 4G LTE connection.
- Ensure the APN settings match those provided by your mobile network operator.
Customize Wi-Fi Settings:
- Change the SSID and password for both 2.4 GHz and 5 GHz bands for better security.
- Enable or disable guest networks as needed.
Connect Devices:
- Connect your devices to the router via Wi-Fi or Ethernet for internet access.
Important Considerations and Best Practices
- Placement: Place the router in a central location, away from obstructions, for optimal signal strength.
- Firmware Updates: Regularly check for firmware updates via the web interface to ensure the router has the latest features and security patches.
- Security: Change the default admin password and enable WPA2 encryption for Wi-Fi to prevent unauthorized access.
- Data Usage: Monitor data usage through the web interface to avoid exceeding your mobile data plan limits.
Example: Connecting the Router to an Arduino UNO
The TP-Link Archer MR600 4G can be used to provide internet access to an Arduino UNO via an Ethernet shield. Below is an example Arduino sketch for connecting to a server:
#include <SPI.h>
#include <Ethernet.h>

// MAC address and IP address for the Ethernet shield
byte mac[] = { 0xDE, 0xAD, 0xBE, 0xEF, 0xFE, 0xED };
IPAddress ip(192, 168, 1, 177); // Static IP address for the Arduino
IPAddress server(192, 168, 1, 1); // Router's IP address

// Initialize the Ethernet client
EthernetClient client;

void setup() {
  // Start the Ethernet connection
  Ethernet.begin(mac, ip);
  Serial.begin(9600);

  // Give the Ethernet shield a moment to initialize
  delay(1000);

  // Attempt to connect to the server
  if (client.connect(server, 80)) {
    Serial.println("Connected to server");
    // Send an HTTP GET request
    client.println("GET / HTTP/1.1");
    client.println("Host: 192.168.1.1");
    client.println("Connection: close");
    client.println();
  } else {
    Serial.println("Connection failed");
  }
}

void loop() {
  // Read and print the server's response
  while (client.available()) {
    char c = client.read();
    Serial.print(c);
  }

  // Close the connection if the server stops responding
  if (!client.connected()) {
    Serial.println();
    Serial.println("Disconnecting...");
    client.stop();
    while (true);
  }
}
Troubleshooting and FAQs
Common Issues and Solutions
No Internet Connection:
- Ensure the SIM card is properly inserted and activated.
- Verify the APN settings in the web interface.
Weak Signal Strength:
- Reposition the router to a location with better 4G LTE coverage.
- Consider using external LTE antennas for improved reception.
Cannot Access the Web Interface:
- Check the device's connection to the router (wired or wireless).
- Ensure the IP address or URL (
http://tplinkmodem.net) is entered correctly.
Forgot Admin Password:
- Reset the router to factory settings by holding the reset button for 10 seconds.
- Reconfigure the router using the default credentials.
Devices Cannot Connect to Wi-Fi:
- Verify the Wi-Fi is enabled using the Wi-Fi On/Off button.
- Check the SSID and password for accuracy.
FAQs
Can I use the router with a 3G SIM card? Yes, the router is backward compatible with 3G networks.
What is the maximum number of devices supported? The router can support up to 64 devices simultaneously.
Does the router support VPN? Yes, the router supports VPN pass-through for secure connections.
Can I use the router without a SIM card? Yes, you can use the WAN/LAN port to connect to a wired internet source.
How do I update the firmware? Navigate to the web interface, go to the "System Tools" section, and check for updates. Follow the on-screen instructions to install the latest firmware.