How to Use Water Pump: Examples, Pinouts, and Specs
Introduction
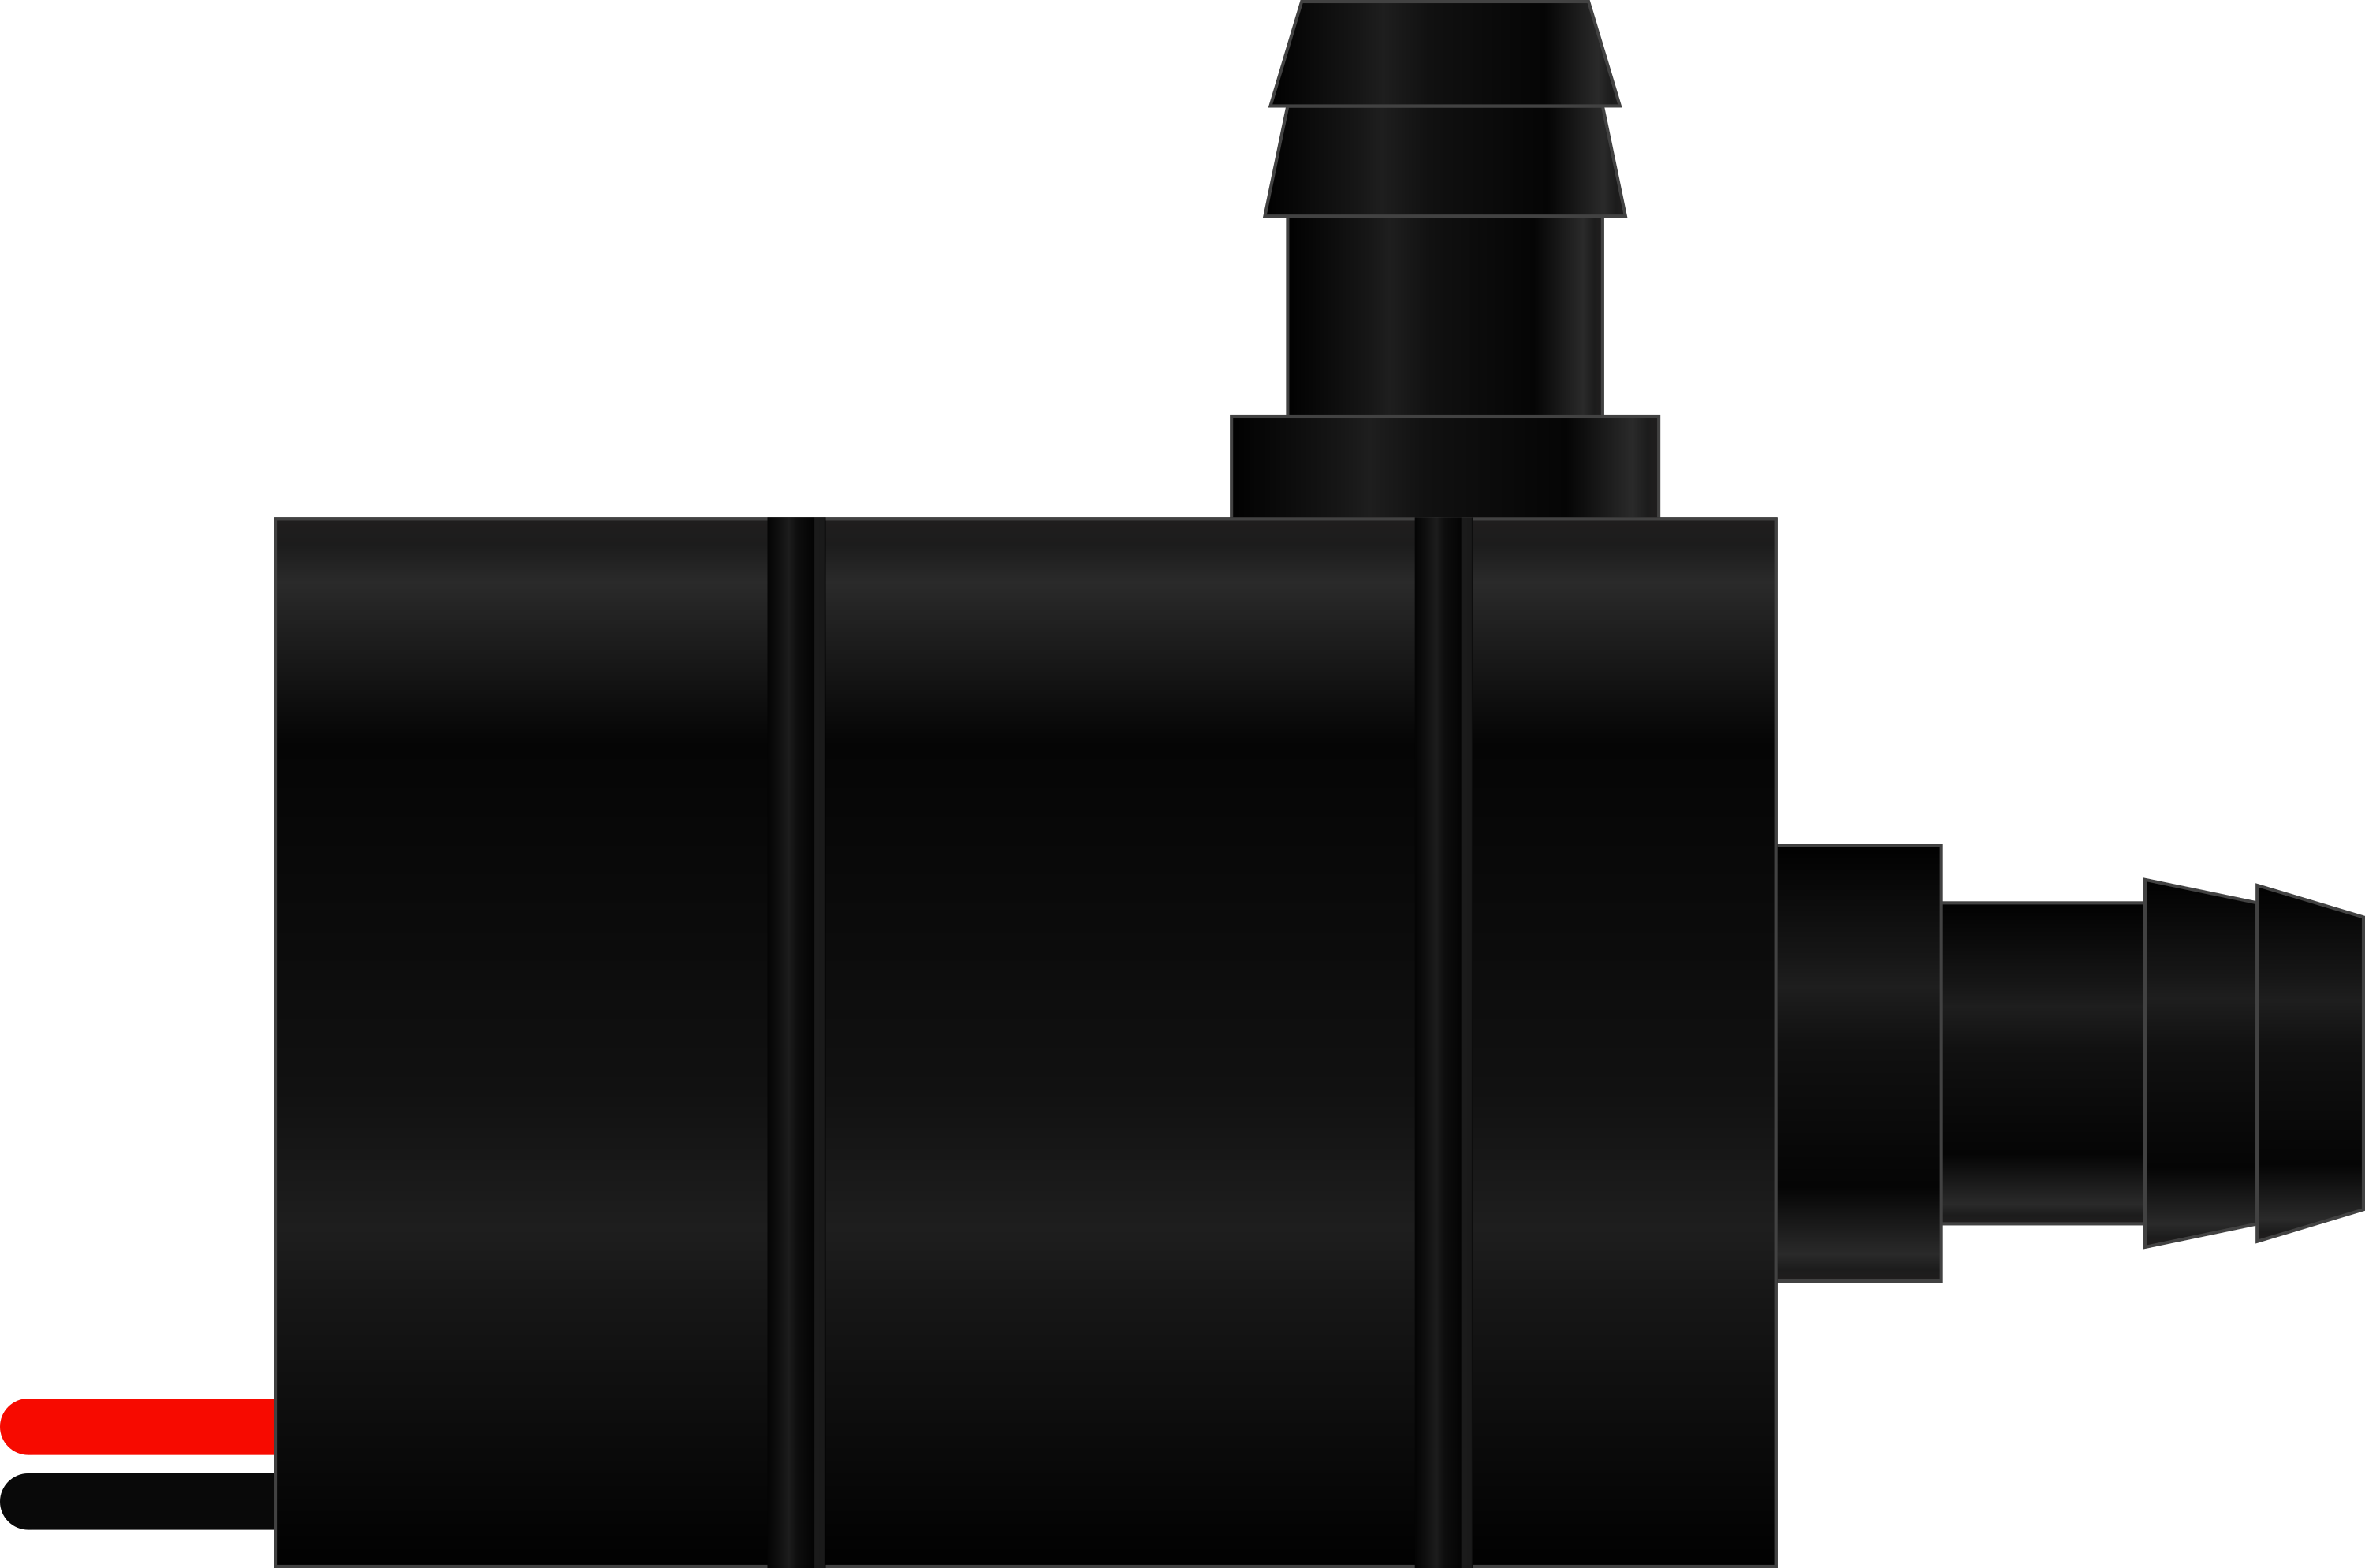
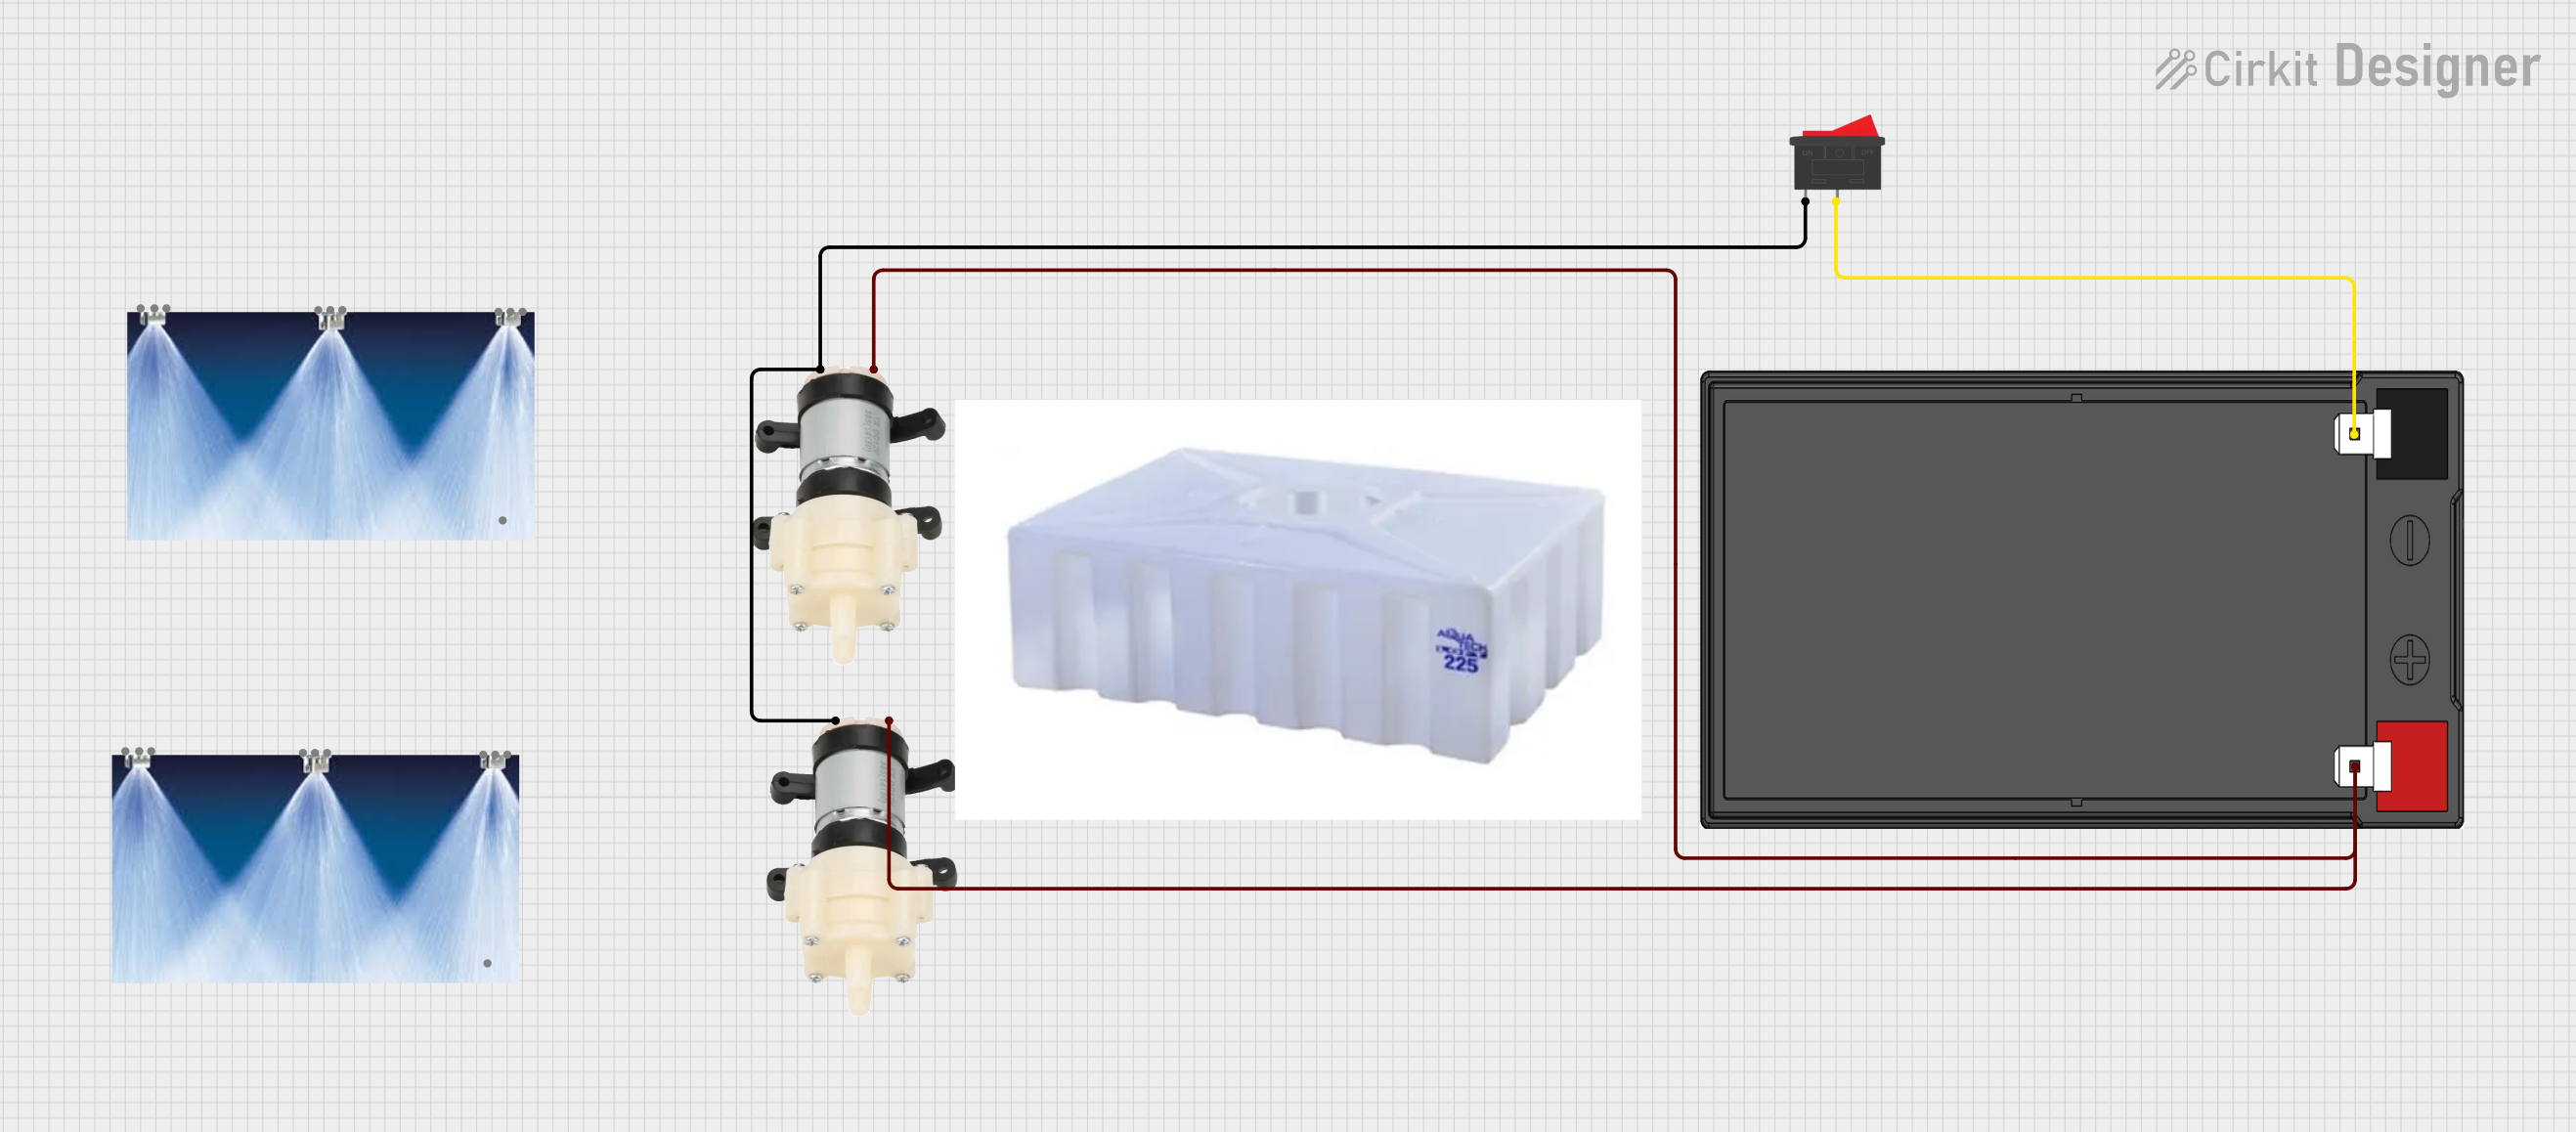
A water pump is an electromechanical device designed to move water from one location to another. It is an essential component in a wide range of applications, including irrigation systems for agriculture, coolant circulation in HVAC systems, and water supply in plumbing systems. Water pumps can vary in size, power, and design depending on their intended use.
Explore Projects Built with Water Pump
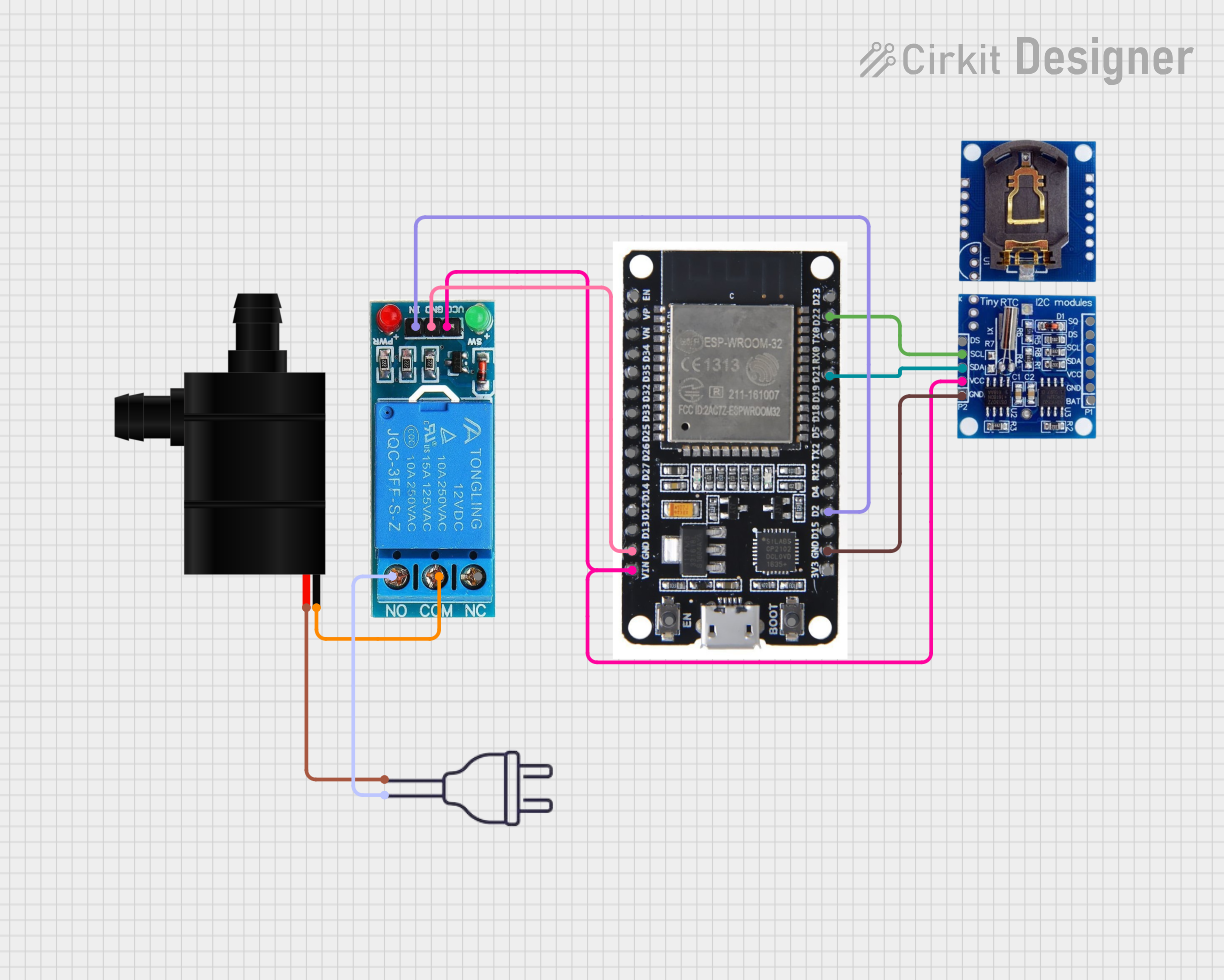
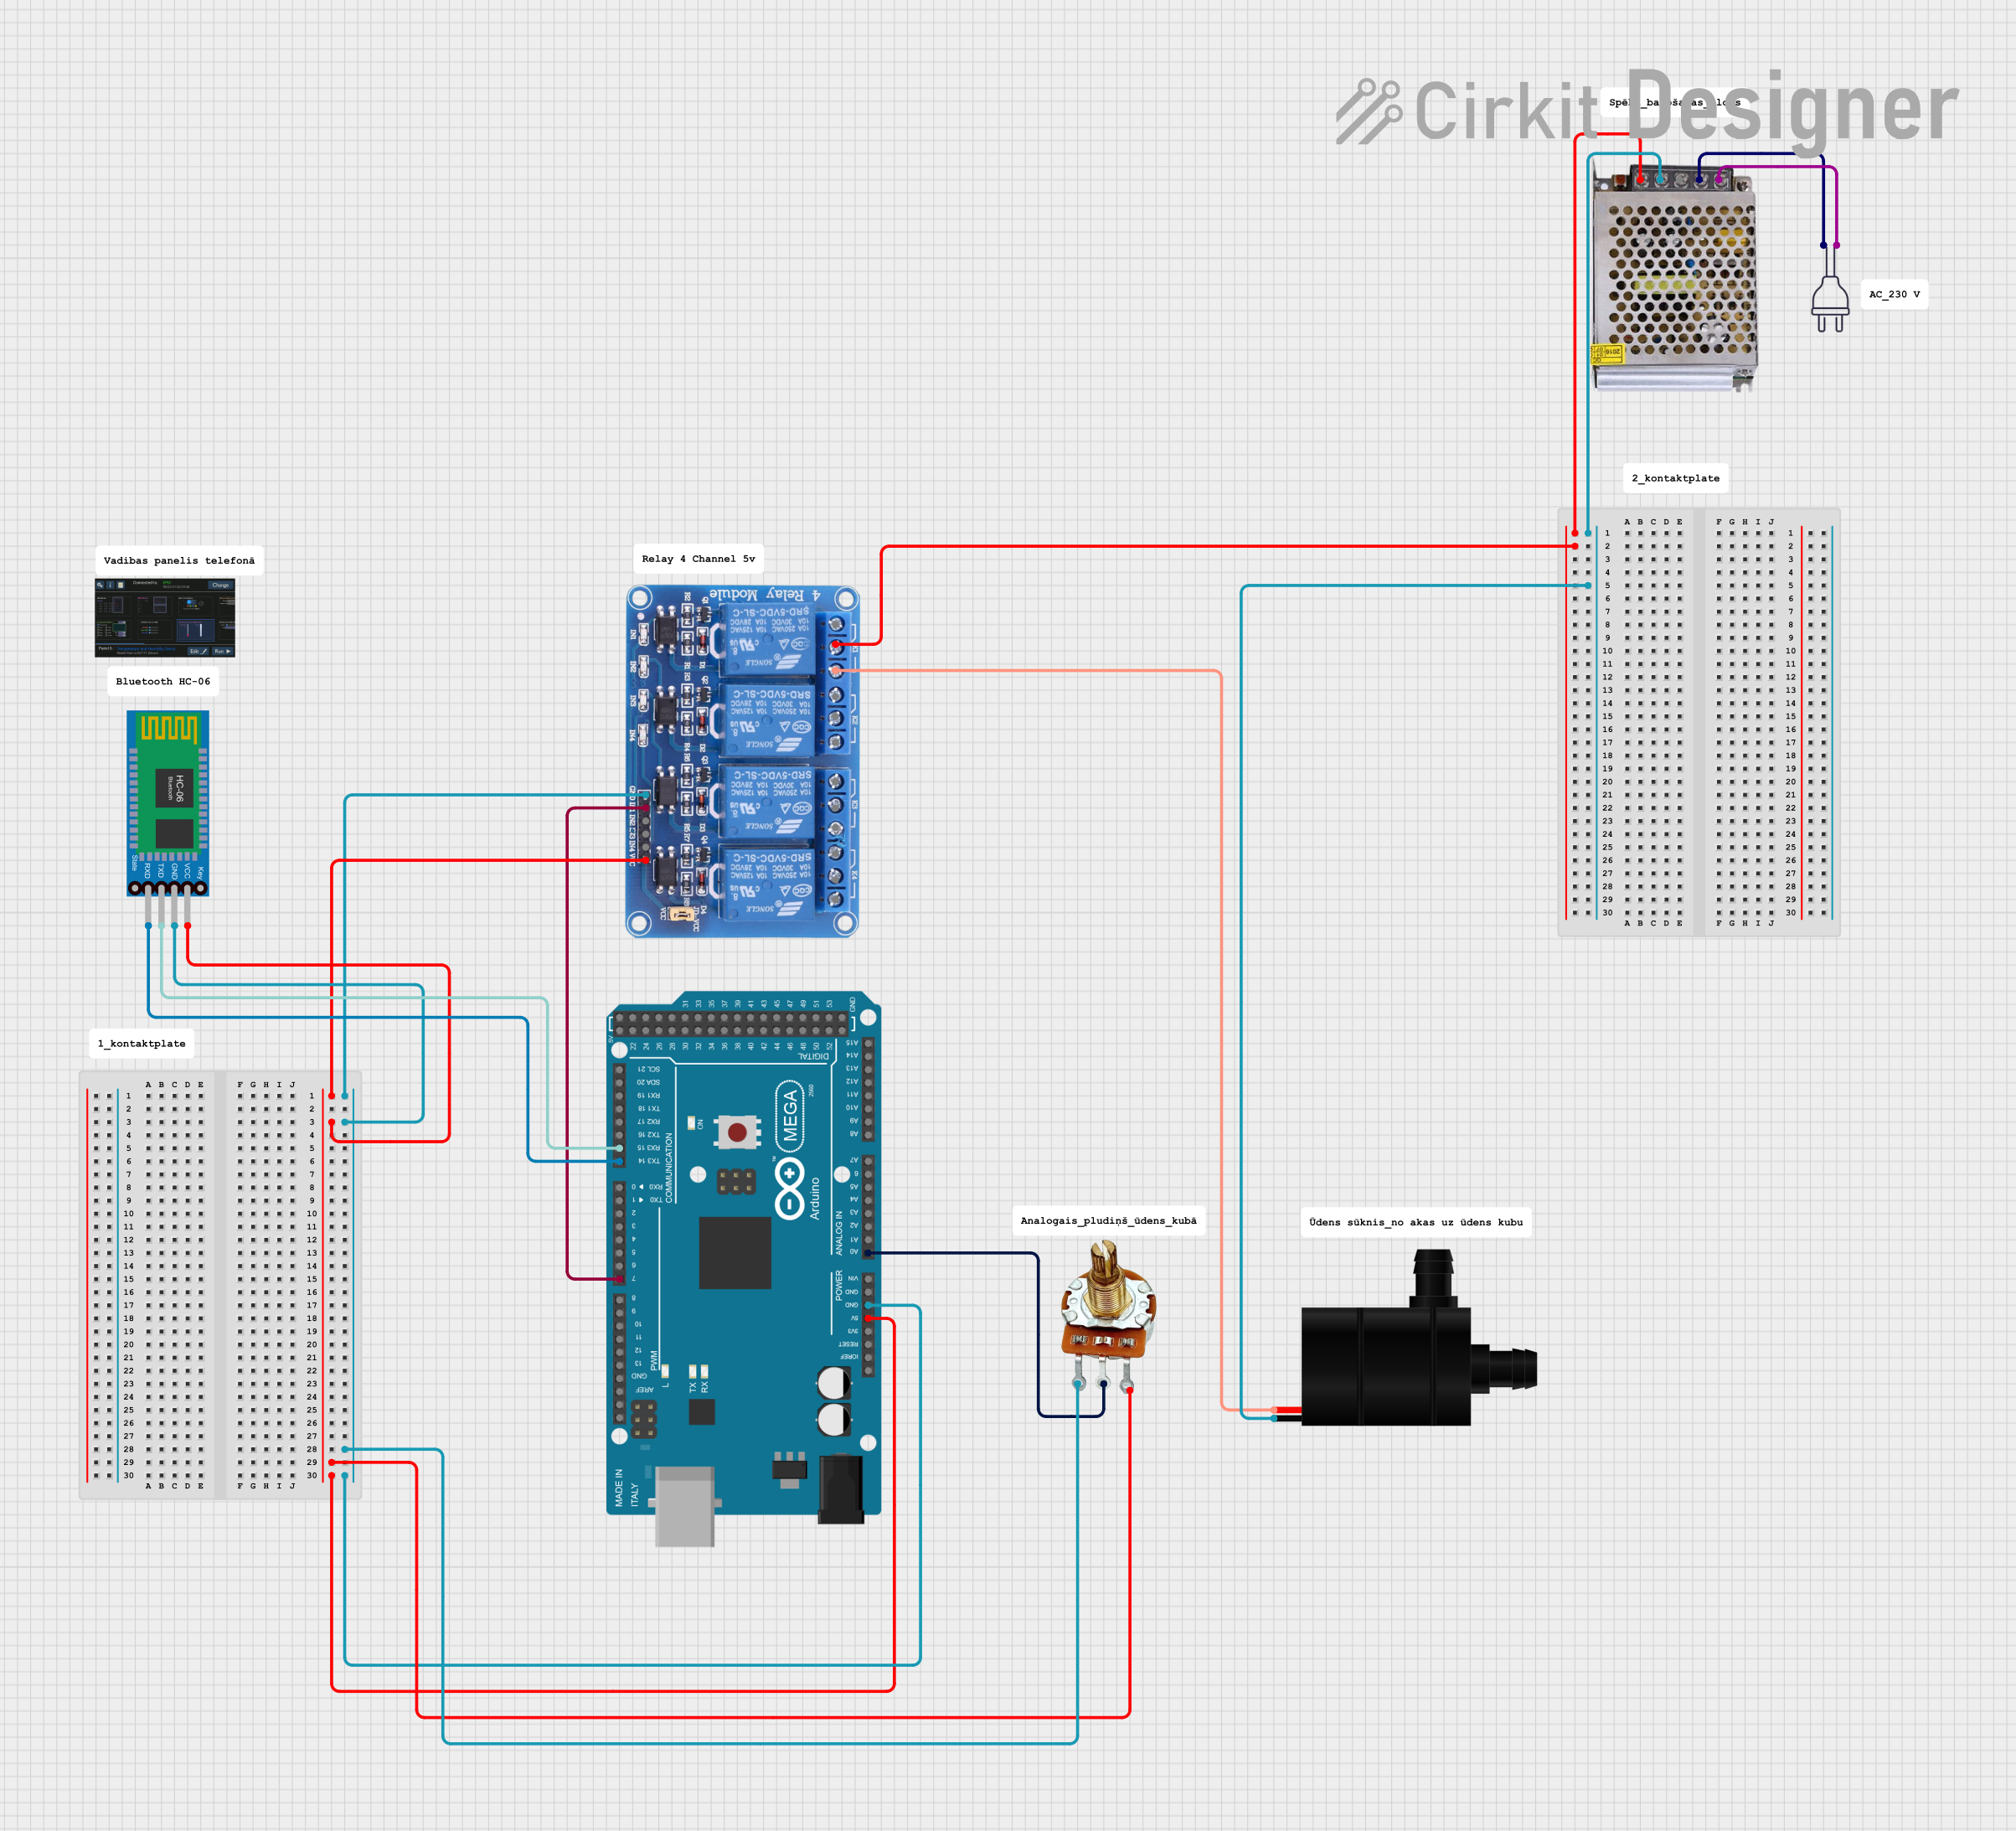
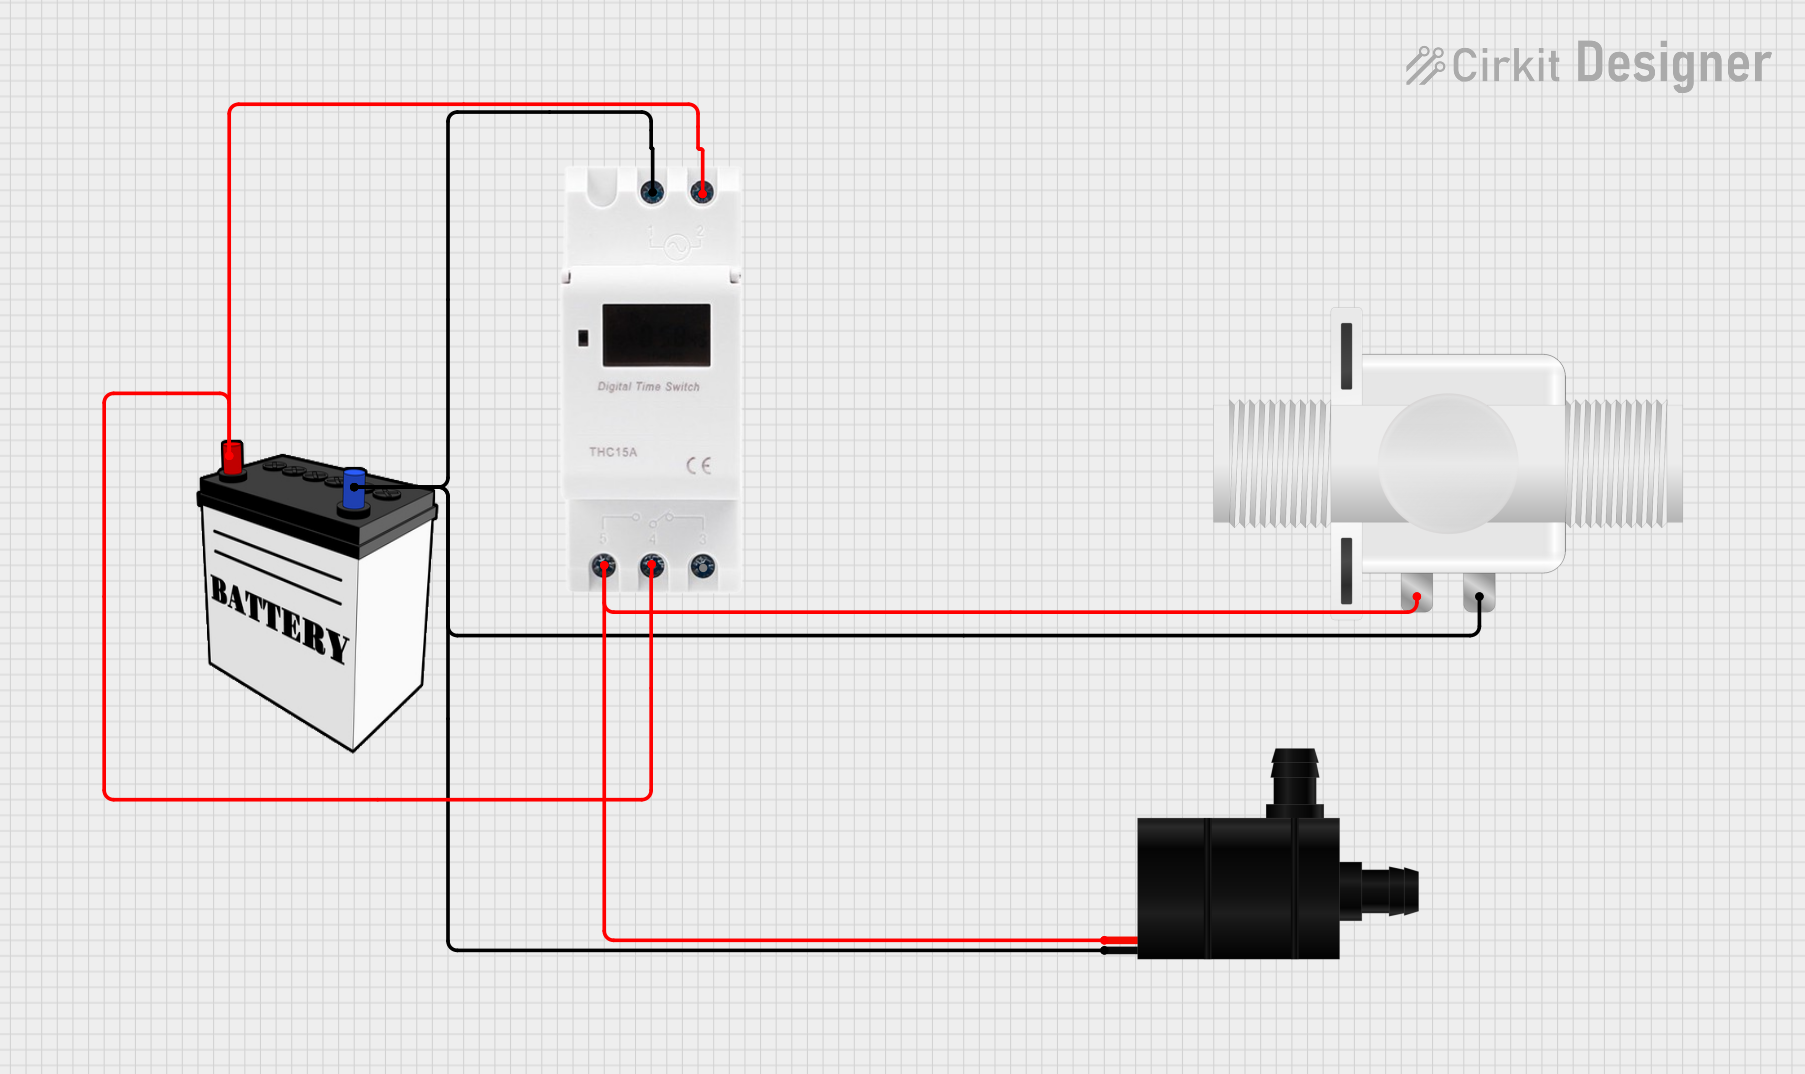
Explore Projects Built with Water Pump
Technical Specifications
Key Technical Details
- Voltage Rating: The typical operating voltage for small water pumps used in DIY projects is between 3V to 12V DC.
- Current Rating: The current draw can range from 100mA to several amperes, depending on the pump's power.
- Power Rating: Power consumption can vary from a few watts to hundreds of watts.
- Flow Rate: Measured in liters per minute (L/min), indicating the volume of water the pump can move per minute.
- Head: The maximum vertical distance the pump can lift water, typically measured in meters.
- Operating Temperature Range: The safe ambient temperature range within which the pump can operate.
Pin Configuration and Descriptions
| Pin Number | Description | Notes |
|---|---|---|
| 1 | Positive Voltage (V+) | Connect to positive supply voltage |
| 2 | Ground (GND) | Connect to system ground |
Usage Instructions
How to Use the Component in a Circuit
Power Supply: Ensure that the power supply matches the voltage and current requirements of the water pump. Overvoltage or excessive current can damage the pump.
Connecting to a Control Circuit: For control purposes, such as turning the pump on and off, use a relay or a transistor circuit that can handle the pump's current draw.
Priming the Pump: Before first use, fill the pump with water (prime it) to avoid running it dry, which can cause damage.
Waterproofing Connections: Ensure all electrical connections are waterproof to prevent short circuits.
Mounting: Secure the pump firmly to avoid vibrations and potential damage.
Important Considerations and Best Practices
- Avoid Dry Running: Do not operate the pump without water to prevent damage.
- Check for Leaks: Regularly inspect the system for leaks and address them promptly.
- Maintenance: Periodically clean the pump and check for any blockages or debris.
- Safety: Always disconnect the power supply before performing maintenance.
Example Arduino UNO Connection
// Example code to control a water pump with an Arduino UNO

const int pumpPin = 7; // Relay connected to digital pin 7

void setup() {
  pinMode(pumpPin, OUTPUT); // Set pump pin as an output
}

void loop() {
  digitalWrite(pumpPin, HIGH); // Turn on the water pump
  delay(10000); // Keep the pump on for 10 seconds
  digitalWrite(pumpPin, LOW); // Turn off the water pump
  delay(20000); // Wait for 20 seconds
}
Troubleshooting and FAQs
Common Issues
- Pump Not Starting: Check the power supply for proper voltage and current. Ensure connections are secure.
- Low Water Flow: Verify that there are no blockages in the pump or the tubing. Check if the pump is properly primed.
- Pump Overheating: Ensure the pump is not running dry and that it's not being operated beyond its rated voltage.
Solutions and Tips
- Power Supply Issues: Use a multimeter to check the voltage at the pump's terminals.
- Blockages: Disconnect the pump and inspect for debris. Clean the pump according to the manufacturer's instructions.
- Priming: To prime the pump, fill the inlet hose and pump with water before starting.
FAQs
Q: Can I run the water pump continuously? A: It depends on the pump's design. Some pumps are rated for continuous operation, while others are intended for intermittent use. Check the manufacturer's specifications.
Q: How do I control the flow rate of the pump? A: You can control the flow rate by using a variable power supply or by incorporating a flow control valve in the water line.
Q: Is it necessary to use a relay with an Arduino? A: Yes, a relay or a suitable transistor is necessary to control the high current required by the pump, which the Arduino cannot provide directly.