Cirkit Designer Logo
Cirkit Designer
Your all-in-one circuit design IDE
Home / 
Component Documentation

How to Use Arrester: Examples, Pinouts, and Specs

Image of Arrester
Cirkit Designer LogoDesign with Arrester in Cirkit Designer

Introduction

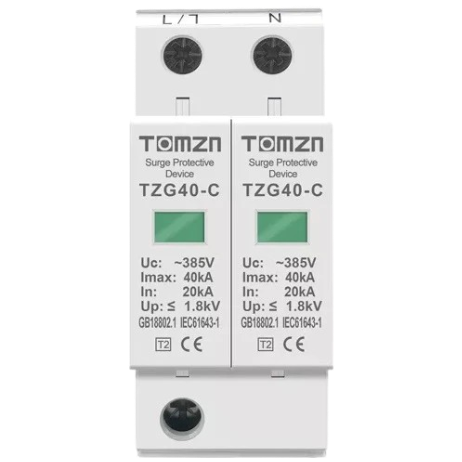
The Arrester (Manufacturer: Tomzn, Part ID: Tomzn) is a protective device designed to safeguard electrical equipment from voltage spikes and surges. By diverting excess voltage to the ground, the arrester prevents damage to sensitive components and ensures the longevity of electrical systems. It is commonly used in power distribution systems, industrial equipment, and residential electrical installations.

Explore Projects Built with Arrester

Use Cirkit Designer to design, explore, and prototype these projects online. Some projects support real-time simulation. Click "Open Project" to start designing instantly!
Solar-Powered Bird Repellant System with Arduino and Servo Motors
Image of Copy of thesis 222: A project utilizing Arrester in a practical application
This solar-powered bird repellant system uses a PIR motion sensor to detect birds and activates a passive buzzer and two servo motors to deter them. The system is controlled by an Arduino UNO, which also manages two LEDs to indicate the system's status, and is powered by a 12V battery with a step-down converter providing 5V to the components.
Cirkit Designer LogoOpen Project in Cirkit Designer
Arduino UNO-Based Smart Car Parking System with IR Sensors and LCD Display
Image of smart parking system: A project utilizing Arrester in a practical application
This circuit is an Arduino-based car parking system that uses two IR sensors to detect the presence of cars and a servo motor to control a barrier. The system displays the number of available parking slots on an LCD screen and updates the count as cars enter and exit.
Cirkit Designer LogoOpen Project in Cirkit Designer
Arduino-Based Security System with Fingerprint Authentication and Voice Recognition
Image of Project ITMI: A project utilizing Arrester in a practical application
This circuit is designed to serve as a multifunctional security and interaction system, featuring biometric authentication through a fingerprint scanner, voice command recognition, visual feedback via an OLED display, and wireless communication capabilities with the ESP8266 WiFi module. The piezo buzzer provides audio feedback, and the Arduino UNO serves as the central controller for the system.
Cirkit Designer LogoOpen Project in Cirkit Designer
ESP32-Based Automatic Passenger Counter and Temperature Sensor with Wi-Fi Connectivity
Image of Embedded Circuit: A project utilizing Arrester in a practical application
This circuit is an automatic passenger counter and temperature sensor system powered by a solar charger. It uses an ESP32 microcontroller to interface with two capacitive proximity sensors for counting passengers and a DHT22 sensor for monitoring temperature and humidity, with data being sent to a Blynk mobile app and Google Sheets for real-time tracking and logging.
Cirkit Designer LogoOpen Project in Cirkit Designer

Explore Projects Built with Arrester

Use Cirkit Designer to design, explore, and prototype these projects online. Some projects support real-time simulation. Click "Open Project" to start designing instantly!
Image of Copy of thesis 222: A project utilizing Arrester in a practical application
Solar-Powered Bird Repellant System with Arduino and Servo Motors
This solar-powered bird repellant system uses a PIR motion sensor to detect birds and activates a passive buzzer and two servo motors to deter them. The system is controlled by an Arduino UNO, which also manages two LEDs to indicate the system's status, and is powered by a 12V battery with a step-down converter providing 5V to the components.
Cirkit Designer LogoOpen Project in Cirkit Designer
Image of smart parking system: A project utilizing Arrester in a practical application
Arduino UNO-Based Smart Car Parking System with IR Sensors and LCD Display
This circuit is an Arduino-based car parking system that uses two IR sensors to detect the presence of cars and a servo motor to control a barrier. The system displays the number of available parking slots on an LCD screen and updates the count as cars enter and exit.
Cirkit Designer LogoOpen Project in Cirkit Designer
Image of Project ITMI: A project utilizing Arrester in a practical application
Arduino-Based Security System with Fingerprint Authentication and Voice Recognition
This circuit is designed to serve as a multifunctional security and interaction system, featuring biometric authentication through a fingerprint scanner, voice command recognition, visual feedback via an OLED display, and wireless communication capabilities with the ESP8266 WiFi module. The piezo buzzer provides audio feedback, and the Arduino UNO serves as the central controller for the system.
Cirkit Designer LogoOpen Project in Cirkit Designer
Image of Embedded Circuit: A project utilizing Arrester in a practical application
ESP32-Based Automatic Passenger Counter and Temperature Sensor with Wi-Fi Connectivity
This circuit is an automatic passenger counter and temperature sensor system powered by a solar charger. It uses an ESP32 microcontroller to interface with two capacitive proximity sensors for counting passengers and a DHT22 sensor for monitoring temperature and humidity, with data being sent to a Blynk mobile app and Google Sheets for real-time tracking and logging.
Cirkit Designer LogoOpen Project in Cirkit Designer

Common Applications and Use Cases

  • Protection of electrical equipment from lightning-induced surges.
  • Safeguarding industrial machinery from transient overvoltages.
  • Use in power distribution networks to ensure system reliability.
  • Protection of sensitive electronics in residential and commercial setups.

Technical Specifications

The following table outlines the key technical details of the Tomzn arrester:

Parameter Specification
Rated Voltage (Un) 230V AC
Maximum Continuous 275V AC
Operating Voltage (Uc)
Nominal Discharge 10kA
Current (In)
Maximum Discharge 20kA
Current (Imax)
Response Time < 25 nanoseconds
Protection Mode Line-to-Ground (L-G)
Operating Temperature -40°C to +80°C
Housing Material Flame-retardant thermoplastic
Mounting Type DIN Rail
Dimensions 90mm x 18mm x 65mm
Weight 150g

Pin Configuration and Descriptions

The arrester typically has a simple terminal configuration for easy installation. Below is the pin description:

Pin Label Description
1 L Line input terminal (connect to the live wire).
2 N Neutral input terminal (connect to the neutral wire).
3 PE Protective Earth terminal (connect to the ground).

Usage Instructions

How to Use the Component in a Circuit

  1. Mounting the Arrester: Secure the arrester onto a DIN rail in the electrical panel.
  2. Wiring:
    • Connect the L (Line) terminal to the live wire of the circuit.
    • Connect the N (Neutral) terminal to the neutral wire.
    • Connect the PE (Protective Earth) terminal to the ground.
  3. Verify Connections: Ensure all connections are secure and comply with local electrical codes.
  4. Power On: After installation, power on the system and verify that the arrester is functioning correctly.

Important Considerations and Best Practices

  • Voltage Rating: Ensure the arrester's rated voltage matches the system voltage.
  • Grounding: Proper grounding is critical for the arrester to function effectively.
  • Periodic Inspection: Regularly inspect the arrester for signs of wear or damage.
  • Replacement: Replace the arrester if it has been subjected to a significant surge event.

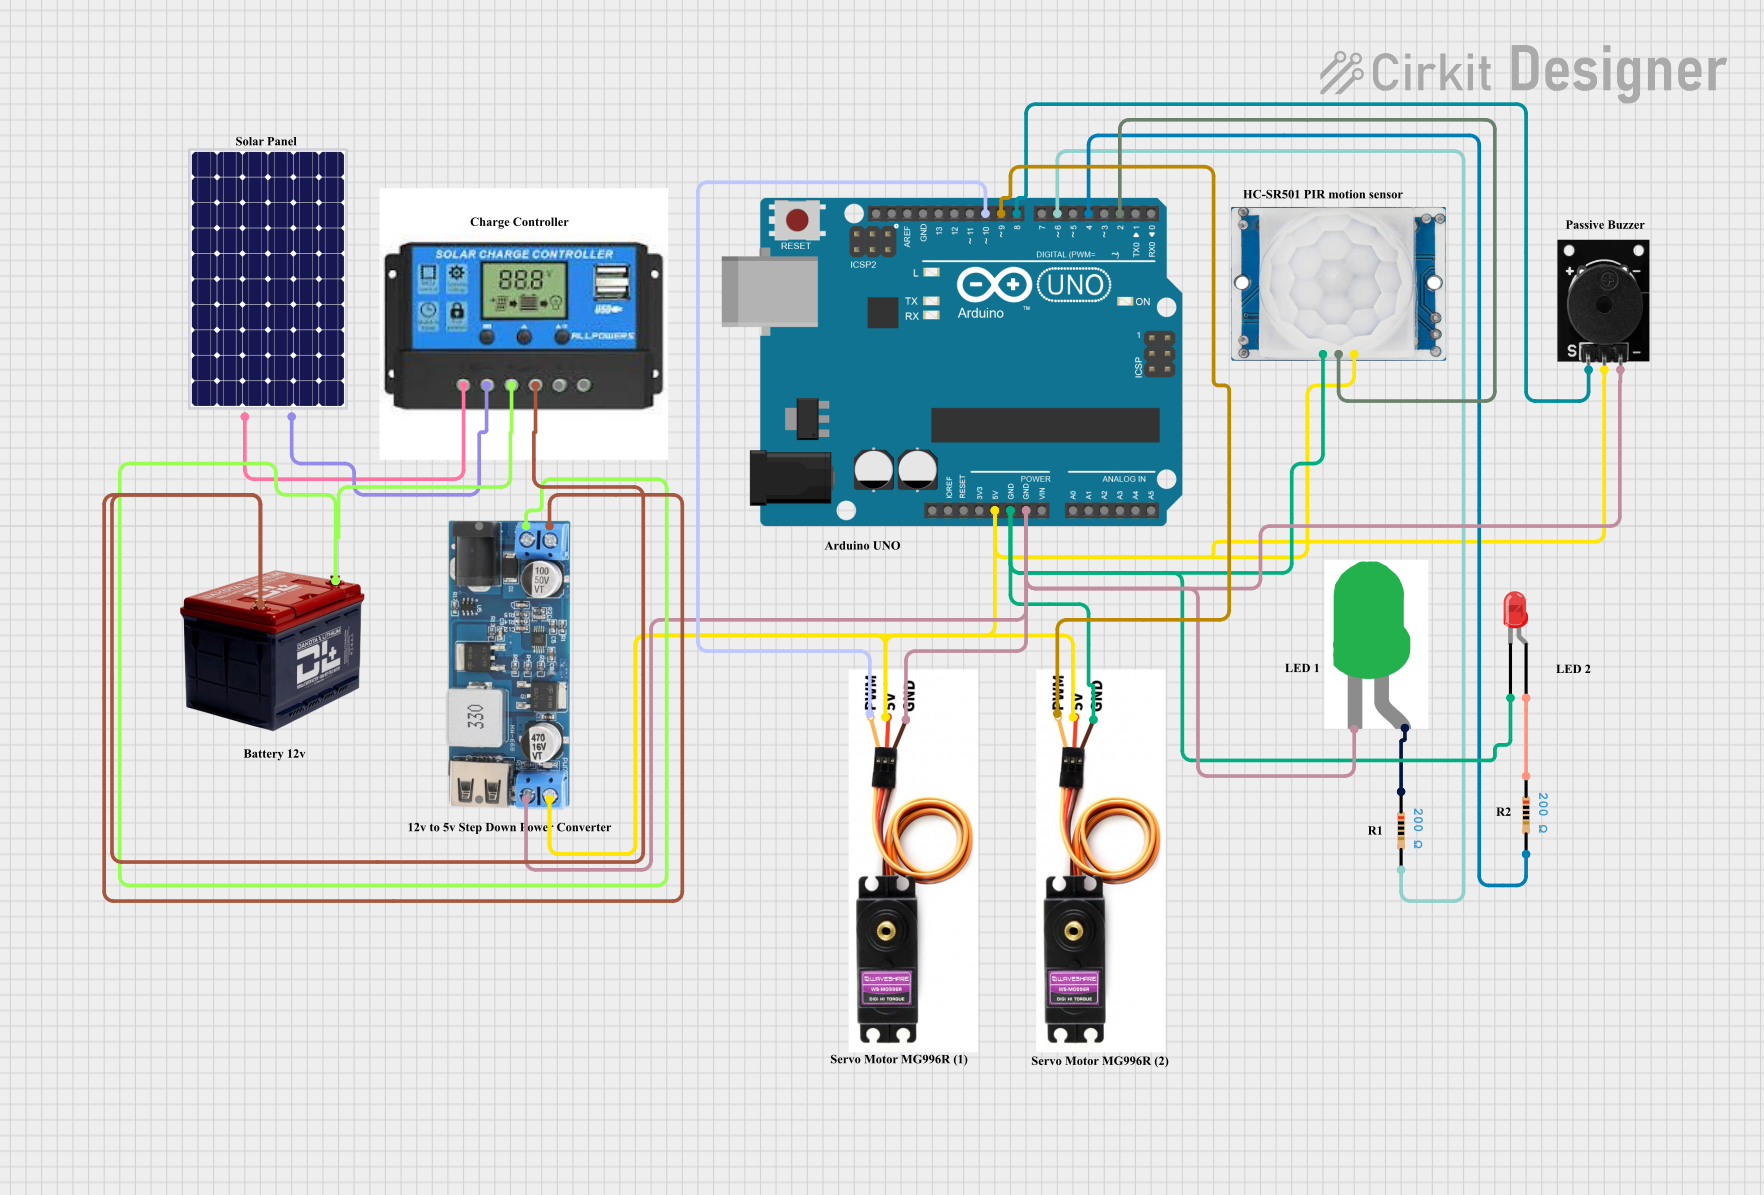
Arduino UNO Integration

While arresters are not typically used directly with microcontrollers like the Arduino UNO, they can be part of a larger system to protect the power supply feeding the Arduino. For example, an arrester can be installed on the AC mains line supplying power to the Arduino's adapter.

Here is an example of how to use an arrester in a system with an Arduino UNO:

// Example: Arduino UNO with surge protection using an arrester
// Note: The arrester is installed on the AC mains line, not directly in the Arduino circuit.
// Ensure proper installation of the arrester as per the manufacturer's guidelines.

// Arduino code to blink an LED (for demonstration purposes)
const int ledPin = 13; // Pin connected to the onboard LED

void setup() {
  pinMode(ledPin, OUTPUT); // Set the LED pin as an output
}

void loop() {
  digitalWrite(ledPin, HIGH); // Turn the LED on
  delay(1000);               // Wait for 1 second
  digitalWrite(ledPin, LOW);  // Turn the LED off
  delay(1000);               // Wait for 1 second
}

Troubleshooting and FAQs

Common Issues Users Might Face

  1. Arrester Not Functioning:

    • Cause: Improper wiring or loose connections.
    • Solution: Double-check the wiring and ensure all terminals are securely connected.
  2. Frequent Tripping of Circuit Breaker:

    • Cause: Faulty arrester or incorrect voltage rating.
    • Solution: Verify the arrester's voltage rating and replace it if necessary.
  3. No Protection During a Surge Event:

    • Cause: Poor grounding or damaged arrester.
    • Solution: Ensure proper grounding and replace the arrester if it shows signs of damage.

Solutions and Tips for Troubleshooting

  • Inspect the Arrester: Look for physical damage, such as cracks or burn marks.
  • Test Grounding: Use a multimeter to verify the integrity of the ground connection.
  • Consult the Manufacturer: If issues persist, contact Tomzn for technical support.

By following this documentation, users can effectively install, use, and maintain the Tomzn arrester to protect their electrical systems from voltage surges.