
Cirkit Designer
Your all-in-one circuit design IDE
Home /
Component Documentation
How to Use SIM800L: Examples, Pinouts, and Specs
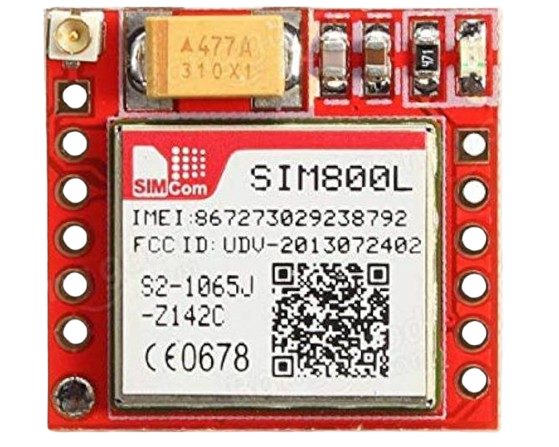
 Design with SIM800L in Cirkit Designer
Introduction
The SIM800L is a compact GSM/GPRS module that enables communication over cellular networks. It supports SMS, voice calls, and data transmission, making it an essential component for IoT applications, remote monitoring, and embedded systems requiring wireless connectivity. Its small size and low power consumption make it suitable for portable and battery-powered devices.
Explore Projects Built with SIM800L
Arduino UNO and Sim800L GSM Module-Based Battery-Powered Smart Light Control System
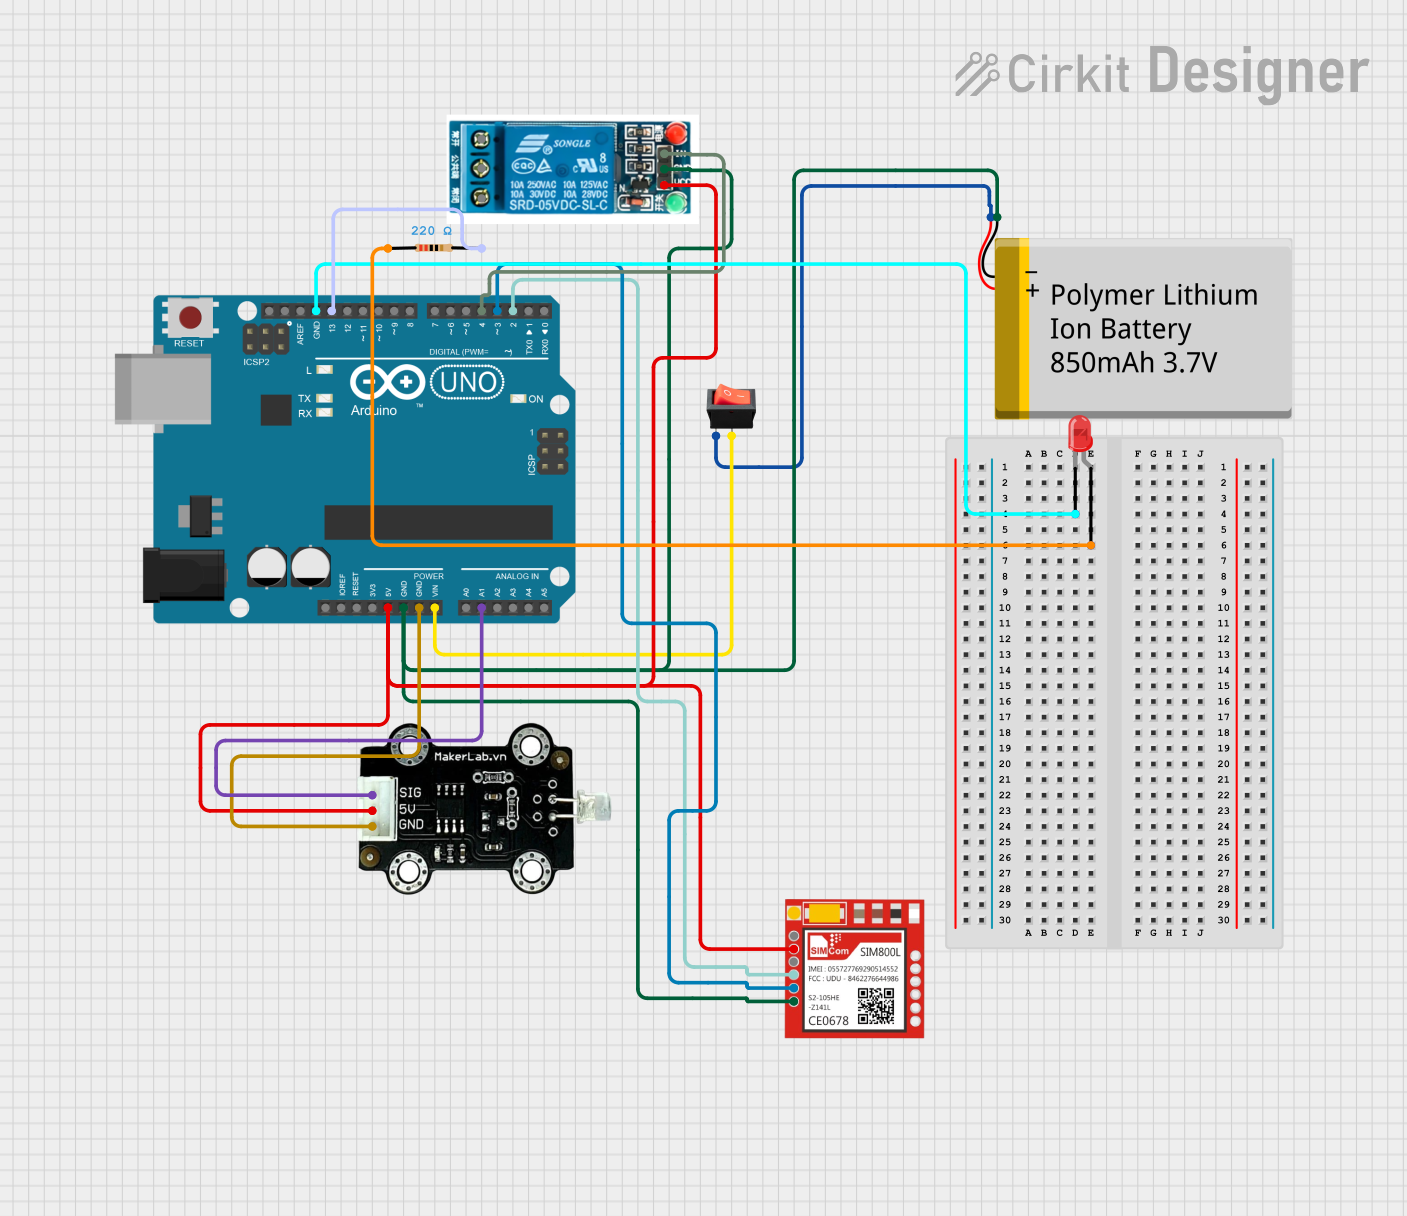
This circuit integrates an Arduino UNO with a SIM800L GSM module, a photo diode light sensor, a relay, and an LED. The Arduino controls the relay and LED based on input from the light sensor and communicates with the SIM800L for GSM functionalities. Power is supplied by a lithium-ion battery, with a rocker switch for power control.
Open Project in Cirkit DesignerArduino UNO and SIM800L GSM Module for Wireless Communication with LM2596 Power Regulation
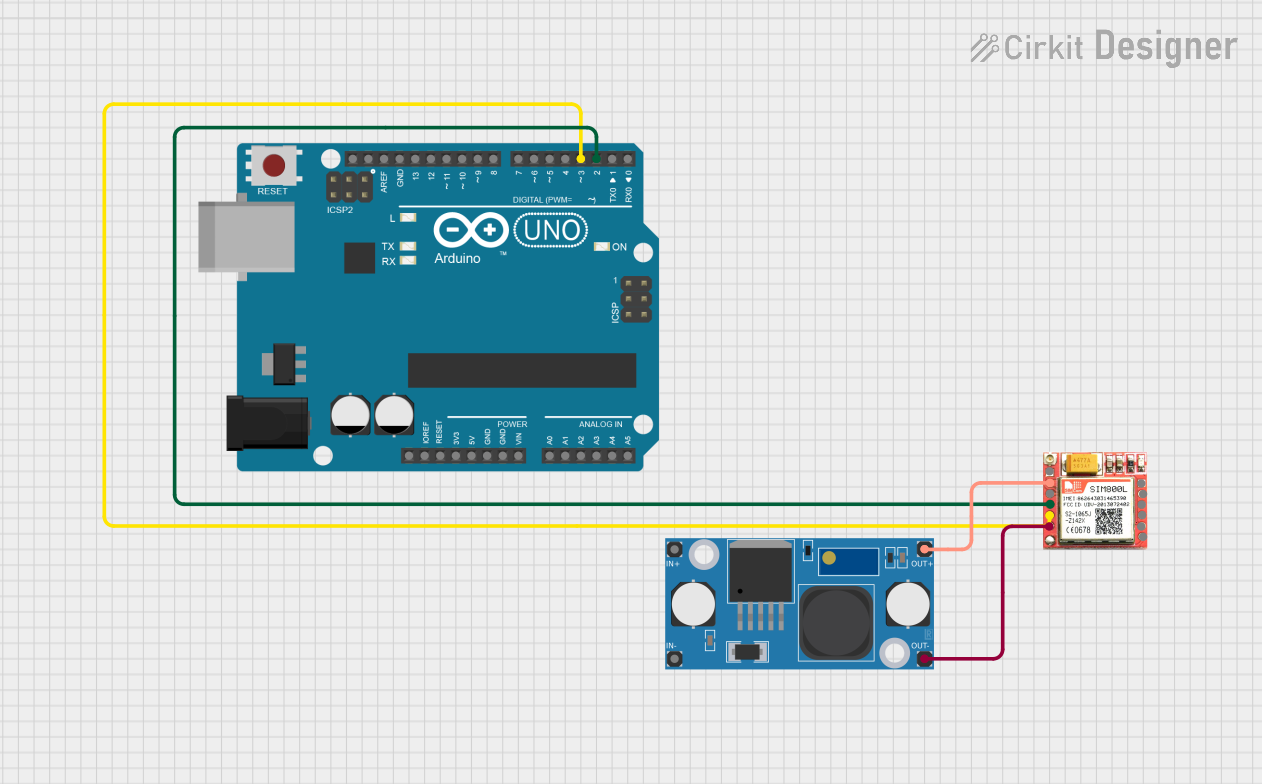
This circuit features an Arduino UNO microcontroller interfaced with a SIM 800L GSM module for communication purposes. The SIM 800L is powered by an LM2596 step-down module, which provides the necessary voltage regulation. The Arduino communicates with the SIM 800L via digital pins D2 and D3 for RX and TX respectively.
Open Project in Cirkit DesignerESP8266 and SIM800L Based GPS Tracker with I2C LCD Display and Battery Power
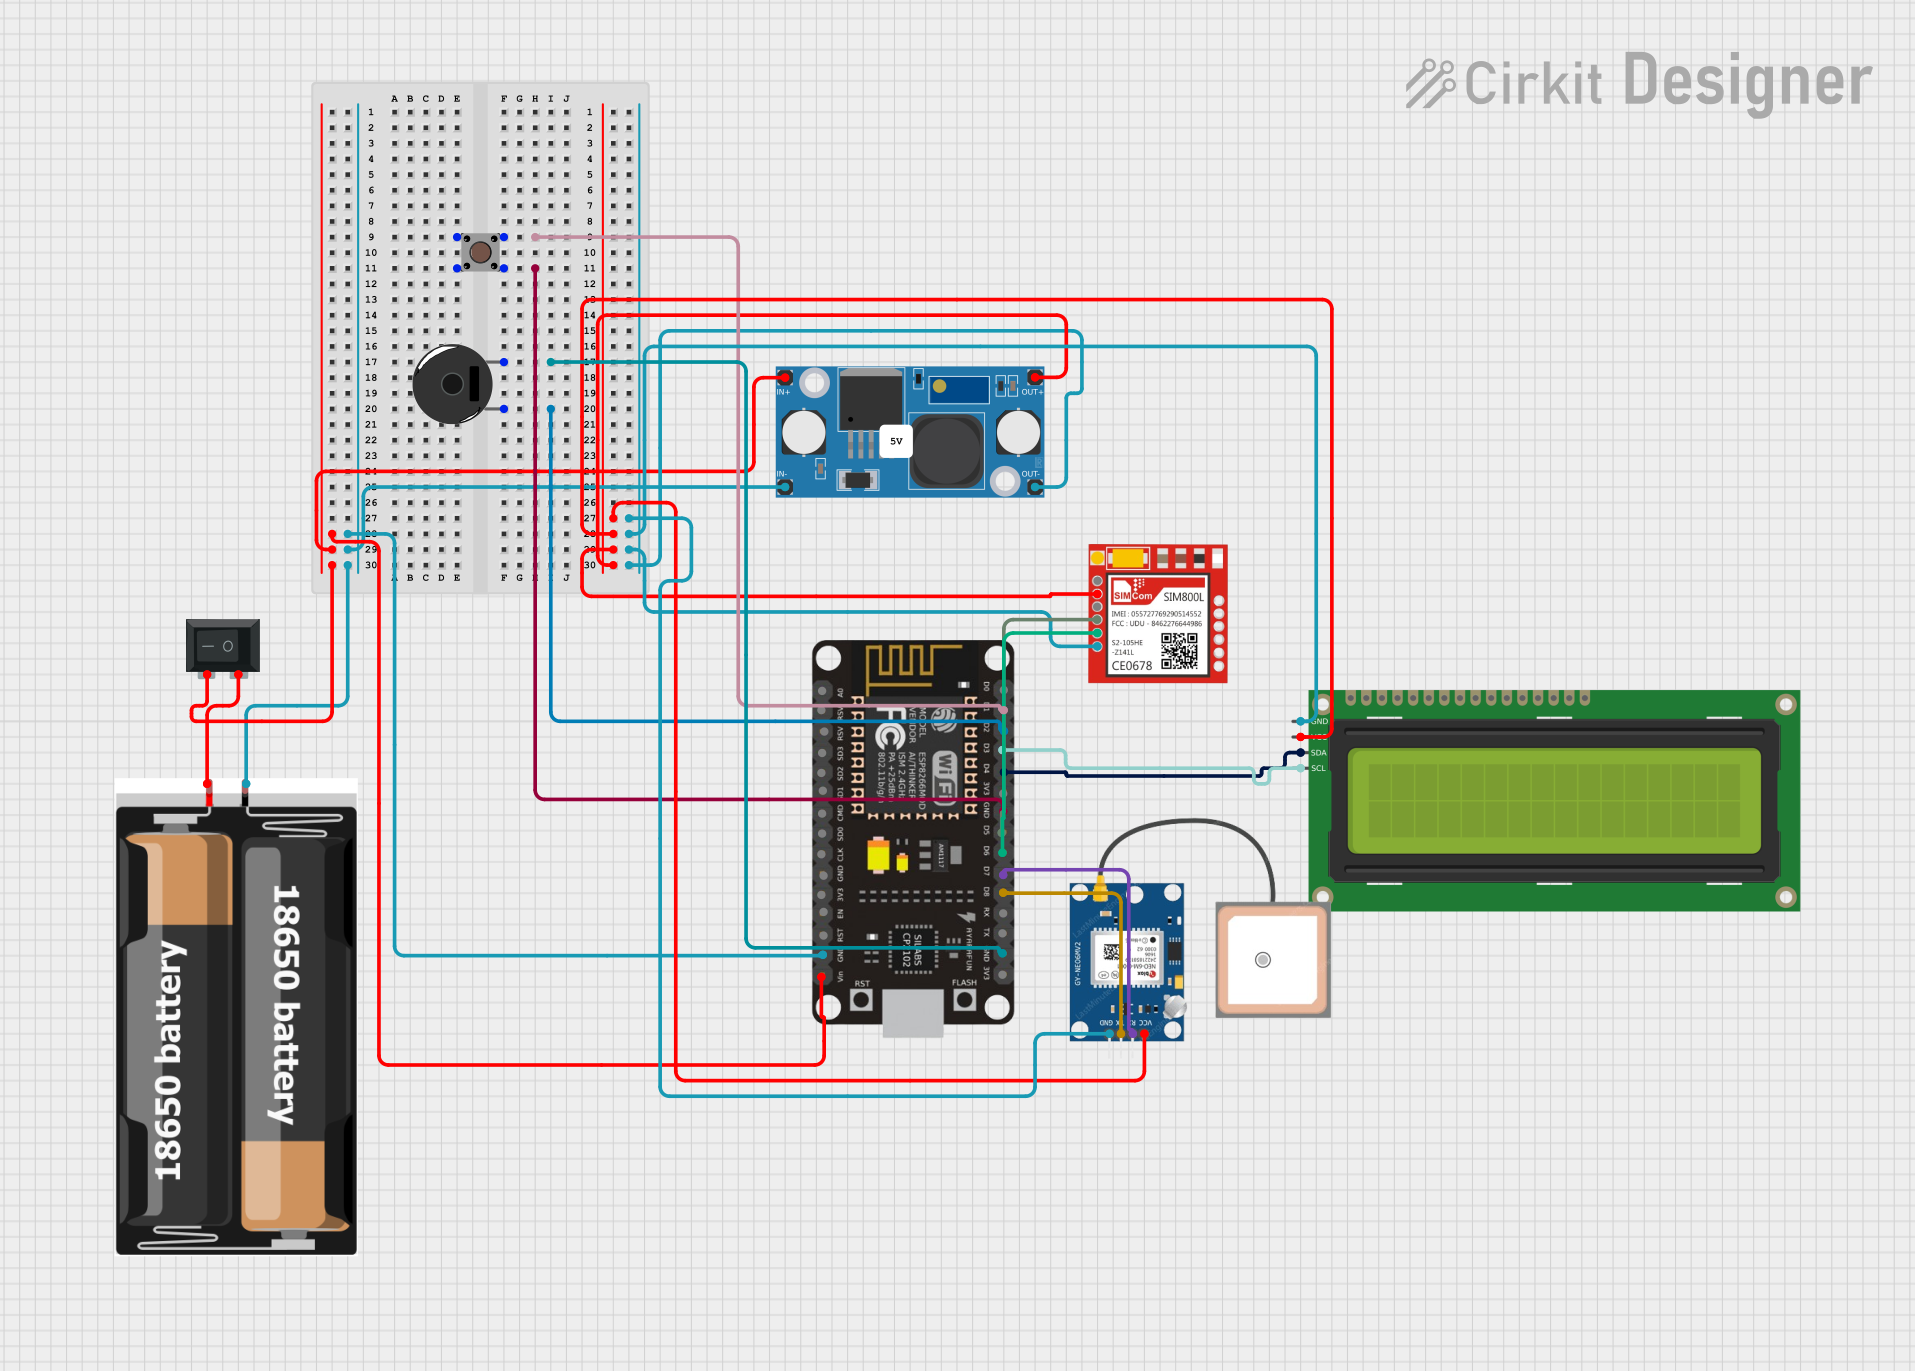
This circuit integrates an ESP8266 NodeMCU microcontroller with a SIM800L GSM module, a GPS NEO 6M module, and a 16x2 I2C LCD display for communication and location tracking. It also includes a pushbutton for user input, a piezo buzzer for audio alerts, and is powered by a 2x 18650 battery pack through an LM2596 step-down module.
Open Project in Cirkit DesignerArduino UNO and SIM800L SMS Communication System
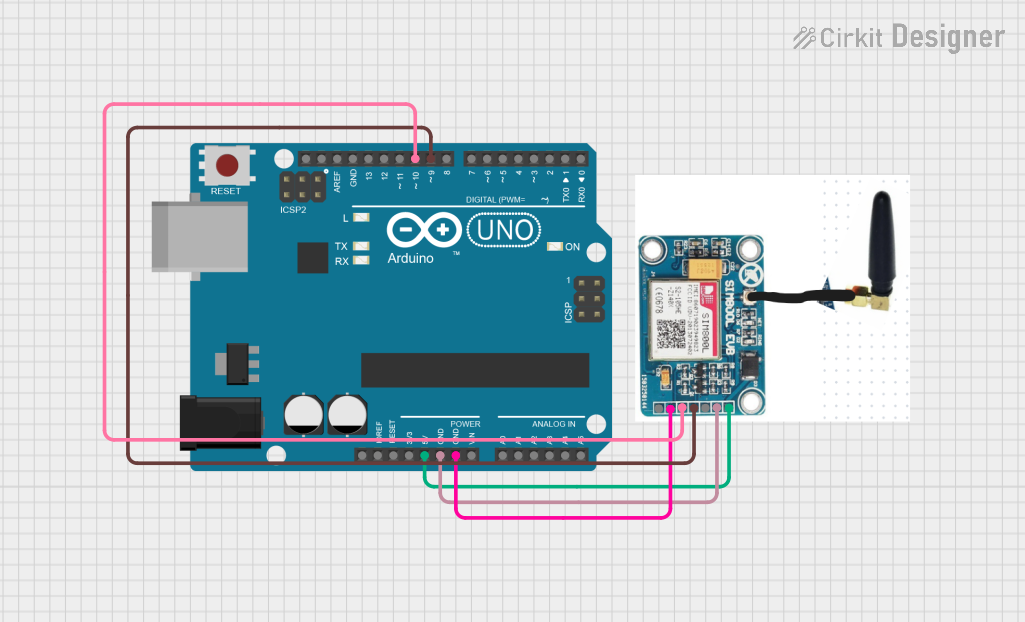
This circuit consists of an Arduino UNO connected to a SIM 800L GSM module. The Arduino UNO communicates with the SIM 800L module via software serial to send and receive SMS messages, with the Arduino providing power and ground connections to the GSM module.
Open Project in Cirkit DesignerExplore Projects Built with SIM800L
Arduino UNO and Sim800L GSM Module-Based Battery-Powered Smart Light Control System
This circuit integrates an Arduino UNO with a SIM800L GSM module, a photo diode light sensor, a relay, and an LED. The Arduino controls the relay and LED based on input from the light sensor and communicates with the SIM800L for GSM functionalities. Power is supplied by a lithium-ion battery, with a rocker switch for power control.
Open Project in Cirkit DesignerArduino UNO and SIM800L GSM Module for Wireless Communication with LM2596 Power Regulation
This circuit features an Arduino UNO microcontroller interfaced with a SIM 800L GSM module for communication purposes. The SIM 800L is powered by an LM2596 step-down module, which provides the necessary voltage regulation. The Arduino communicates with the SIM 800L via digital pins D2 and D3 for RX and TX respectively.
Open Project in Cirkit DesignerESP8266 and SIM800L Based GPS Tracker with I2C LCD Display and Battery Power
This circuit integrates an ESP8266 NodeMCU microcontroller with a SIM800L GSM module, a GPS NEO 6M module, and a 16x2 I2C LCD display for communication and location tracking. It also includes a pushbutton for user input, a piezo buzzer for audio alerts, and is powered by a 2x 18650 battery pack through an LM2596 step-down module.
Open Project in Cirkit DesignerArduino UNO and SIM800L SMS Communication System
This circuit consists of an Arduino UNO connected to a SIM 800L GSM module. The Arduino UNO communicates with the SIM 800L module via software serial to send and receive SMS messages, with the Arduino providing power and ground connections to the GSM module.
Open Project in Cirkit DesignerCommon Applications
- Internet of Things (IoT) devices
- Remote monitoring and control systems
- GPS tracking systems
- Home automation
- SMS-based alert systems
- Voice communication in embedded projects
Technical Specifications
Key Technical Details
| Parameter | Value |
|---|---|
| Operating Voltage | 3.4V to 4.4V |
| Recommended Voltage | 4.0V |
| Power Consumption | Idle: ~1mA, Active: ~200mA |
| Peak Current | ~2A (during transmission bursts) |
| Frequency Bands | GSM 850/900/1800/1900 MHz |
| Communication Protocols | GSM, GPRS (Class 12) |
| Data Transmission Speed | Up to 85.6 kbps |
| SIM Card Support | Micro SIM |
| Dimensions | 25mm x 23mm x 3mm |
| Operating Temperature | -40°C to +85°C |
Pin Configuration and Descriptions
| Pin Name | Pin Number | Description |
|---|---|---|
| VCC | 1 | Power supply input (3.4V to 4.4V). Recommended: 4.0V. |
| GND | 2 | Ground connection. |
| RXD | 3 | UART Receive pin. Connect to the TX pin of the microcontroller. |
| TXD | 4 | UART Transmit pin. Connect to the RX pin of the microcontroller. |
| RST | 5 | Reset pin. Active LOW. Pull LOW for at least 100ms to reset the module. |
| NET | 6 | Network status LED pin (blinks to indicate network activity). |
| SIM | - | Micro SIM card slot for cellular network connectivity. |
Usage Instructions
How to Use the SIM800L in a Circuit
- Power Supply: Ensure a stable power supply of 4.0V with sufficient current (at least 2A). Use a capacitor (e.g., 1000µF) near the module to handle peak current demands.
- Connections:
- Connect the
VCCpin to a 4.0V power source. - Connect the
GNDpin to the ground of your circuit. - Connect the
RXDpin to the TX pin of your microcontroller (e.g., Arduino). - Connect the
TXDpin to the RX pin of your microcontroller. - Optionally, connect the
RSTpin to a GPIO pin for software-controlled resets.
- Connect the
- Antenna: Attach an external antenna to the module for better signal reception.
- SIM Card: Insert a micro SIM card with an active cellular plan into the SIM card slot.
Important Considerations
- Voltage Regulation: The SIM800L is sensitive to voltage fluctuations. Use a low-dropout (LDO) regulator to provide a stable 4.0V supply.
- Peak Current: Ensure your power supply can handle the module's peak current of ~2A during transmission.
- UART Communication: The module operates at 3.3V logic levels. Use a level shifter if your microcontroller operates at 5V.
- Antenna Placement: Place the antenna away from other components to minimize interference.
Example: Connecting SIM800L to Arduino UNO
Below is an example of how to send an SMS using the SIM800L module and an Arduino UNO.
Circuit Connections
SIM800L VCC→ External 4.0V power supplySIM800L GND→ Arduino GNDSIM800L RXD→ Arduino TX (Pin 1)SIM800L TXD→ Arduino RX (Pin 0)SIM800L RST→ Arduino Digital Pin 7 (optional)
Arduino Code
#include <SoftwareSerial.h>

// Define RX and TX pins for SoftwareSerial
SoftwareSerial sim800l(10, 11); // RX = Pin 10, TX = Pin 11

void setup() {
  // Initialize serial communication
  Serial.begin(9600); // For debugging
  sim800l.begin(9600); // For SIM800L communication

  // Wait for the module to initialize
  delay(1000);
  Serial.println("Initializing SIM800L...");

  // Send AT command to check communication
  sim800l.println("AT");
  delay(1000);
  if (sim800l.available()) {
    Serial.println("SIM800L is ready!");
  } else {
    Serial.println("No response from SIM800L.");
  }

  // Send SMS
  sendSMS("+1234567890", "Hello from SIM800L!");
}

void loop() {
  // Nothing to do here
}

void sendSMS(String phoneNumber, String message) {
  sim800l.println("AT+CMGF=1"); // Set SMS mode to text
  delay(1000);

  sim800l.print("AT+CMGS=\"");
  sim800l.print(phoneNumber); // Set recipient phone number
  sim800l.println("\"");
  delay(1000);

  sim800l.print(message); // Write the SMS message
  delay(1000);

  sim800l.write(26); // Send Ctrl+Z to send the SMS
  delay(5000);

  Serial.println("SMS sent!");
}
Notes
- Replace
+1234567890with the recipient's phone number. - Ensure the SIM card has sufficient balance and is activated for SMS services.
Troubleshooting and FAQs
Common Issues
No Response from the Module:
- Ensure the power supply is stable and provides sufficient current.
- Check the UART connections (TX and RX pins).
- Verify the SIM card is properly inserted and activated.
Module Keeps Restarting:
- This is often caused by insufficient power. Use a capacitor (e.g., 1000µF) near the module to handle peak current demands.
No Network Connection:
- Check the antenna connection and placement.
- Verify the SIM card is active and supports the GSM network in your region.
SMS Not Sending:
- Ensure the SIM card has sufficient balance.
- Verify the phone number format (e.g., include the country code).
Tips for Troubleshooting
- Use an AT command tester (e.g., a USB-to-TTL converter) to directly communicate with the module.
- Check the
NETpin LED for network status:- Fast blinking: Searching for a network.
- Slow blinking: Connected to a network.
By following these guidelines, you can effectively integrate the SIM800L module into your projects and troubleshoot common issues.