How to Use Waveshare ESP32 S3 4.3B Touch: Examples, Pinouts, and Specs
Introduction
The Waveshare ESP32 S3 4.3B Touch is a 4.3-inch touchscreen display module powered by the ESP32-S3 microcontroller. This versatile component combines a high-resolution display with the powerful processing capabilities of the ESP32-S3, which includes dual-core processing, Wi-Fi, and Bluetooth connectivity. It is designed for interactive applications such as smart home interfaces, IoT dashboards, industrial control panels, and educational projects.
Explore Projects Built with Waveshare ESP32 S3 4.3B Touch

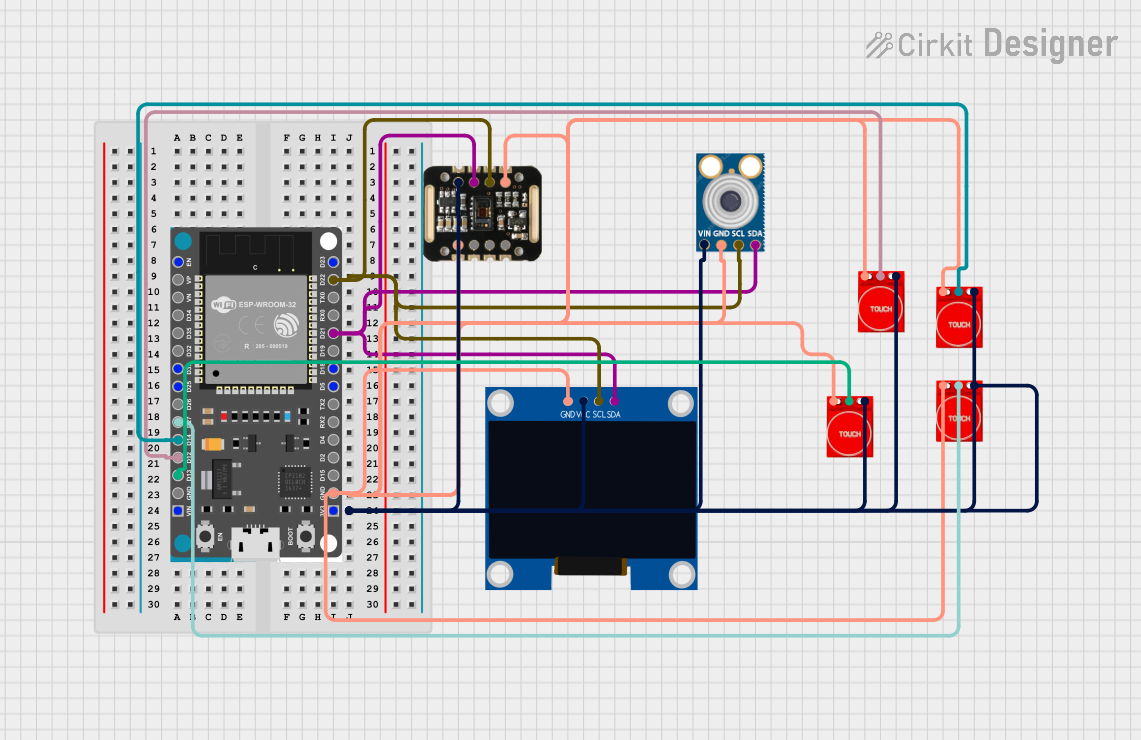
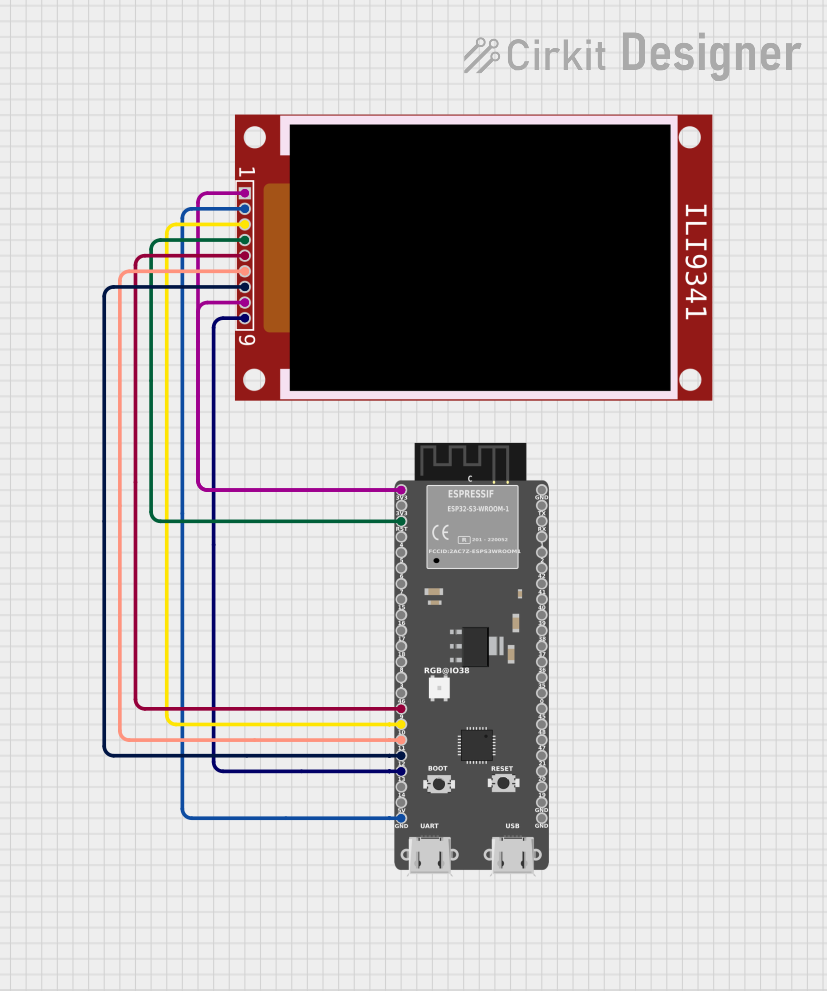

Explore Projects Built with Waveshare ESP32 S3 4.3B Touch
Common Applications and Use Cases
- Smart home control panels
- IoT device interfaces
- Industrial automation displays
- Educational and prototyping projects
- Portable monitoring systems
Technical Specifications
Key Technical Details
| Parameter | Specification |
|---|---|
| Microcontroller | ESP32-S3 |
| Display Size | 4.3 inches |
| Resolution | 800 x 480 pixels |
| Touchscreen Type | Capacitive Touch |
| Communication Interfaces | UART, SPI, I2C |
| Connectivity | Wi-Fi 802.11 b/g/n, Bluetooth 5.0 |
| Operating Voltage | 5V (via USB-C) |
| Power Consumption | ~200mA (typical) |
| Flash Memory | 16MB |
| PSRAM | 8MB |
| Dimensions | 105mm x 67mm x 12mm |
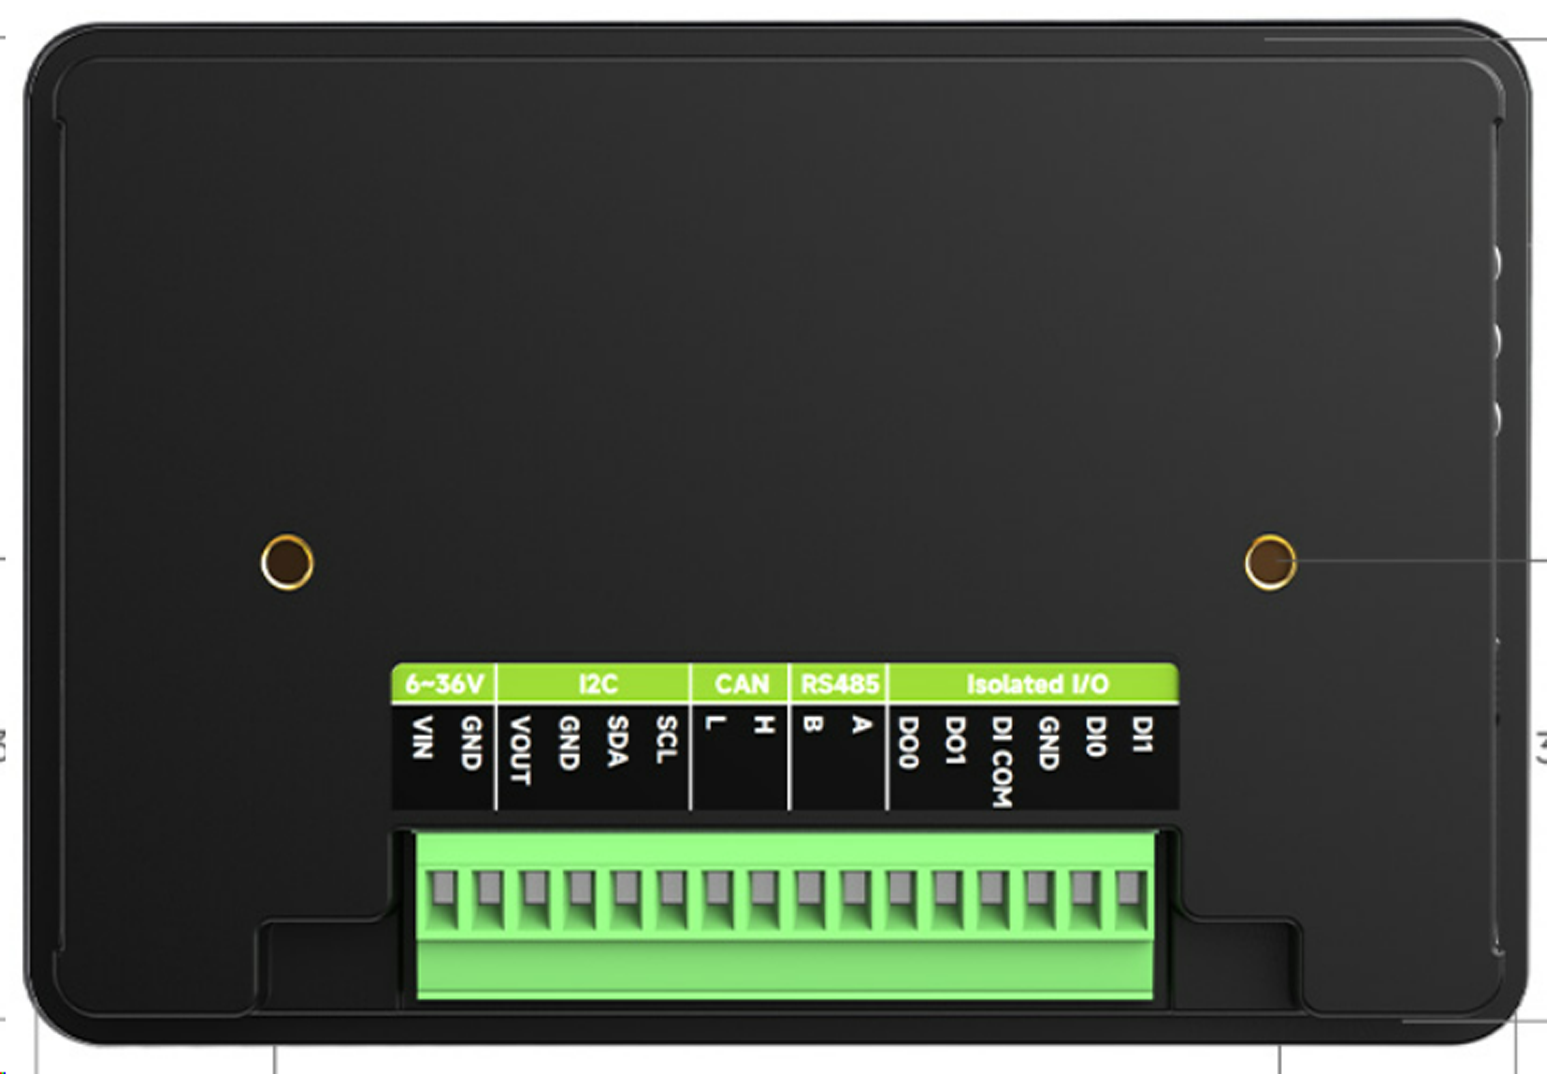
Pin Configuration and Descriptions
The Waveshare ESP32 S3 4.3B Touch features a USB-C port for power and programming, as well as GPIO pins for external connections. Below is the pin configuration:
| Pin Name | Type | Description |
|---|---|---|
| 5V | Power | 5V input for powering the module |
| GND | Ground | Ground connection |
| TX | UART TX | Transmit data (UART communication) |
| RX | UART RX | Receive data (UART communication) |
| GPIO0 | GPIO | General-purpose I/O pin |
| GPIO1 | GPIO | General-purpose I/O pin |
| SCL | I2C Clock | I2C clock line |
| SDA | I2C Data | I2C data line |
| MOSI | SPI Data | SPI Master Out Slave In |
| MISO | SPI Data | SPI Master In Slave Out |
| SCK | SPI Clock | SPI clock line |
| CS | SPI Select | SPI chip select |
Usage Instructions
How to Use the Component in a Circuit
- Powering the Module: Connect the module to a 5V power source using the USB-C port or the 5V and GND pins.
- Programming: Use the USB-C port to upload code to the ESP32-S3 microcontroller via the Arduino IDE or other compatible platforms.
- Connecting Peripherals: Use the GPIO, UART, I2C, or SPI pins to interface with external sensors, actuators, or other devices.
- Touchscreen Operation: The capacitive touchscreen can be used to create interactive user interfaces. Libraries such as LVGL (Light and Versatile Graphics Library) are recommended for GUI development.
Important Considerations and Best Practices
- Power Supply: Ensure a stable 5V power supply to avoid unexpected resets or malfunctions.
- ESD Protection: Handle the touchscreen carefully to avoid electrostatic discharge damage.
- Firmware Updates: Keep the ESP32-S3 firmware updated for optimal performance and security.
- Library Compatibility: Use compatible libraries for touchscreen and display control, such as
TFT_eSPIorLVGL.
Example Code for Arduino UNO
Below is an example of how to initialize the Waveshare ESP32 S3 4.3B Touch display and draw a simple rectangle using the TFT_eSPI library:
#include <TFT_eSPI.h>  // Include the TFT_eSPI library

TFT_eSPI tft = TFT_eSPI();  // Create an instance of the display

void setup() {
  tft.init();               // Initialize the display
  tft.setRotation(1);       // Set display orientation (1 = landscape)
  tft.fillScreen(TFT_BLACK); // Clear the screen with black color

  // Draw a red rectangle on the screen
  tft.fillRect(50, 50, 200, 100, TFT_RED);
  // Parameters: x, y, width, height, color
}

void loop() {
  // No actions in the loop for this example
}
Notes:
- Install the
TFT_eSPIlibrary via the Arduino Library Manager before running the code. - Configure the
User_Setup.hfile in theTFT_eSPIlibrary to match the Waveshare ESP32 S3 4.3B Touch display settings.
Troubleshooting and FAQs
Common Issues and Solutions
Display Not Turning On:
- Ensure the module is receiving 5V power via USB-C or the 5V pin.
- Check for loose connections or damaged cables.
Touchscreen Not Responding:
- Verify that the touchscreen library is correctly installed and configured.
- Ensure the I2C lines (SCL and SDA) are properly connected if using external peripherals.
Wi-Fi or Bluetooth Not Working:
- Confirm that the ESP32-S3 firmware is up to date.
- Check the Wi-Fi or Bluetooth configuration in your code.
Code Upload Fails:
- Ensure the correct COM port and board type are selected in the Arduino IDE.
- Press and hold the BOOT button on the module while uploading the code.
FAQs
Can I use this module with other microcontrollers? Yes, the module can interface with other microcontrollers via UART, I2C, or SPI, but the ESP32-S3 is the primary controller.
What is the maximum touchpoints supported? The capacitive touchscreen supports up to 5 simultaneous touchpoints.
Is the display sunlight-readable? The display is not optimized for direct sunlight and is best used indoors or in shaded environments.
Can I power the module with a battery? Yes, you can use a 5V battery pack with a USB-C output or connect a regulated 5V source to the 5V pin.