
How to Use 18650 12V 3S Li-ion battery: Examples, Pinouts, and Specs
 Design with 18650 12V 3S Li-ion battery in Cirkit Designer
Introduction
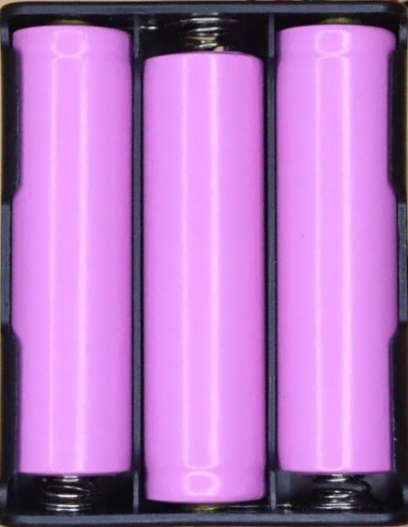
The 18650 12V 3S Li-ion battery is a rechargeable lithium-ion battery pack composed of three 18650 cells connected in series. This configuration provides a nominal voltage of 12V, making it suitable for a wide range of applications. Known for its high energy density, long cycle life, and lightweight design, this battery pack is commonly used in portable electronics, electric vehicles, robotics, and backup power systems.
Explore Projects Built with 18650 12V 3S Li-ion battery
 Open Project in Cirkit Designer
 Open Project in Cirkit Designer
 Open Project in Cirkit Designer
 Open Project in Cirkit Designer
Explore Projects Built with 18650 12V 3S Li-ion battery
Open Project in Cirkit DesignerOpen Project in Cirkit DesignerOpen Project in Cirkit DesignerOpen Project in Cirkit DesignerCommon Applications
- Portable electronic devices (e.g., LED lights, power tools)
- Electric vehicles and e-bikes
- DIY projects and robotics
- Uninterruptible Power Supplies (UPS)
- Solar energy storage systems
Technical Specifications
The following table outlines the key technical details of the 18650 12V 3S Li-ion battery:
| Parameter | Specification |
|---|---|
| Nominal Voltage | 12.6V (fully charged) |
| Nominal Capacity | Typically 2000–3000mAh per cell |
| Configuration | 3 cells in series (3S) |
| Maximum Charging Voltage | 12.6V |
| Minimum Discharge Voltage | 9.0V (3.0V per cell) |
| Standard Charge Current | 0.5C (e.g., 1A for a 2000mAh pack) |
| Maximum Discharge Current | Typically 10A (varies by model) |
| Protection Circuit | Overcharge, over-discharge, and short-circuit protection |
| Dimensions | Varies based on cell holder design |
| Weight | Approximately 150–200g |
Pin Configuration
The 18650 12V 3S Li-ion battery pack typically has the following connections:
| Pin/Terminal | Description |
|---|---|
| Positive (+) | Positive terminal of the battery pack |
| Negative (-) | Negative terminal of the battery pack |
| BMS Balance Leads | Optional leads for battery management system (BMS) |
Usage Instructions
How to Use the 18650 12V 3S Li-ion Battery in a Circuit
- Connect the Battery Pack:
- Identify the positive (+) and negative (-) terminals of the battery pack.
- Connect the positive terminal to the positive rail of your circuit and the negative terminal to the ground rail.
- Use a Battery Management System (BMS):
- Ensure the battery pack includes a BMS to protect against overcharging, over-discharging, and short circuits.
- If the BMS is not integrated, connect an external BMS to the balance leads.
- Charging the Battery:
- Use a dedicated Li-ion battery charger with a maximum output voltage of 12.6V.
- Avoid using chargers not designed for Li-ion batteries, as this can damage the cells or cause safety hazards.
- Load Connection:
- Ensure the load does not exceed the maximum discharge current rating of the battery pack.
- For high-current applications, use appropriate wiring and connectors to minimize resistance and heat.
Important Considerations and Best Practices
- Avoid Deep Discharge: Do not allow the battery voltage to drop below 9.0V, as this can permanently damage the cells.
- Temperature Monitoring: Operate the battery within the recommended temperature range (typically 0°C to 45°C for charging and -20°C to 60°C for discharging).
- Storage: Store the battery at approximately 50% charge in a cool, dry place if not in use for extended periods.
- Safety Precautions: Never short-circuit the terminals, puncture the cells, or expose the battery to fire or water.
Example: Using the Battery with an Arduino UNO
The 18650 12V 3S Li-ion battery can power an Arduino UNO through its VIN pin. Below is an example circuit and code to read the battery voltage using a voltage divider.
Circuit Setup
- Connect the positive terminal of the battery to the VIN pin of the Arduino.
- Connect the negative terminal of the battery to the GND pin of the Arduino.
- Use a voltage divider (e.g., 10kΩ and 2kΩ resistors) to step down the battery voltage for safe measurement by the Arduino's analog input pin.
Arduino Code
// Define the analog pin connected to the voltage divider
const int voltagePin = A0;

// Define the resistor values in the voltage divider
const float R1 = 10000.0; // 10kΩ resistor
const float R2 = 2000.0;  // 2kΩ resistor

void setup() {
  Serial.begin(9600); // Initialize serial communication
}

void loop() {
  int rawValue = analogRead(voltagePin); // Read the analog input
  float voltage = (rawValue / 1023.0) * 5.0; // Convert to voltage (0-5V range)

  // Calculate the actual battery voltage using the voltage divider ratio
  float batteryVoltage = voltage * ((R1 + R2) / R2);

  // Print the battery voltage to the Serial Monitor
  Serial.print("Battery Voltage: ");
  Serial.print(batteryVoltage);
  Serial.println(" V");

  delay(1000); // Wait for 1 second before the next reading
}
Troubleshooting and FAQs
Common Issues
- Battery Not Charging:
- Cause: Faulty charger or damaged BMS.
- Solution: Verify the charger output voltage and ensure it matches the battery's charging requirements. Check the BMS for proper operation.
- Battery Drains Quickly:
- Cause: High self-discharge rate or excessive load.
- Solution: Test the battery capacity using a battery analyzer. Reduce the load or replace the battery if necessary.
- Overheating During Use:
- Cause: Excessive current draw or poor ventilation.
- Solution: Ensure the load does not exceed the battery's maximum discharge current. Improve airflow around the battery pack.
- Arduino Not Powering On:
- Cause: Insufficient voltage or incorrect wiring.
- Solution: Check the battery voltage and ensure proper connections to the Arduino's VIN and GND pins.
FAQs
Q1: Can I use this battery pack without a BMS?
A1: It is not recommended to use the battery pack without a BMS, as it protects the cells from overcharging, over-discharging, and short circuits.
Q2: How do I know when the battery is fully charged?
A2: The battery is fully charged when the charger output reaches 12.6V and the charging current drops to near zero.
Q3: Can I connect multiple 18650 12V 3S packs in parallel?
A3: Yes, but ensure all packs have the same voltage and are equipped with individual BMS units to prevent imbalances.
Q4: What happens if I over-discharge the battery?
A4: Over-discharging can permanently damage the cells and reduce their capacity. Always use a BMS or low-voltage cutoff circuit to prevent this.